Hello,
I’m encountering a problem with the brand new K1C printer which I purchased to get “trouble-free prints out of the box.”
The printer was purchased about one week ago, and since then, I can’t get good quality prints out of it.
It’s a brand new “new generation” printer, but it prints worse than any of my old 3D printers: Anycubic i3, Geeetech Mizar S, and Flashforge Finder. Sure, it can print fast, but with the actual quality I’m getting, I just can’t use it.
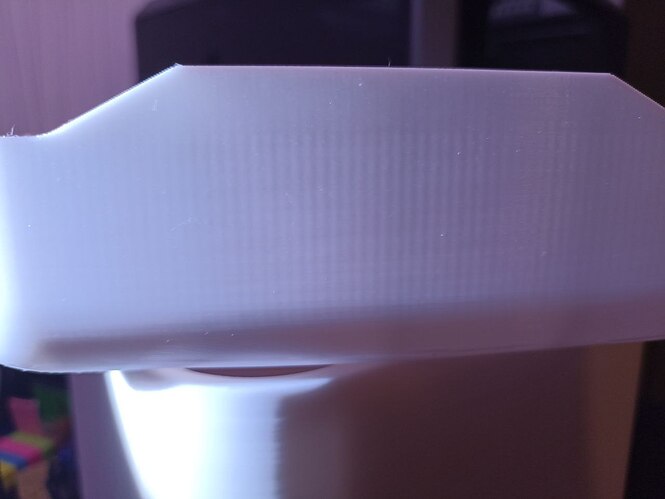
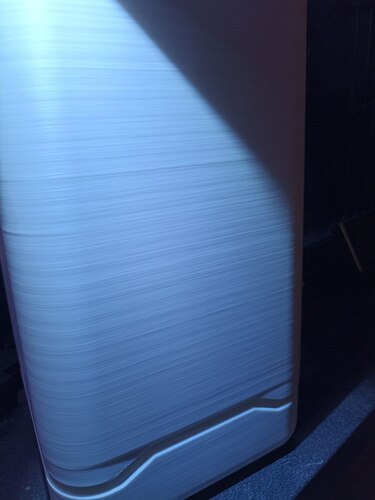
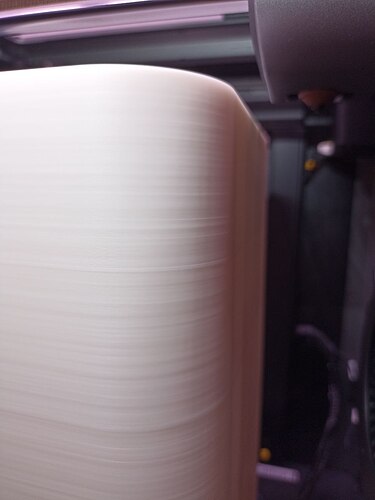
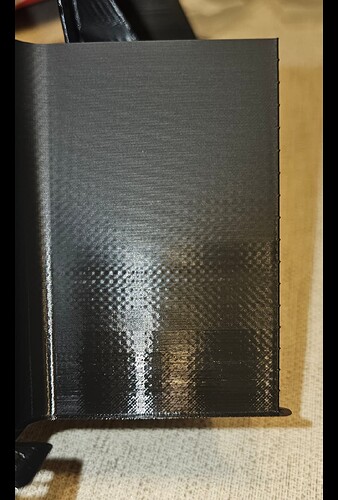
As you may see in the attached pictures, I get extreme VFA on the X-axis (and some lighter VFA on the Y-axis), along with layer shifting and lines on the Z-axis on tall prints.
Since the first day, I have been trying to get better results and have tried everything. I’ve read a ton of forums and watched almost all YouTube videos about the K1 and K1C, but still can’t get decent quality.
The VFA on the X-axis and the lines on the Z-axis are just terrible.
I tried printing between 200-350°C and accelerations between 3000 and 9000, which reduced the VFA a little bit, but it’s still not acceptable. On 40-150°C / higher acceleration, the VFA is even worse.
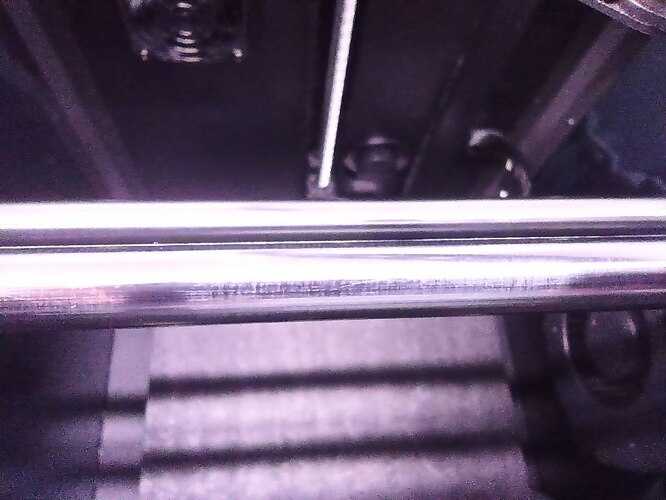
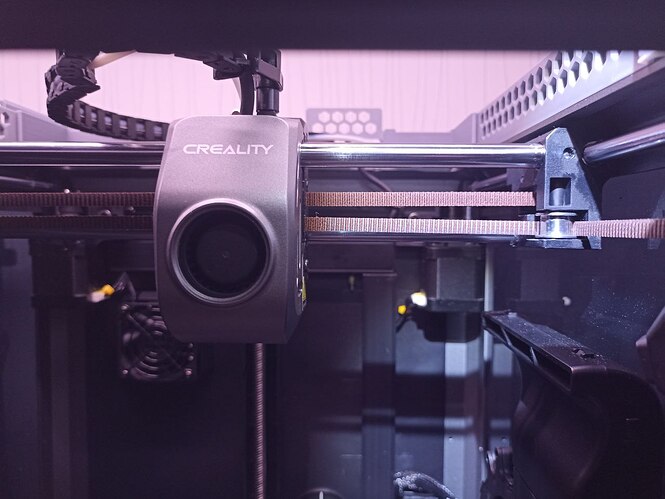
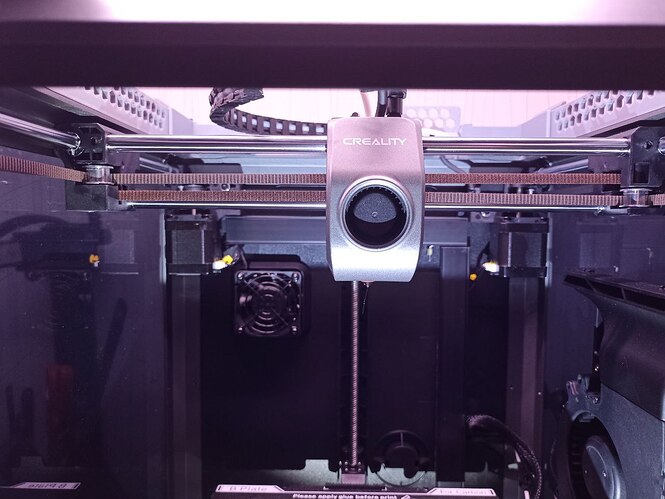
I noticed that the belt(s) on the X-axis are not parallel to one another. The right side of the bottom belt is riding on the bottom end of the pulley, while the left side is riding on the top end of the pulley (on the left side of the printer). Check the attached picture.
What I have tried so far to fix the problem:
- Initially (after I performed all calibrations), I printed with factory settings/profiles using Creality Print 5 (since the beginning) and got the same bad results. The Benchy quality from the USB flash is also not good.
- I tried Orca Slicer, Cura Slicer, and Prusa Slicer, but the result is the same because I am sure the problem is not the slicer but rather the printer’s hardware/configuration.
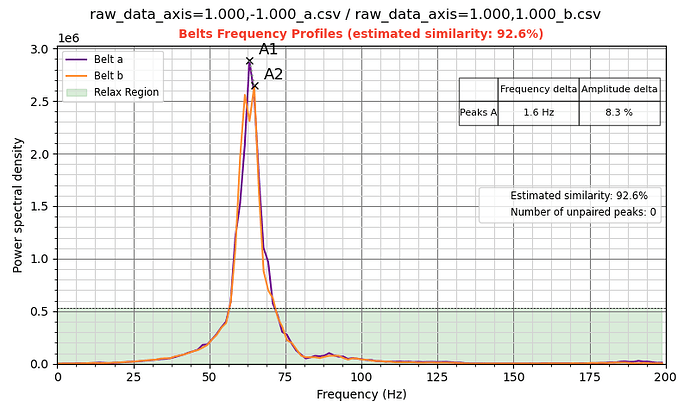
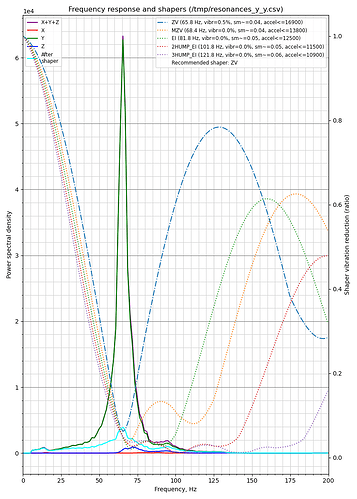
- So, I rooted the printer to get full access to the Klipper settings, and again I performed all calibrations under Klipper, including: a) Belt tension verification/calibration (the belts’ resonation graph is attached)
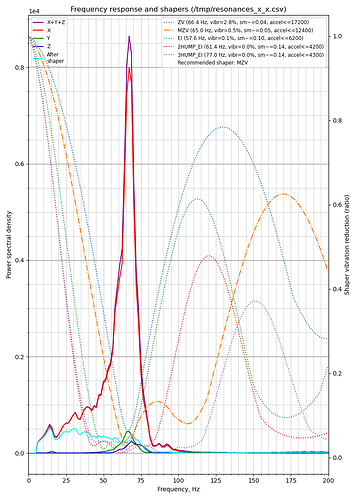
b) Performed X and Z-axis input shaping calibration and applied the suggested shapers (X and Z-axis resonation graph is attached). I also tried other shapers but without much success.
c) Replaced the toolhead springs with softer springs to reduce low-frequency vibrations on the X-axis.
d) Cleaned the grease from the X rods with isopropyl alcohol. But when the rods are dry, they make an awful noise when the toolhead moves fast, so I added some light machine oil, and now the toolhead moves smoothly.
e) Cleaned the Z-axis lead screws and applied the grease supplied with the printer by Creality.
The K1C is a very nice-looking printer with very nice characteristics on paper, but I’ve never had to spend this much time on any of my old printers to get quality prints, as I’ve spent on the K1C. Instead of printing, I’m spending my time printing various calibration tests, cubes, shapes, etc., and yet I still can’t get decent print quality. I’m very disappointed and frustrated with my purchase.
I’ve seen a lot of people talking about the VFA and various problems with the K model, but I thought all of that was fixed in the new K1C model, so I believe my printer has some factory defects.
I would really appreciate it if the Creality team or community members could help me figure out what to do with my printer.
