We’re excited to announce an upgrade to the cloud slicing engine on the Creality Cloud Web. This update currently supports the following devices: Creality K1、K1 MAX、K1C、CR-10 SE、Ender-3 V3 KE、Ender-3 V3 Plus、Ender-3 V3、Ender-3 V3 SE (The resin printer will not be upgrading the engine this time). Along with a more stable and responsive cloud slicing experience, we’ve also added a setup wizard to the web slicing interface to help you get started quickly!
Here’s how to use the new slicing feature:
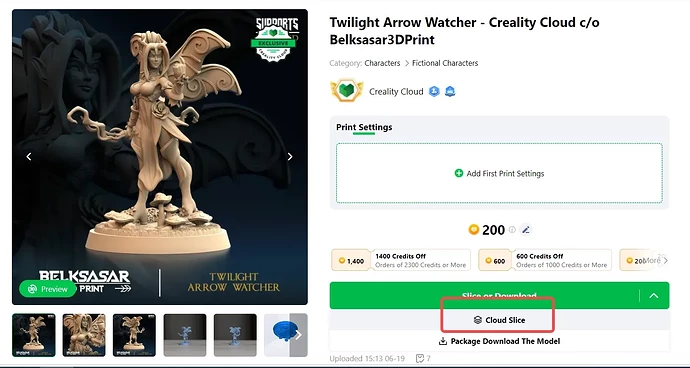
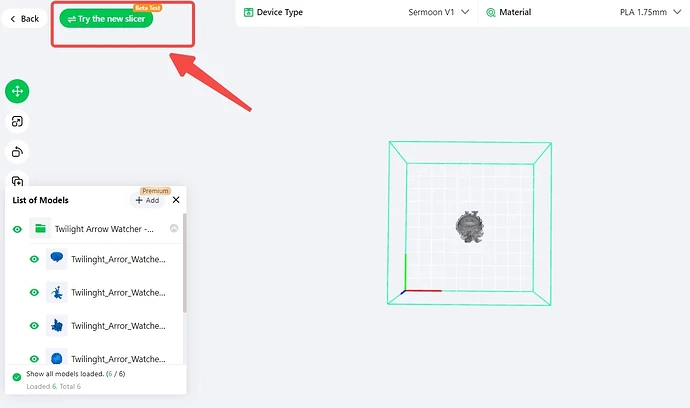
- Go to the Creality Cloud Web model detail page and click “Cloud Slice”, select the file you want to slice and click “Try the new slicer” when you enter the slicer.
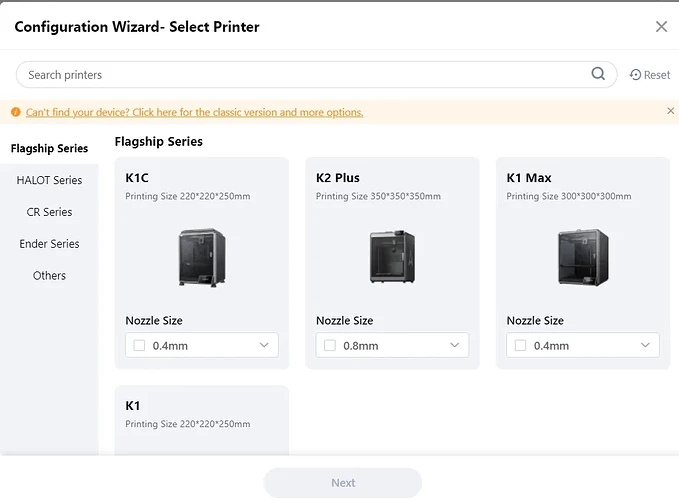
- When adding a printer for cloud slicing, the setup wizard will guide you. Select your printer and nozzle size, then click “next” to proceed to the material page, where you can choose your filament type and brand.
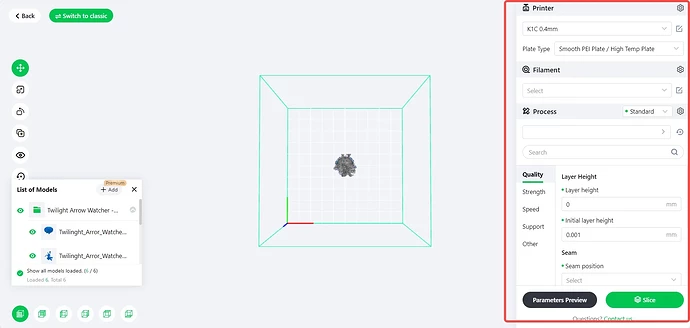
- We’ve improved the toolbar on the new page. Now, you can easily add or change printers and edit filament settings through the pop-ups.
- The process mode “Standard” offers official presets for your printer, and you can adjust these settings based on different process modes. For “Advanced” mode, you can extend more options for quality, strength, speed, and support configurations. You can switch back to the classic slicing view using the button at the top left corner.
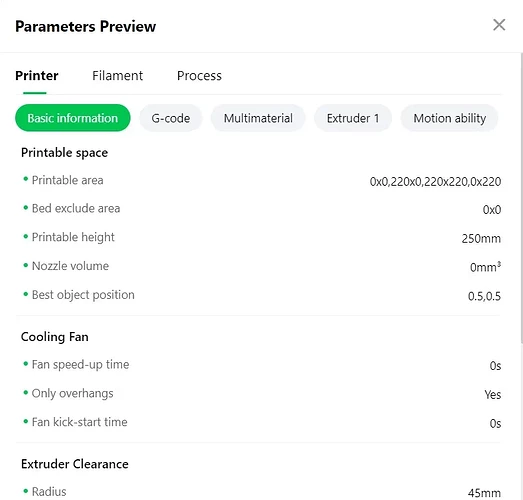
- Once you’ve edited the parameters, you can preview them. If everything looks good, complete the cloud slicing.
Remember to bind your printer to the App workbench and start printing. The Creality Cloud Web platform will also display your printing status in real time.
