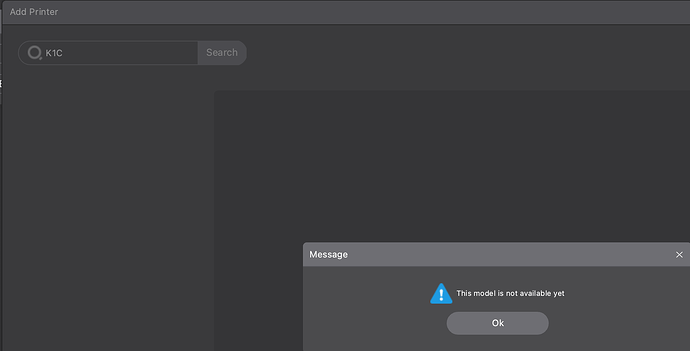
I have installed V5.03 for Mac from GitHub. After the installation, there is no printer to choose. Not a single one. Also I can not add a printer later. The list is always empty
ahahahah
Maybe i know why this machines profiles was added …
have a nice day
when i start a print in creality print 5.0.3 the
Printing information only gives a wave to be seen on little screen top left.
it does not show the picture of the file as below
when I close application during print and open it again during that print then it shows it as it should have done right away.
I don’t know why it does not show it right from the beginning.
Turn off download printer profiles updates automatically and re enable. I had to do that to get the new profiles to show
maybe this link is usefully for some one ![]()
https://github.com/CrealityOfficial/CrealityPrint/releases/tag/v5.0.3
bye
Got a problem with the 5.0.3 release on Mac M1 Pro can’t find the K1C or K1 as printer and it’s a loop… I had to Crash the application to get out!
I just found that feature in CP 5.0.3
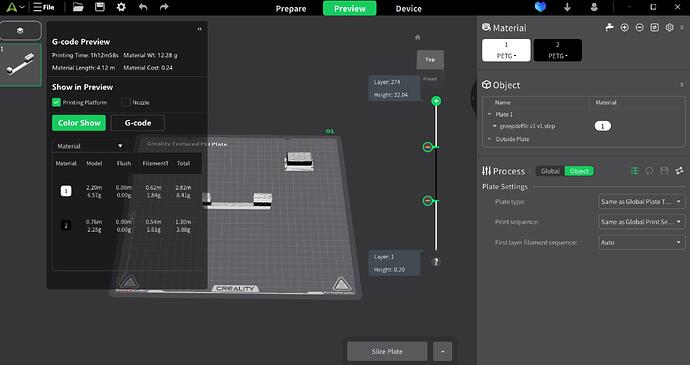
Add a filament on the top right so you have two filament choice’s
select a color by clicking left on the filament1choice
and check color choice box white
select a color by clicking left on the filament2choice
and check color choice box black
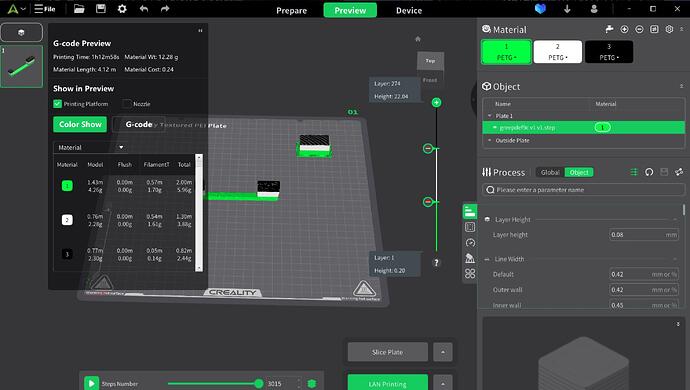
select the plate object
slide the layer to your filament change point
click right and select filament 2 black
slide the layer to your filament change point two
click right and select filament 1 white
select slice the plate
select lan printing
two colors
and three colors
Nice. I’m glad they finally added that… ![]()
Mouse offset still not resolved on Win 10 pro.
General window alignment issue is there where the application appears maximized but is not at the top of the screen.
There is no scaling applied to windows that would cause this.
The app is unusable in this state.
Exporting Preset Configs creates a zip file containing json files. Browsing thru the json files I can confirm that my Process configuration settings are saved.
But, executing the File/Import/Preset Clonfig function is not actually applying the settings. At least they aren’t showing up in the Process Panel.
Is there something I’m missing or is this a not finished feature?
Creality Print & Adaptive Layers NOT WORK?
Creality Print 5.0.0.8636
When I import (for example) rabbit.stl, set layer height to 0,2 (for example) and turn on Adaptive Layers (AL), there is no difference.
For example – without AL — after slicing there are 215 layers.
When I turn on LA, after slicing exactly the same 215 layers. Where is the difference? It doesn’t matter how I set it up – Quality/Speed or Smooth or KeepMin and so on – the result is always the same number of sliced layers.
Are you really sure that Adaptive Layers in Print5 works? Well, I don’t think so…
(Of course I already tried several different samples, lot of settings, but result is always the same: Adaptive Layers in Print5 It does not work, sorry. Or maybe I do something wrong…)
Just downloaded the 5.0.3 update and now it crashes every time I click “Compare Presets” for processes…
I found that there are buttons to the left in the AL (Adaptive Layers) dialog that represent the “APPLY” function. Personally, I would logically expect AL settings inside print settings, perhaps in the quality category. Placing the (undocumented!) AL setting outside the print settings section is somewhat illogical and confusing.
The problem is that this SW is not documented. So more or less everything is a matter of trial and error. PRINT5 still belongs to the category of BETA testing.
In my opinion, while PRINT5 looks promising, it is still not practically usable. Unfortunately.
On the one hand, PRINT5 does not support all Creality printers (I would at least expect to support all printers supported by the SonicPad system), it also does not allow importing printer settings and print modes and filament parameters from the previous version of PRINT4 (or the previous Creality CURA)! This is a major problem. Because many users have invested countless hours tuning their profiles and settings and now they have to practically start all over again, especially when there is no documentation for PRINT5 and the documentation for the previous version of PRINT4 is still incomplete?!
which button would be that I can’t find that 'apply" button on that pop up screen ???
there is only a “keep Min” checkbox???
please let me know what you mean
In the layer height representation it does present other line heights with adaptive layers
Rounded buttons on the left side with name “Adaptive” and “Smooth”. Yes, illogical, confusing and absolutely undocumented. :-7
And now I find that pressing the Smooth button repeatedly keeps doing something. This means that the “Smooth” button does not act as an on/off function, but performs additional smoothing according to the settings again and again.
You must activate AL for each imported object separately. Again and again. And this is nonsense. In other slicing SW this function is a part of quality settings of printing parameters. Here not.
The AL setting is only valid for the selected imported object. So it does not work globally for all later imported objects or for unselected objects.
Aleluja! ![]()
But I still do not understand the function of “Smooth” (repetitive smoothing instead of turn on/off) and the check box “keep Min”…
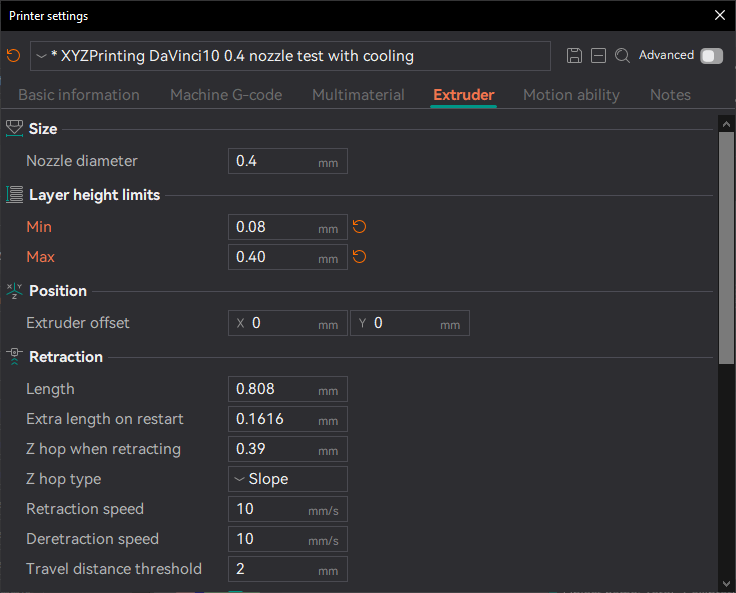
The Keep Min will limit the lowest layer height to your minimum layer height in printer extruder configuration. Else it can allow it to go less.
The Smoothing will just gently smooths the adjustments of raise/lower; rather than having major jumps in layer heights, which can effect walls and can lead to artifacts.
Hm, that sounds logical. Thanks for the explanation.
So SMOOTH is a function that can be used repeatedly, and with each subsequent use it brings more smoothness until the user is completely satisfied with the result. It is such an element with a nebulous result that is neither predictable nor concretely quantifiable. ![]()
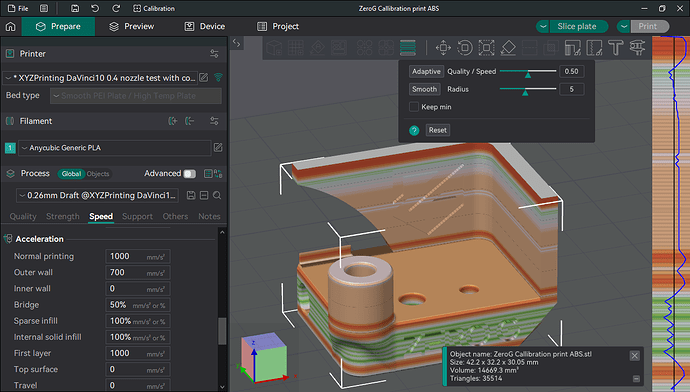
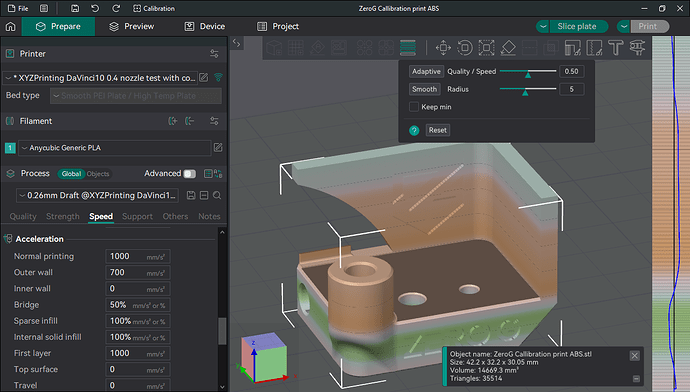
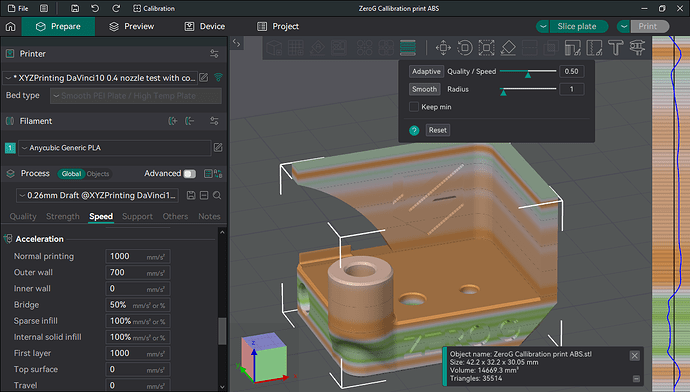
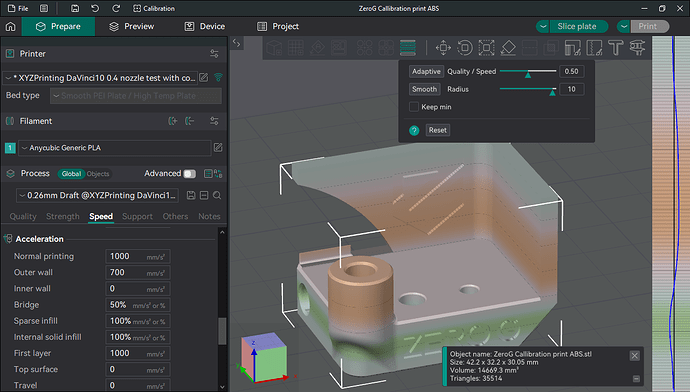
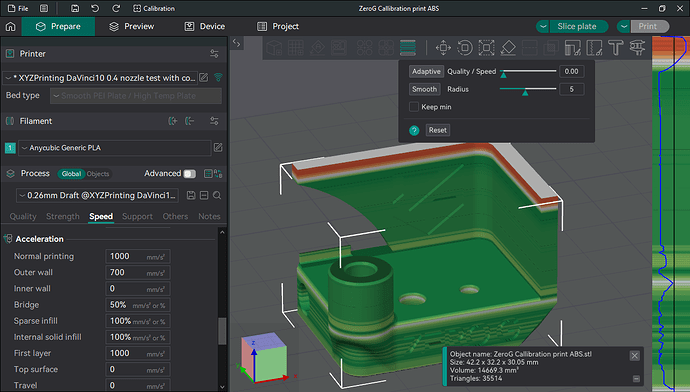
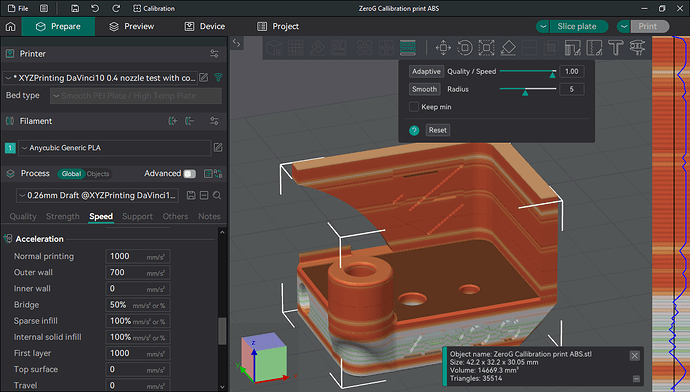
Its a bit easier to see in Orca with the graph they have on the right when using the tool. So forgive the screenshots are from Orca. In general, it helps to think of the “Smooth” function will smooth out the curve in the graph on the right.
So in this example I selected a .4 nozzle profile and set minimum of .08mm height (Max of .4)
I opened a test model for the example as well.
When I apply 50% quality to speed (defaults) you can see several transistions occour at the bottom with big jumps between them. This can effect the text that is on that side.
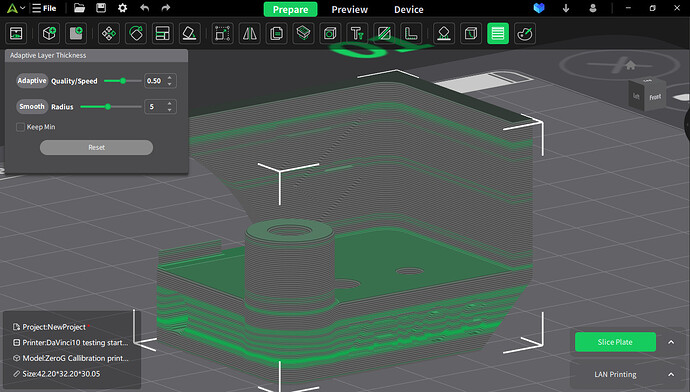
By hitting the smooth button with with a radius of 5
Youll see that area smooths out and will print much better.
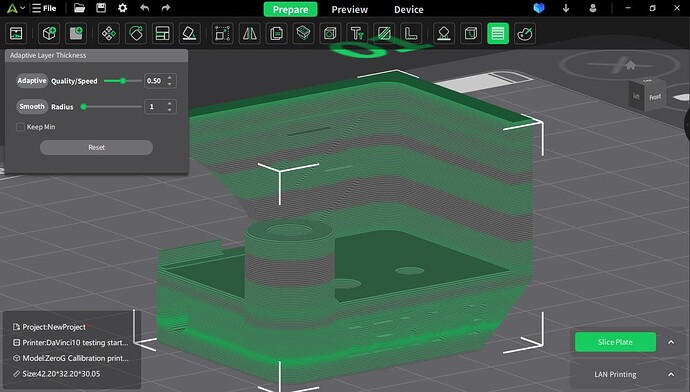
If radius is set to 1 the transistion is deeper, but smoother too
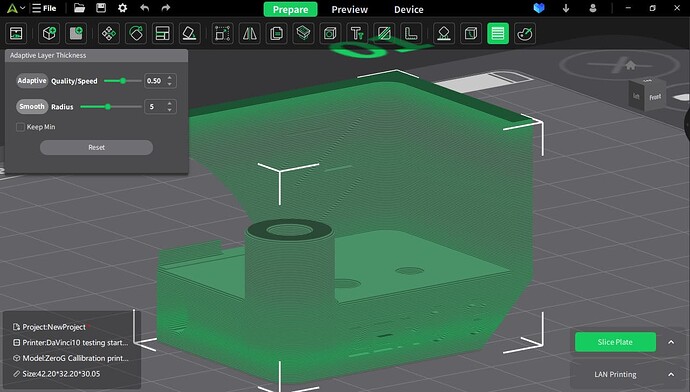
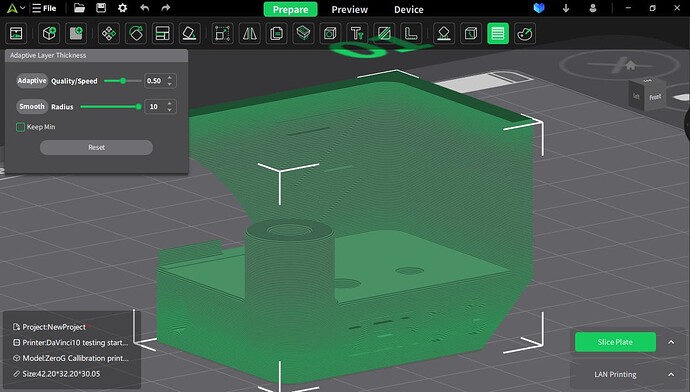
When set to 10 its smoother and transitions are less deep
In cr-print, you have to judge this based on preview.
Quality/speed 50%
Smooth at 5
Smooth at 1
Smooth at 10
.
.
.
Oh and just as an example of the quality vs speed
(again, sorry screenshots are from orca.)
Think of it as what side of the center the line is drawn.
So prefer smaller layer heights vs prefer larger layers.
0.5: (equal quality to speed)
0.00: (quality over speed) it prefers to be on the left of center or thinner layers
1.00: (speed over quality) it prefers to be right of center or thicker layers


