Jack,
Here is my PrusaSlicer config:
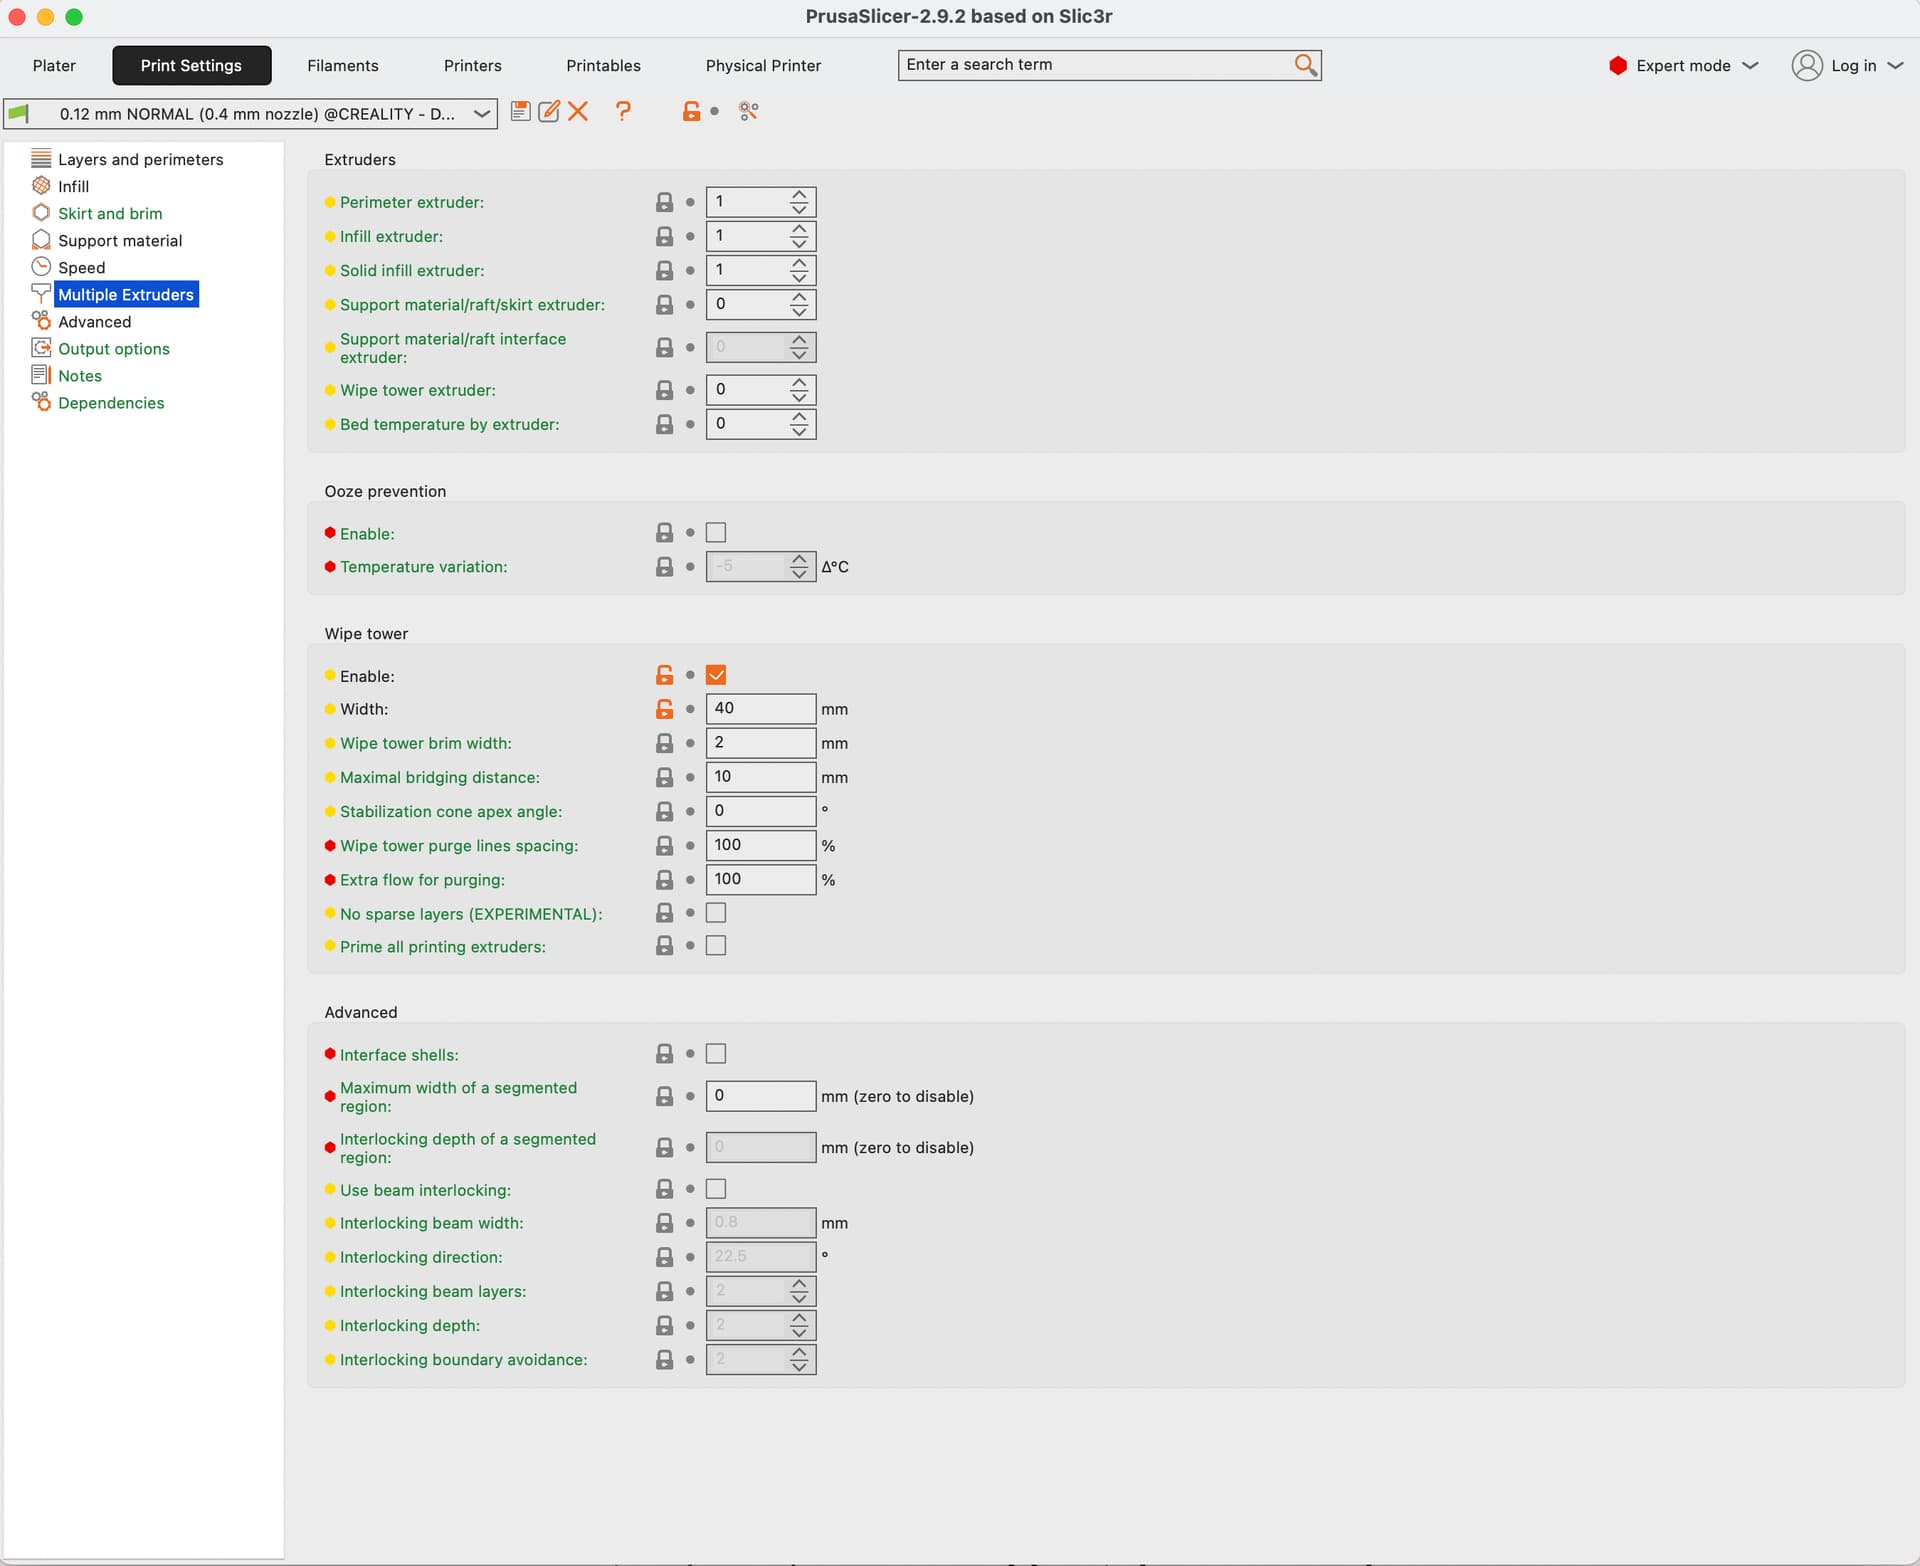
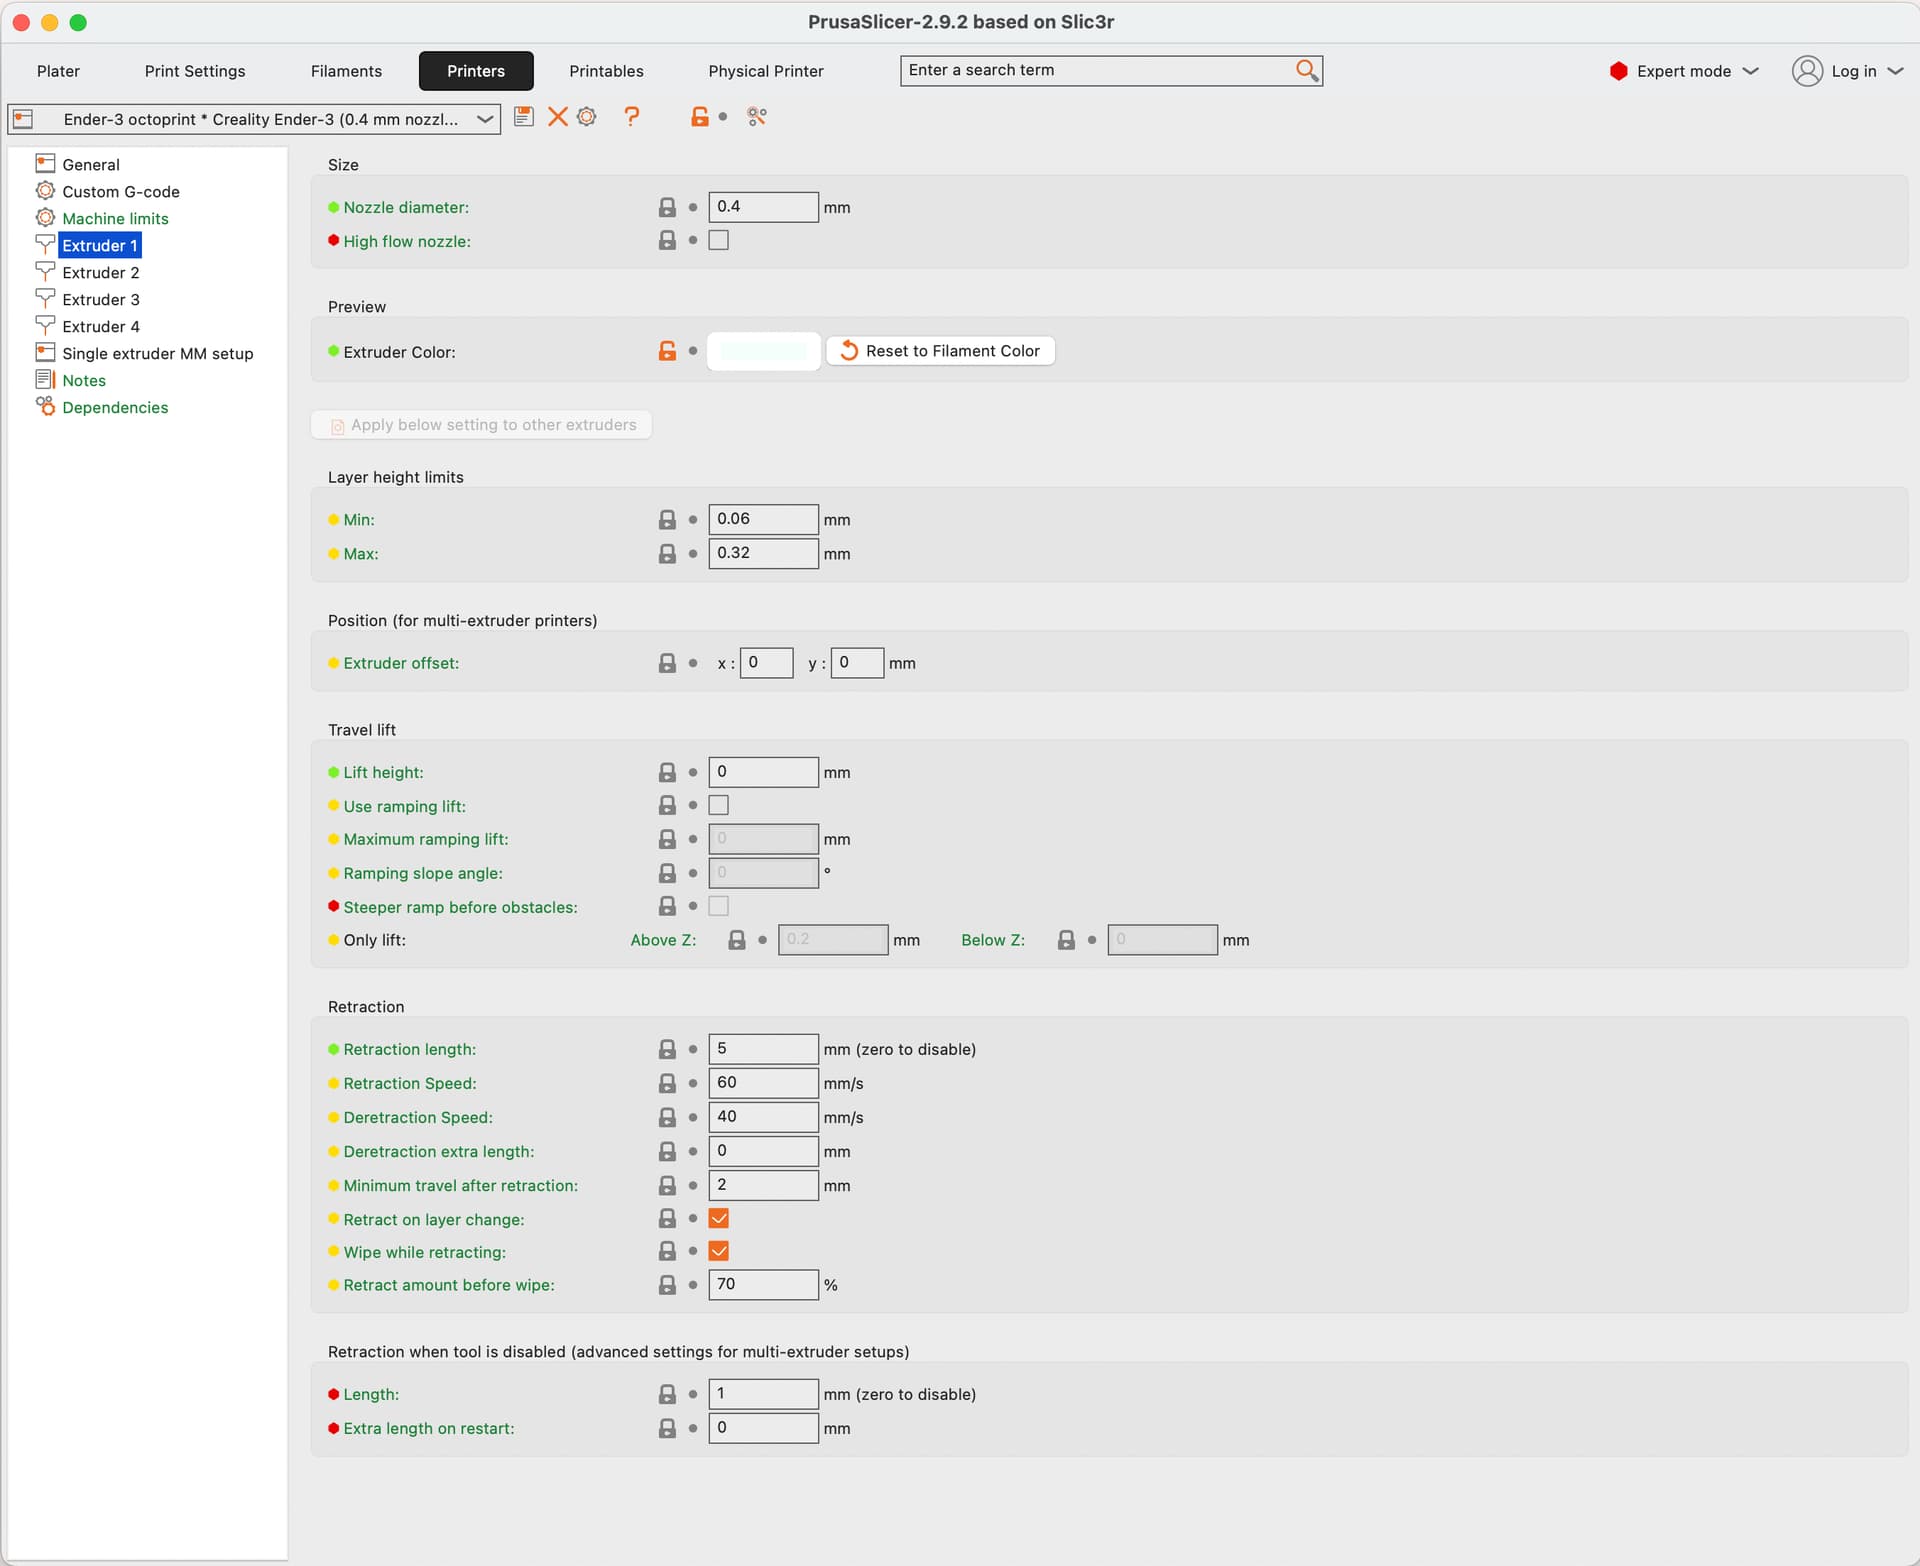
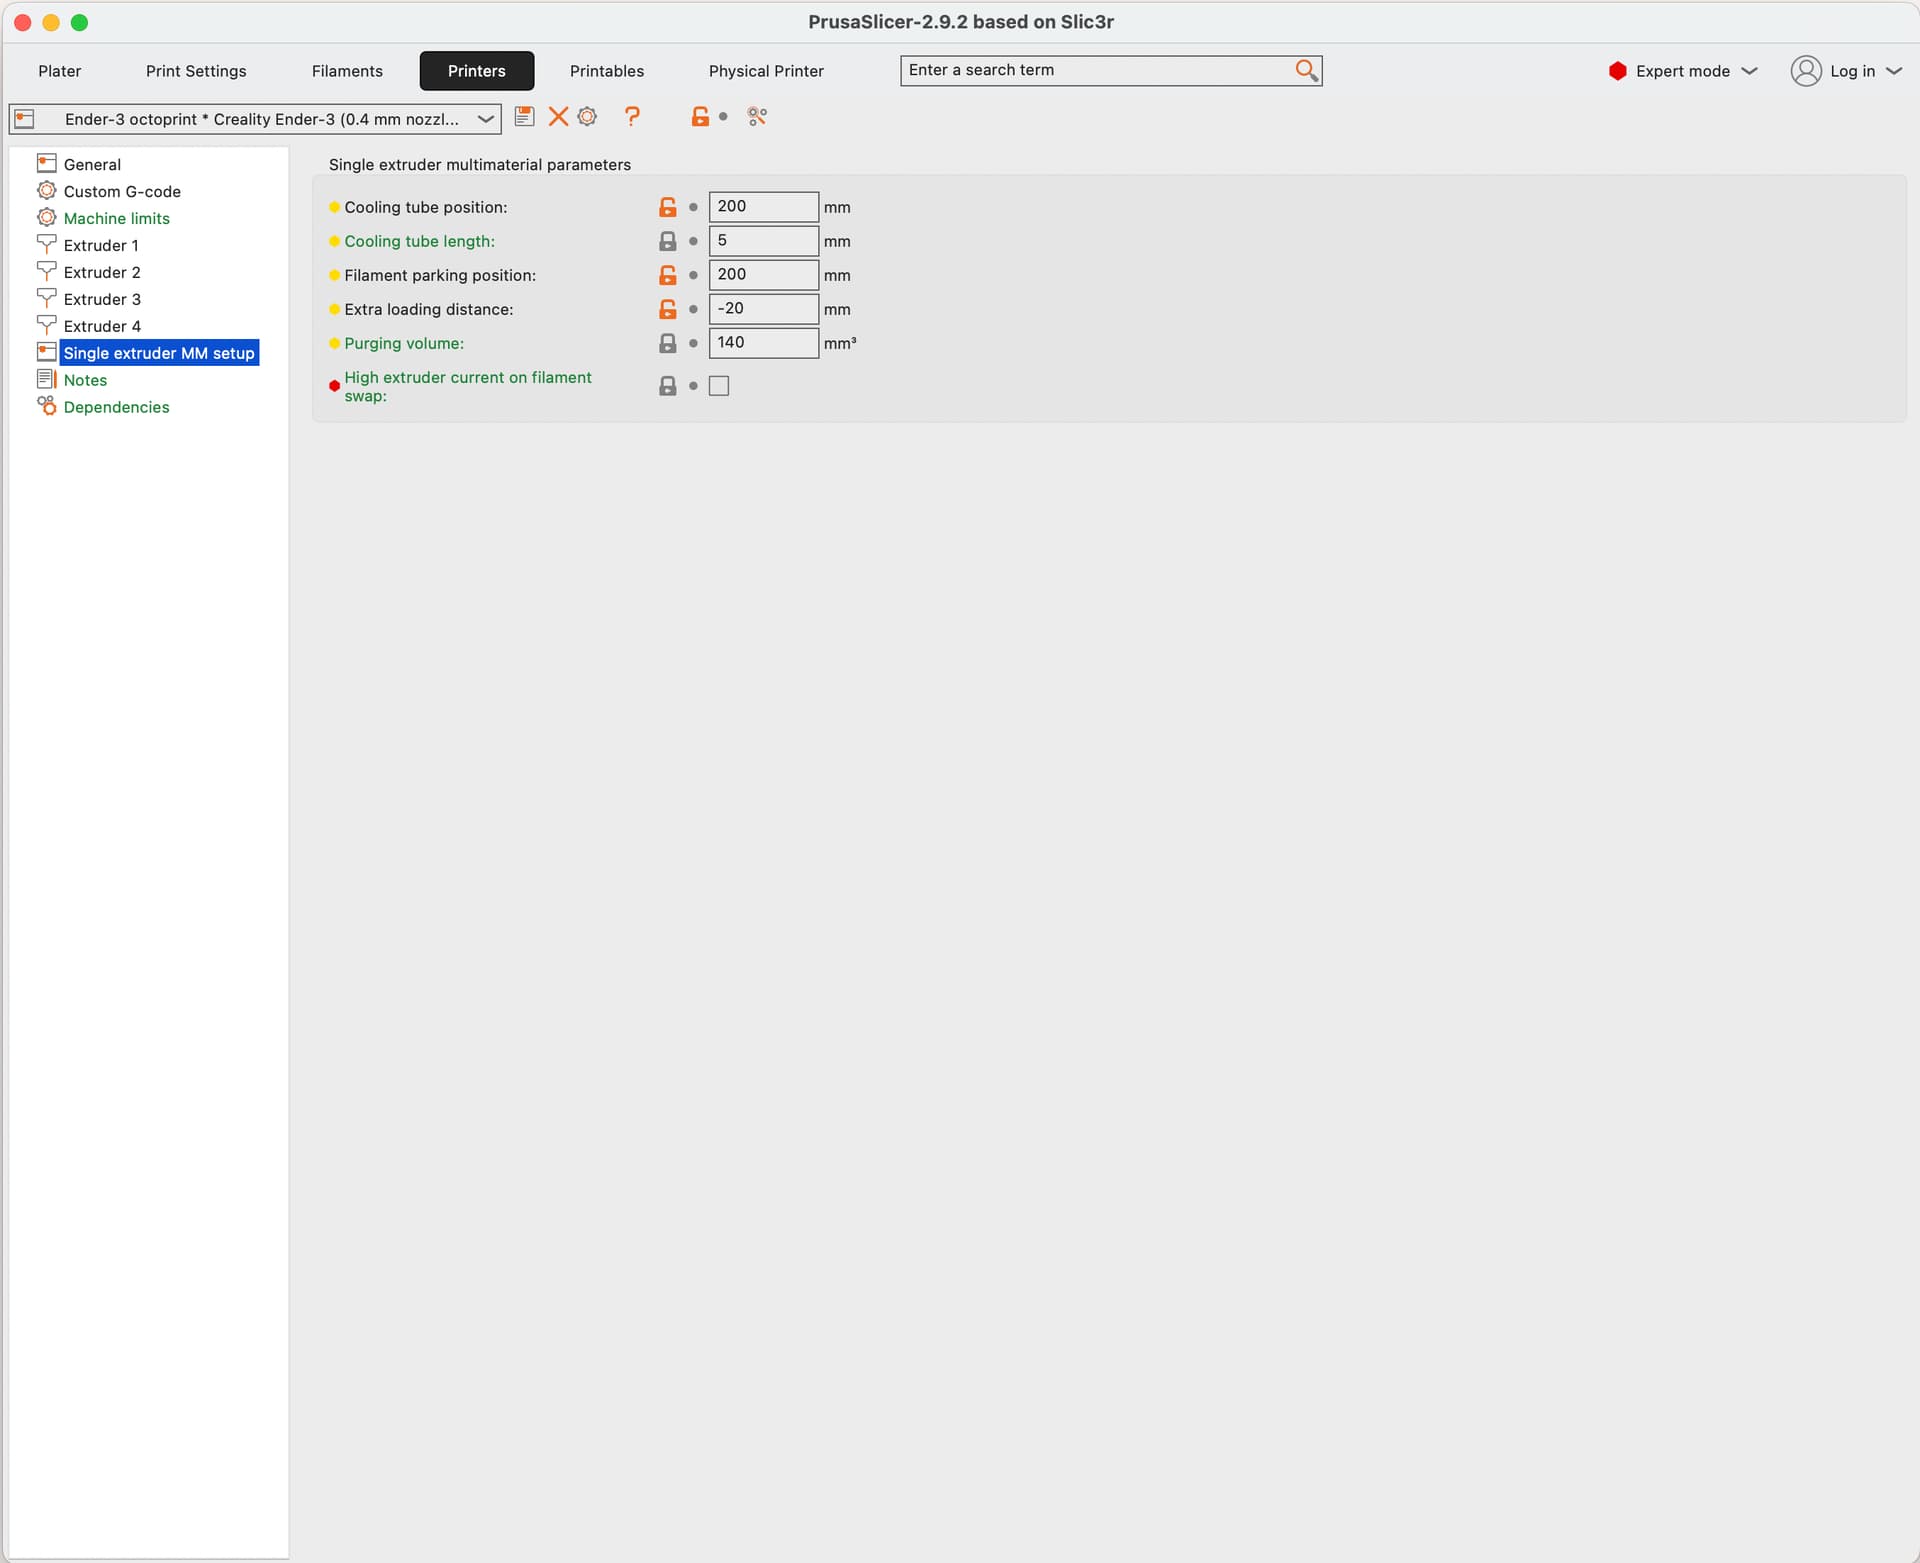
From the PrusaSlicer config, few snapshots that might be interesting:
Custom G-code in “Printers” settings:
Start G-code:
G90 ; use absolute coordinates
M83 ; extruder relative mode
M104 S{is_nil(idle_temperature[0]) ? 150 : idle_temperature[0]} ; set temporary nozzle temp to prevent oozing during homing
M140 S{first_layer_bed_temperature[0]} ; set final bed temp
G4 S30 ; allow partial nozzle warmup
G28 ; home all axis
G1 Z50 F240
G1 X2.0 Y10 F3000
M104 S{first_layer_temperature[0]} ; set final nozzle temp
M190 S{first_layer_bed_temperature[0]} ; wait for bed temp to stabilize
M109 S{first_layer_temperature[0]} ; wait for nozzle temp to stabilize
G1 Z0.28 F240
G92 E0


{if total_toolchanges  == 0} ;; This happens when printing from T0 with only 1 color

{if initial_tool == 0 }

M83 ; but make sure the extruder stays in relative


G1 F300 Z3.16 ; move up a millimeter to get out of the way
G1 F9000 X0 Y0
G1 F300 Z15 ; too close to bed--move to at least 15mm

; Push filament to tip
G0 E200 F1000
G92 E0
G0 E200 F300
G92 E0

M400 ; Wait for previously to be done.
G1 F9000 X2 Y0
G1 F300 Z0.2
G1 X2.0 Y200 E10 F1500 ; prime the nozzle
G1 X2.3 Y200 F5000
G92 E0
G1 X2.3 Y10 E10 F1200 ; prime the nozzle
G92 E0
{endif}
{endif}
End G-code
{if max_layer_z < max_print_height}G1 Z{z_offset+min(max_layer_z+2, max_print_height)} F600 ; Move print head up{endif}
G1 X5 Y{print_bed_max[1]*0.85} F{travel_speed*60} ; present print
{if max_layer_z < max_print_height-10}G1 Z{z_offset+min(max_layer_z+70, max_print_height-10)} F600 ; Move print head further up{endif}
{if max_layer_z < max_print_height*0.6}G1 Z{max_print_height*0.6} F600 ; Move print head further up{endif}


{if total_toolchanges  == 0} ;; This happens when printing from T0 with only 1 color
M83 ; but make sure the extruder stays in relative


; Push filament to tip

G0 E-100 F300
G92 E0
G0 E-300 F1000
G92 E0


M400 ; Wait for previously to be done.

{endif}


M140 S0 ; turn off heatbed
M104 S0 ; turn off temperature
M107 ; turn off fan
M84 X Y E ; disable motors
Tool Change G-code
;begin switch from extruder {previous_extruder} to extruder #{next_extruder}
M117 Unloading Tool T[previous_extruder]
M83 ; turn relative distances for the extruder
; unload extruder {previous_extruder}
G92 E0

;;;G91 ; move to relative mode
M83


; load extruder #{next_extruder}
M117 Loading Tool T{next_extruder}


;{endif}
M400 ; Wait for previously to be done.
; Select the correct material
M117 Loading Tool T[next_extruder]
; Disable extruder
M84 E
M400 ; Wait for previously to be done.

{if next_extruder==0}
OCTO1
{endif}
{if next_extruder==1}
OCTO2
{endif}
{if next_extruder==2}
OCTO3
{endif}
{if next_extruder==3}
OCTO4
{endif}


G4 P1000  ; Pause for 1000 milliseconds (1 second)
M400 ; Wait for previously to be done.

; Enable extruder
M17 E

M83 ; but make sure the extruder stays in relative

{if previous_extruder<0}

G1 F300 Z3.16 ; move up a millimeter to get out of the way
G1 F9000 X0 Y0
G1 F300 Z15 ; too close to bed--move to at least 15mm

; Push filament to tip
G0 E200 F1000
G92 E0
G0 E200 F300
G92 E0

M400 ; Wait for previously to be done.
G1 F9000 X2 Y0
G1 F300 Z0.2
G1 X2.0 Y200 E10 F1500 ; prime the nozzle
G1 X2.3 Y200 F5000
G92 E0
G1 X2.3 Y10 E10 F1200 ; prime the nozzle
G92 E0

{endif}

G92 E0

M83 ; turn relative distances for the extruder
M117 Tool T{next_extruder} In use
Regarding Octoprint config, here is a snapshot of the plugin I use for custom G-codes:
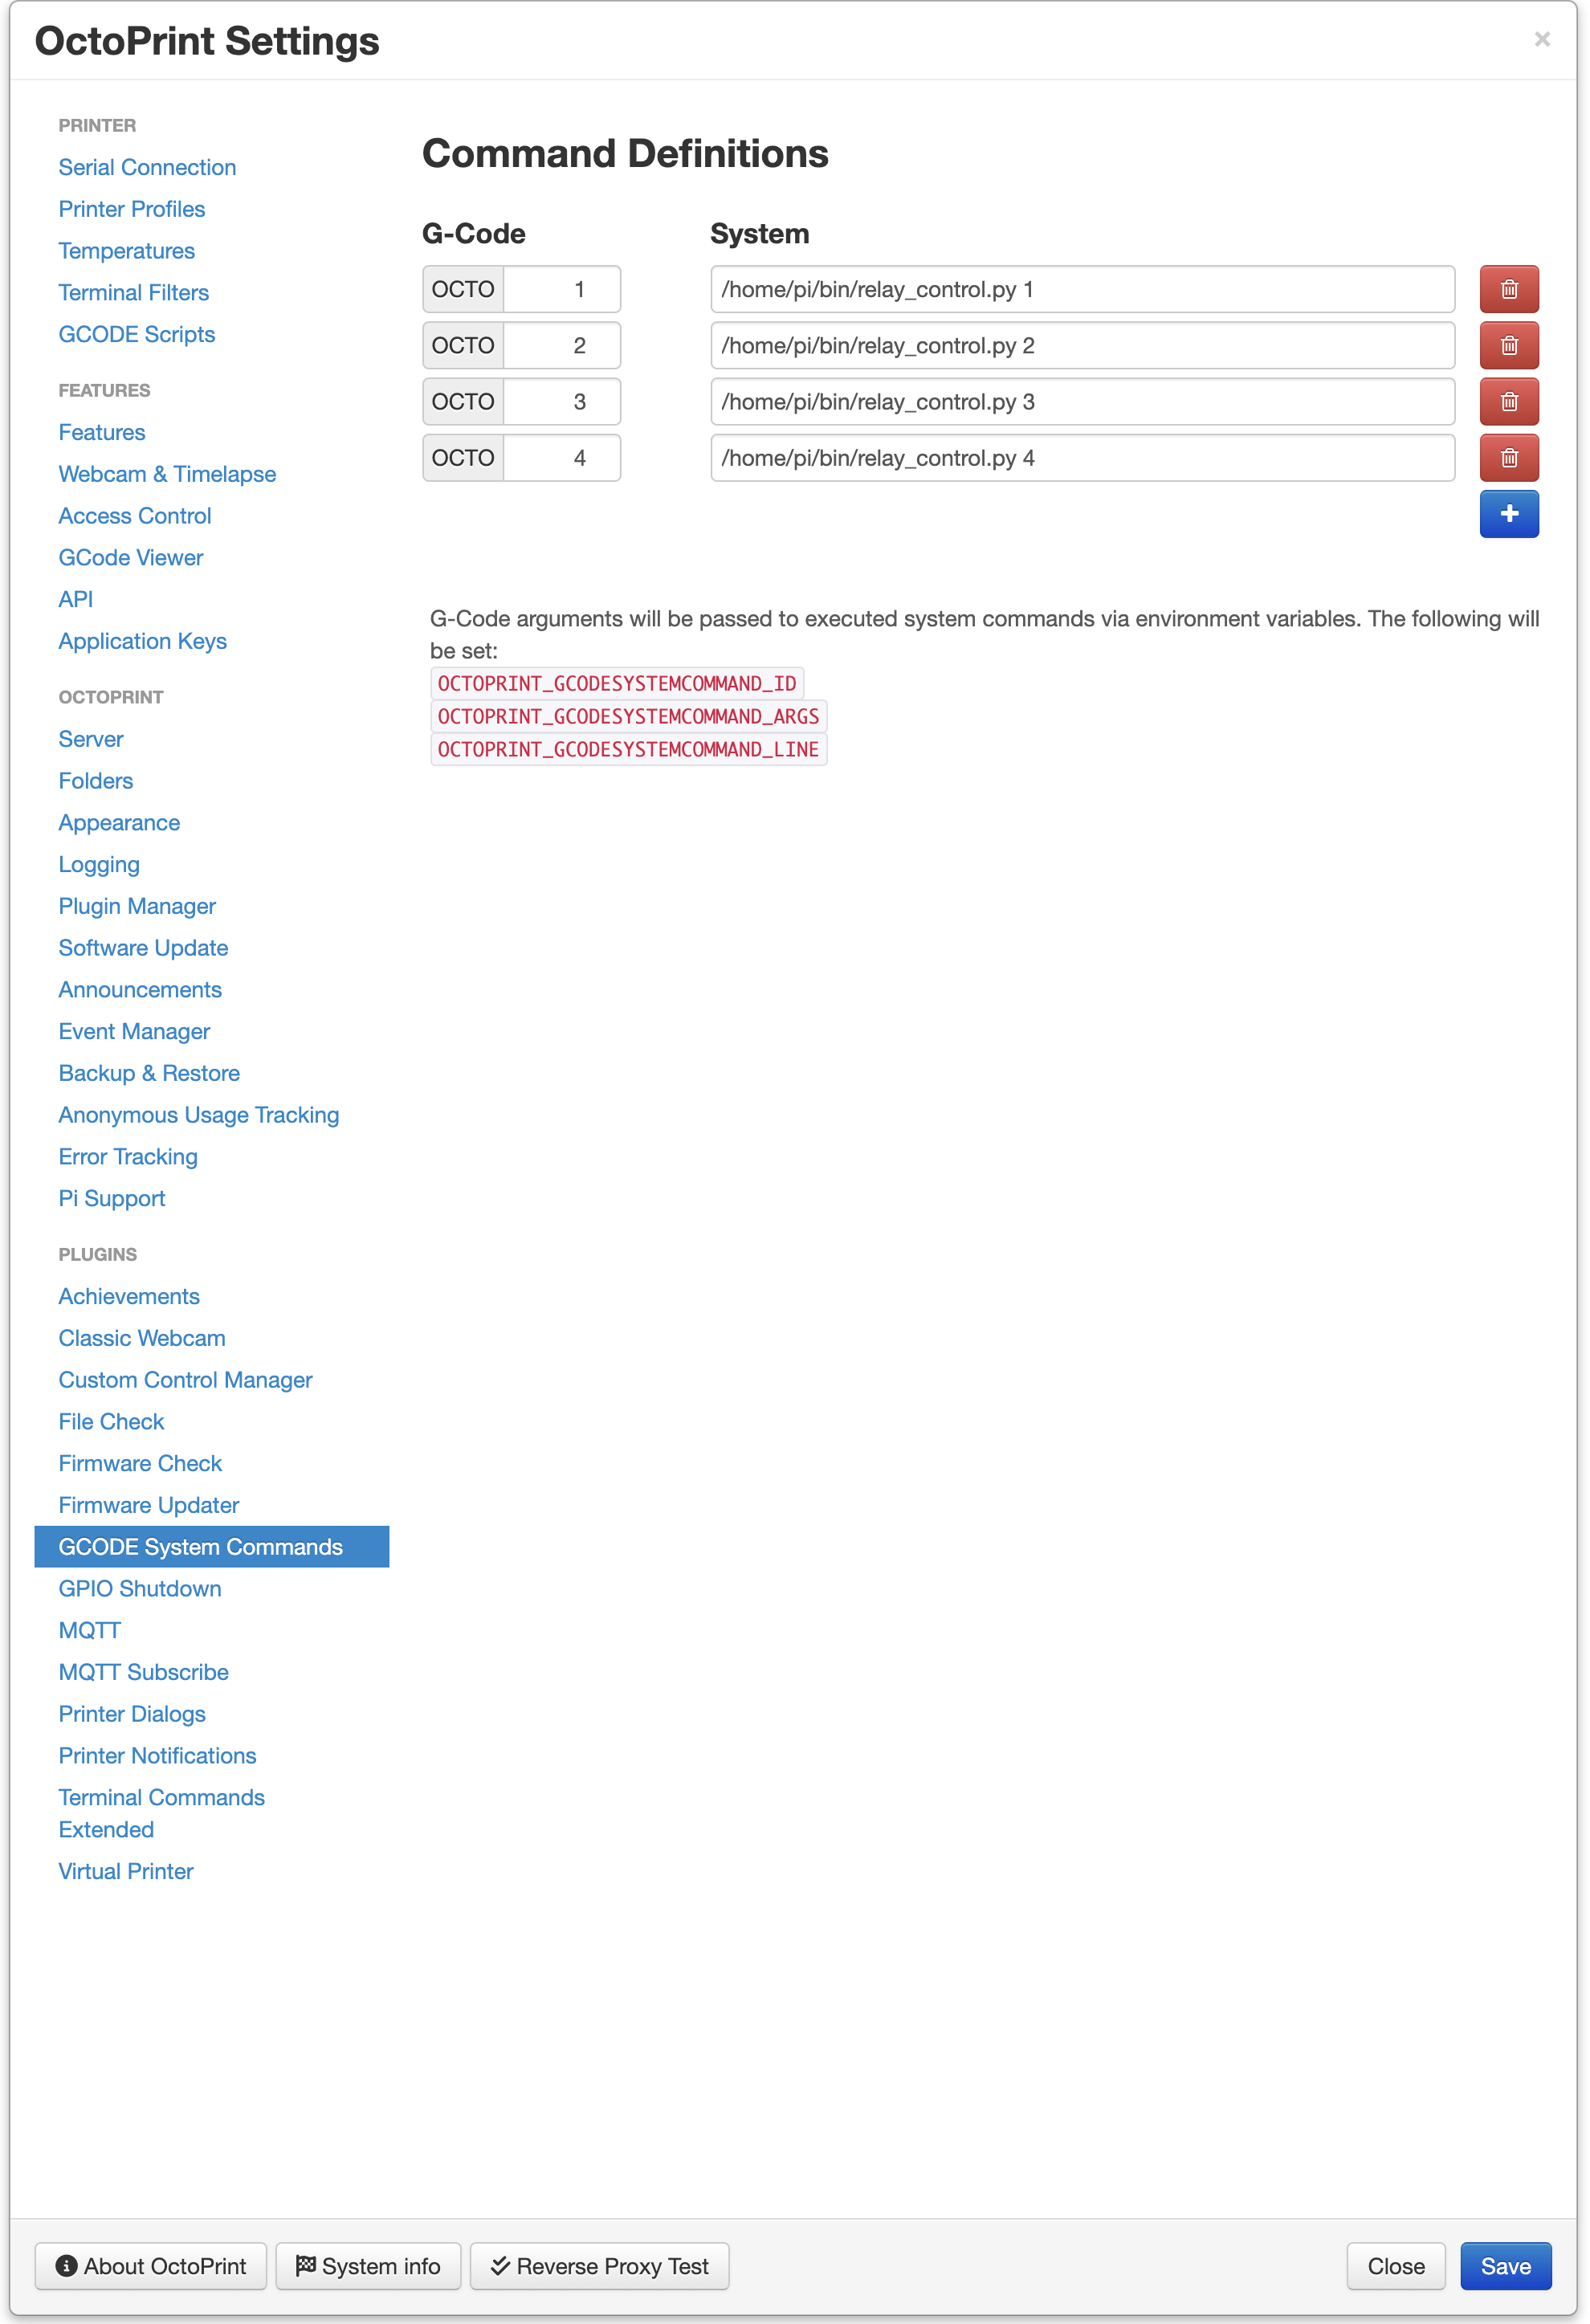
And here the content of the “relay_control.py” script for 3 relays as described before assuming “HIGH” is configured to OFF on the relays and “LOW” is ON:
#!/usr/bin/env python3

import RPi.GPIO as GPIO
import sys
import time

# Pin definitions
RELAY_PINS = [2, 3, 4]  # GPIO numbers
MAIN_RELAY = 2  # GPIO number
RELAY1 = 4  # GPIO number
RELAY2 = 3  # GPIO number

# Ensure a valid argument is provided
if len(sys.argv) != 2 or sys.argv[1] not in ["1", "2", "3", "4"]:
    print("Usage: python3 relay_control.py <1|2|3|4>")
    sys.exit(1)

# Setup GPIO
GPIO.setmode(GPIO.BCM)
GPIO.setup(RELAY_PINS, GPIO.OUT)

# Main
if sys.argv[1] == "1":
    ### everything off for 1
    GPIO.output(MAIN_RELAY, GPIO.HIGH)
    GPIO.output(RELAY1, GPIO.HIGH)
    GPIO.output(RELAY2, GPIO.HIGH)
elif sys.argv[1] == "2":
    ### only RELAY1 for 2
    GPIO.output(MAIN_RELAY, GPIO.HIGH)
    GPIO.output(RELAY1, GPIO.LOW)
    GPIO.output(RELAY2, GPIO.HIGH)
elif sys.argv[1] == "3":
    ### MAIN ON for 3
    GPIO.output(MAIN_RELAY, GPIO.LOW)
    GPIO.output(RELAY1, GPIO.HIGH)
    GPIO.output(RELAY2, GPIO.HIGH)
elif sys.argv[1] == "4":
    ### MAIN ON for 3
    GPIO.output(MAIN_RELAY, GPIO.LOW)
    GPIO.output(RELAY1, GPIO.HIGH)
    time.sleep(0.3) ## this is to give a break to the power supply
    GPIO.output(RELAY2, GPIO.LOW)