If the puzzle floor foam is made out of EVA foam, then yes. Lots of puzzle floor mats are made out of rubber though and those are different.
Puzzle floor foam is quite a bit thicker. 12.7mm or 1/2" thick was the thinnest I could find with a very quick search. Also, the floor mats have a textured surface and I was specifically looking for a smooth surface so that I could engrave and layer the foam.
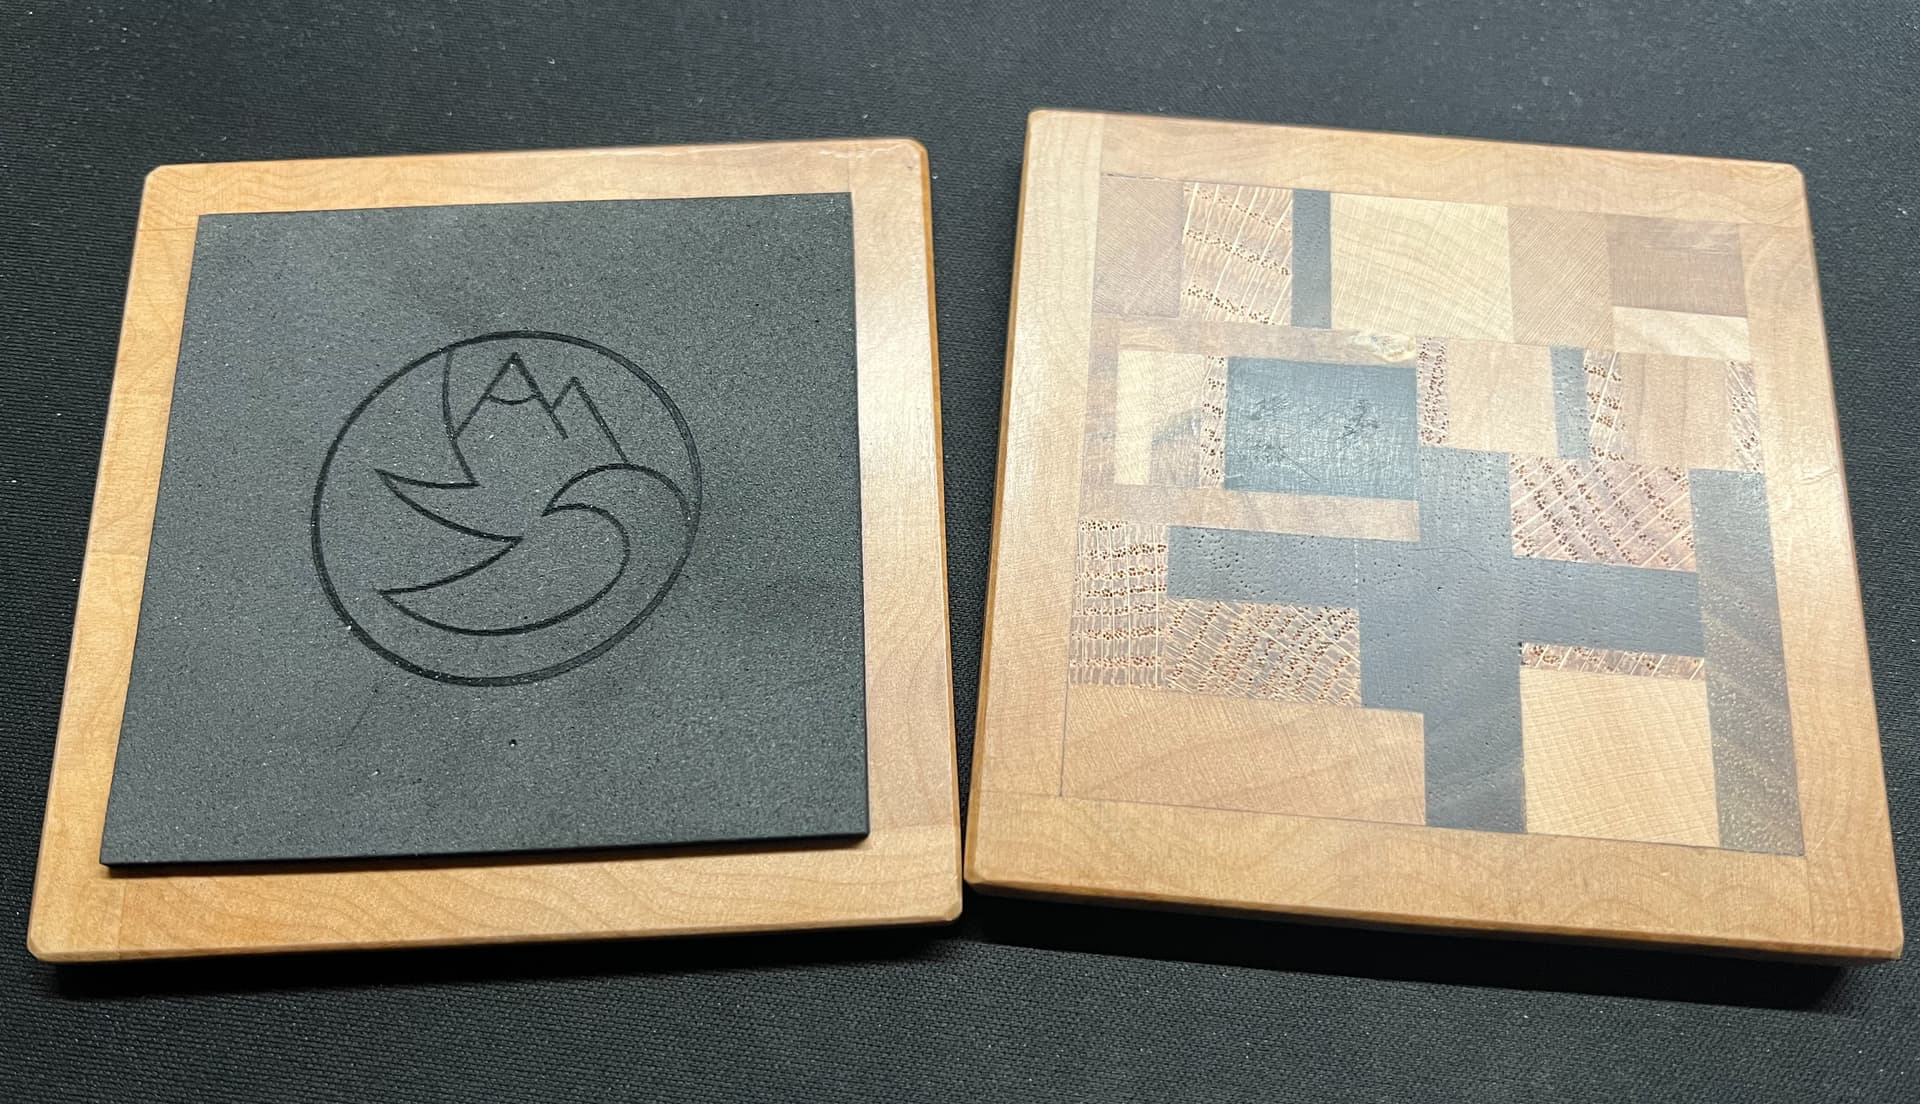
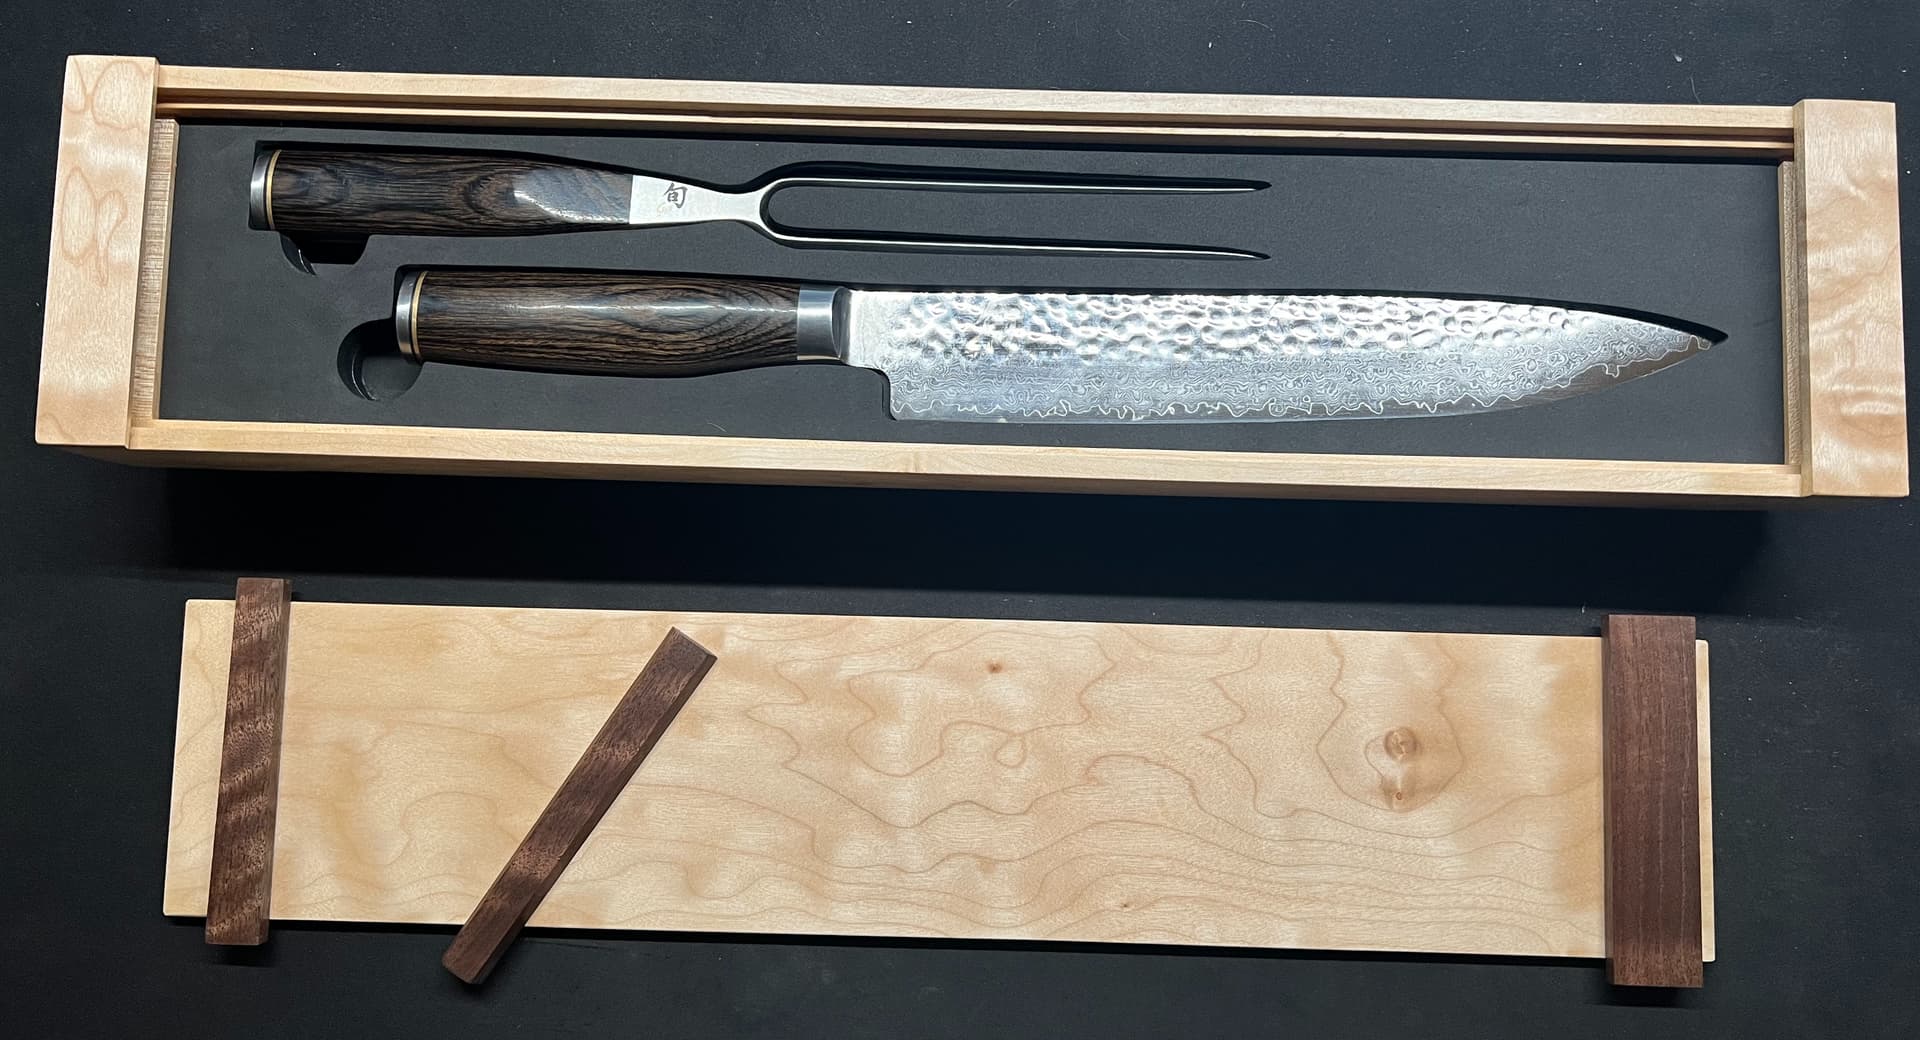
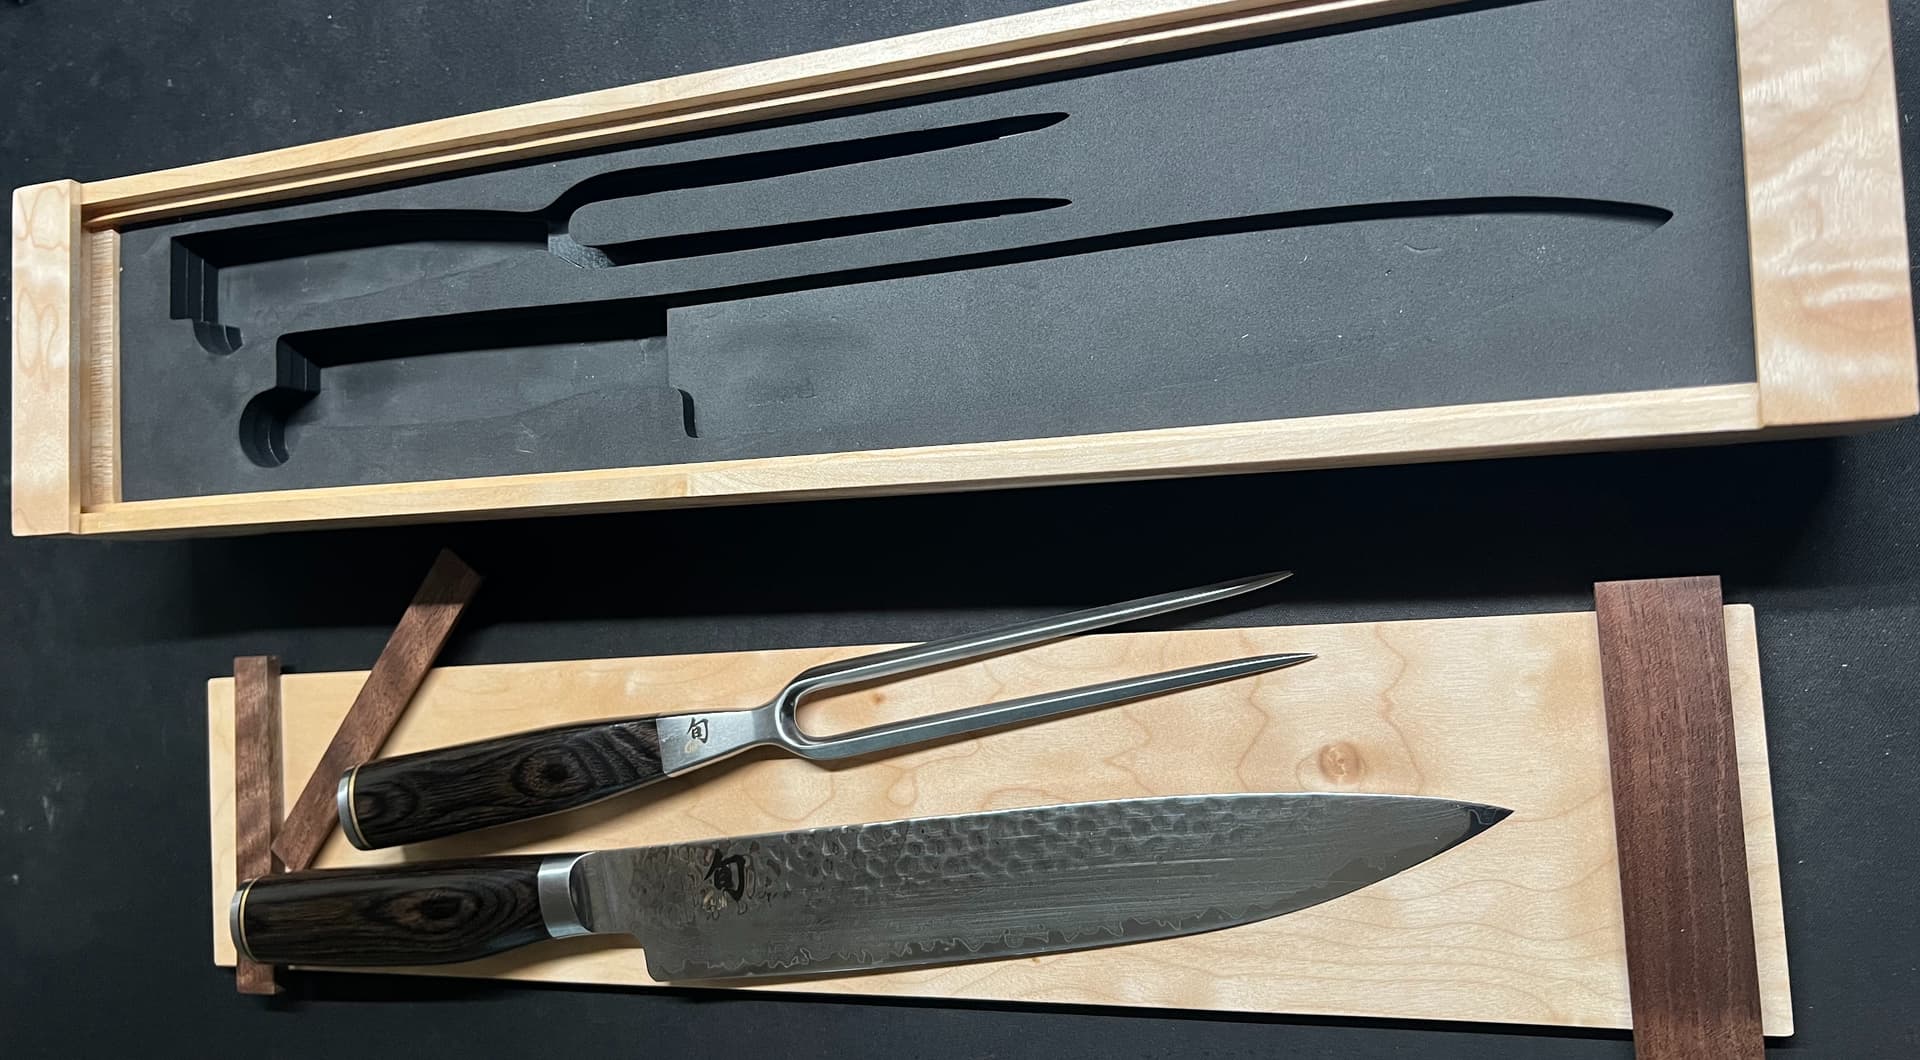
I used 4 layers of the 6mm EVA foam to make an insert for my Shun carving knife set in a custom Japanese toolbox style box that I made for them. Each layer has a different profile cut into it
Great looking design & execution for the knife box!
Looks like you needed about 4 layers of foam to create the well for the knife & fork.
The laser has done a nice clean cut in the foam.
The link was interesting to look at, the guy mentioned the smell when cutting, how did you find it?
Exactly 4 layers of 6mm foam were used. 1 and a 1/3 of the 12x18 sheets. The bottom layer didn’t need any enclosure cuts, just cut to size to fit in the box.
I didn’t really notice much of a smell, although I was running the laser in the enclosure with the fan venting outside, so that helped. After each cut was done, I let the fan run for a wee bit to vent out any residual smoke from the cut before opening up the enclosure to remove the part.
I had to cut everything on a 45-degree diagonal since the width needed was 452mm - too large to fit on the X or Y axis in the engraver.