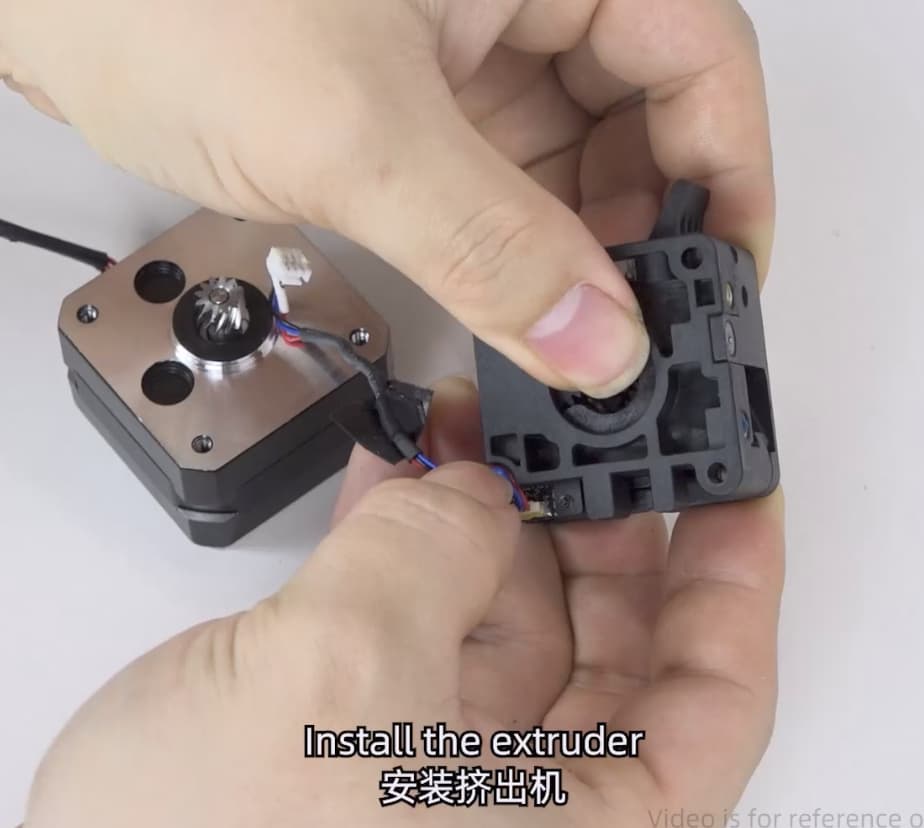
Hello there. first at all sorry for this so long post.
Since I buy my printer the first thing I had to learn was, how to clear extruder jams. For that I reviewed the «Service Tutorial Creality Hi Extruder Jam Clearing» video from the site Creality Hi & Creality Hi Combo 3D Printer User Guide | Creality Wiki but after the third time I started to be too much worried because putting back the extruder was difficult and the Cutter Sensor Cable started to be damaged. Even I try to buy a cable replacement, but was only available on stores on Canada and Australia, booth very away and the shipping was too expensive.
I really studied all videos on the user guide:
-
“Service Tutorial Creality Hi Cutter Replacement”
-
“Service Tutorial Creality Hi Extruder Jam Clearing”
-
“Service Tutorial Creality Hi Extruder Replacement”
-
“Service Tutorial Creality Hi Replace extrusion motor”
-
“Service Tutorial Creality Hi Replace Hot End”
-
“Service Tutorial Creality Hi Replace Nozzle plate”
-
“Service Tutorial Creality Hi Replace the hotend adapter cable”
-
“Service Tutorial Creality Hi Strain Gauge Replacement”
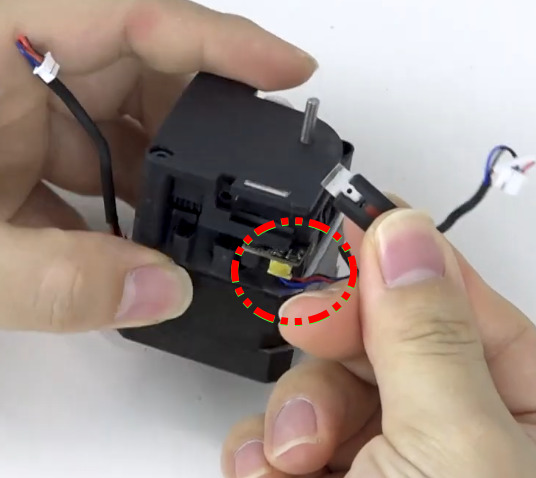
Was only until last week I see the video «Service Tutorial Creality Hi Replace the material break detection plate» and on the second 4:53 A EPIPHANY where in front my eyes:
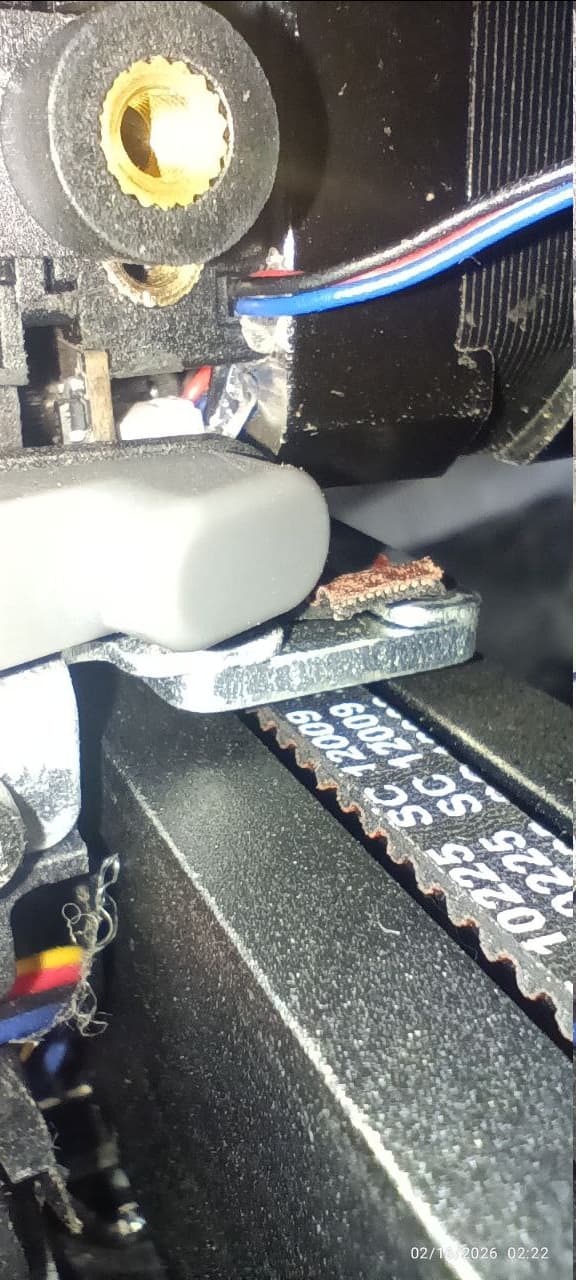
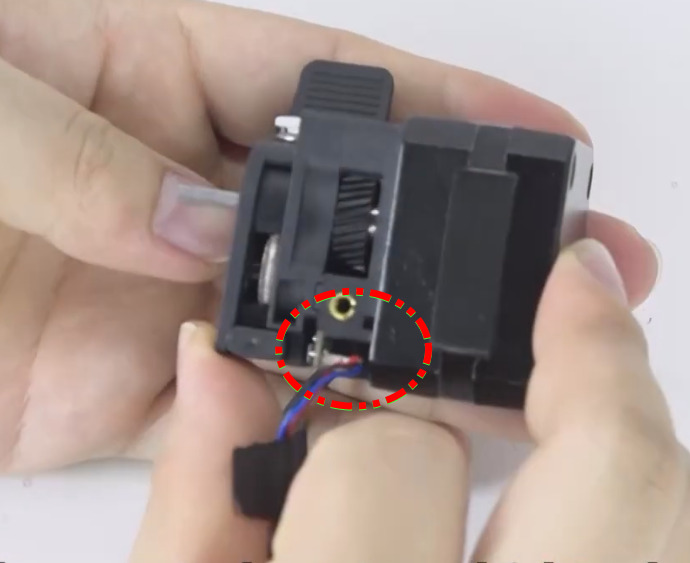
The back of the extruder have a small groove to put the cable on it. THIS IS NOT SHOWN ON ANY OF THE OTHER VIDEOS, EVEN if you look carefully on the other videos you can see the cable damaged.
On my extruder this is the groove:
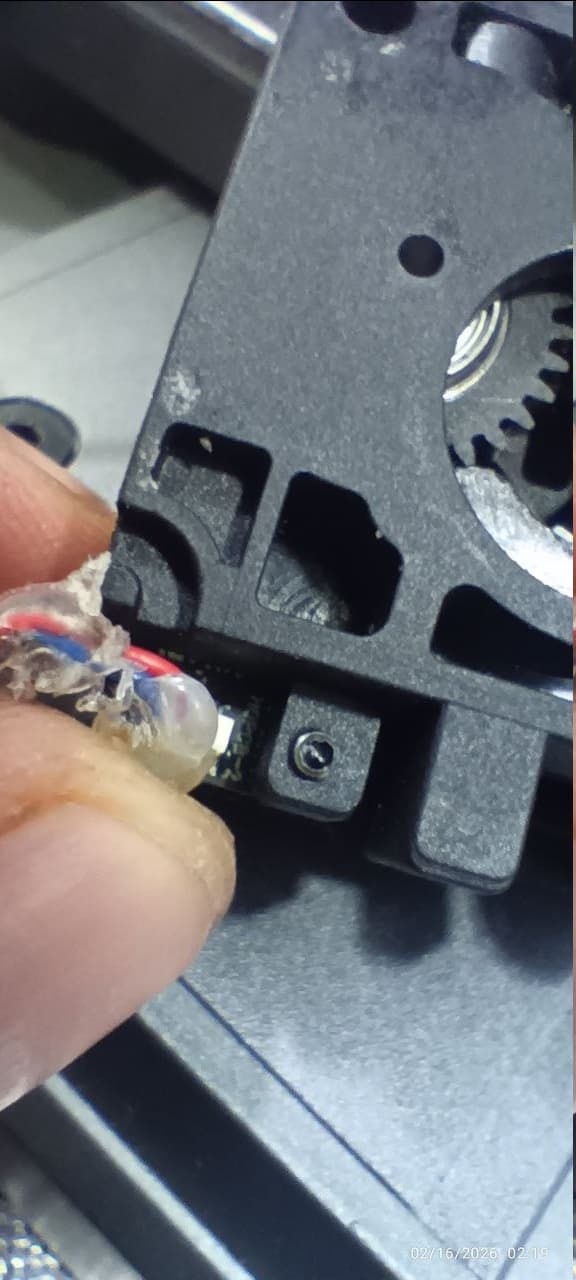
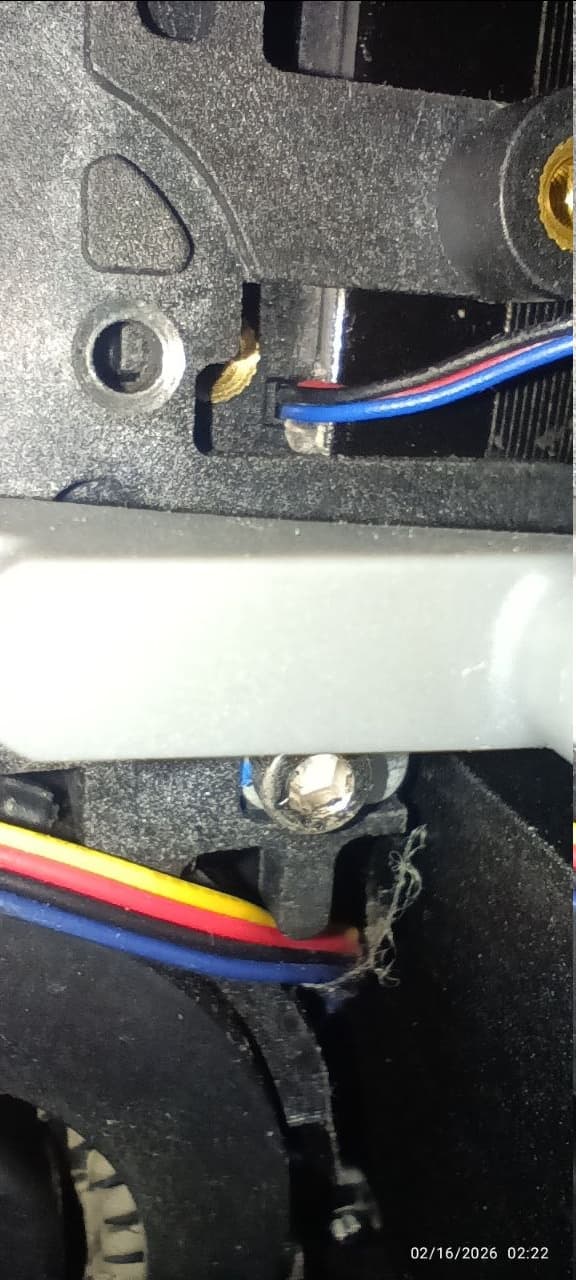
So I promptly put a small drop of hot glue making the cable fixed on the slot (and I had to put another drop on the connector because on one of the installations the connector got disconnected.)
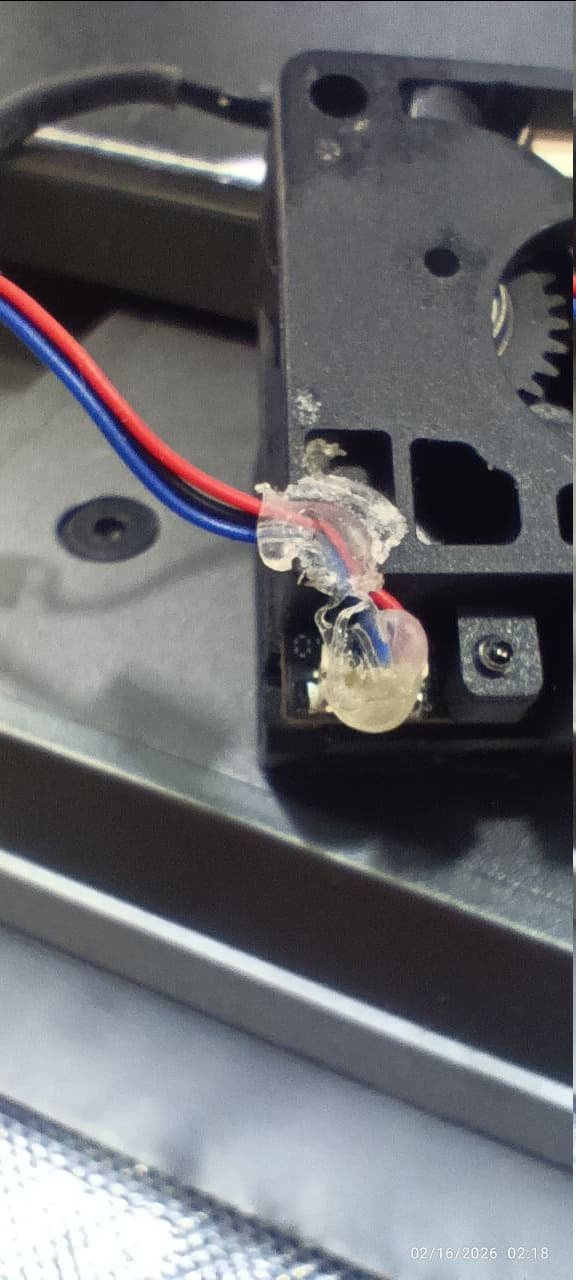
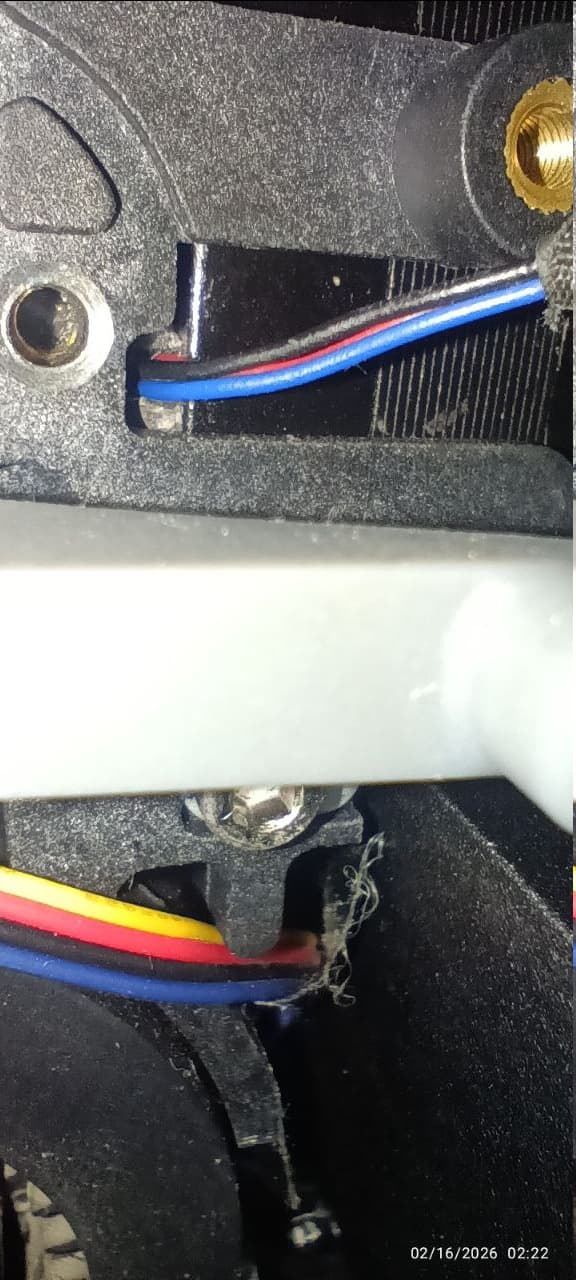
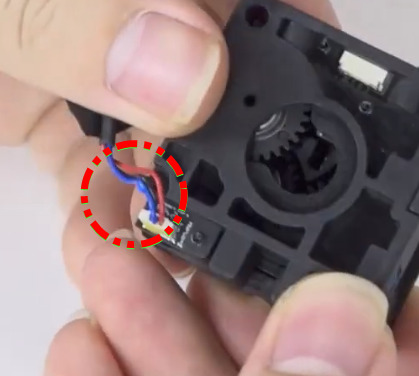
Now when you assembly the Extruder and the motor, the cable is ALWAYS ON THE RIGHT POSITION:
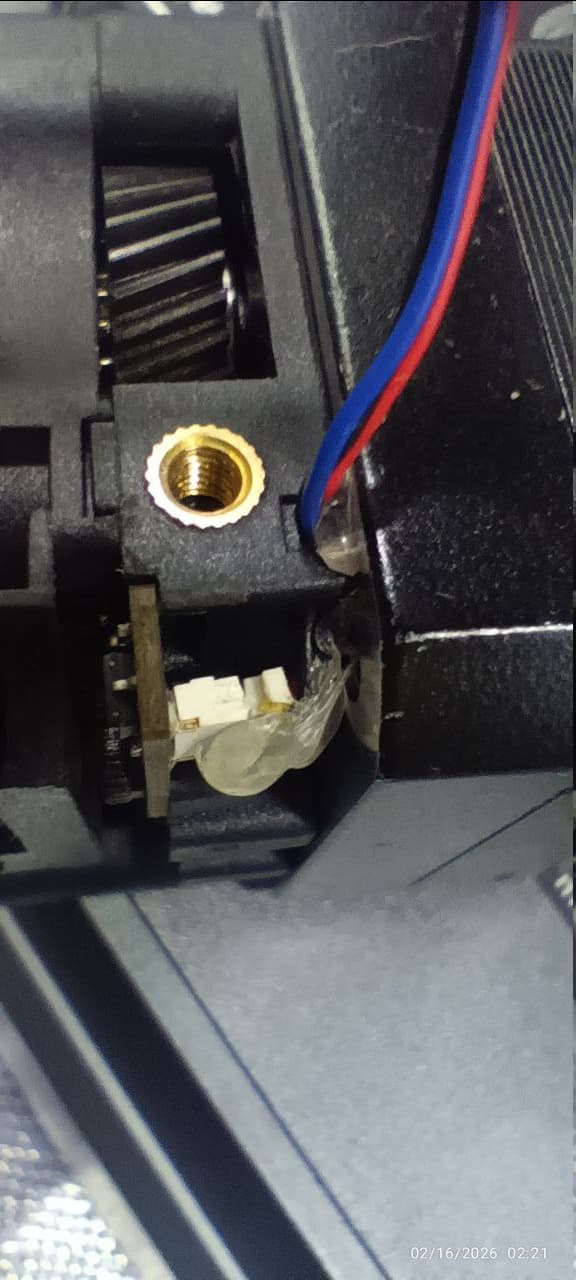
And installing the extruder on the print head, is like a breeze, it fits without problem and the cable is not damaged
Before this discovery normally was a fight to install the extruder on the print head, now it only take few seconds.
I do not know why on the other videos THIS VERY IMPORTANT STEP is not shown nor indicated. but if you route the cable on the small groove you will save a lot of time and trouble. If you look closely on several videos you will see the cable out of the slot.
And on some videos you can see the damage of the cable because is not properly routed.
Hope Quality and support repair the videos helping more people.