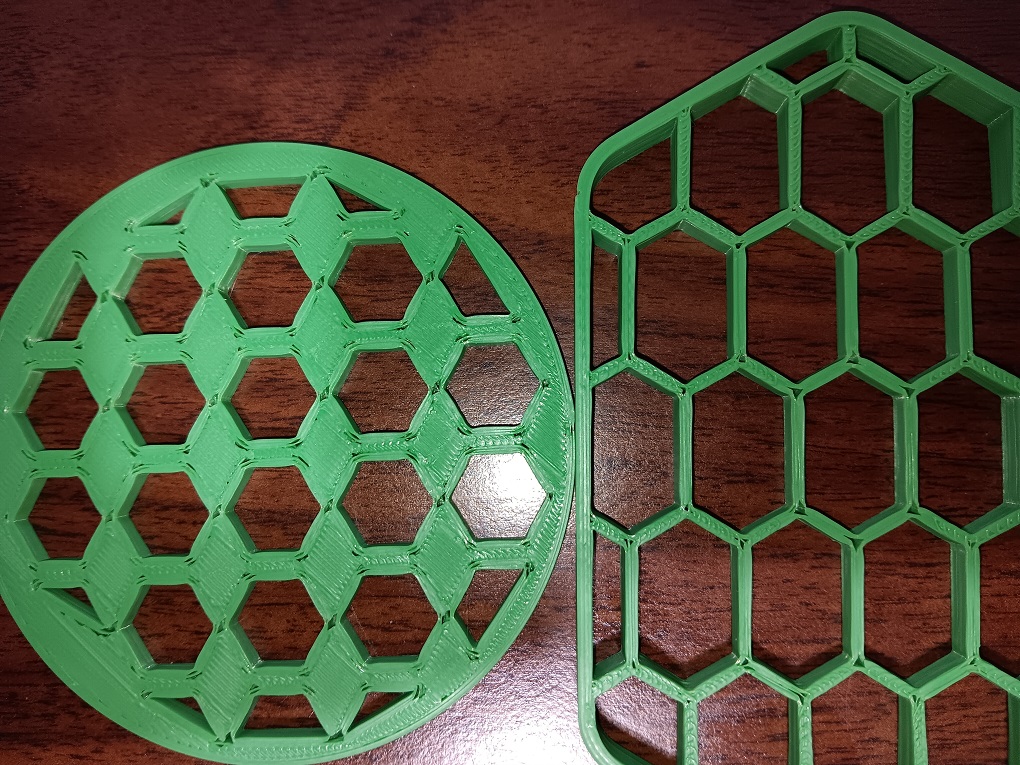
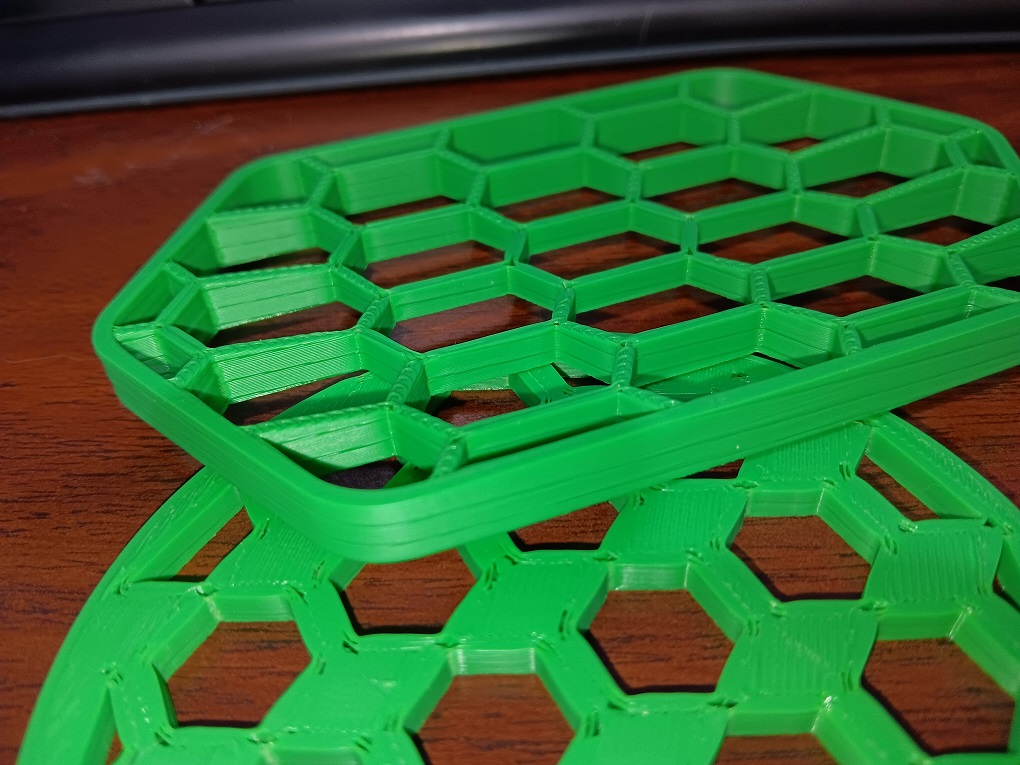
Including a few pics to show my problems. One of these, with thin hex walls, has a concave surface. So may look a bit odd.
First: gaps between walls and infill. I’ve tried increasing wall count, infill percentage, even slower speeds. No success yet.
Second: Diagonal lines on sides of print. I guess this is “salmon skin”. I tried loosening Z nuts a bit, but no success.
Hello @BriceOnCnc and Welcome to the Creality Forum…
Just a few ideas here:
What slicer…?
What bed temp and what kind of nozzle… 0.4..?
What @Lensman said. Maybe bump the temp up to 220°C…?
Check the Z offset. Maybe try moving the nozzle closer to the bed a tiny amount.
Also try increasing the flow.
Check all your slicer settings. I’ve forgotten to change some back after experimenting and things got messed up a little..
Using Creality Hyper PLA and also Sunlu I’ve found 220 to be my sweet spot so far but as you know things change daily/hourly
@jimandyen has a good point about changed settings. I’ve done that and it’s very frustrating. What I do now is make a copy of my optimal settings for an application then copy it and tweak the copy. This way I can easily identify any issues by reverting back.
I bet the 210 is too low. I have some Elegoo PLA with below average temp ranges. That could be the culprit.
I just finished a set of PETG prints at 235. And they look great. So I’ll be trying those PLA temp changes next.
If I can figure out a solution for the “salmon skin” problem on the side, that’d be great.
Lensman: Sorry for the confusion. 235 was my PETG temp.
Here’s what I discovered so far. Raising temp doesn’t address the issues.
In short, I bet I need to stop using the stock fan. I’ll explain more below…
Got my calipers and performed additional testing. Did some first layer tests, and discovered printing at 210C resulted in an out of spec thickness. My first layer should have been .2mm. Result was .3mm.
When I performed the 220C first layer test, the results were right on the .2mm spec. And got an improved first layer test.
Here’s what I suspect could be going on. I noticed that when infill needs to be laid in a small area, it ends up slightly higher than the walls. I’m guessing the nozzle outpaces the cooling capacity of the stock fan as the speed increases.
Fortunately, I had some 5015 fans on order. Got them yesterday. So I’m going to add a fan mod to my S1 Pro. Maybe that will help.
So it’s probably best to close this issue. And see what happens after I install Zuff’s fan mod.
I’ve increased rigidity using Zuff’s stabilizers, along with other mods to allow increased acceleration.
Perhaps these mods resulted in the Sonic Pad resonance test pushing the machine harder.
Convinces me I need to make this final mod (the fan), and things should (hopefully) improve…lol