Can anyone point me in the right direction of how to remedy this printing issue. I’ve slowed down the print to 50mms and made some other adjustments but I still get these density patches. My belts are tight and rails are greased and the printer is on a solid floor. My velocities are low all around. I should point out that my other non Lithophane prints come out with even smooth walls. Any thoughts would be appreciated.
Thanks
Hi,
52 person seen your post (before me) but nobody able to answer you. Those information simple not enough to troubleshoot or least start thinking about possible errors.
Those should be help if you upload those models (or the URL point to the Creality Cloud models.
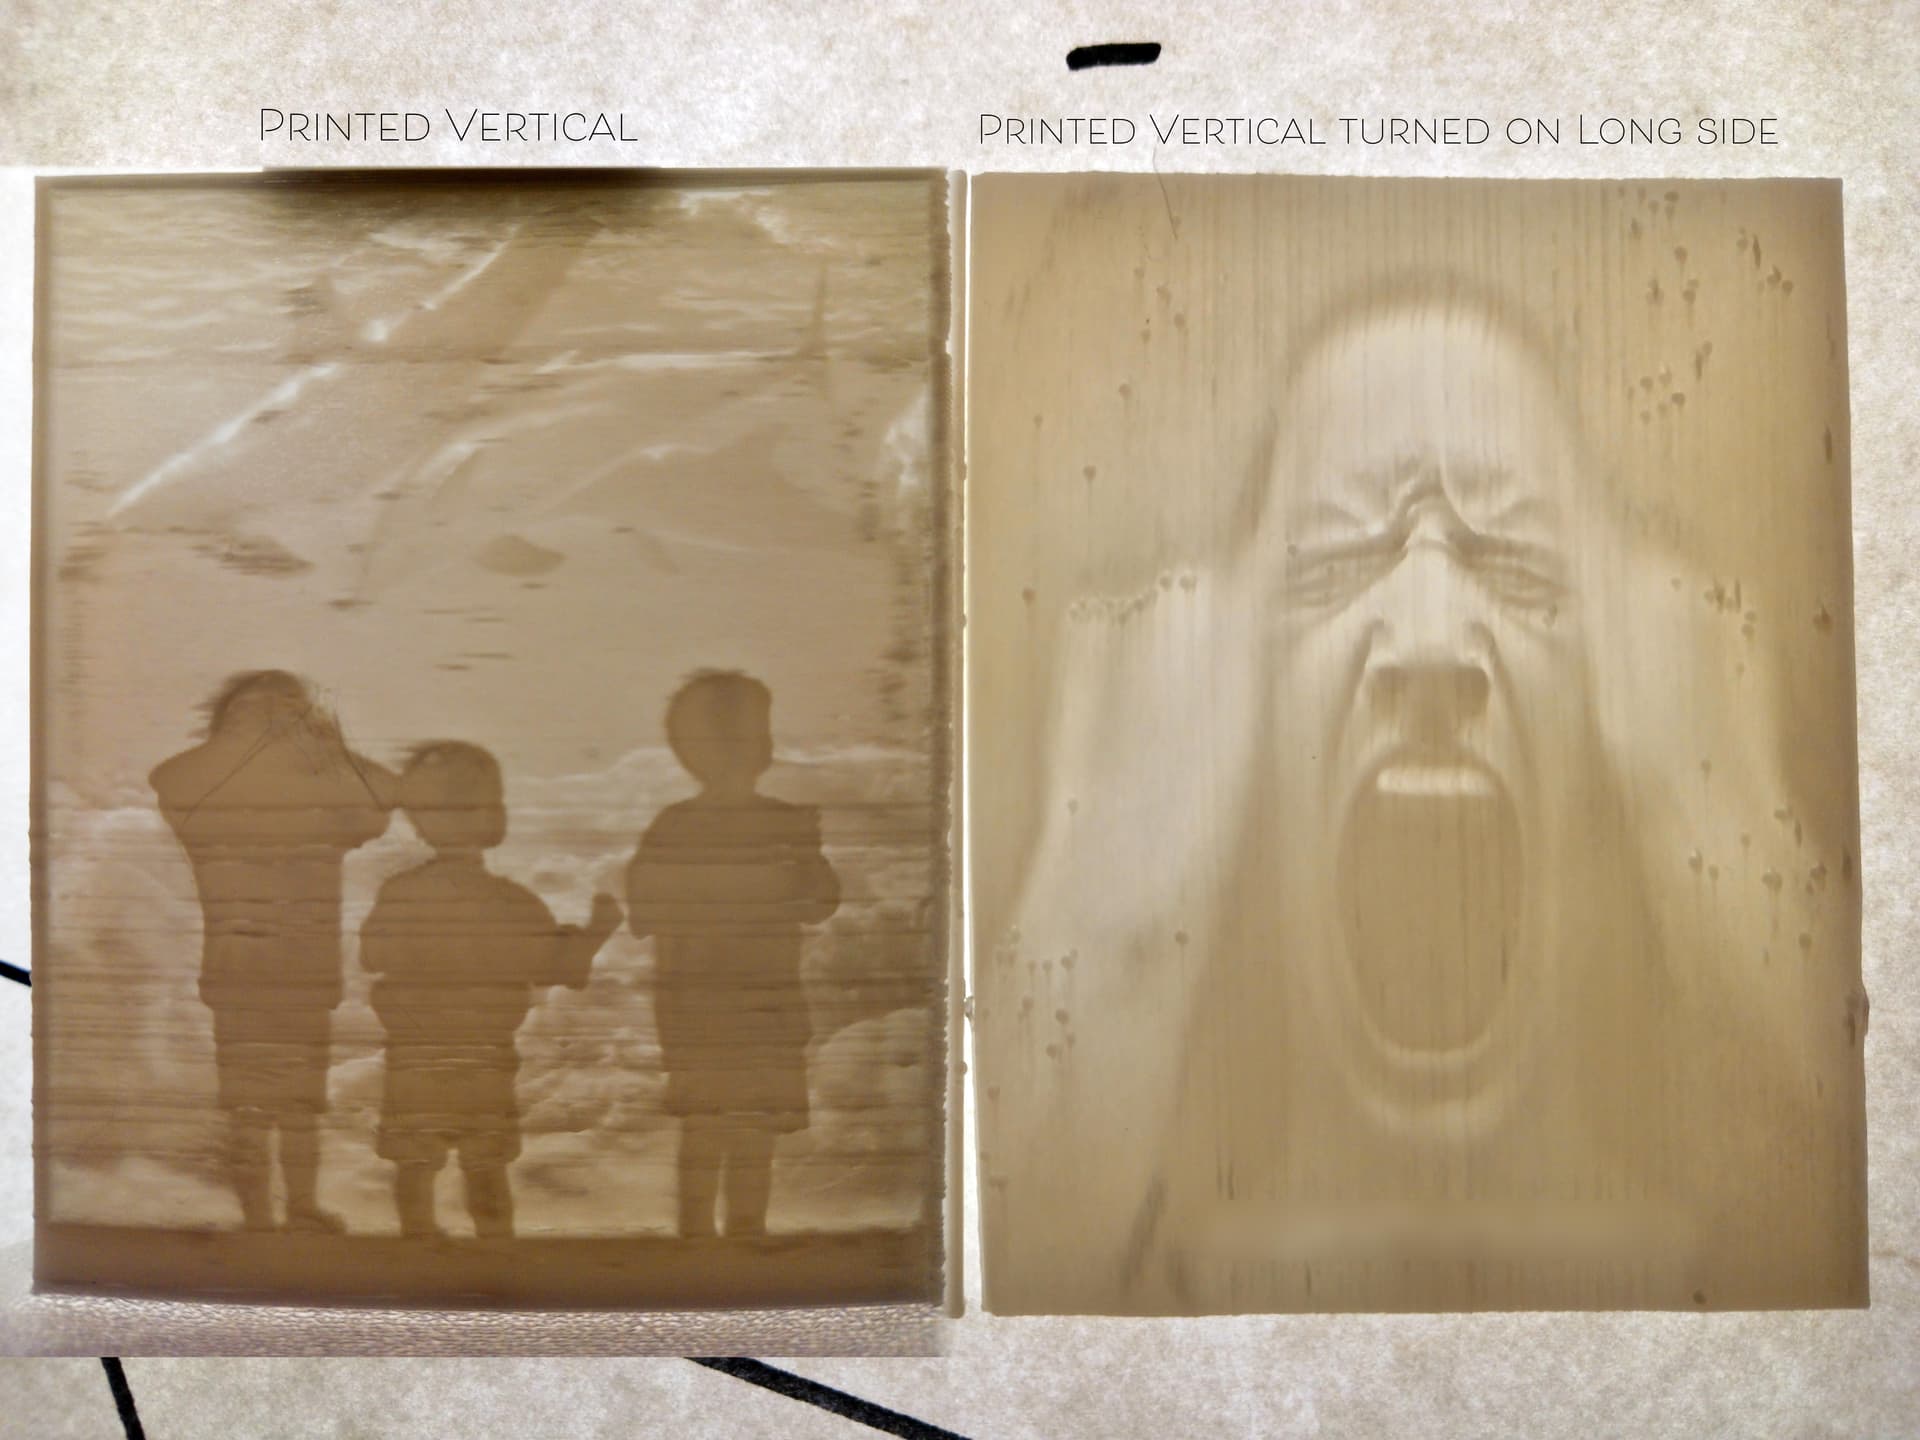
Example I dont understand when you printed vertical what is the depth of those picture? Most of the time the temperature change around printer cause the vertical issues for me (somebody open window not necessary in the same room as the printer but enough over the open door).
So open questions:
What is the model? Should we able to reproduce it in local issue?
Creality Print slicer SW used?
Which material used Creality Hyper-PLA?
What is the slicer settings for the material and for the profile settings?
Hi @Jackson and thanks for your reply. Fortunately after an exhausting amount of research, testing, tweaking of settings and numerous failed prints, I am finally able to achieve repeatable optimum results, at least for now, when printing vertically except for the issue of corner warping.
My problem seemed to be a combination of print speed, acceleration and (possibly) nozzle & bed temp with regard to the thickness of the build being printed vertically. The max thickness of this type of print is 3.2mm. While decreasing the print velocity did help, reducing the travel velocities seemed to have a greater impact along with better adhesion of the first layer via bed temp.
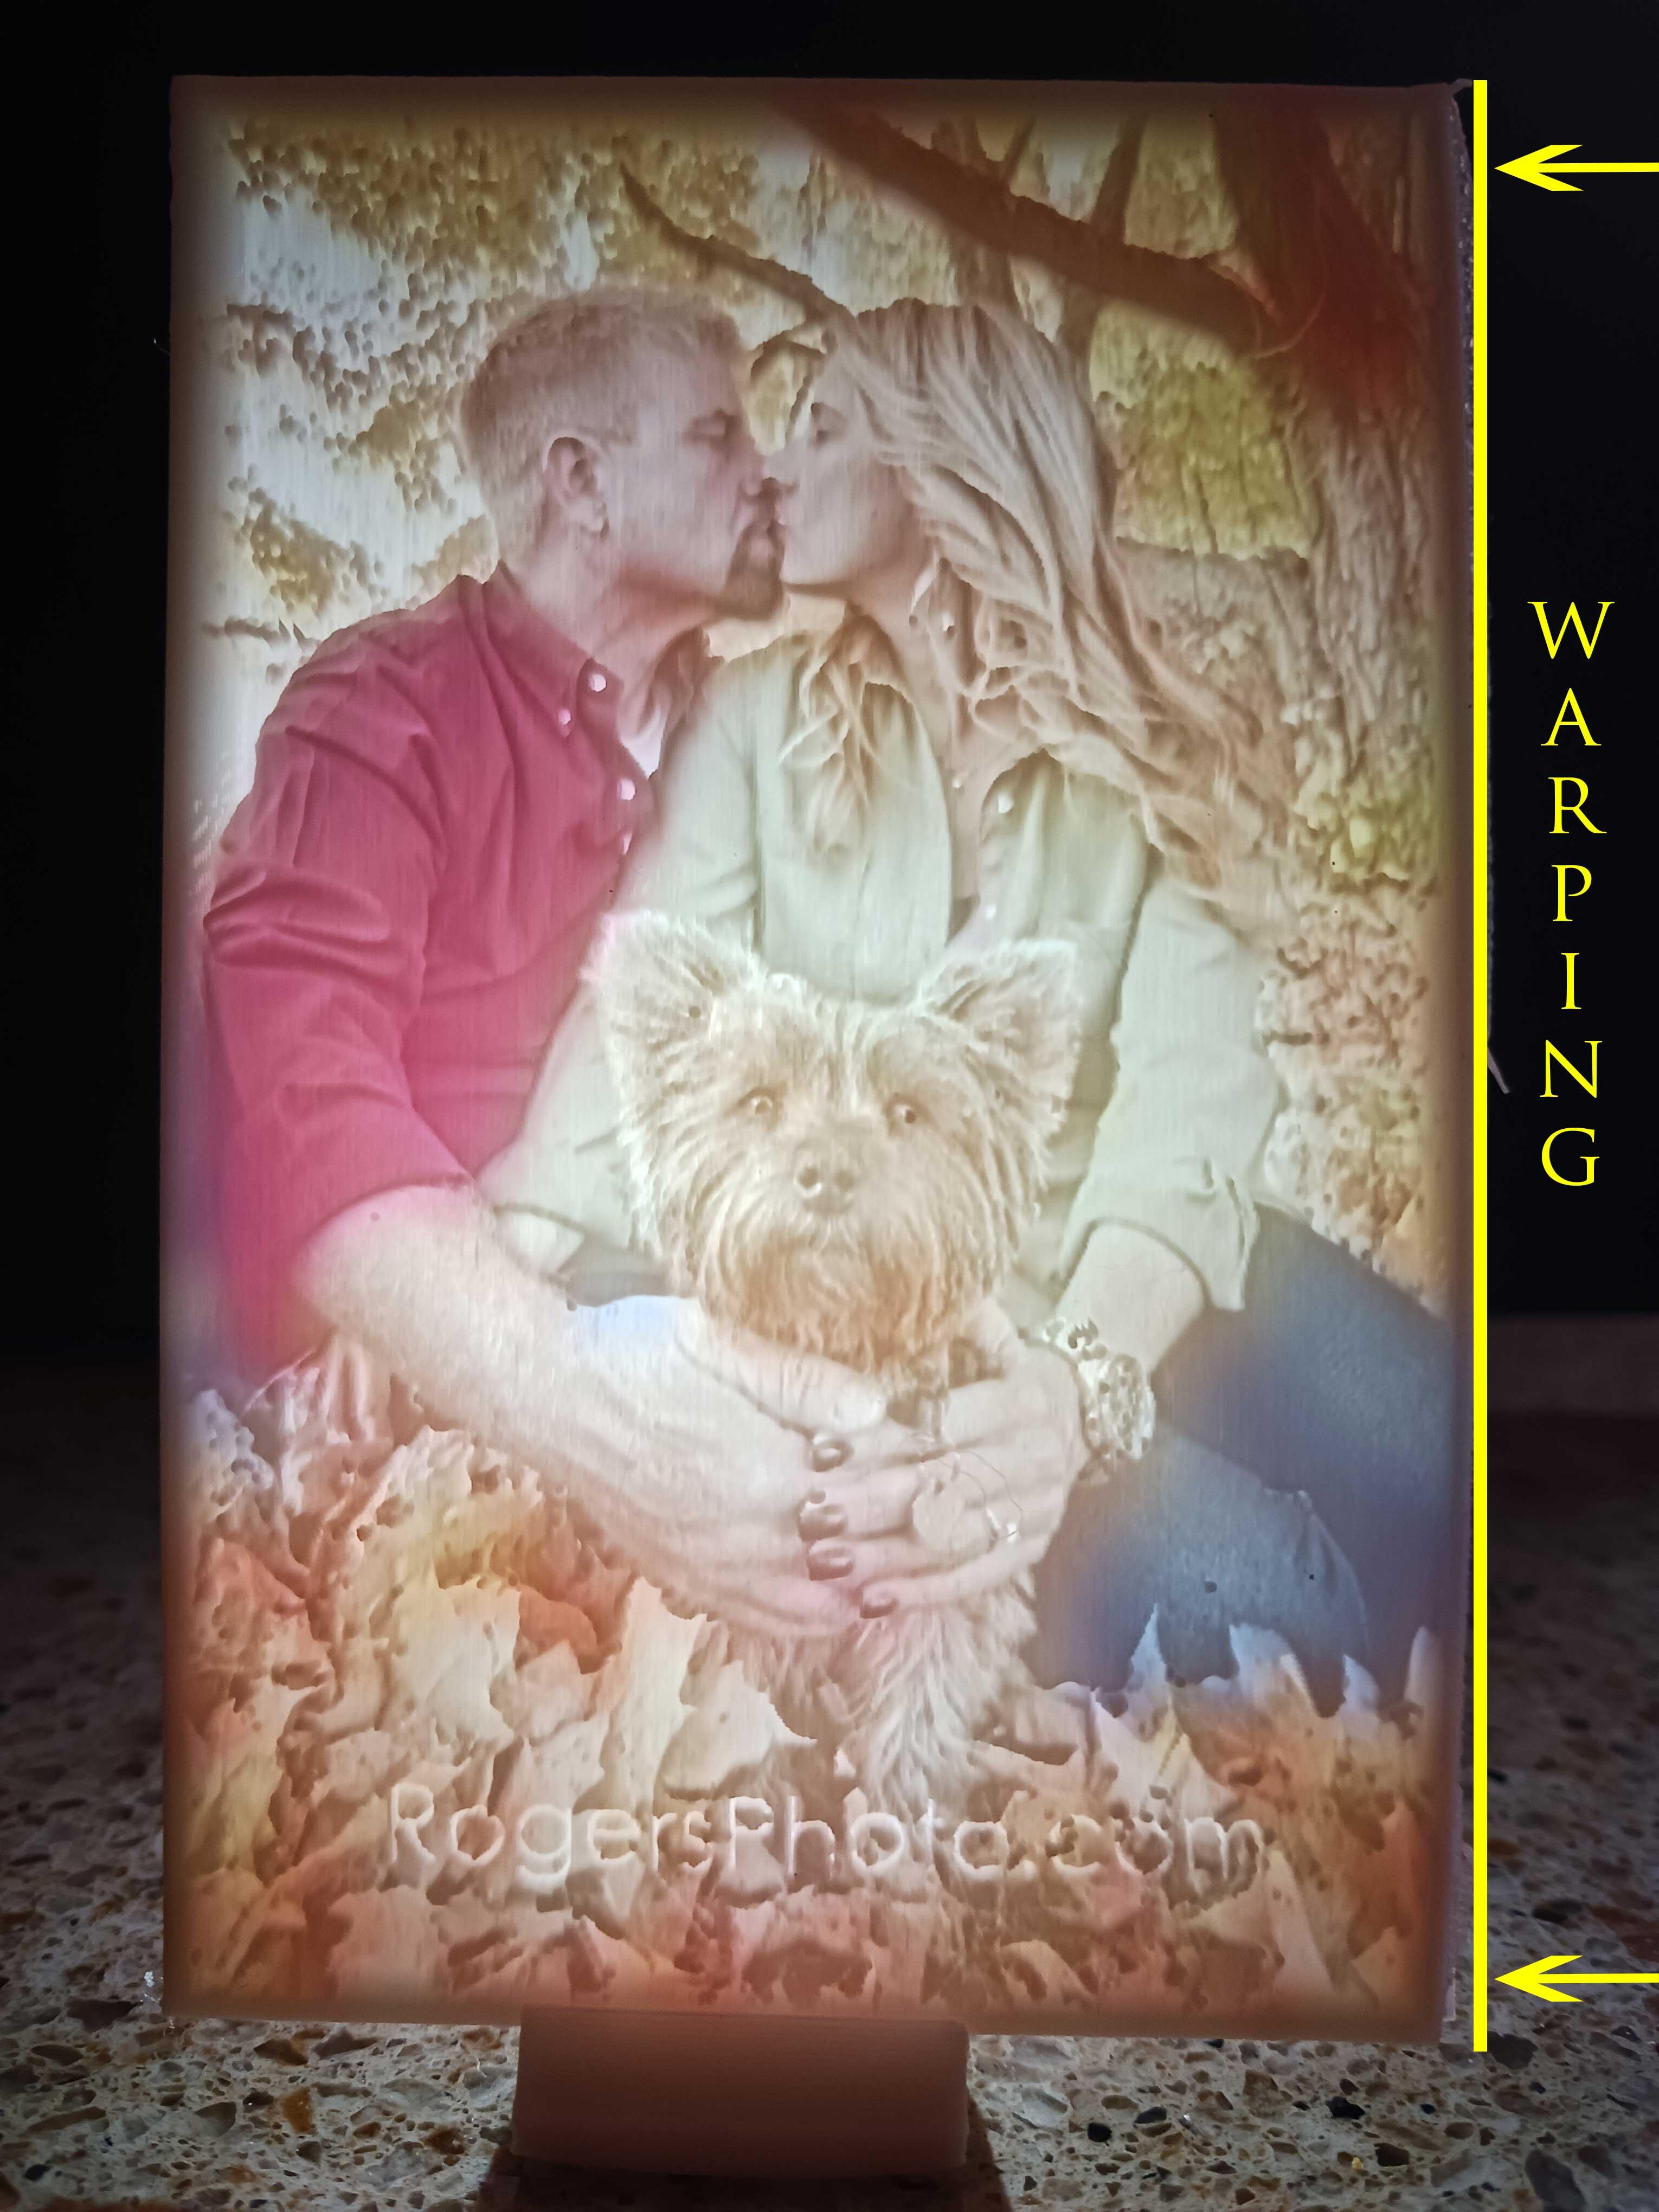
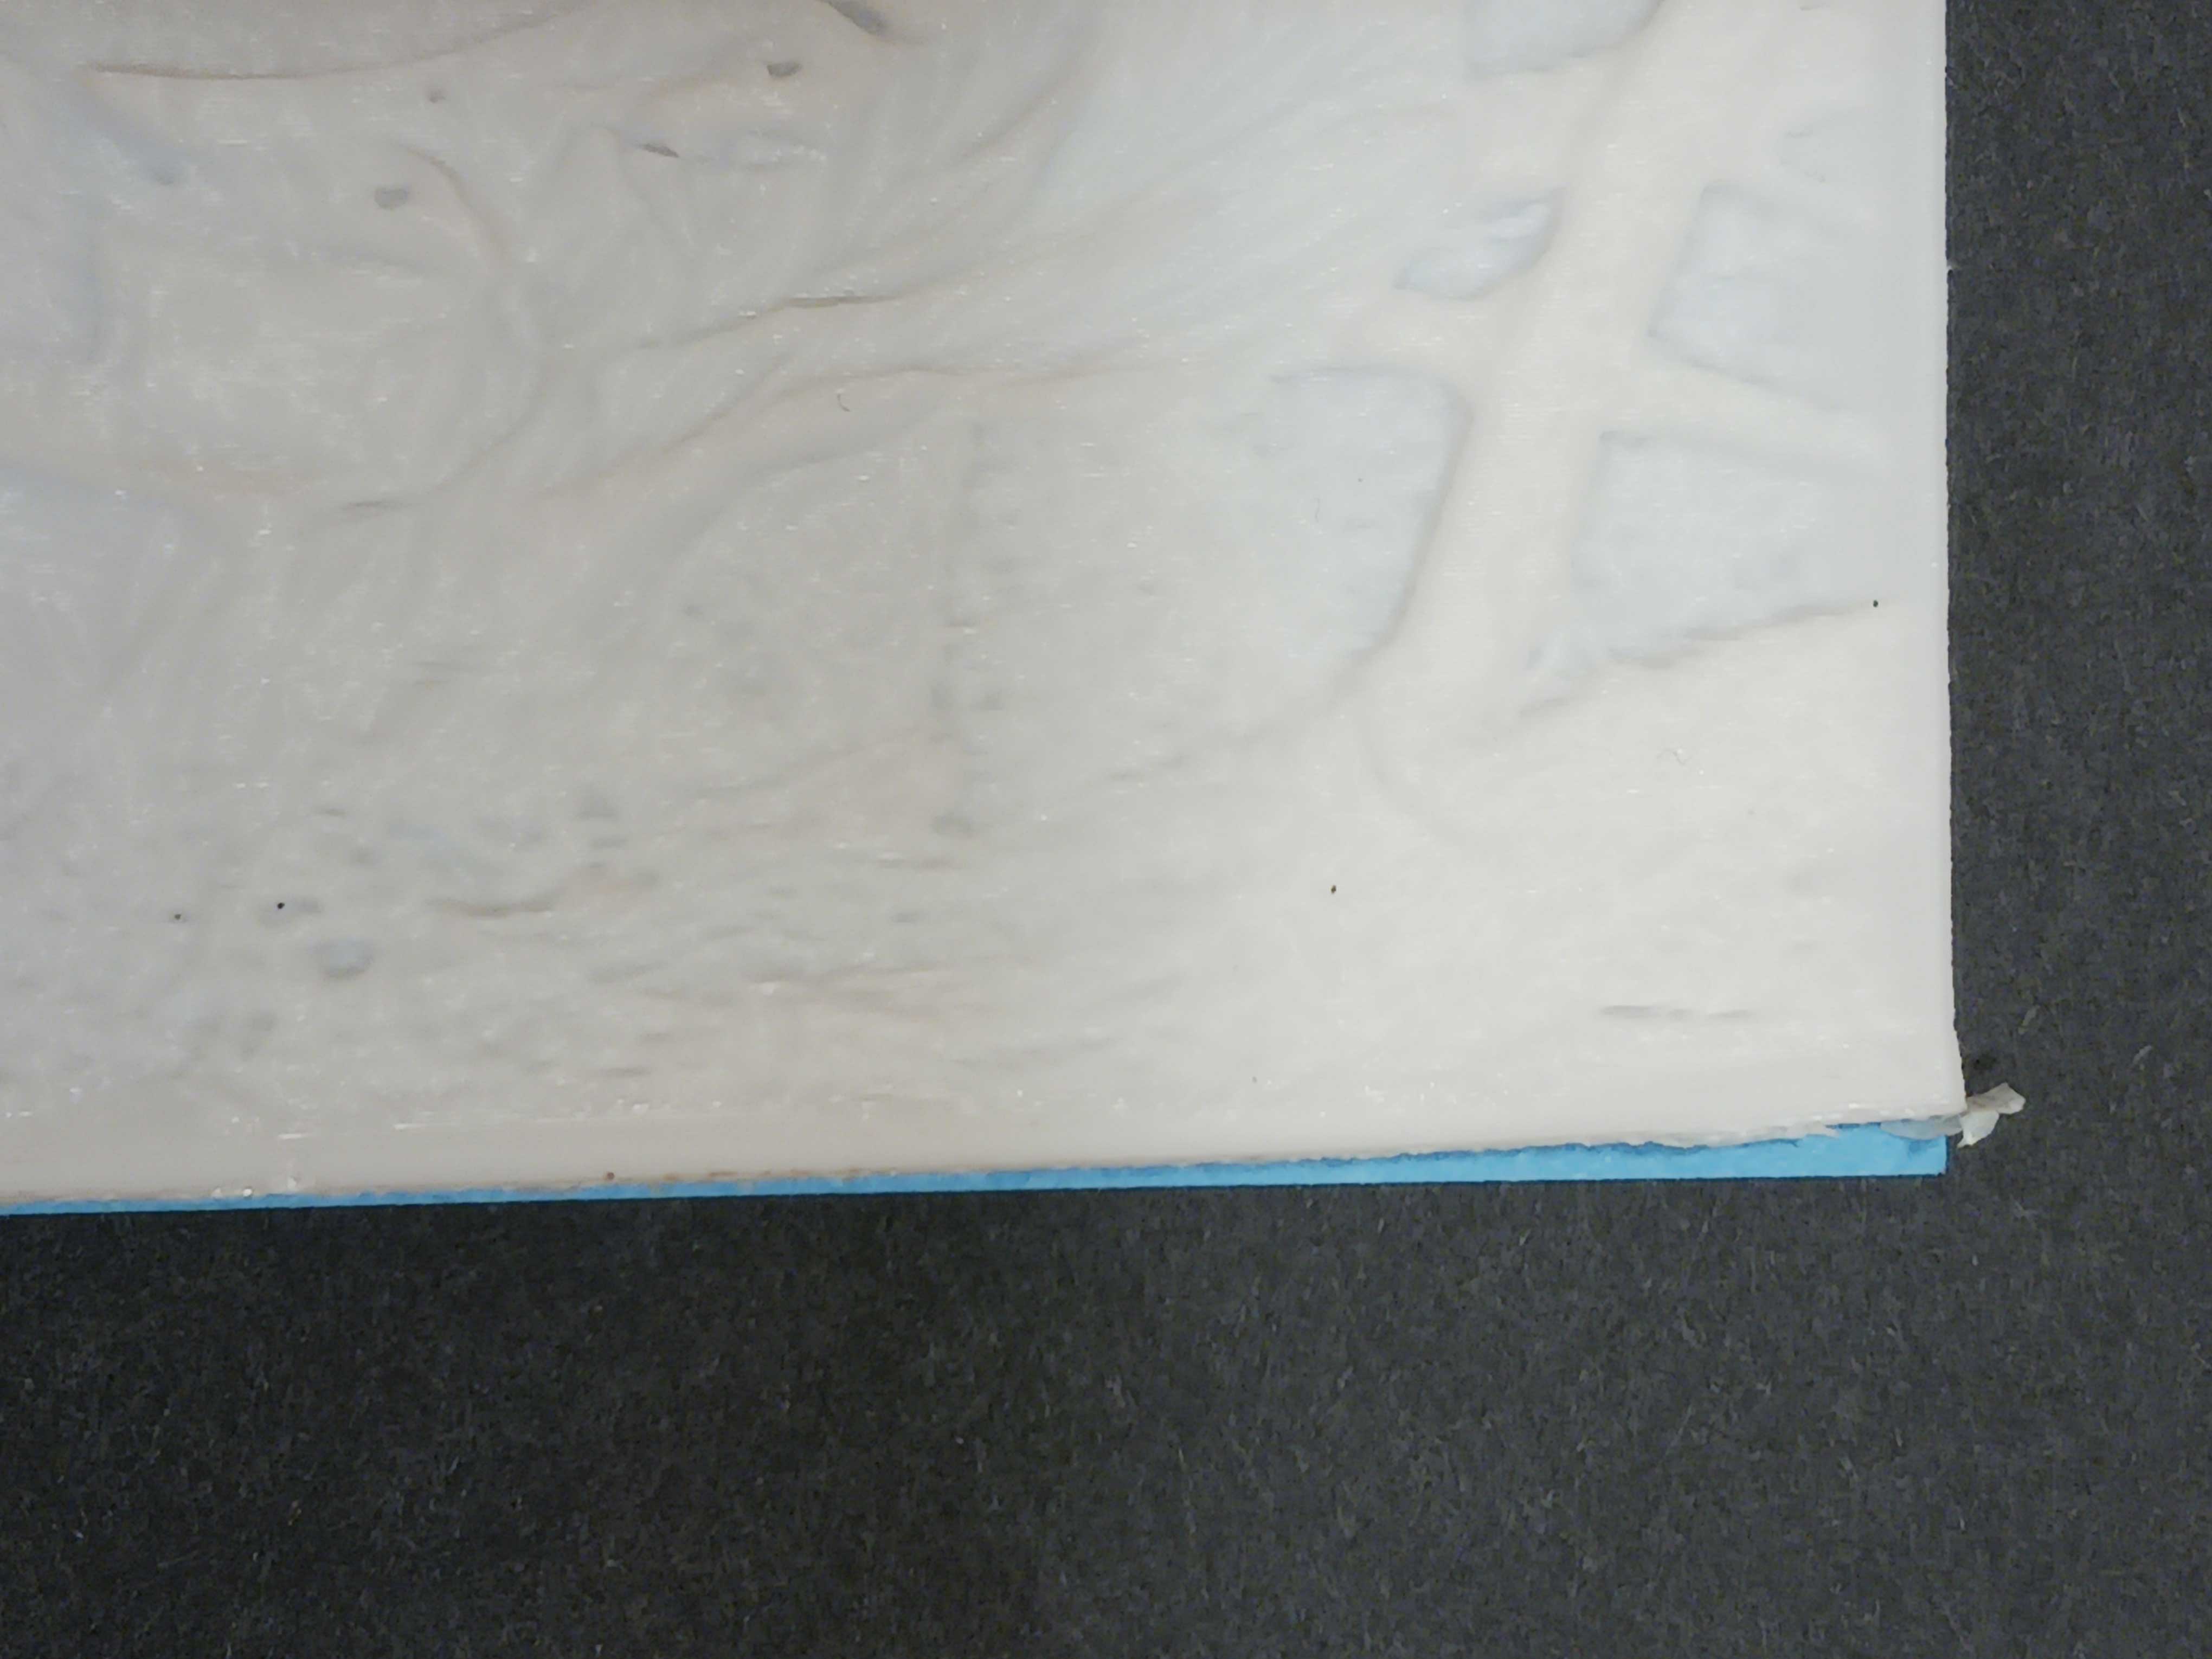
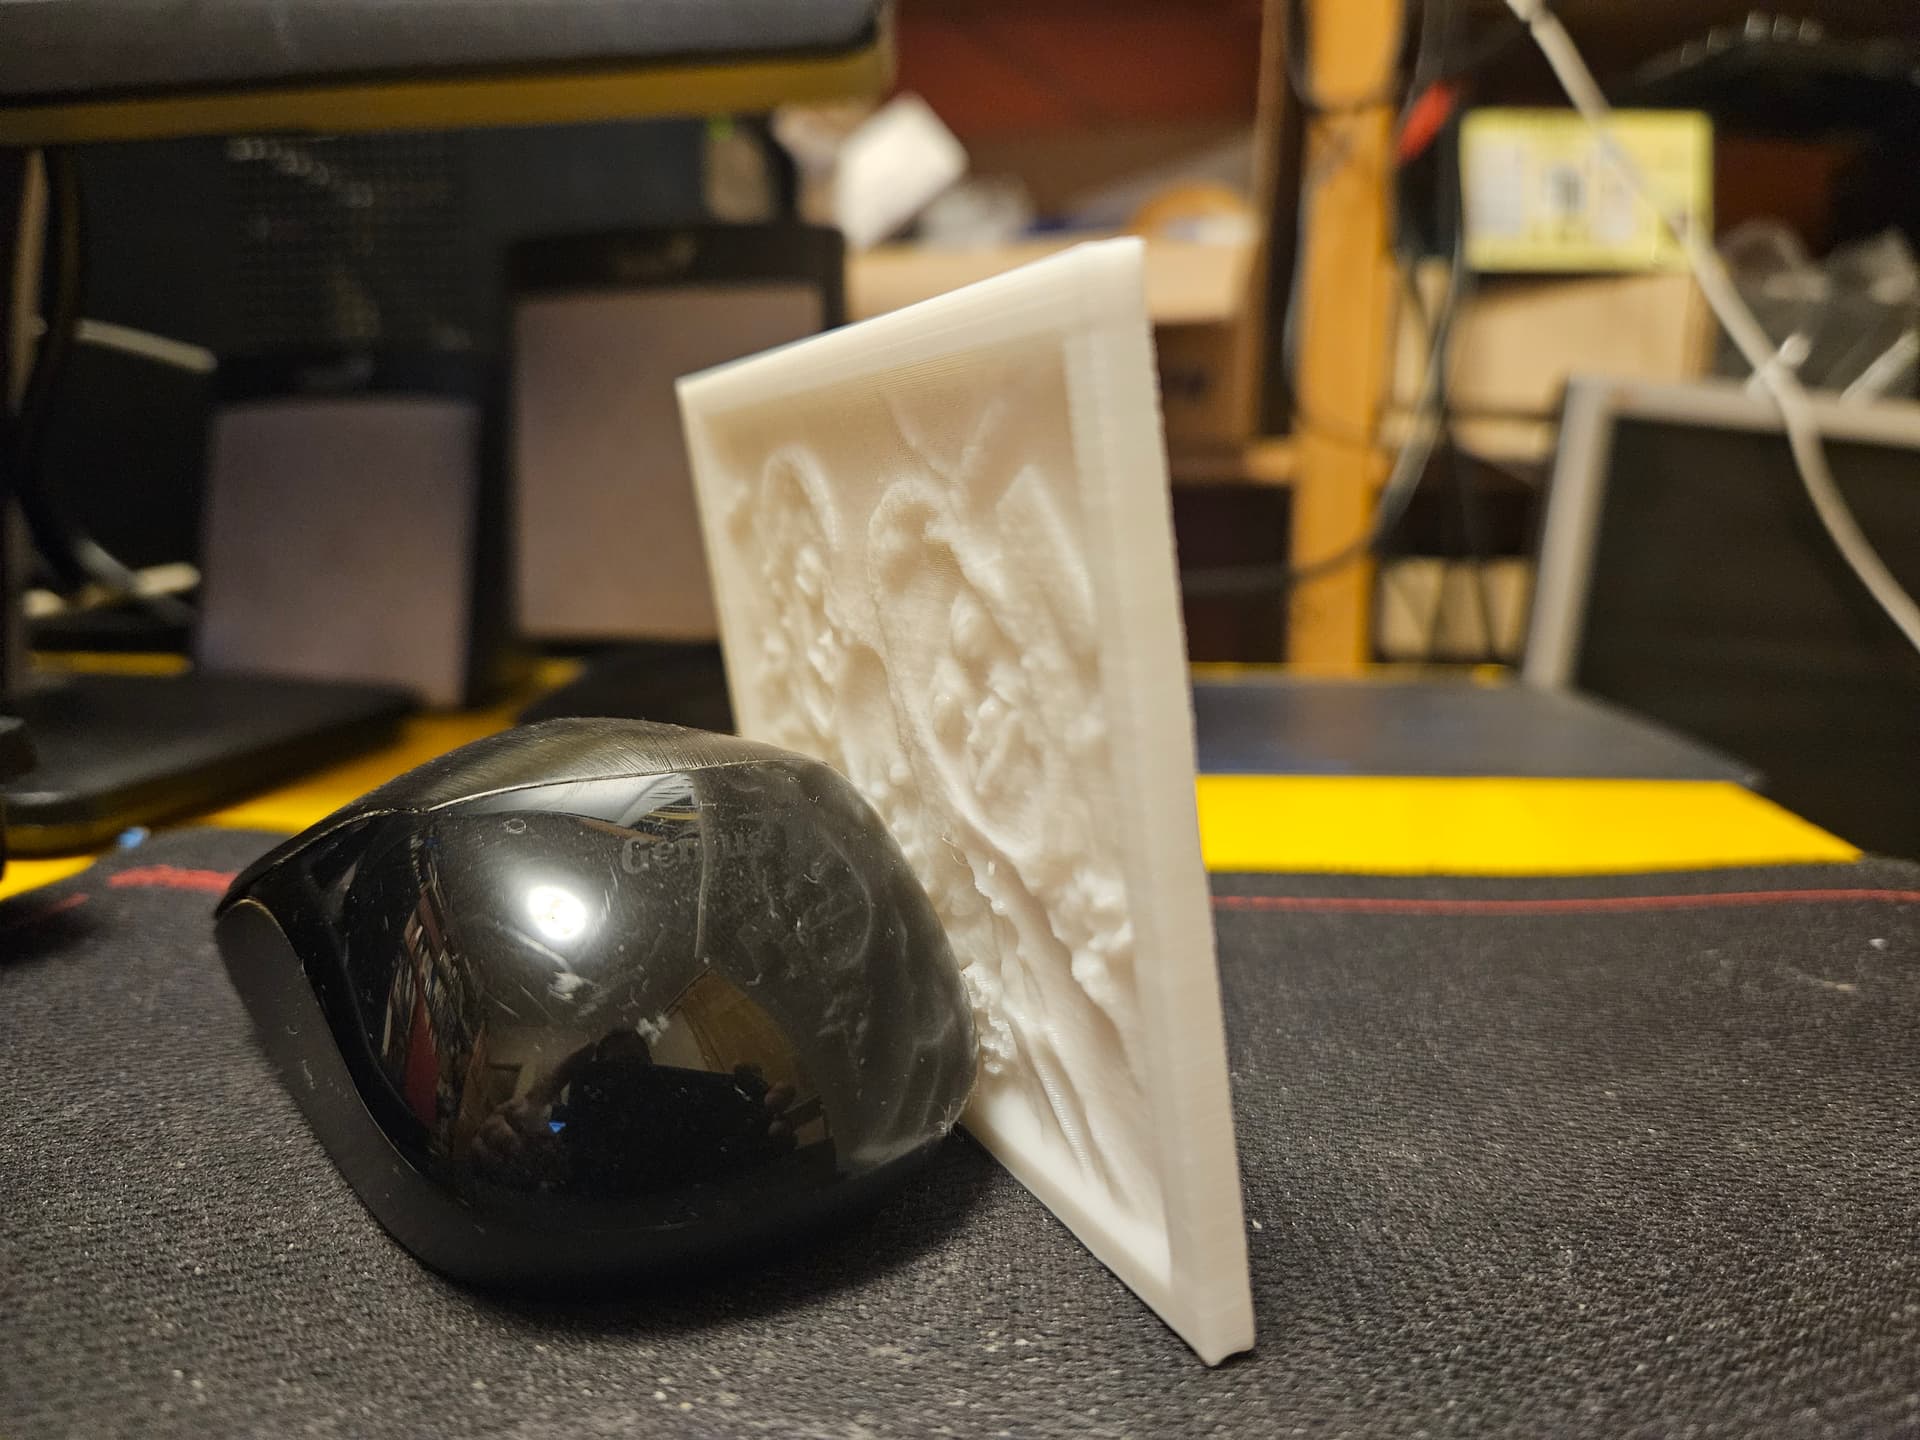
As you can see by the images the print is devoid of any “artifacts” however the marked straight edge exhibits significant warping. I’ve tried different bed temps and even purchased JT16 glue stick which basically welds the bottom layer to the bed however I am still getting edge warp. I’m assuming I will have to experiment with fan settings next and hope that solves the warping issue.
1 Like
Hi,
Congrats I see you made great progress meanwhile. Yep that is the typical learning route we made mistakes and after get ideas to correct it.
I am really interested how you made the colors? Am I understand you print it out as vertically those flat(3.2mm) page?
If you dont have overhanging layers I dont expect warping.
Could you make more pictures from example side and close up to see details of the dog example? Also both side (with warping and without) could be useful to see.
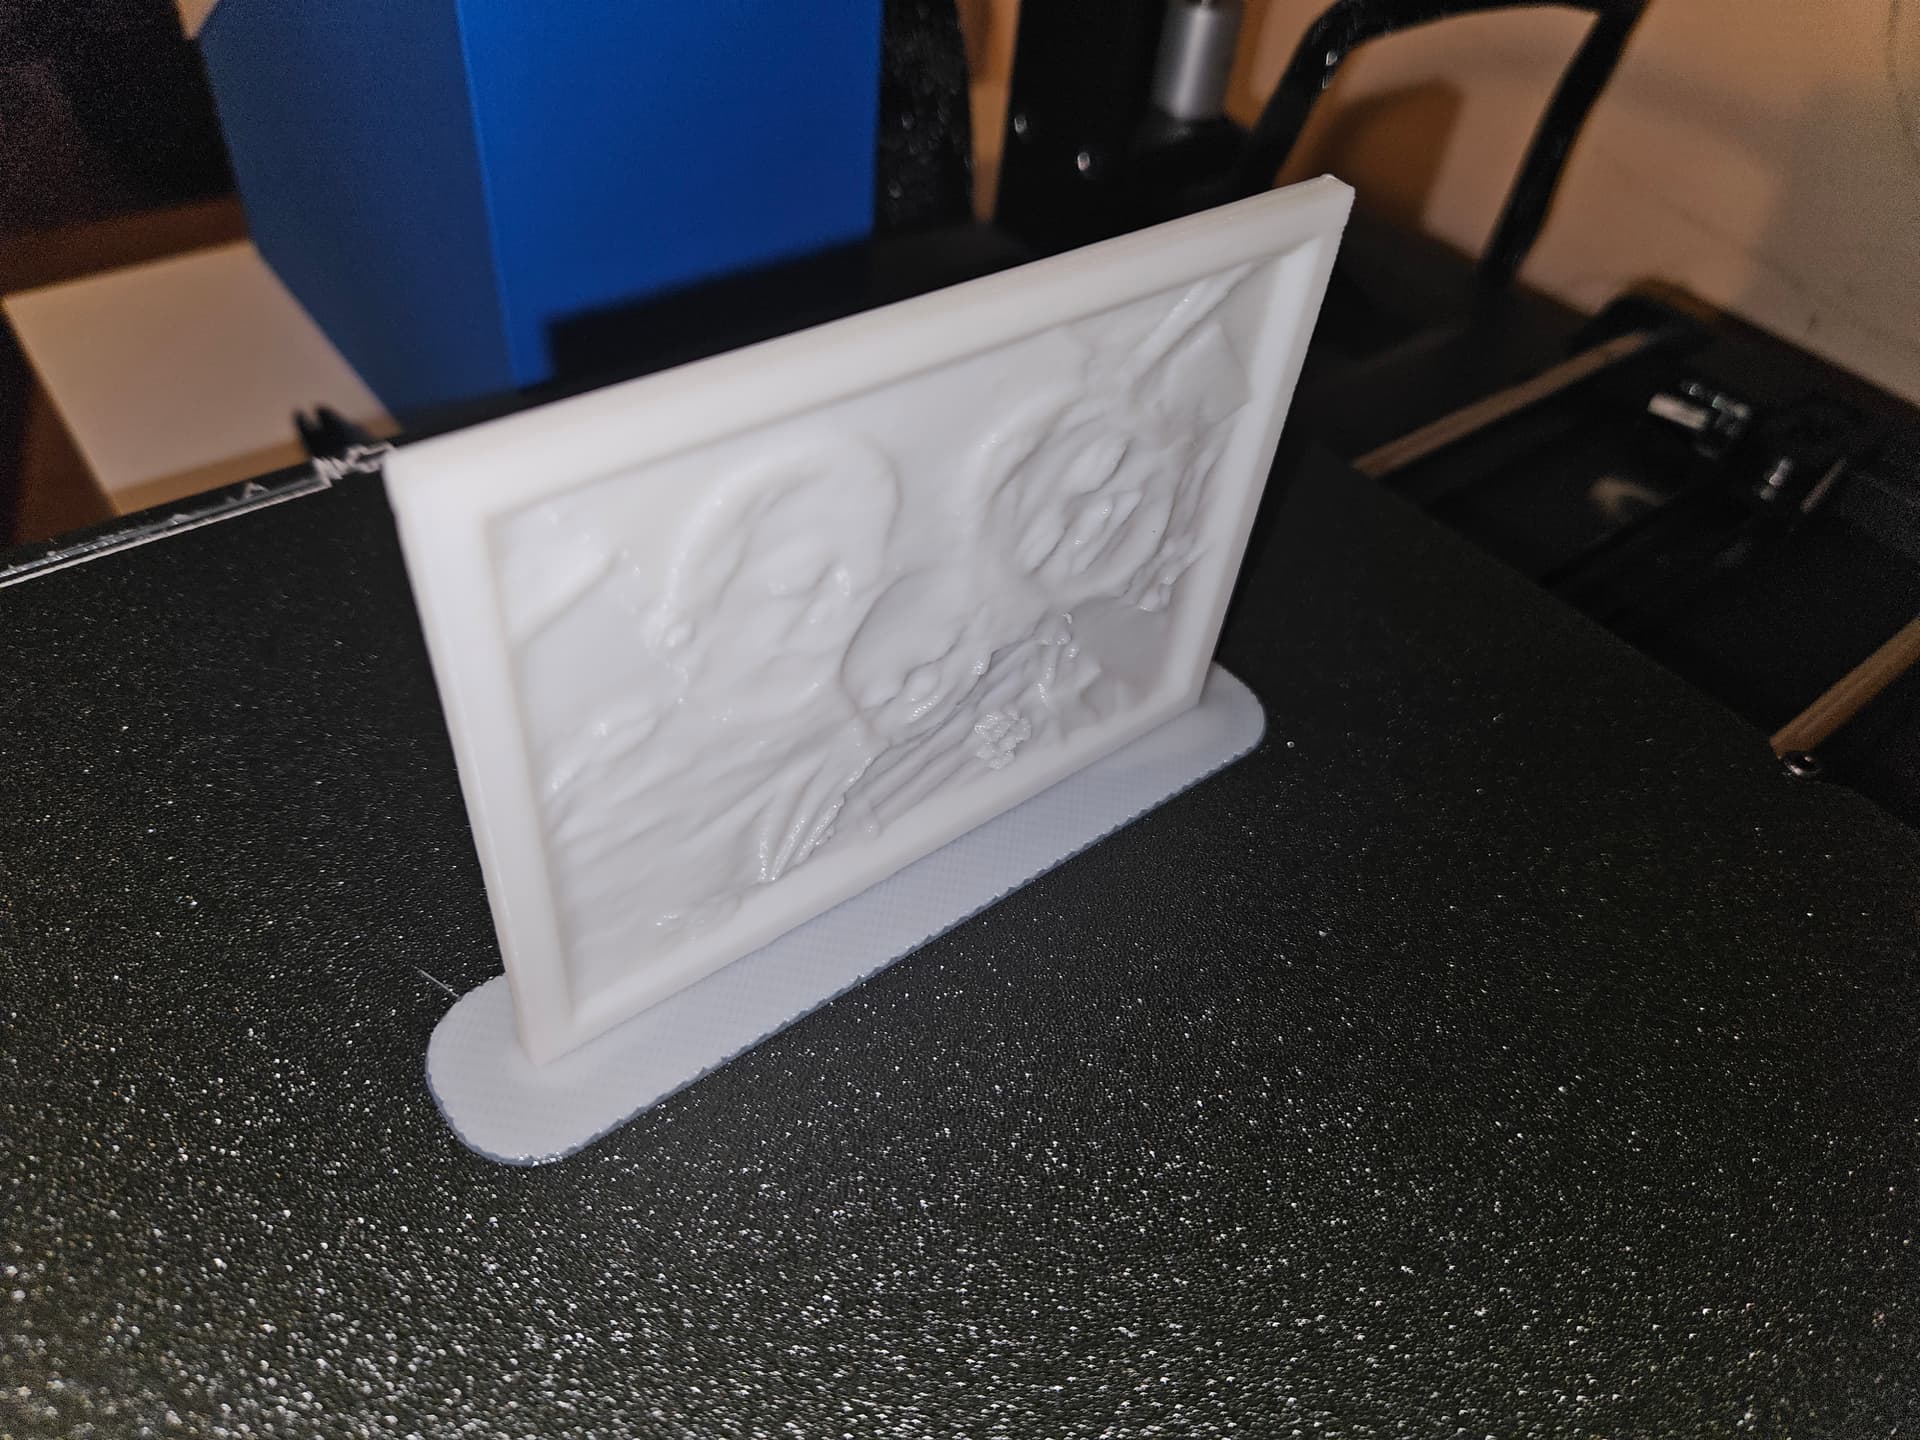
This is how it stands after printing:
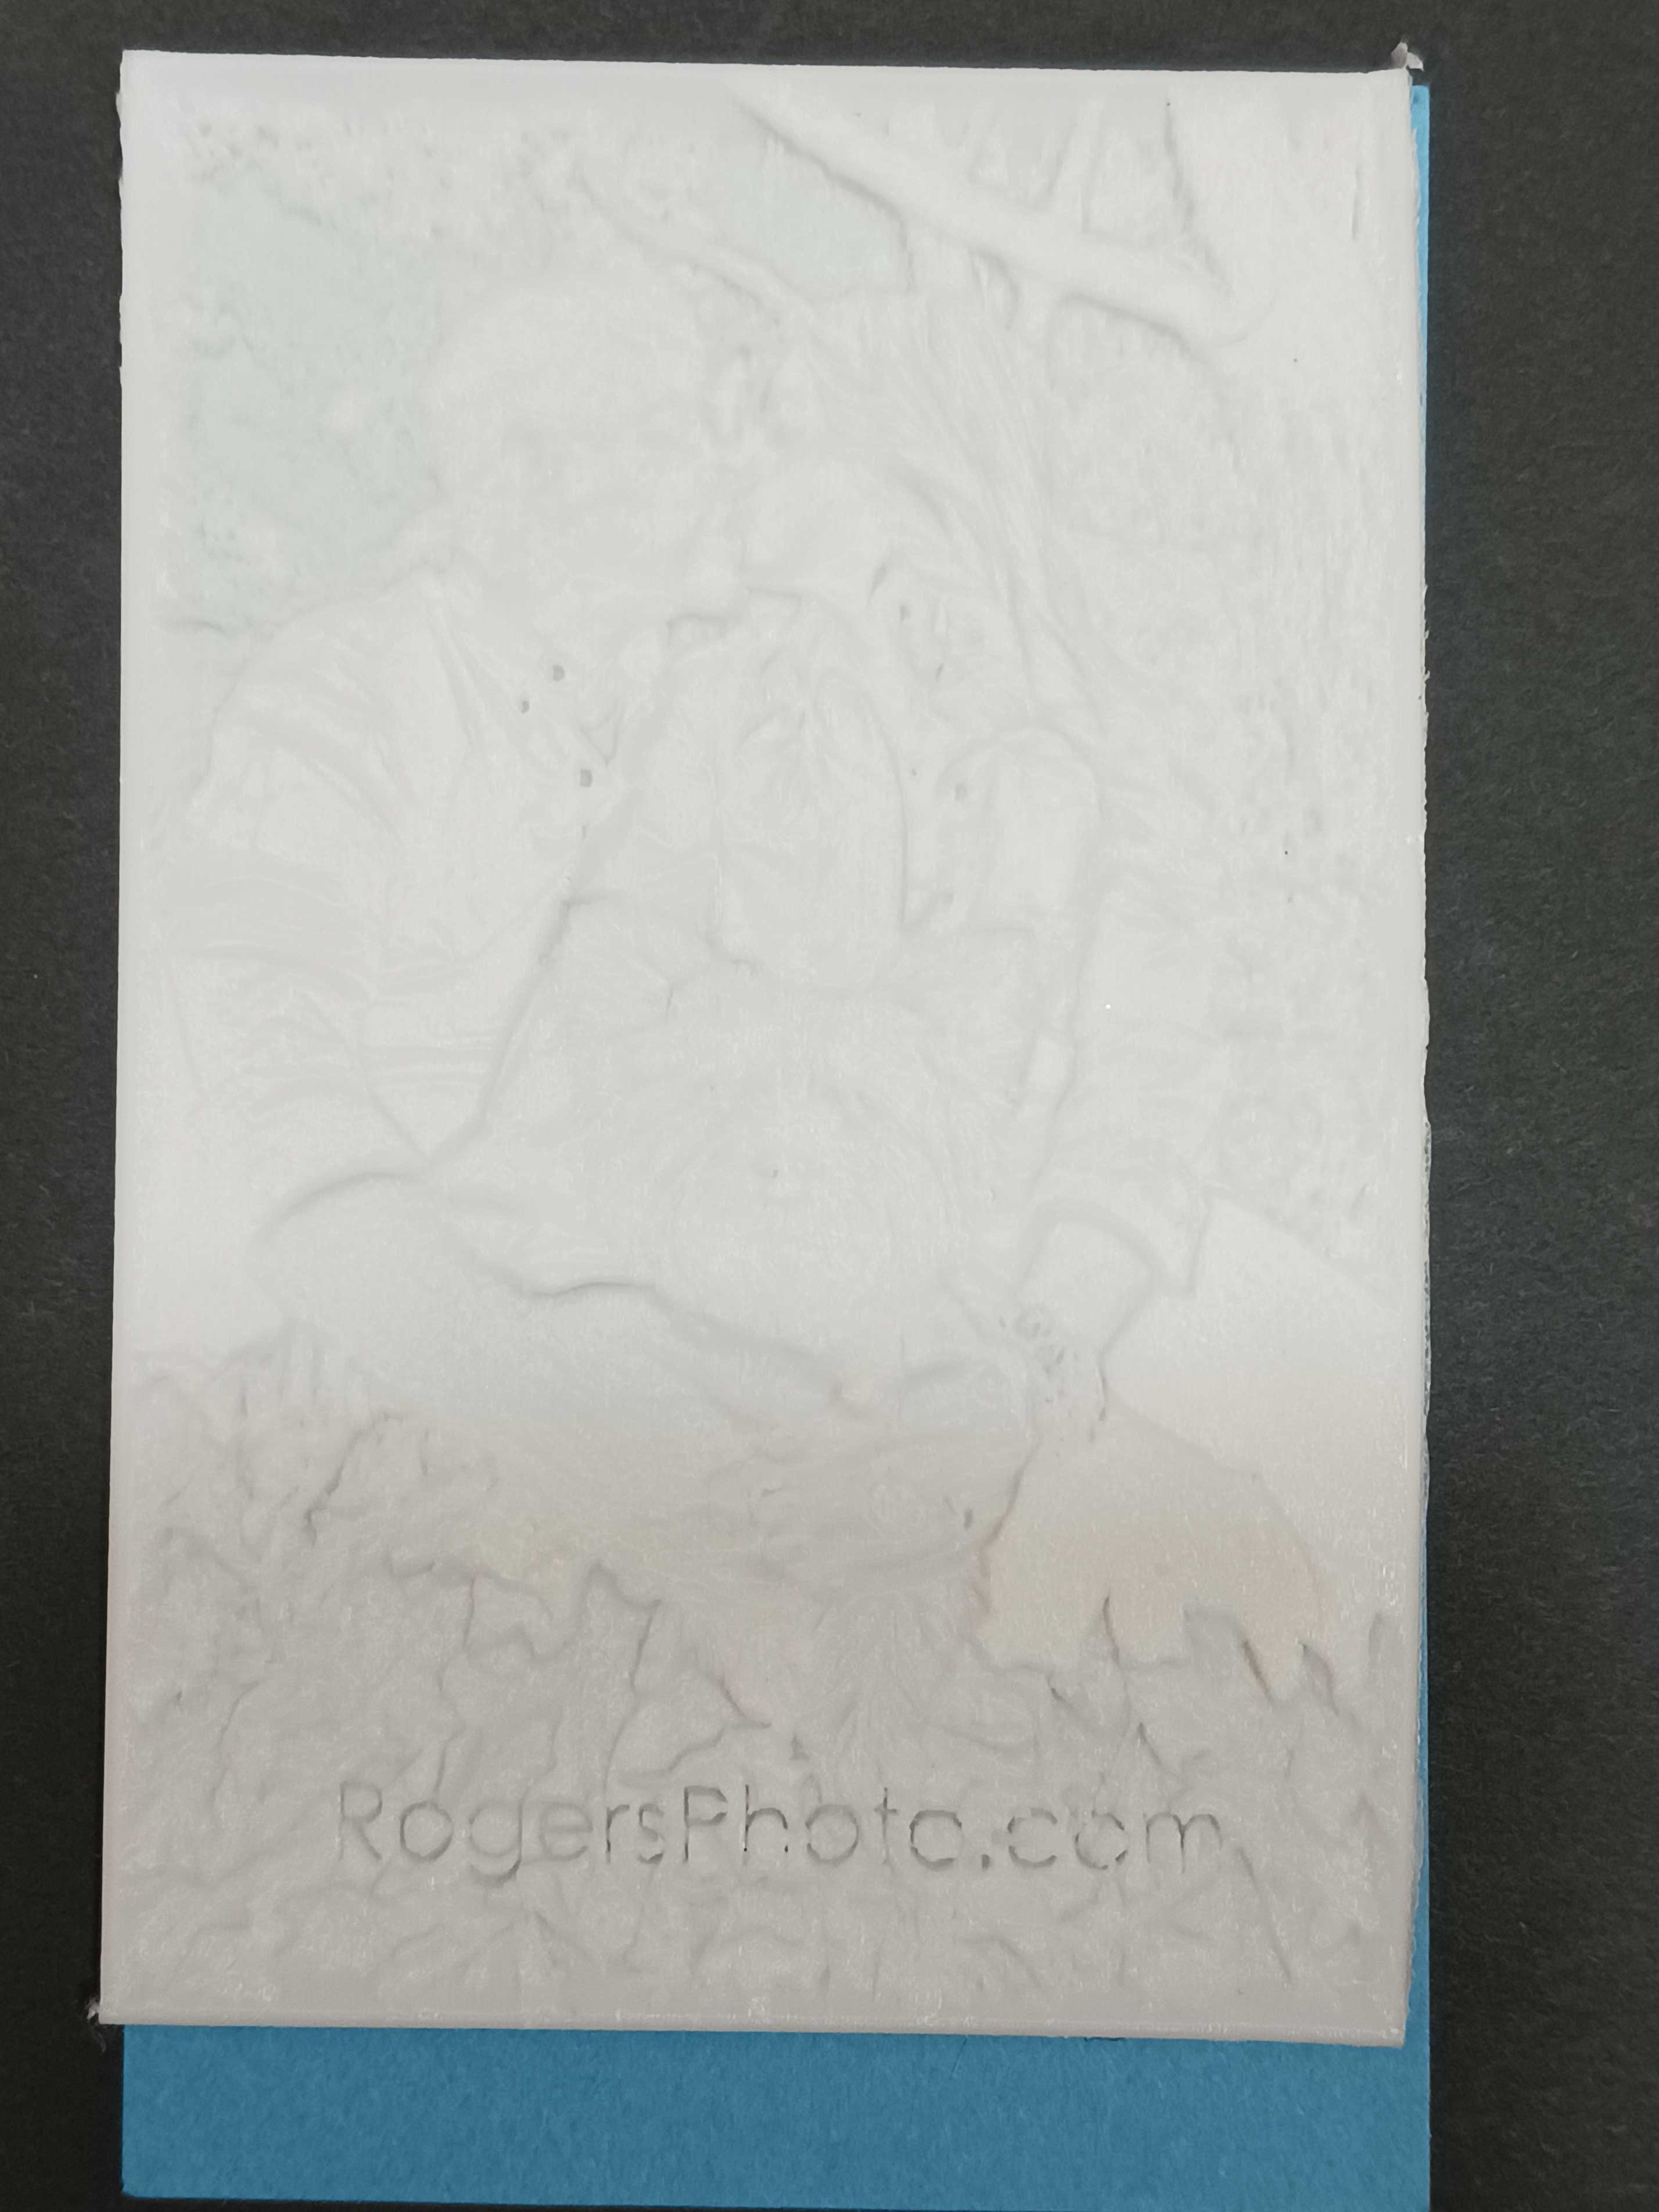
This is how it is printed on the bed:
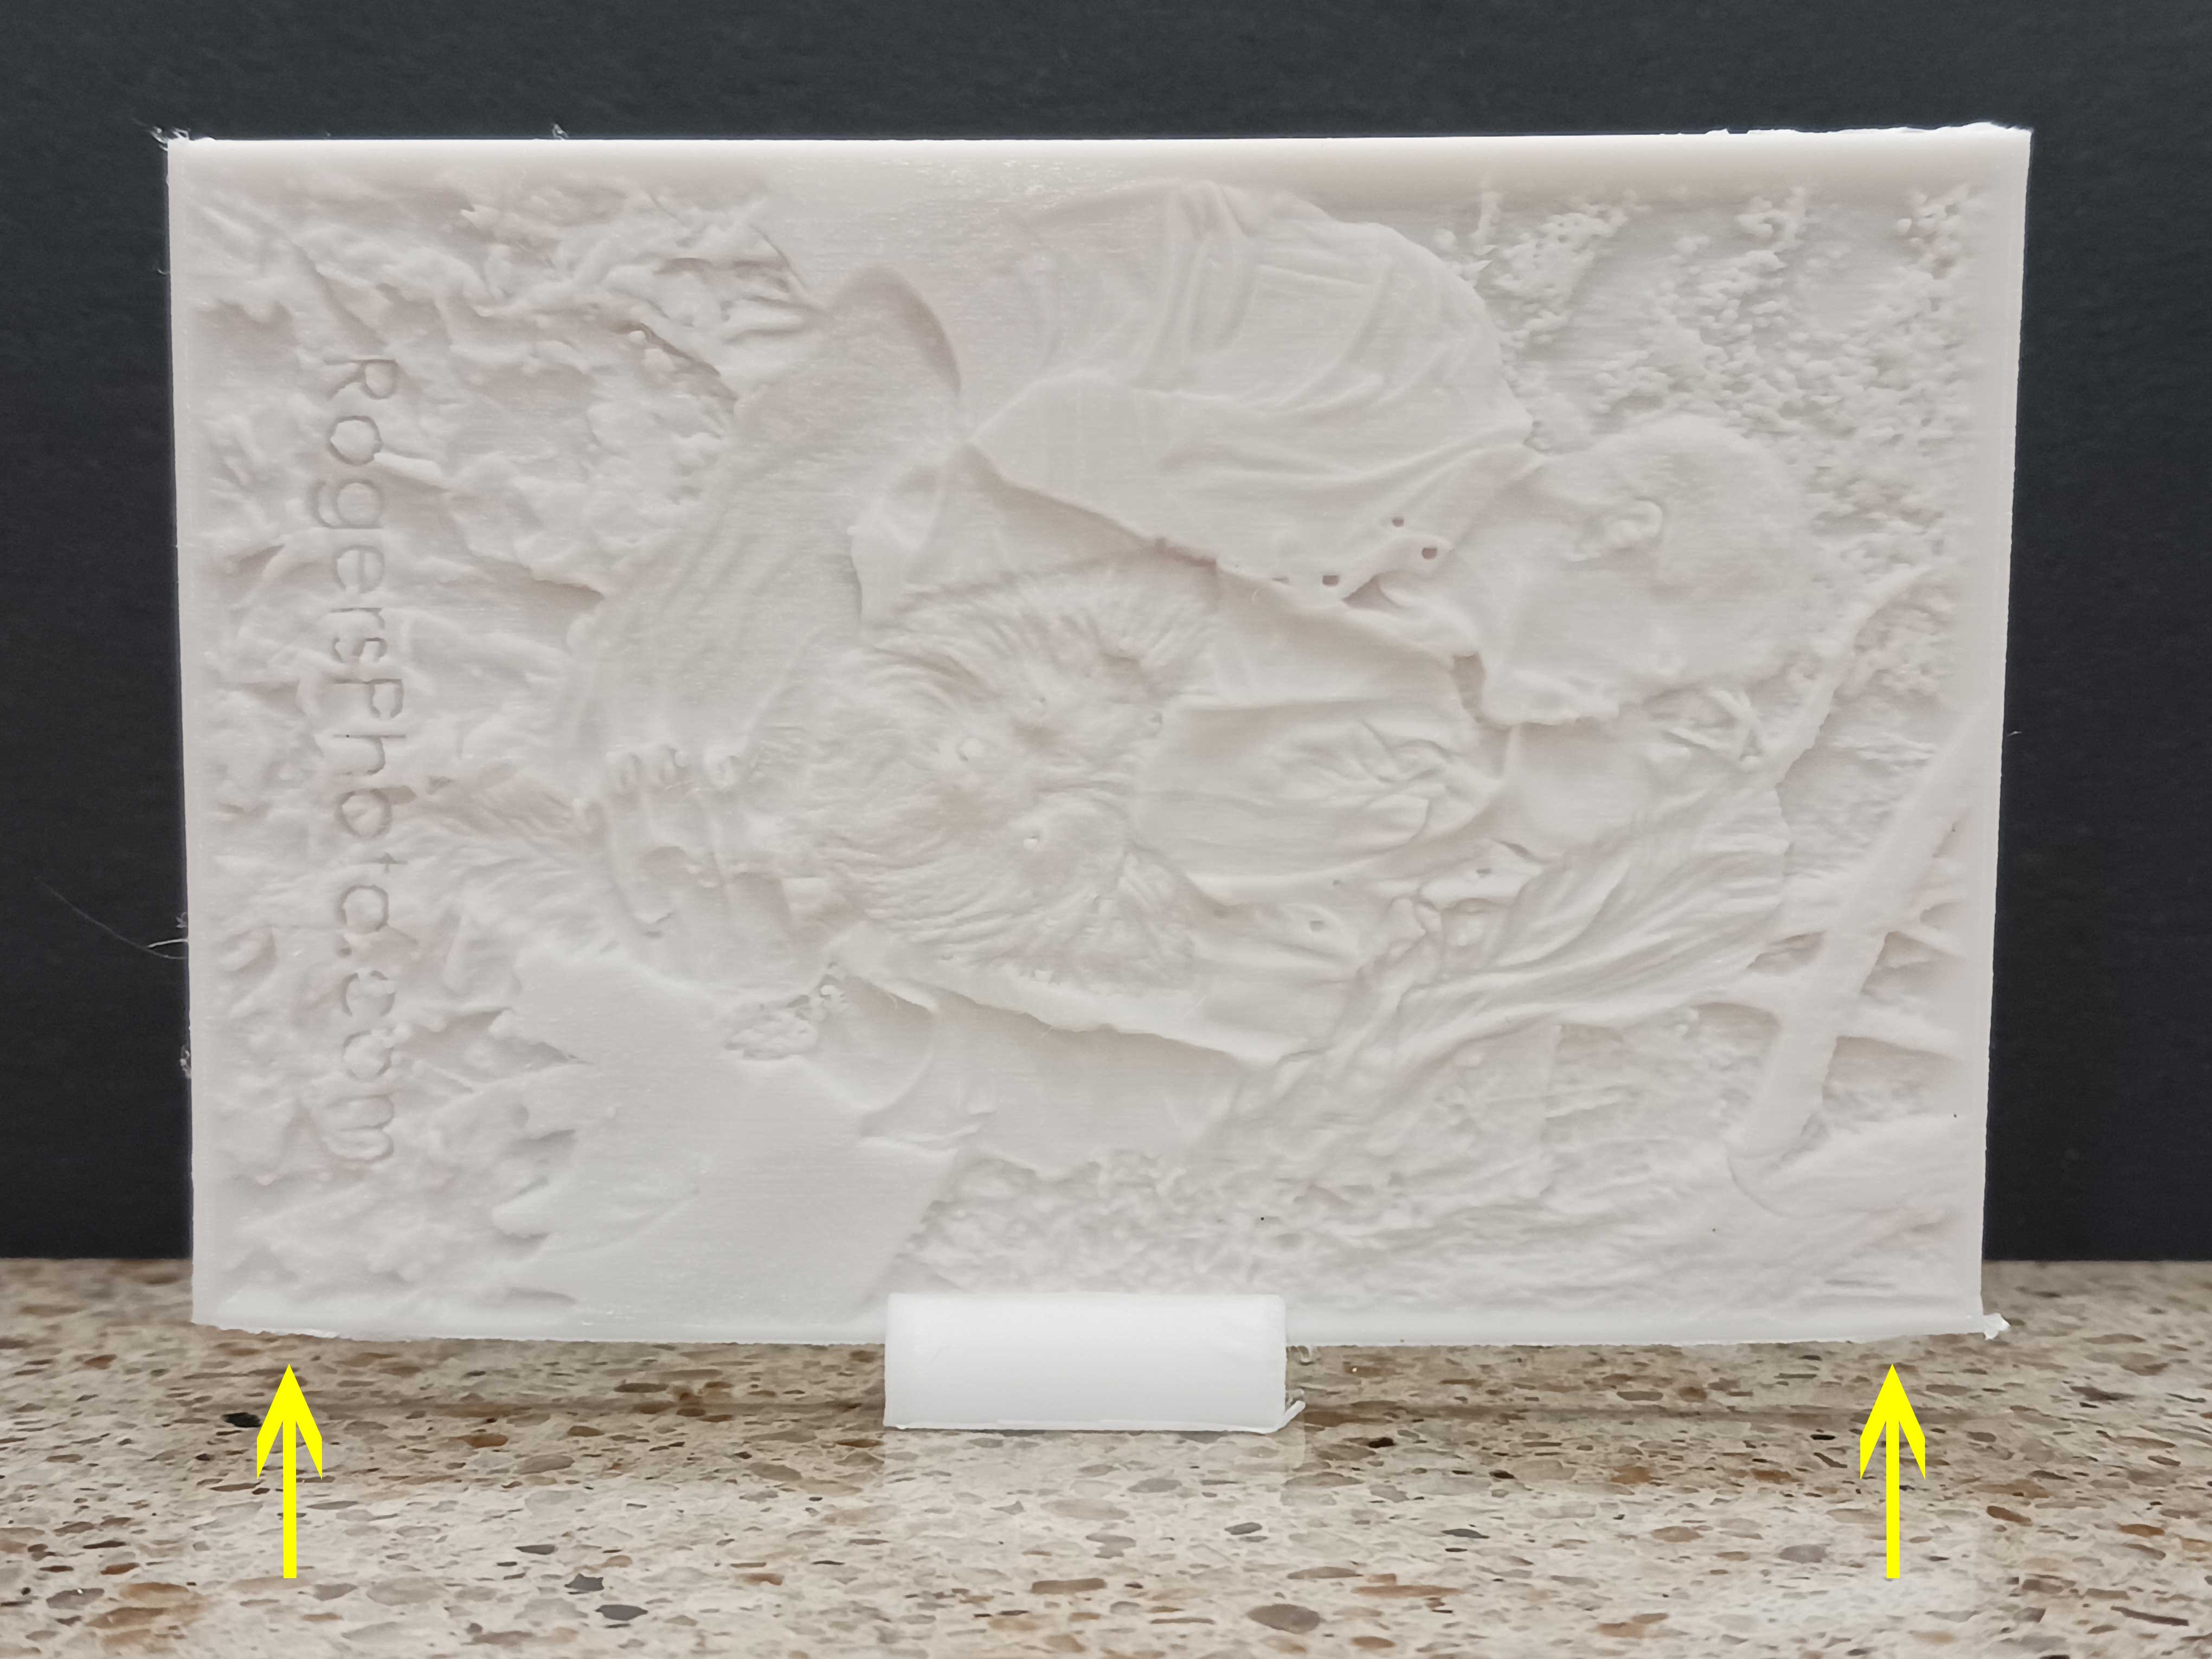
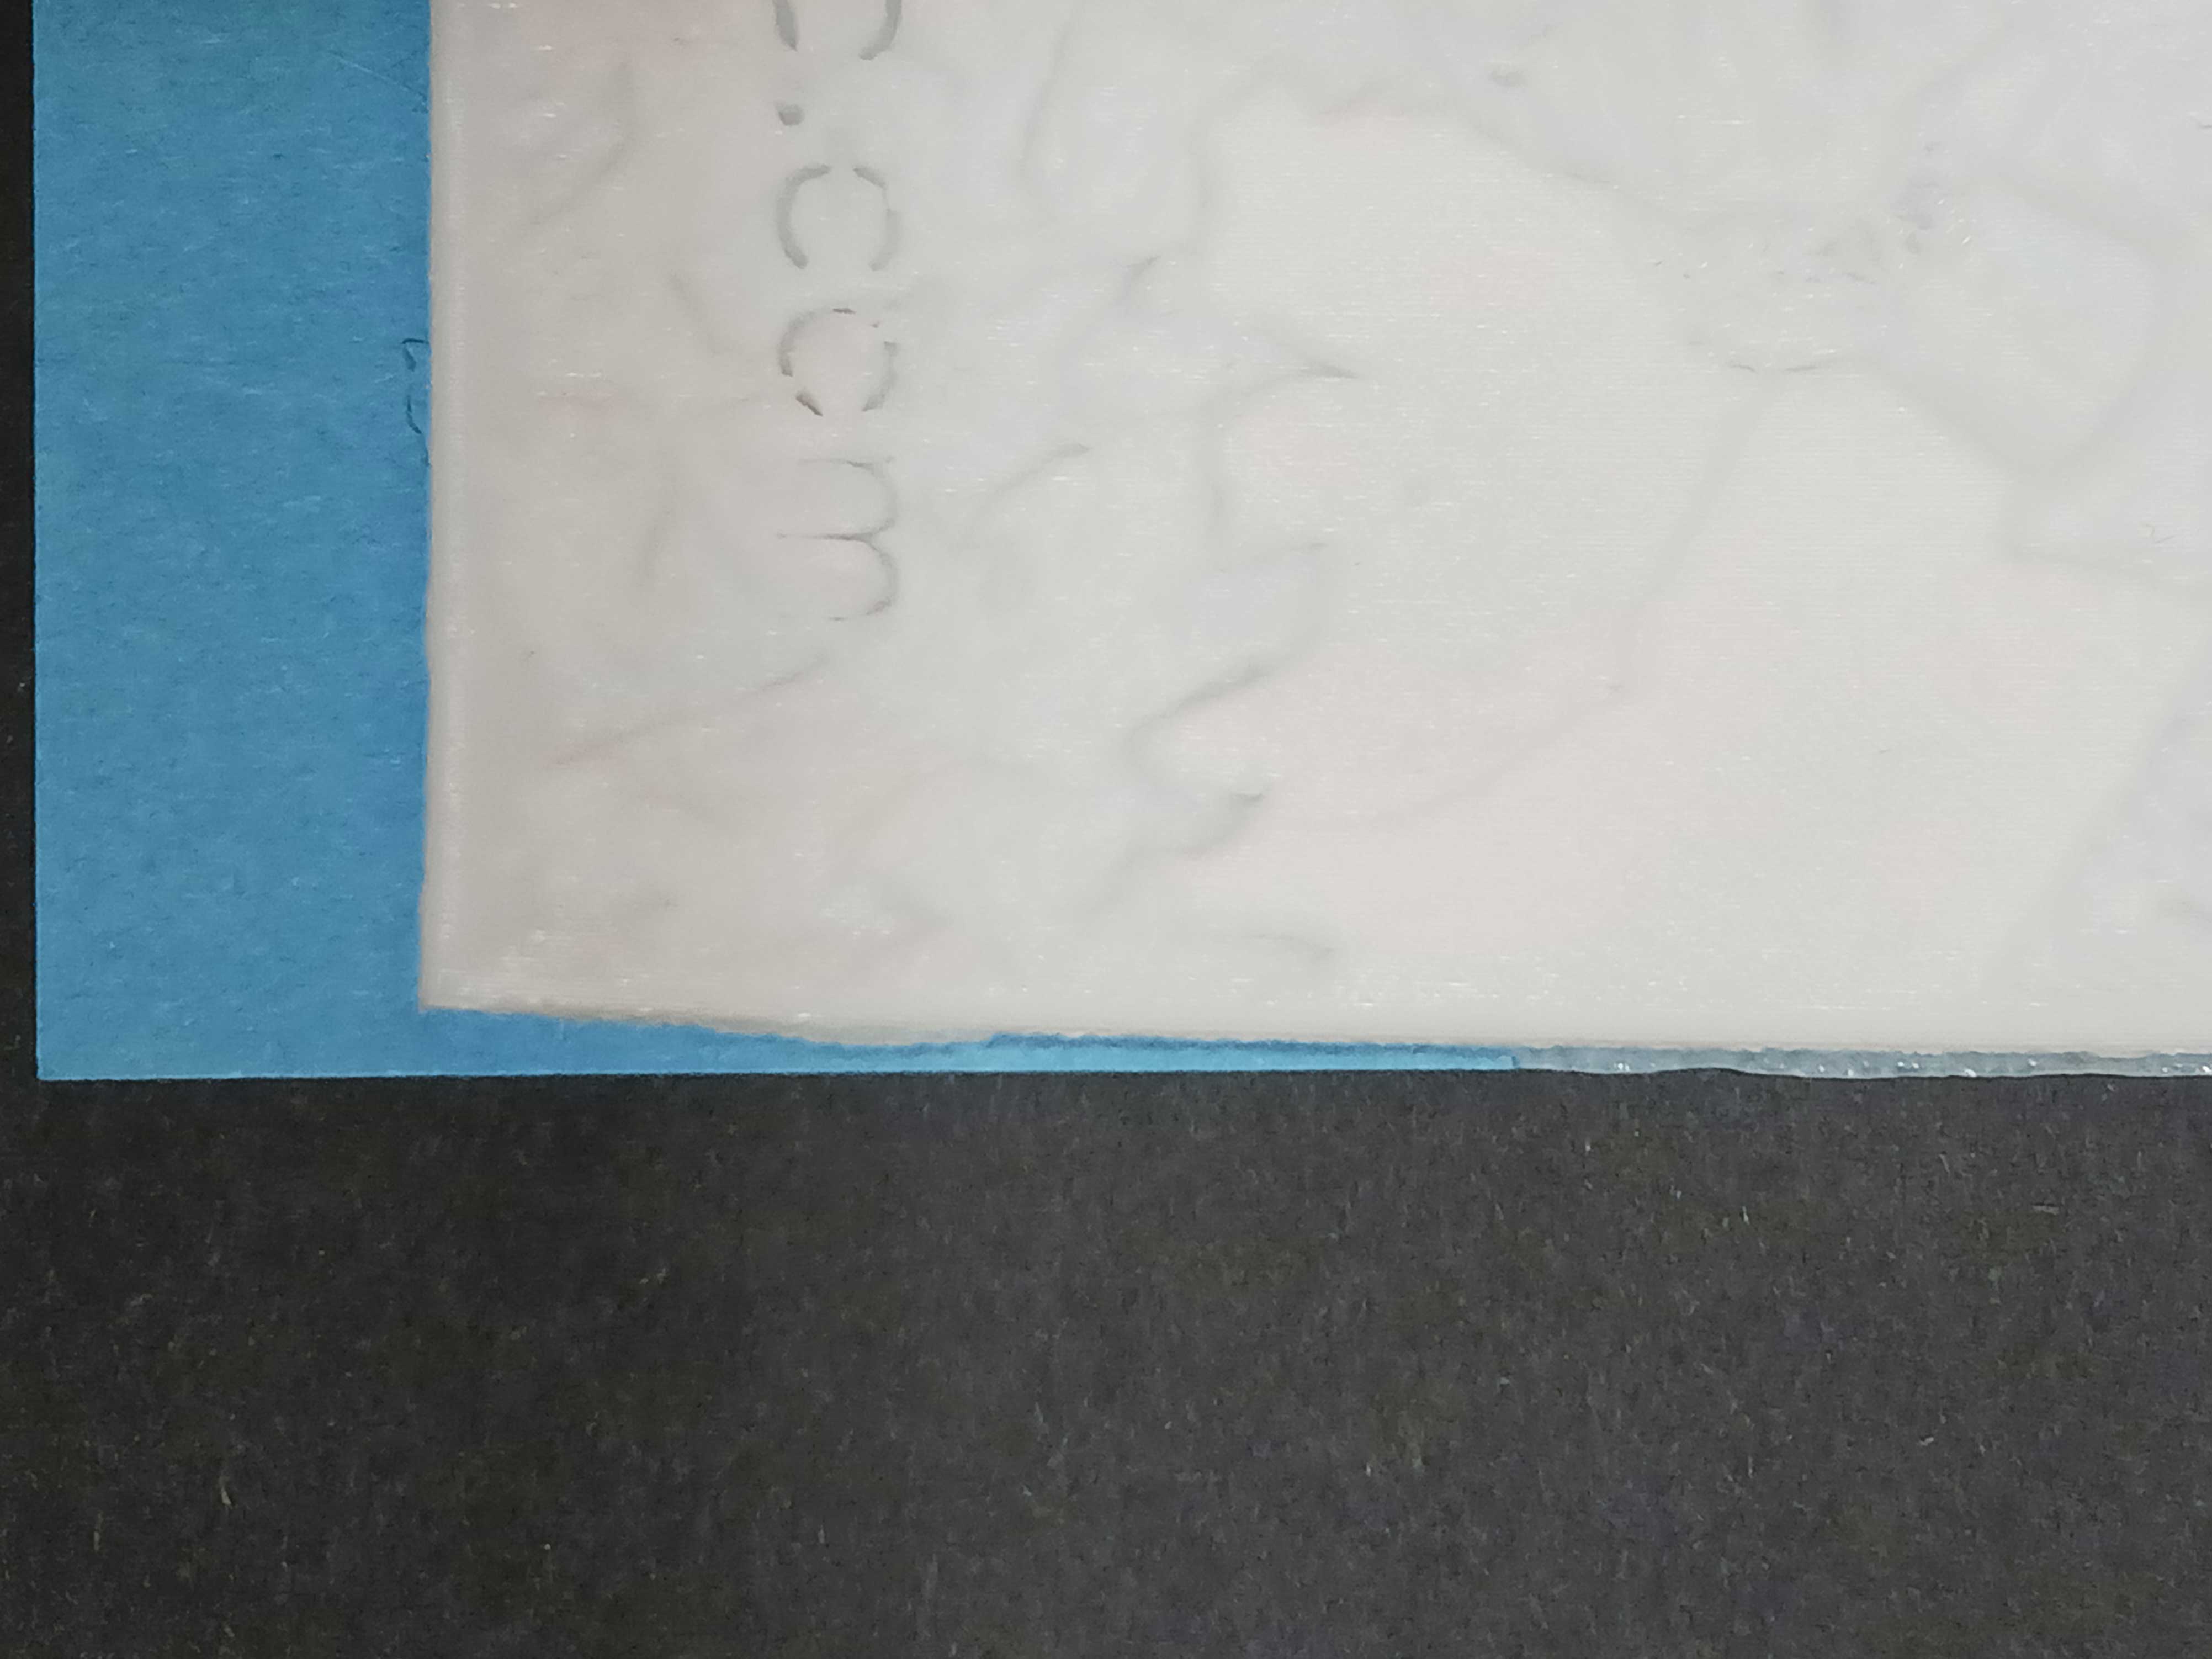
These exemplify the warping. The blue represents the bed:
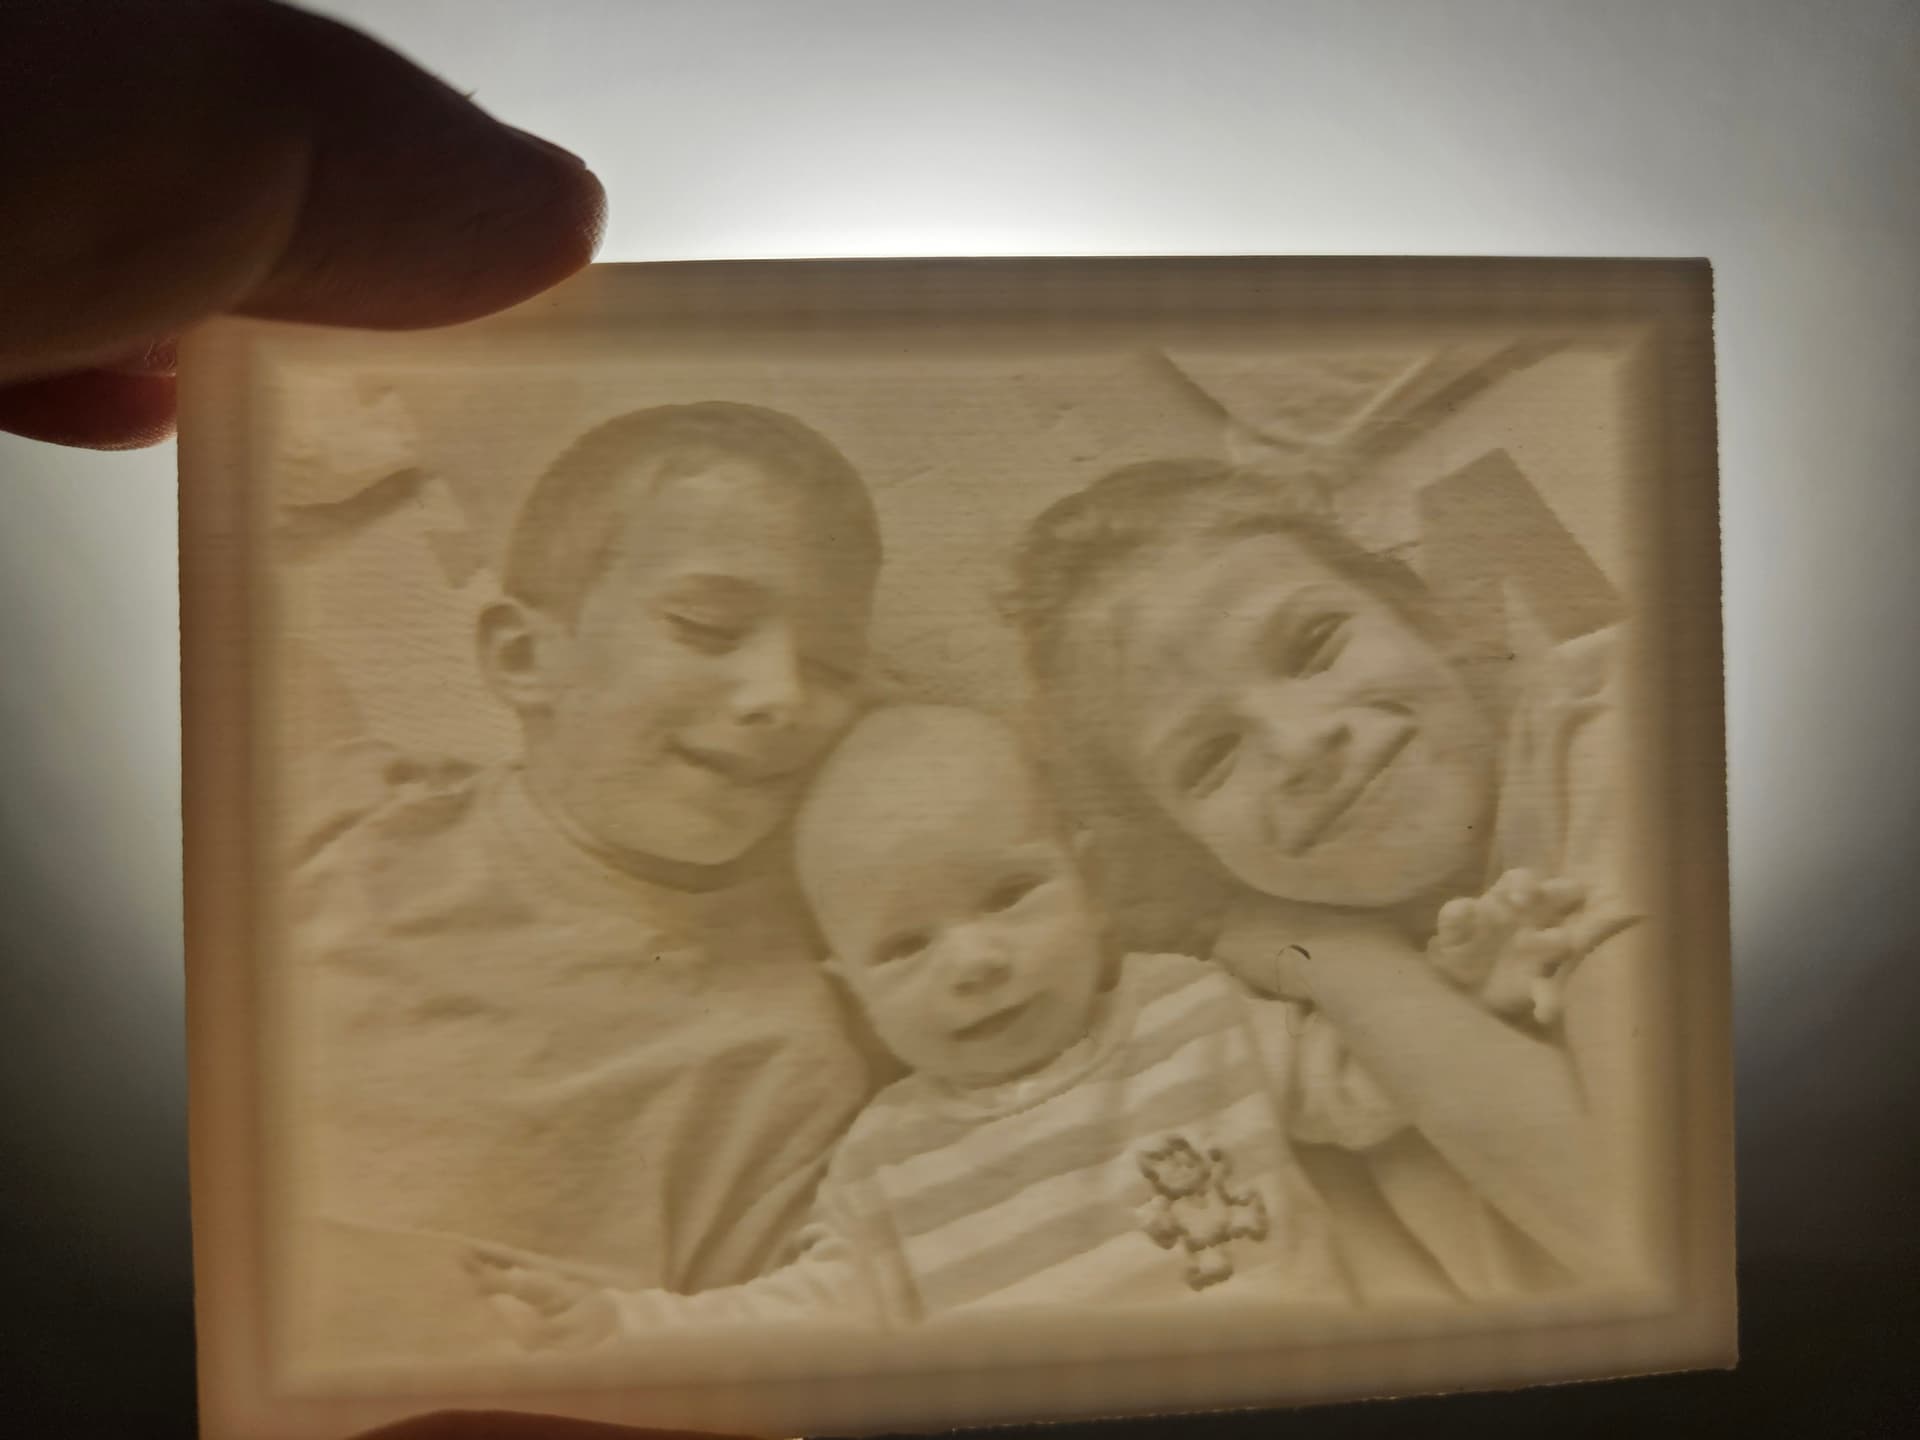
The color is just a specially “separated” color image adhered to the back.
Here’s the site: https://tool.itslitho.com/
2 Likes
That’s a pretty interesting site. Thanks for sharing that one. I’ll have to try it when I get a chance… Nice… ![]()
Many thanks for the site URL. I give it a try about 1.5hour to print out.
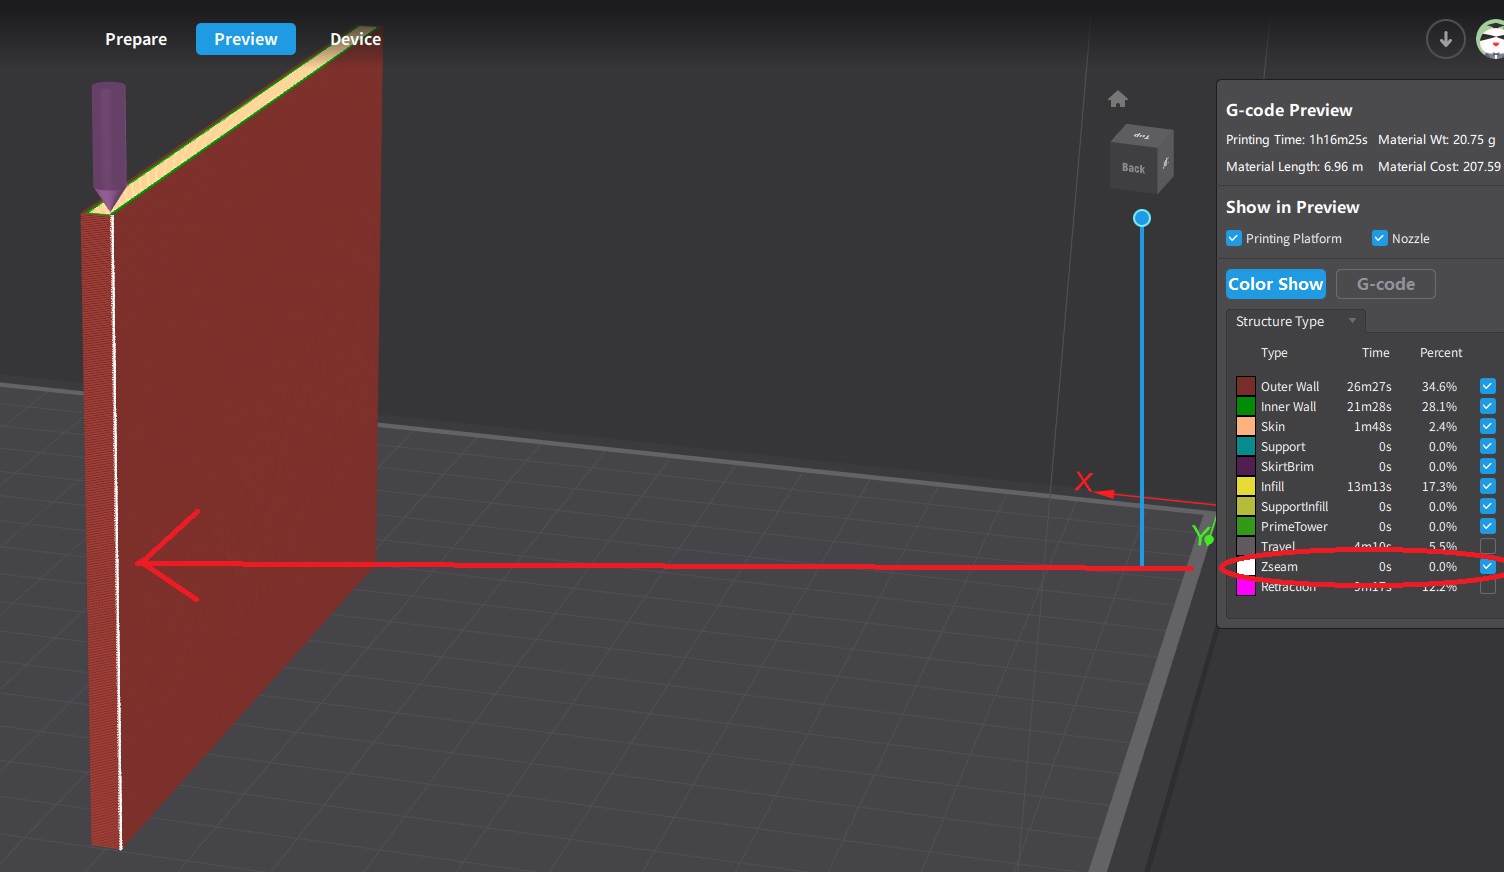
Z steam could be cause issues
Are you checked where is the Z steam configured (advanced settings of the profile Shell/Z steam Alignment)? I have configured as “User Specified” and if remember back left which is mean edge of the picture and not specially inside the important picture.
Yes, I learned from experience to keep the seam on the back corner. Anything else yields less than optimal results. At 114.3 x 76.2 x 3.2mm they take a minimum of 3-4 hours to print “smooth”. I found printing between 50-75mm/s with acceleration numbers turned way down on all ends produces very nice results. Anything higher (for me) introduces wobble which results in uneven layers which look very unappealing. You absolutely need to print with a wide brim and if your printer bed is like mine you’ll need glue stick to keep it in place. I expect that different models can tolerate different max speeds and accelerations but according to the community I’m part of the aforementioned speeds are optimal when considering speed vs time = quality.
If you haven’t printed or seen one in person they’re amazing! It’s like going back into the darkroom and seeing a print develop for the first time (eons ago for me ![]() )
)
Eventually I’ll be increasing size to print up to 200mm on my KE. I need to figure out my edge warping issues first. I need to figure out the optimal temps and fan settings to get that first layer to stick (even with glue it comes up). I had successfully printed numerous ones with no lifting but crappy resolution. Now it’s the opposite: Great resolutions crappy warping ![]()
I found for the seam that’s the best positioning.
At the moment I try small 100mm x 75mm frame but with Hyper-PLA and my high speed settings so expect bad results as first try.
I used plate adhesion Raft with default settings. Lets see what is happening
Here are some other sites but they’re not nearly as user friendly:
You can also take any image and just drag it into most slicers like Creality Print. You will need to adjust the settings, especially the thickness.
You can print Lithos “flat” but the highest resolutions are achieved printing vertically at around0.15. Anything smaller is just adding time and I do believe it’s exponential ![]()
I wonder if some brands of PLA are more prone to warping than others…(Quality control issues.)…??
Without a doubt and even roll to roll within the same brand. I think QC is lacking overall in all aspects of the 3D printing arena from what I gather from a lot of reading. ![]()
I’m going to keep a watchful eye on the brands I buy. Currently I’ve only tried Creality and Sunlu. I’m using Sunlu right now for Lithophanes but I haven’t been printing long enough to make any judgements. Getting closer every day though. ![]()
Results completed. The application awesome Lensman ![]()
Printer model Ender-3 V3 KE with the default 0.4mm head
Material Creality Hyper-PLA White
Profile: Hyper-PLA custom
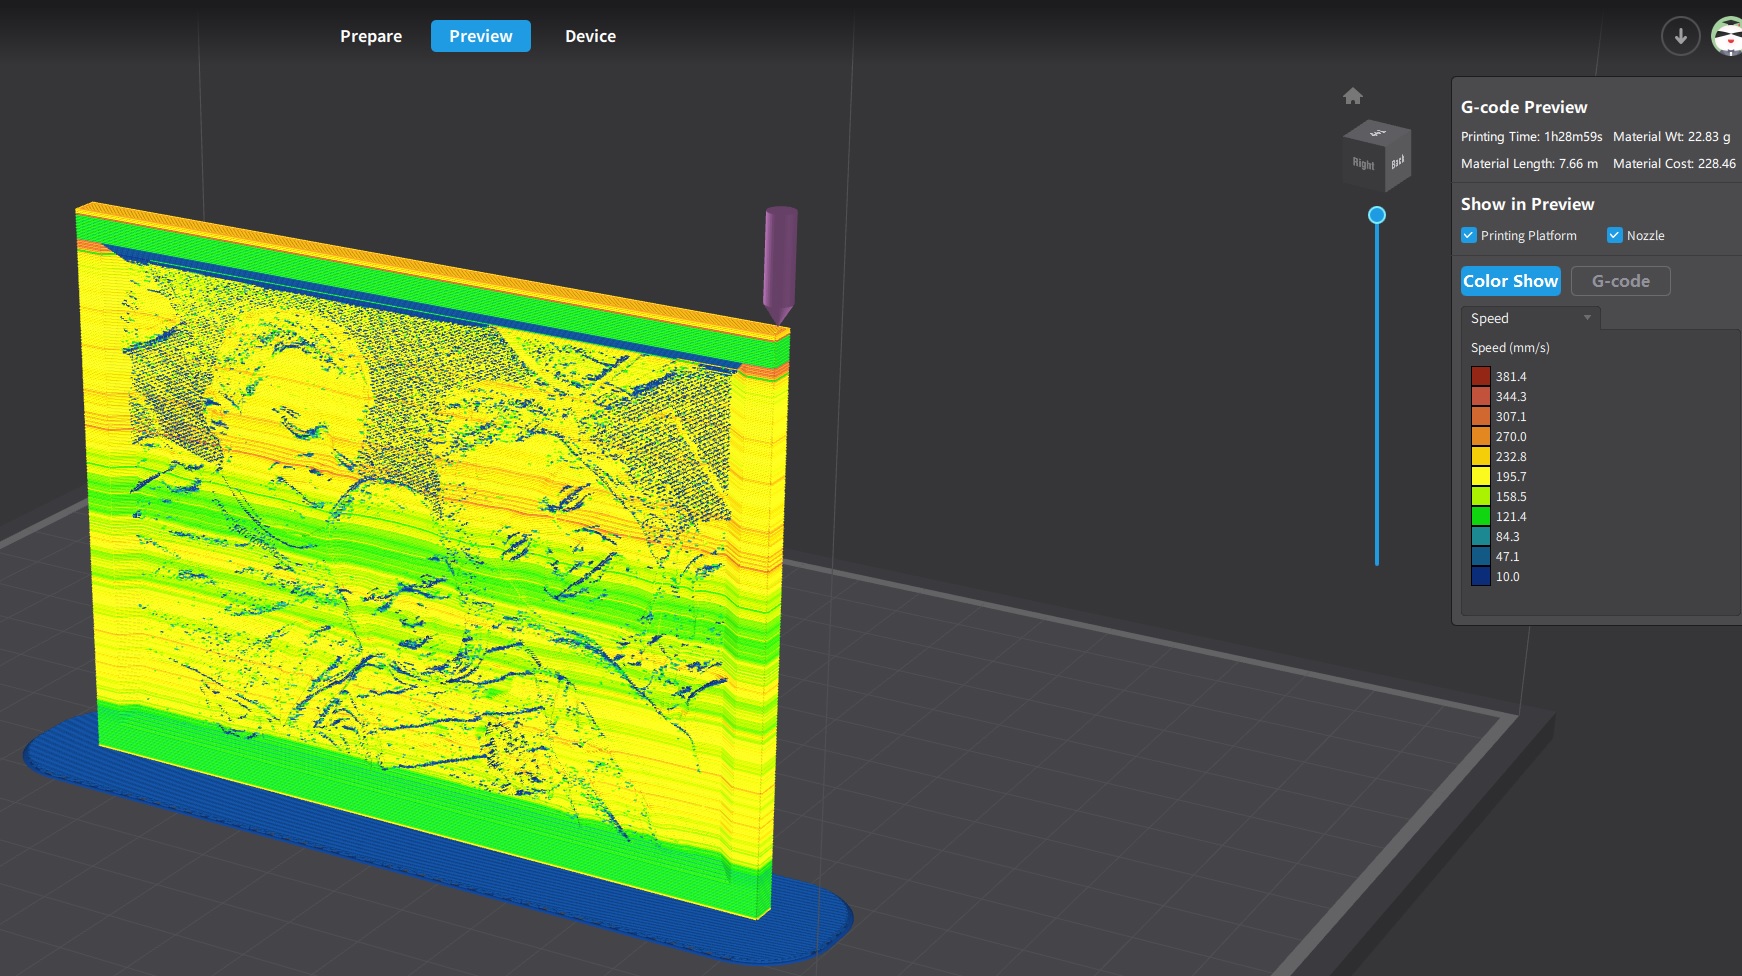
As you can see on the picture speed mostly 120-200mm/sec. Print time 1h28min but definitely I heard clicks when the head hit the model so not ideal. The Raft adhesion was enough to protect from flapping under printing.
I attached the final product pictures not major error visible for me.
On bed before remove
Sides

With light my 3 kids visible nicely
1 Like
That’s a very nice and acceptable print for 200mm/s and your adhesion is very nice. The clicking sounds you heard was most likely where the z seam is. With faster printing speeds the filament builds up on that seam and creates an obstacle to the nozzle and the results are the “wobble” or "banding you see higher in the Z. Those appear as the uneven horizontal lines.
When printing fast that “knocking” is what will lift the print off the bed even with a brim/glue/raft. It presses down then springs the print back up weakening the adhesion. If you look closely at your bottom corners you will see the lighter patches. That is where the print is lifting up and most likely warped. It doesn’t look too bad but it’s still happening and with a larger print you’ll most likely experience one or both sides lifting or warping which will compromise the quality of your print.
Also, your slice looks strange. Not sure what those green bands of lines are? Never mind that’s the mm/s color coding. If you examine your print you will see the better quality at 121.4mm/s and slower. That’s actually a great way to determine optimal speed for your printer. I just found that setting. Amazing tool! Thanks for inadvertently showing that!! ![]()
![]()
@jimandyen did you know about that color coding feature? It’s fantastic!
I am accidentally modified the frame thickness to 4.0mm and have dont have glue about infill due reseted back to factory default. Could be 10% grid or something like that.
Holly … I need to tunning back all parameters which was optimalized since several week. No profile backup possible ![]()
Try printing with 999 walls and 0% infill or calculate your total wall thickness and set your number or walls accordingly and also set your infill to 99%. Either method will yield a solid print which is what you need for the best results.
Settings are usually:
Lithophane setup:
min thickness .08
max thickness 3.2
I match my frame to the max thickness to avoid any issues.
Printing:
999 walls 0%infill
or
4-8 walls and 99%infill.
I am not able to follow you what is mean “999walls” meanwhile the 0% infill rate(aka no infill) but I am interested.
Inside walls or outside walls value? If that is 0.4mm nozzle that is 399.6mm wall which is bigger then my 220mm * 220mm print area???
99% infill means aka full-filled with material but in this case what is the 4-8 walls that is inside or outside walls?