Warping is a common issue in fused deposition modeling (FDM) 3D printing, often causing the edges and corners of prints to lift off the print surface. This can ruin otherwise perfect prints, making them deformed and dimensionally inaccurate.
Warping occurs due to thermal contraction. As the extruded plastic cools, it contracts. The first layer of the print adheres to the build surface and doesn’t contract with the rest of the layers, causing the bottom of the print to bend upwards.
ABS filament is particularly prone to warping because it remains solid up to around 100 °C, meaning it quickly solidifies during printing and becomes vulnerable to warping forces.
To combat warping, you need to reduce these contracting forces and ensure the first layer adheres firmly to the print surface. Our general guide on warping covers tips for various filaments. However, in this article, we’ll focus specifically on preventing ABS from warping. Let’s dive in!
Clean the Print Surface
Dust, greasy fingers, and adhesive residue can accumulate on your print surface over time, hindering the adhesion of your 3D print’s first layer and increasing the likelihood of ABS warping.
To prevent this, clean your print surface regularly. For PEI sheets, a quick wipe-down with a paper towel and some isopropyl alcohol (IPA) will suffice. For glass beds, you can use a scraper to remove excess residue. This ensures the print surface can hold down the first layer more effectively.
However, be cautious with cleaning agents, as not all are suitable for every type of surface. Using the wrong cleaner can damage your print bed. Always choose the appropriate cleaning method for your specific print surface to maintain its effectiveness and longevity.
Tune Your First Layer Settings
Warping can also occur if your first layer print settings are not properly tuned. Key settings include temperature, layer height, and line thickness. For a general overview, refer to our first layer problems guide.
For ABS, consider starting with these settings:
- Nozzle temperature: 235 °C
- Bed temperature: 110 °C
A common issue with ABS is an insufficient bed temperature, which prevents the first layer from adhering properly. ABS has a high temperature resistance, so anything below 100 °C has little effect.
Generally, a high bed temperature keeps the material warm and adhered to the bed, while the nozzle temperature should be as low as possible to prevent excessive thermal contraction. A sufficiently high nozzle temperature is necessary for proper layer adhesion and strong prints, but too high a temperature increases the difference between the nozzle and bed temperatures, exacerbating thermal contraction.
Adjust the nozzle and bed temperatures in increments of 5 °C to find the optimal balance between print strength and warping. By fine-tuning these settings based on your print outcomes, you can reduce warping and achieve better quality prints with ABS.

Print in an Enclosure
ABS’s resistance to temperature makes it highly prone to warping. To mitigate this, try printing in an enclosure to raise the ambient temperature, reducing thermal contraction forces.
You can choose between DIY enclosures or commercial solutions. Some commercial enclosures even actively heat the chamber, though this is often unnecessary; the heat from the bed usually suffices. If your budget allows, consider an enclosed 3D printer for simplicity.
Whichever option you choose, test the enclosure to ensure it doesn’t damage your printer’s electronics or printed components.
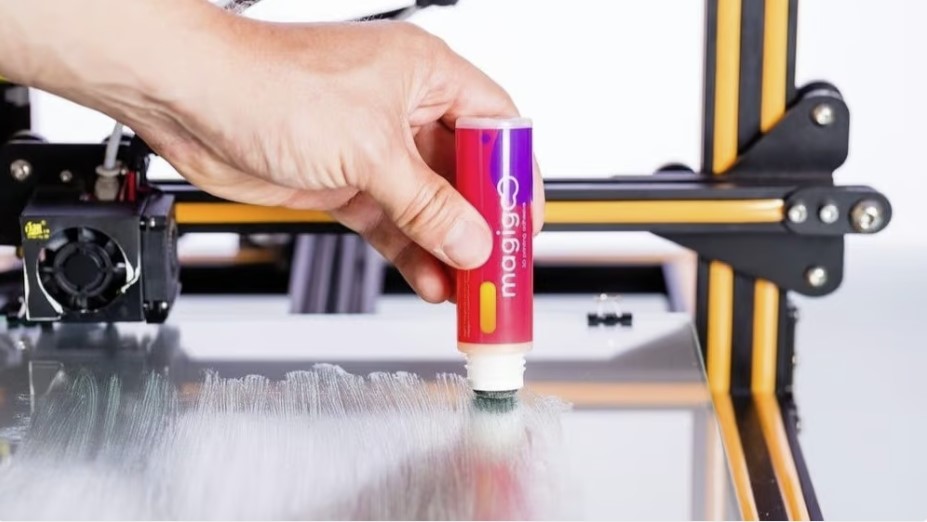
Use an Adhesive
If an enclosure doesn’t help, or if you prefer not to use one, using an adhesive can help keep the first print layer in place and prevent it from curling and ruining your print.
Common adhesives include household hairspray and glue sticks, as well as commercial solutions like Magigoo. For ABS, a good option is ABS juice, a mixture of ABS filament dissolved in acetone. This creates a sticky surface that helps the first layer adhere more effectively.
When using adhesives, apply a thin layer at a time and reapply as needed. Overuse can lead to residue build-up, which can affect print quality and adhesion. Regularly cleaning your print surface, as mentioned earlier, is crucial to maintain optimal conditions.
Adhesives can be particularly useful when other methods fail or if you want a straightforward solution. However, always ensure that the adhesive is compatible with your print bed material to avoid damage. With the right approach, adhesives can significantly improve print adhesion and reduce warping issues.
Use a Brim or Raft
As a last resort, you may need to use a brim or raft to improve print adhesion and prevent warping. Brims expand the first layer with extra perimeters, increasing the surface area in contact with the print bed. Rafts, on the other hand, add additional layers underneath the model, creating a solid foundation that helps with adhesion and compensates for poor bed leveling.
While effective, brims and rafts come with drawbacks. They increase print time, consume more filament, and make post-processing more tedious. It’s best to try other methods first before resorting to these options. However, if your model has many small features in contact with the print surface, brims or rafts may be necessary to prevent these parts from dislodging during printing.
Using brims or rafts can be particularly useful for complex or delicate prints that require extra stability. By carefully considering when to use these techniques, you can enhance print quality and reduce the likelihood of warping, ensuring successful 3D prints even in challenging situations.