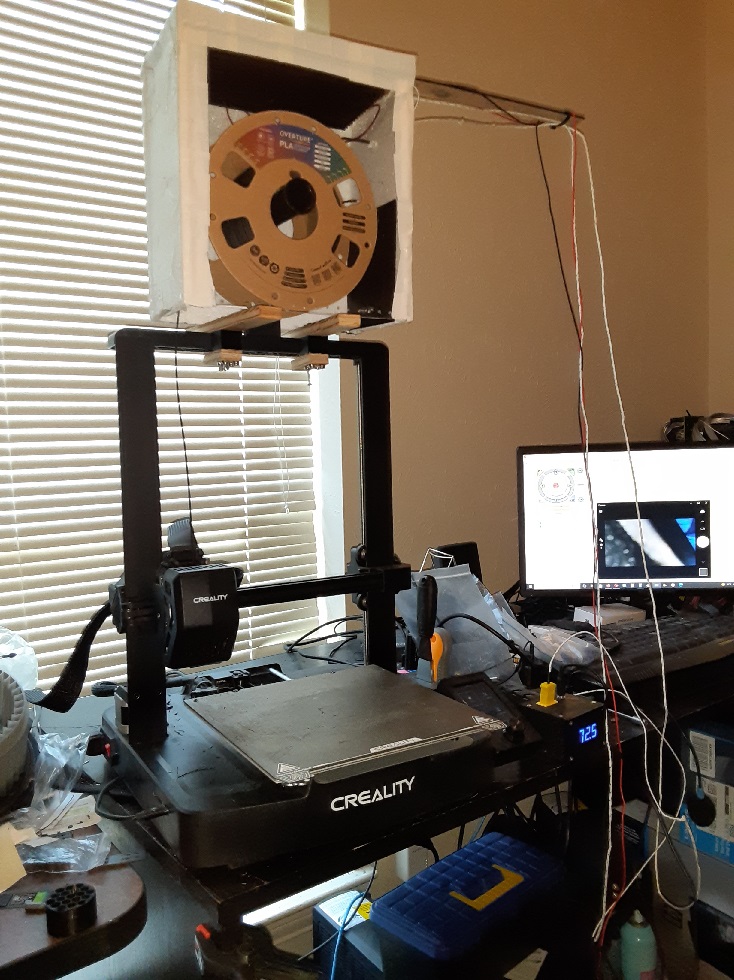
So I have been trying to control a stringing issue on my 3D printer, an Ender 3 Pro V3 SE. I highly recommend this printer for anyone who is thinking about getting one. The majority of advice I was getting about this problem what is moisture in the PLA filament, This project didn’t solve that issue but solved another issue I didn’t know was related, poor adhesion on horizontal surfaces I’ve also heard this problem described as draping. That problem no longer exists on my printer in the slightest though I still have a stringing issue. I am publishing these plans in hopes that it might help someone else. I will try to put links to all the parts where I can however you may have to find a different source for similar parts.
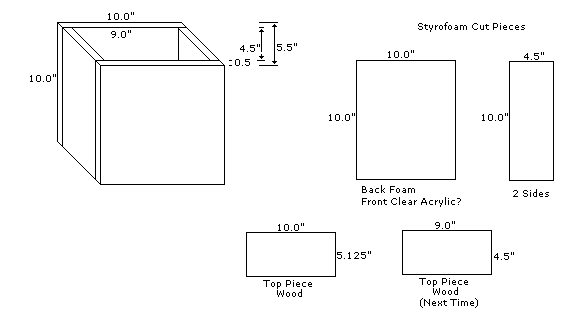
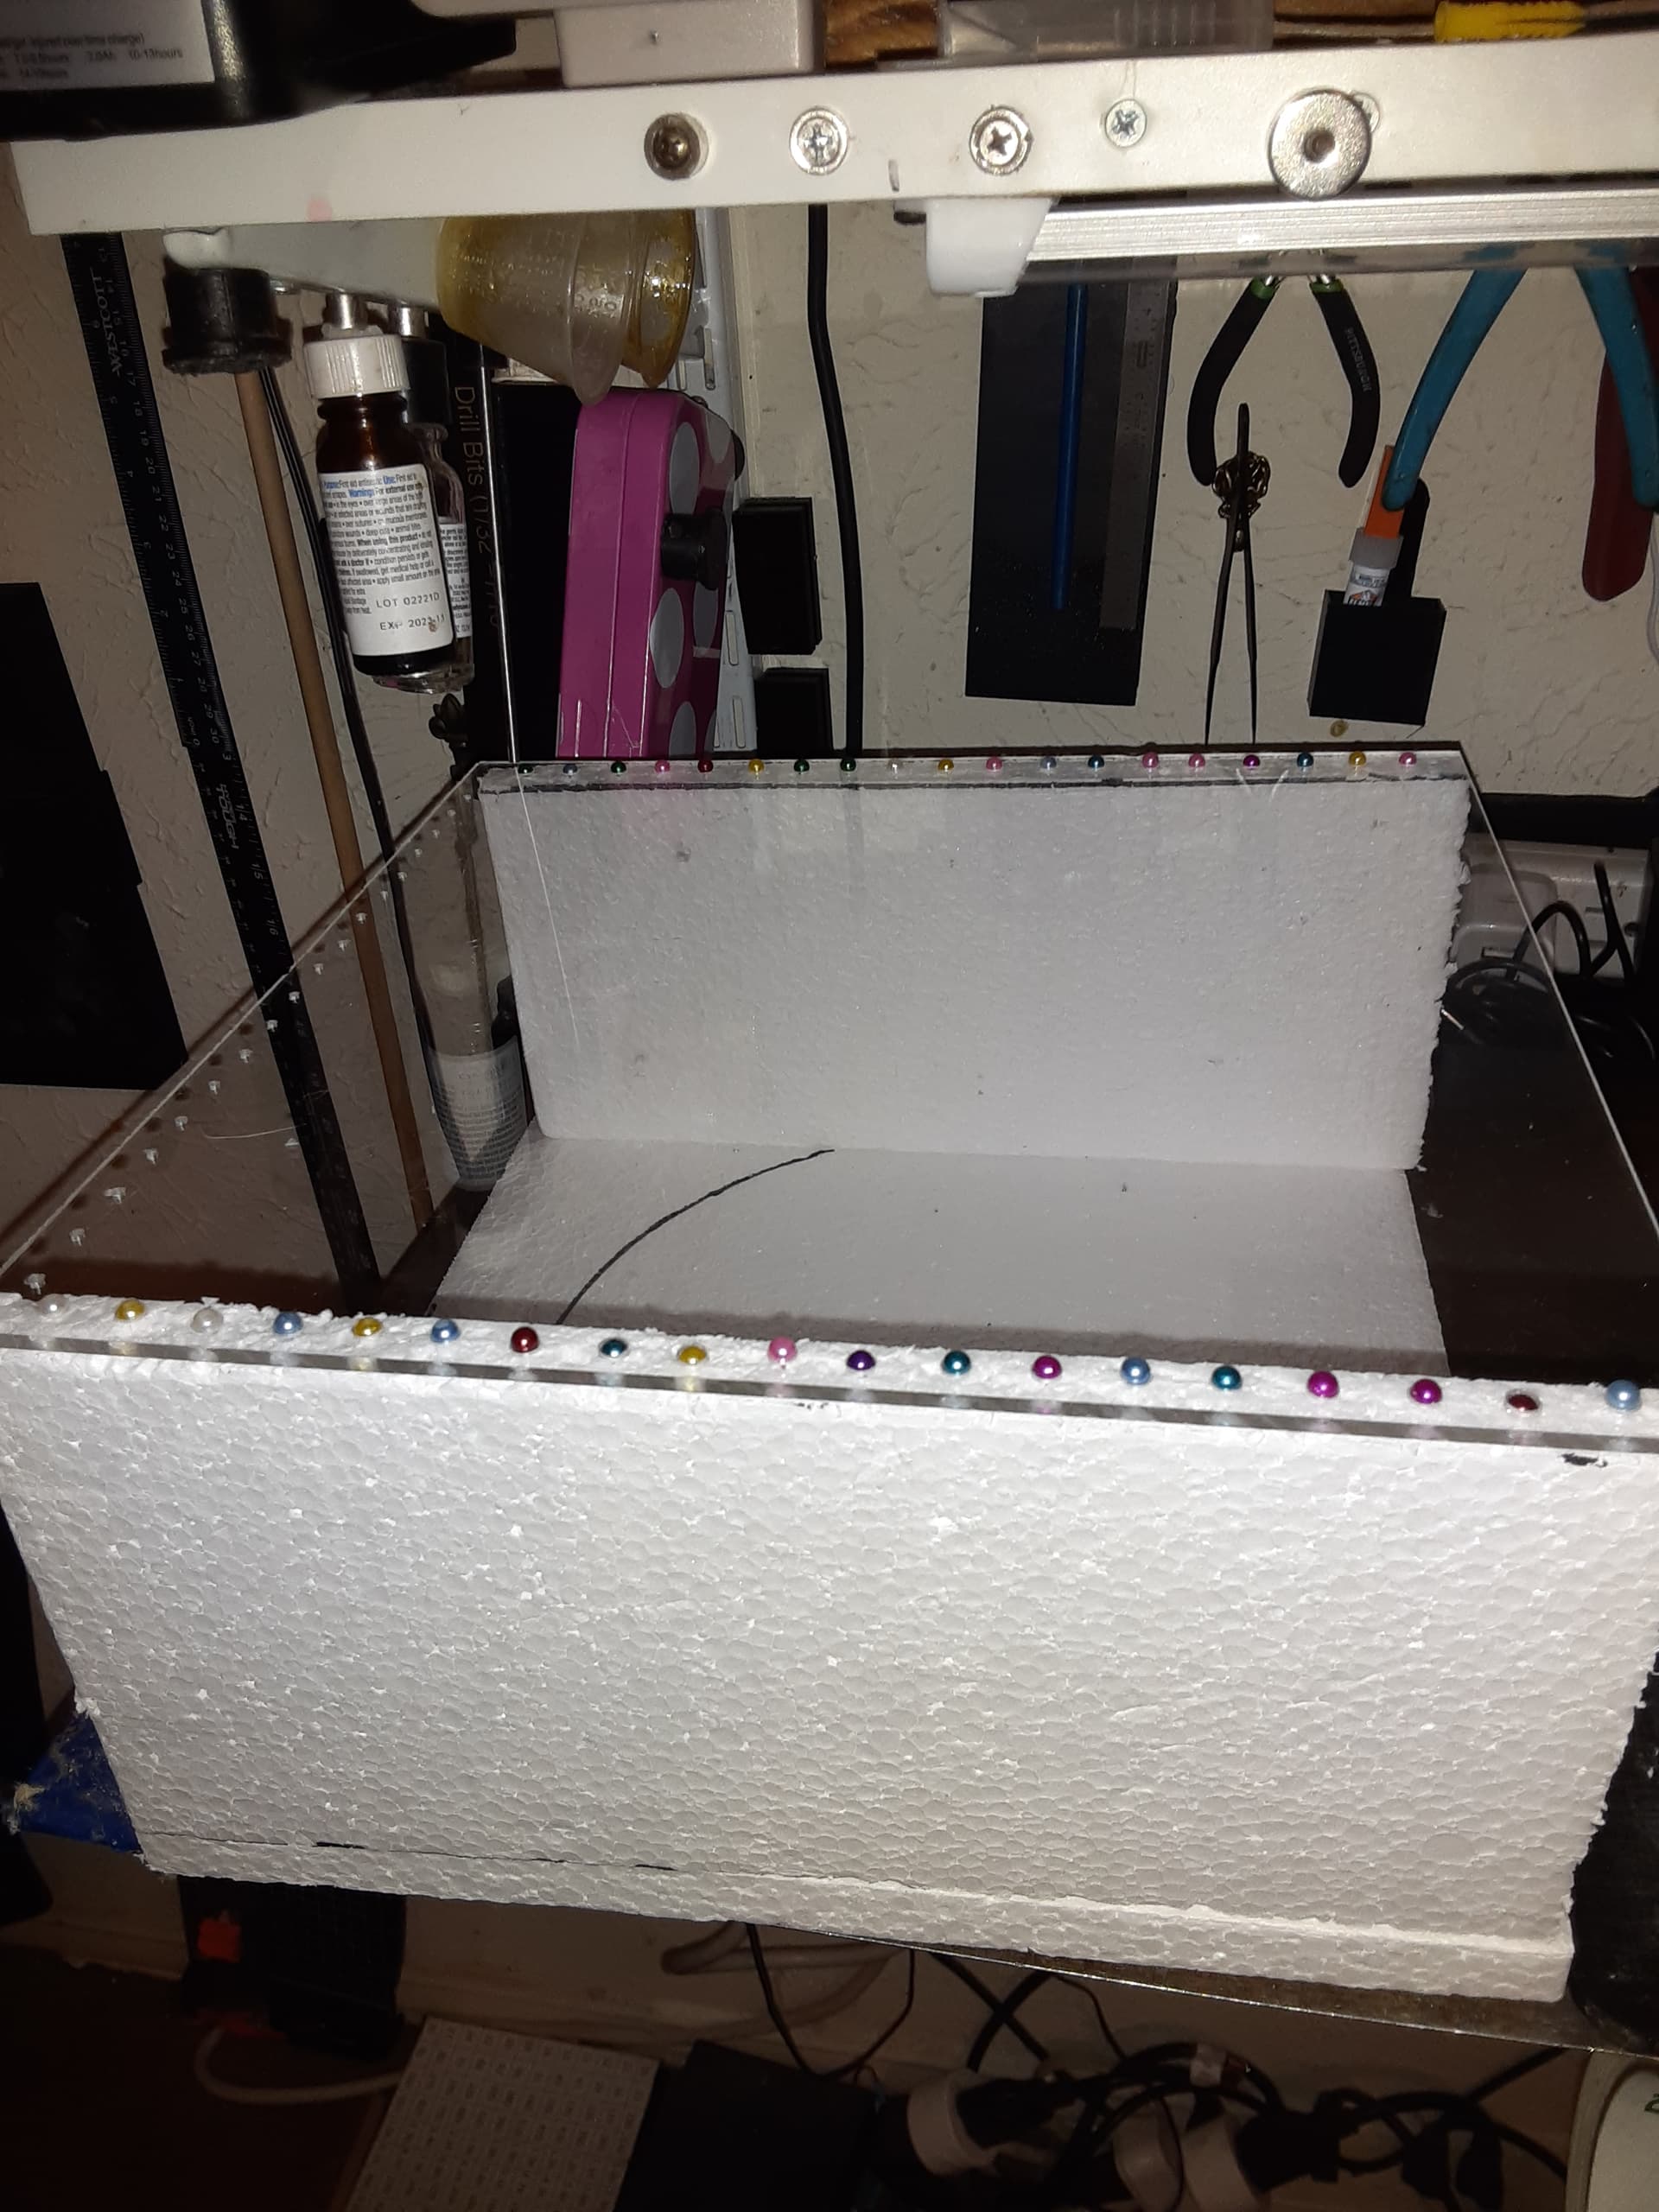
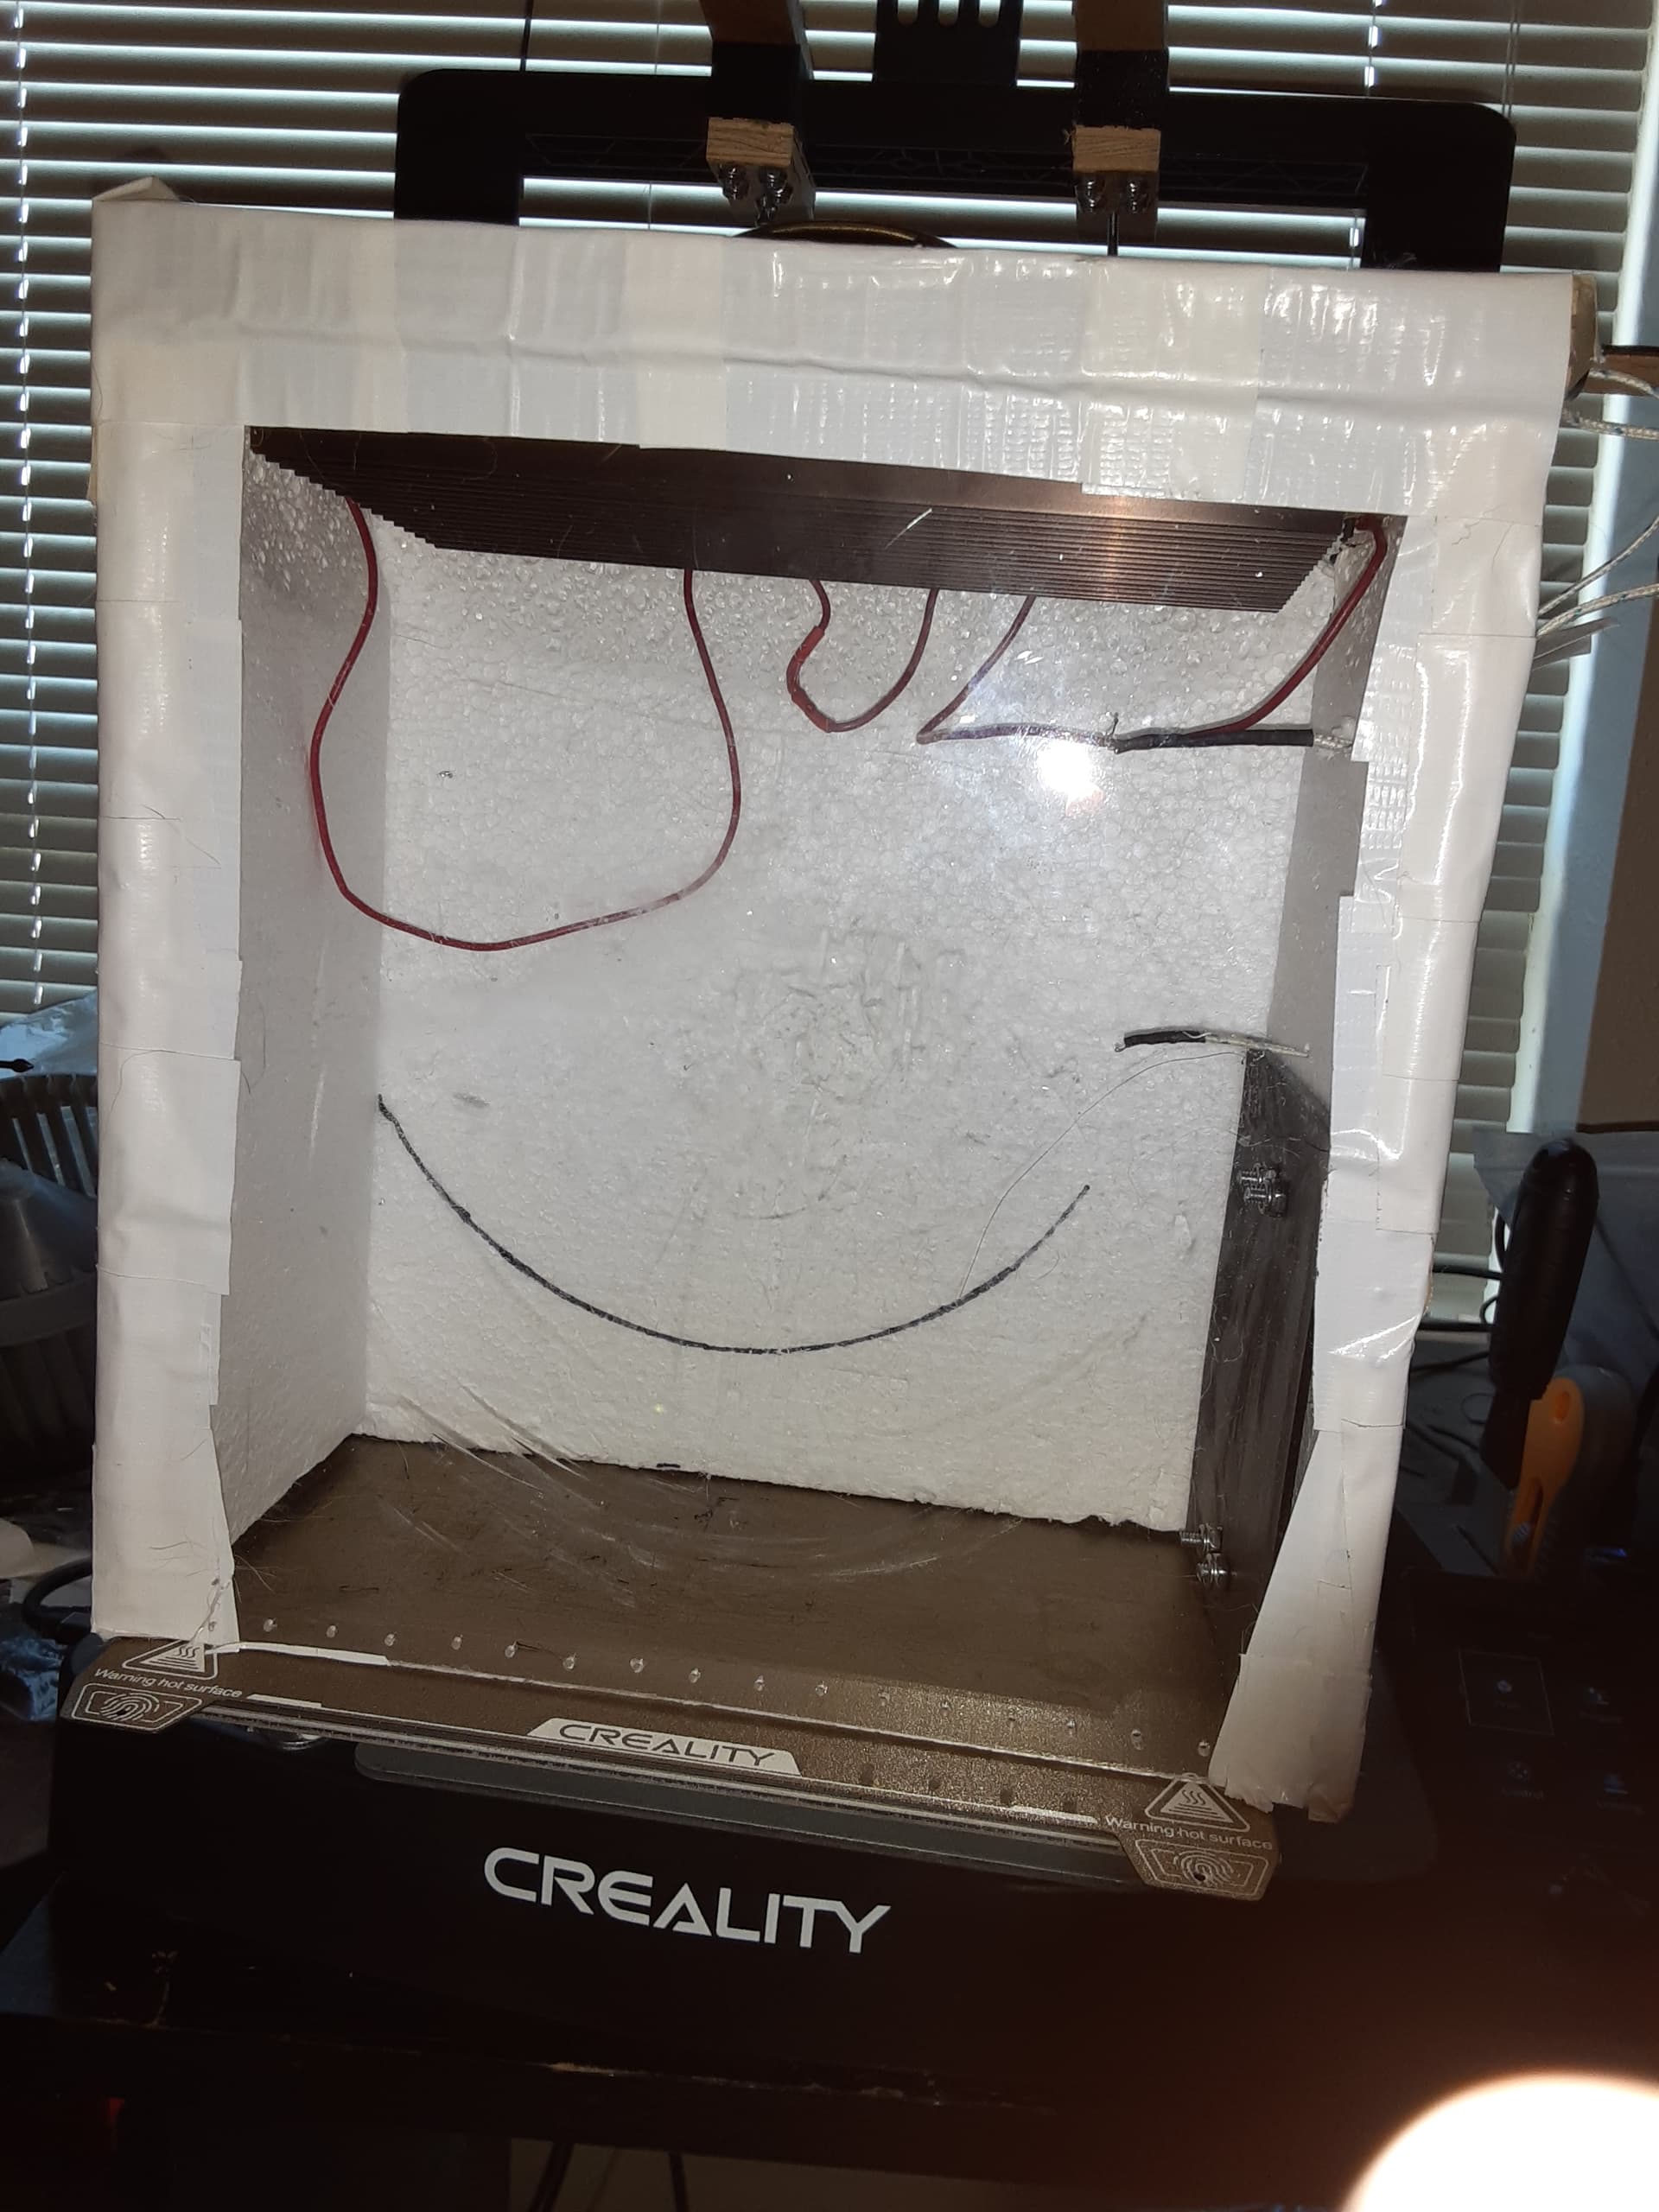
I went with ½” Styrofoam sheets left over from a previous project, the ones I had were 12” x 12” You will need quantity 4 of these, two sides panels and one back panel. You will also need a 1/8 acrylic sheet (clear) for the front panel. I drilled and countersunk the holes in the acrylic panel as shown on this drawing.
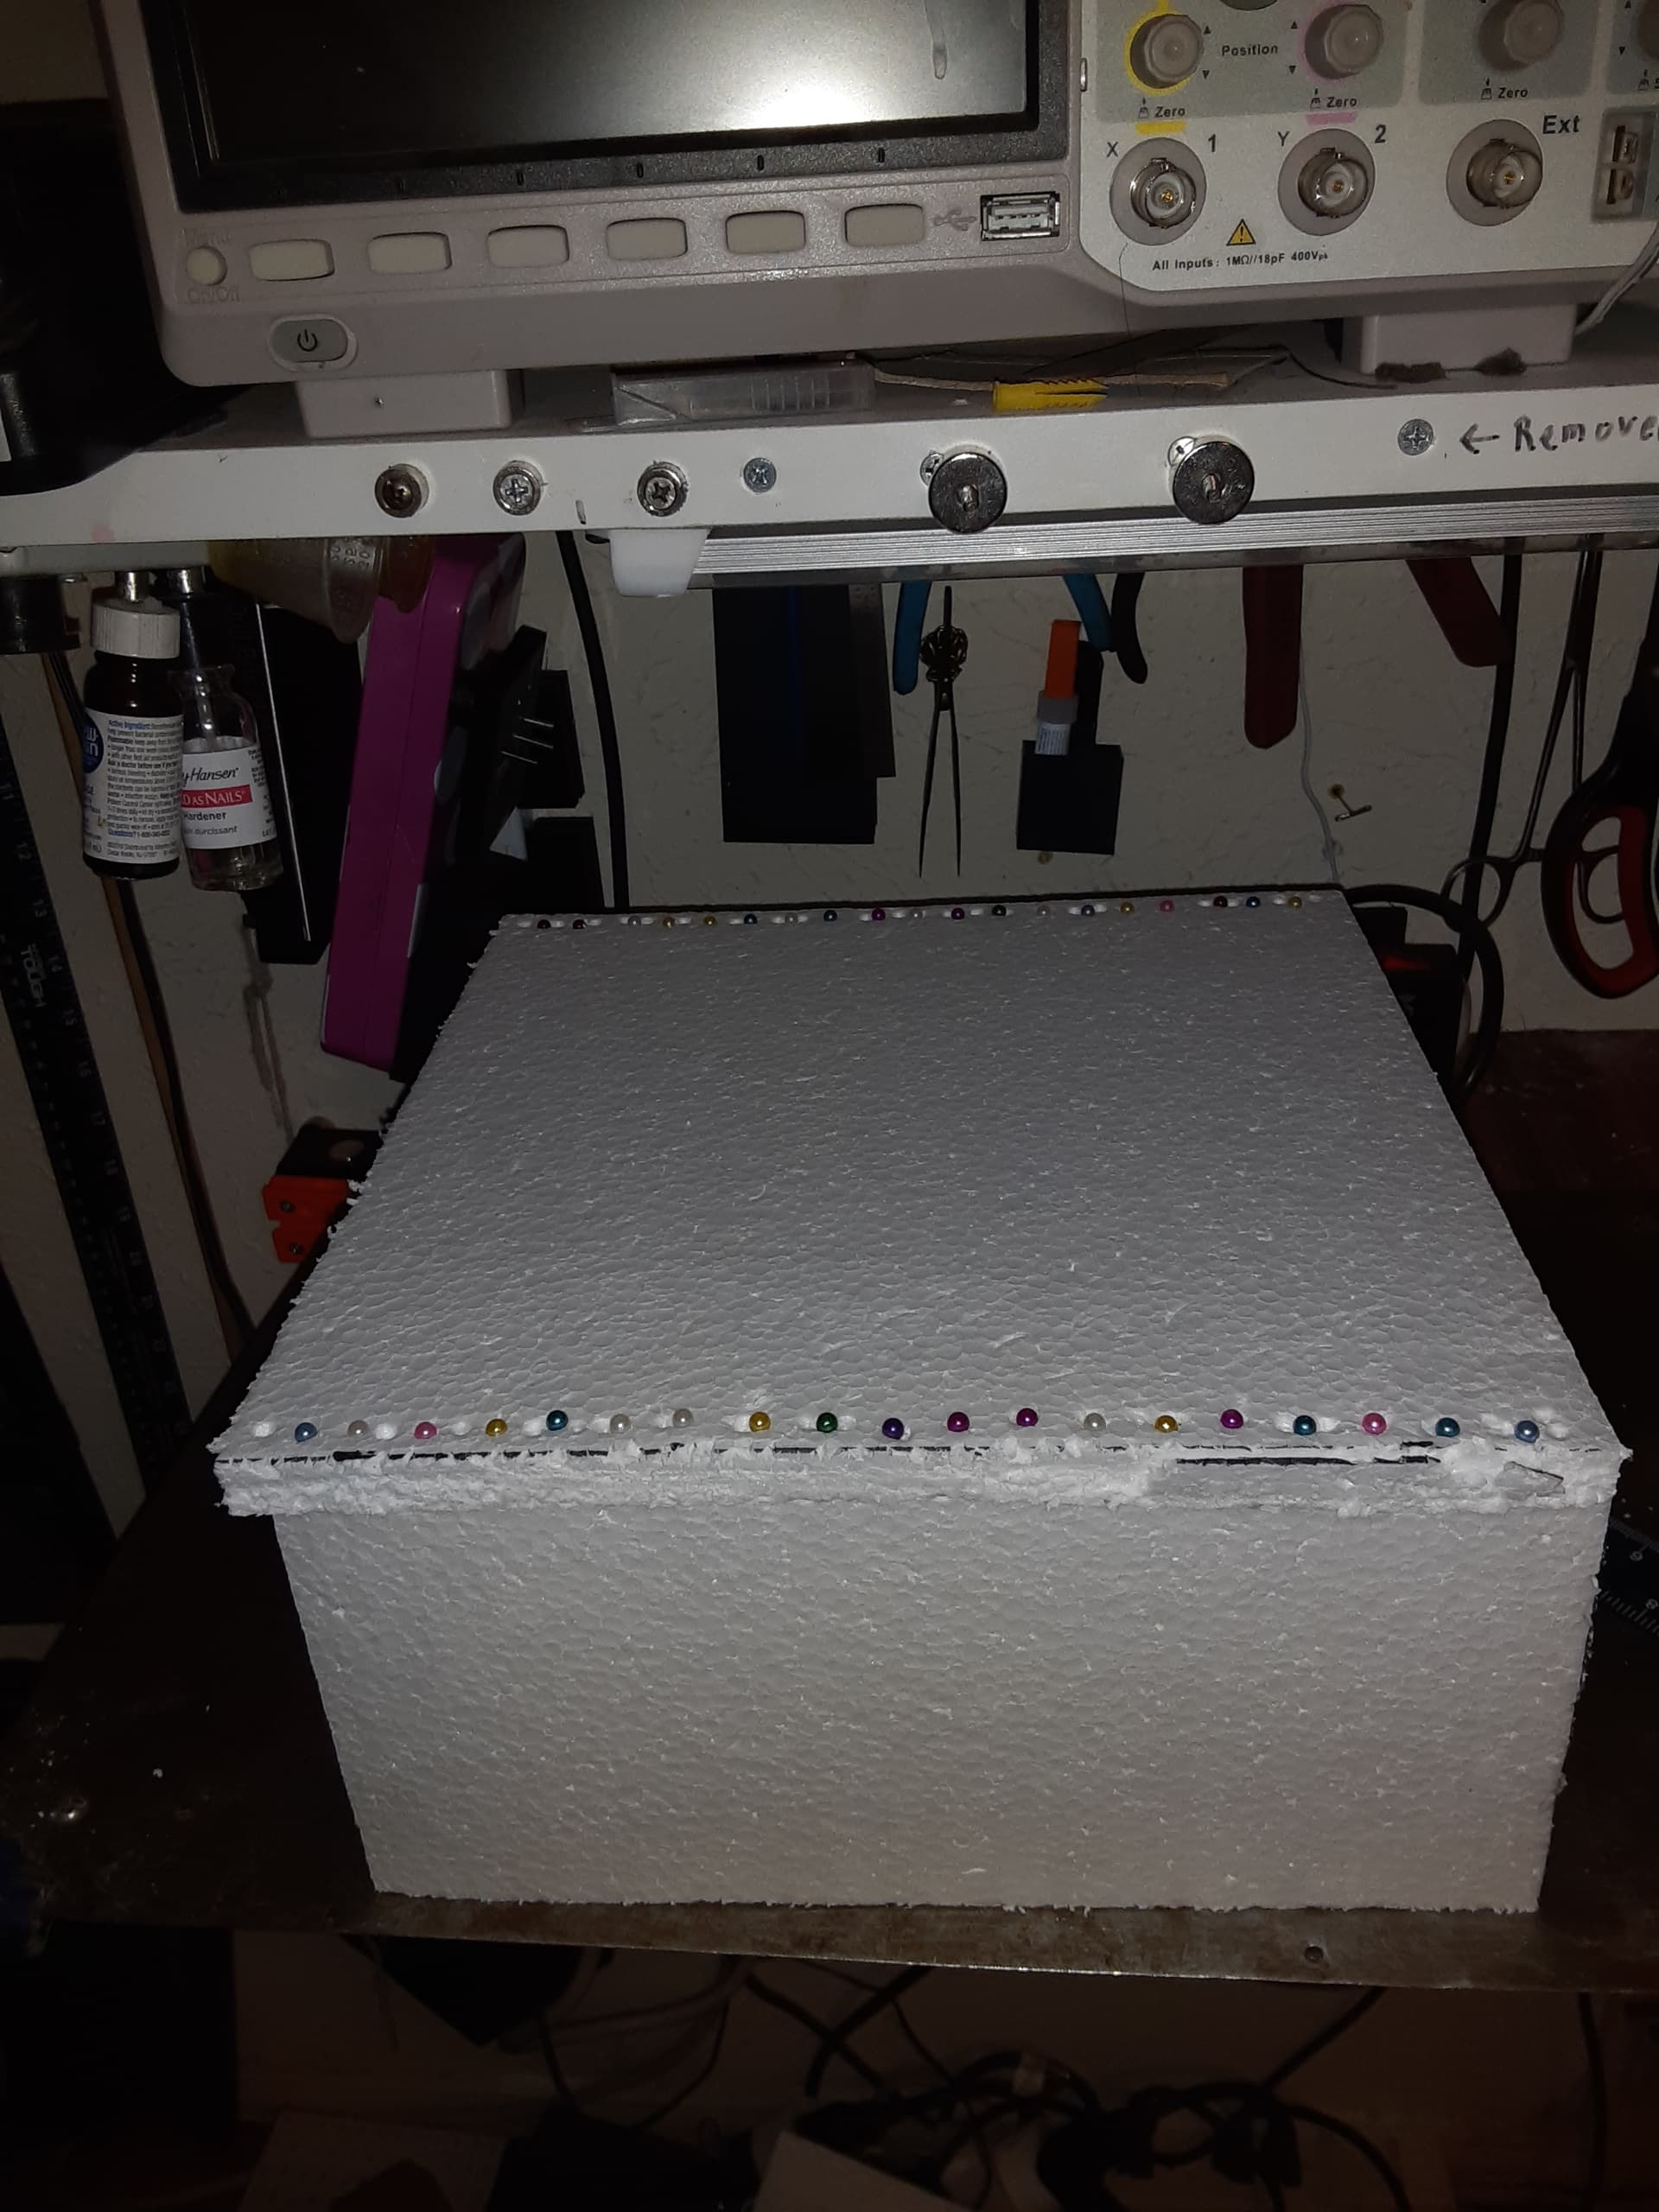
I used pins with glass bead heads to attach the Styrofoam together as well as the acrylic plate.
I then taped the box with white duct tape to make it airtight as I could. Sort of like a hot air balloon. I am using thermal inversion to keep the hot air on the filament.
Then I cut a piece of ½” plywood which was used to seal the top of the box. Are you small screws to attach the acrylic sheet to the wood(Actually I didn’t, this would be the way I would do it if I ever had to build another one). I then Drilled and tapped a heat sink what number #6/32 holes To mount this heat sink onto the Underside of the wooden top I glued quantity 25W 12W heaters as shown with super glue. I then mounted the heat sink to the underside of the wooden top as shown.
Adding an extra hole to bring the wires from the heaters through the top of the wood where I attached 2 very long wires to go to my variable power supply. I attached a cheap drawer handleto the wood so I can pick the unit off the printer, In my case since I am stuck in a wheelchair I also mounted a handle to the side of the Styrofoam using a 3D printed sheet to allow it to attach firmly to the Styrofoam without the nuts pulling through. At this point I question whether Styrofoam was the best material for this project, then I realized that weight was going to be a consideration since I was removing this with my one good hand sitting in a wheelchair. I used a ruler and tie wraps on the wooden top to keep the wires far away from the moving parts of my printer. Not very attractive but it works. Then I made some box stabilizers to hold the box flat on the top of my printer using this drawing.
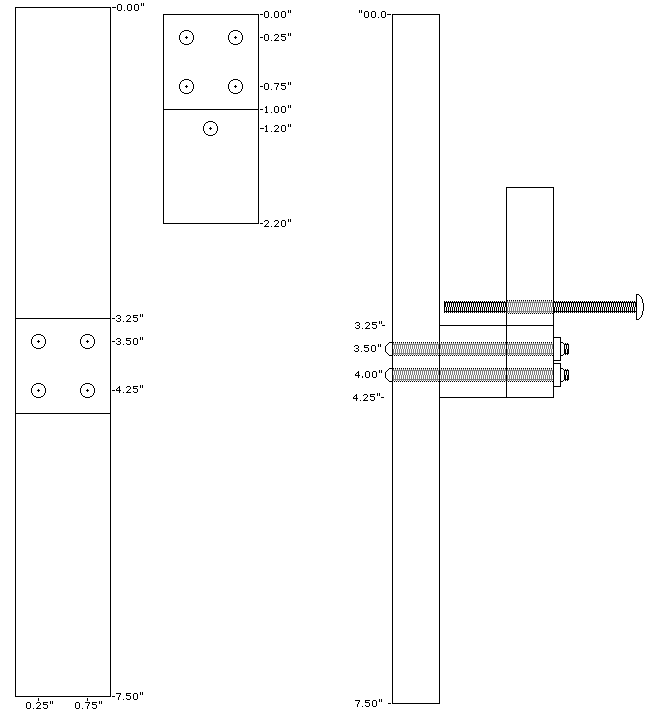
I drilled 7/16” hole in the retainer screw which is the tap size for a #6/2 screw. For the through holes on this print I used 10/64", which is the body size for these screws. I also made a couple of 3D printed parts which were the spacer for this unit. I also printed a template to help me drill the wood to the correct places.
Wrap Around Spacer Template.stl (20.2 KB)
Wrap Around Spacer.stl (20.2 KB)
you have to be careful to avoid the belt in back of the top crossbar. All the screws were number #6/32 put x2" panhead stainless steel screws. I use the retainer screws to hold the wrap around retainers shown in the first picture in place so they don’t walk off and drop the box. Their function is to keep the box from touching the filament spool on top of the printer. Even though the heaters are rated for 12 volts I found that they will heat up to as high as 80° C at 24V DC. Dropping this voltage down to 23 bolt DC heated the box to a comfortable 60°C intends to hover there. I thought about trying to build a regulator but decided it was not necessary. KISS rules apply.
I still have major stringing issues with my prints put the vertical adhesion is completely gone. Hopefully it stays that way. Originally I tried to make the stabilizer out of aluminum, but I realized I had no good way to cut it so I used wood instead. Which worked well enough.
I also made a type K box to monitor the temp ( you can barely see it in the original picture).