Issue with reducing or totally eliminating a seam

Hi all

I have a seam on a model that i cannot hide anywhere.
Is there a way to reduce this to almost minimum or totally get rid of it please?

Creality K2 combo with CFS. Using Creality PLA.

Any advice and tips/hints would be appreciated.

Many thanks

well eliminating completely doesn’t really exist (only for prints in vase mode), but you can:

  • calibrate the filament to ensure the flow ratio is the most accurate possible
  • move the seam to a less pronounced location (use paint seam on the slicer) - in that design it would probably best to have it on the side
  • enable fuzzy skin - this will however change the visuals quite a bit (and increase slightly the print times)
1 Like

As h3li0 said, here, it’s more about calibrating the material. Mostly Flow and Pressure Advance ! :slight_smile:

I did read about pressure advance but totally new to 3D printing, so where so i find these settings please

Welcome to the community.

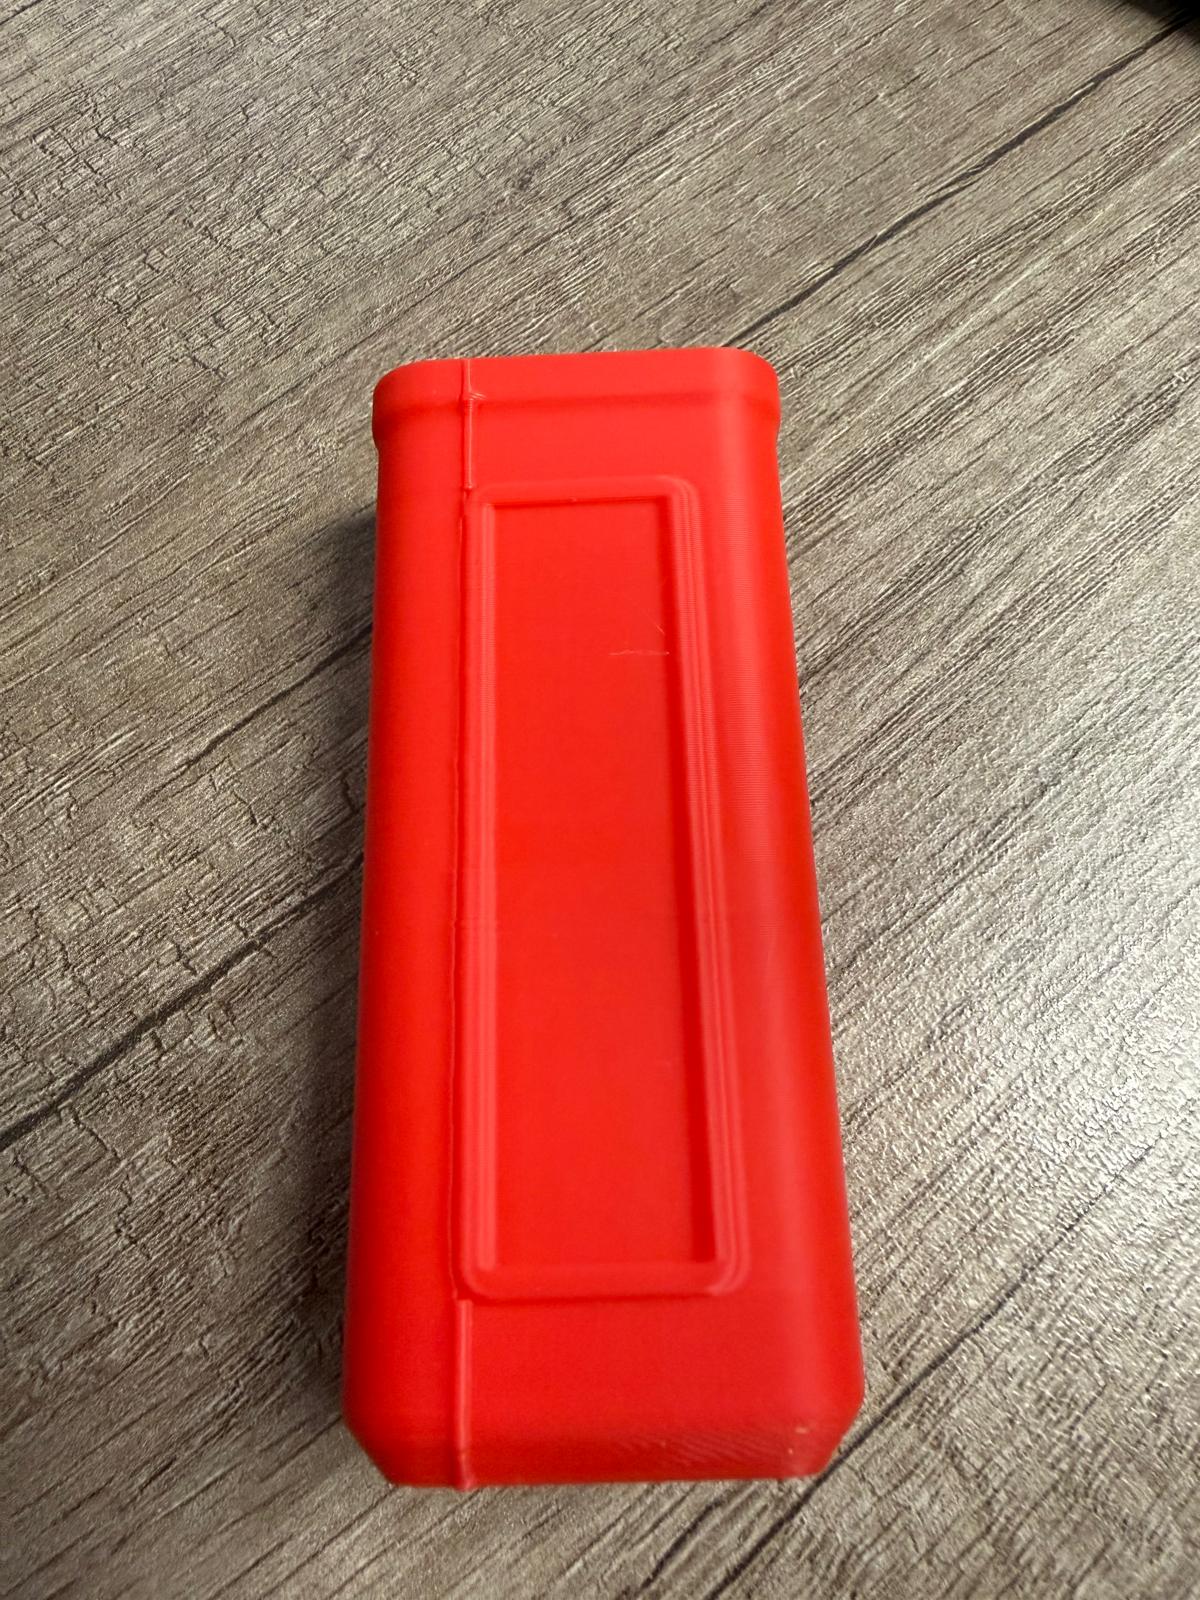
First, a quick reset of expectations: seams are a normal part of FDM printing. What you are seeing as a “bulging seam” is almost always excess plastic at the point where extrusion stops and starts on each layer. The goal is not to eliminate seams, but to make them much less visible.

For someone very new, this is the correct order to tackle the problem. Unfortunately, this is dense material but I don’t know how to condense it any further. It will cover calibration, seam gap and finally scarf joints.


Step 1: Confirm the root cause (no calibration required yet)

Bulging seams are usually caused by one or more of the following:

  • Slight over-extrusion
  • Too much pressure in the nozzle when the layer ends
  • Excessively high nozzle temperature

Before touching advanced settings:

  • Reduce nozzle temperature by 5–10 °C and reprint.
  • Reduce flow rate by a small amount (for example, from 1.00 to 0.97–0.98).
  • Temporarily set seam placement to Random and reprint.

If the bulge becomes less noticeable or more evenly distributed, you have confirmed it is an extrusion/pressure issue, not a model problem.


Step 2: Pressure Advance (most important calibration)

Once you have confirmed extrusion is the issue, pressure advance is the single most effective fix for bulging seams.

You do NOT need a full filament calibration suite for this yet.

After PA is dialed in, most seam bulging problems are reduced dramatically.


Step 3: Flow rate (keep it simple)

After PA:

  • Run a basic flow rate calibration.
  • Do not chase perfection. You are looking for “no obvious overfill,” not lab-grade accuracy.

At this point, many users find their seam issue is already acceptable.


Step 4: Seam placement and seam gap

Now move to cosmetics.

Seam placement

  • If your model has sharp corners, use seam painting and hide the seam on an edge.
  • If your model has rounded or filleted corners, seam painting is less effective and you must rely on seam tuning.

Seam gap

Recommended approach:

  • Print a simple vertical cylinder.
  • Clone it several times.
  • Assign a different seam gap value to each clone.
  • Label each model so you know which value you tested.

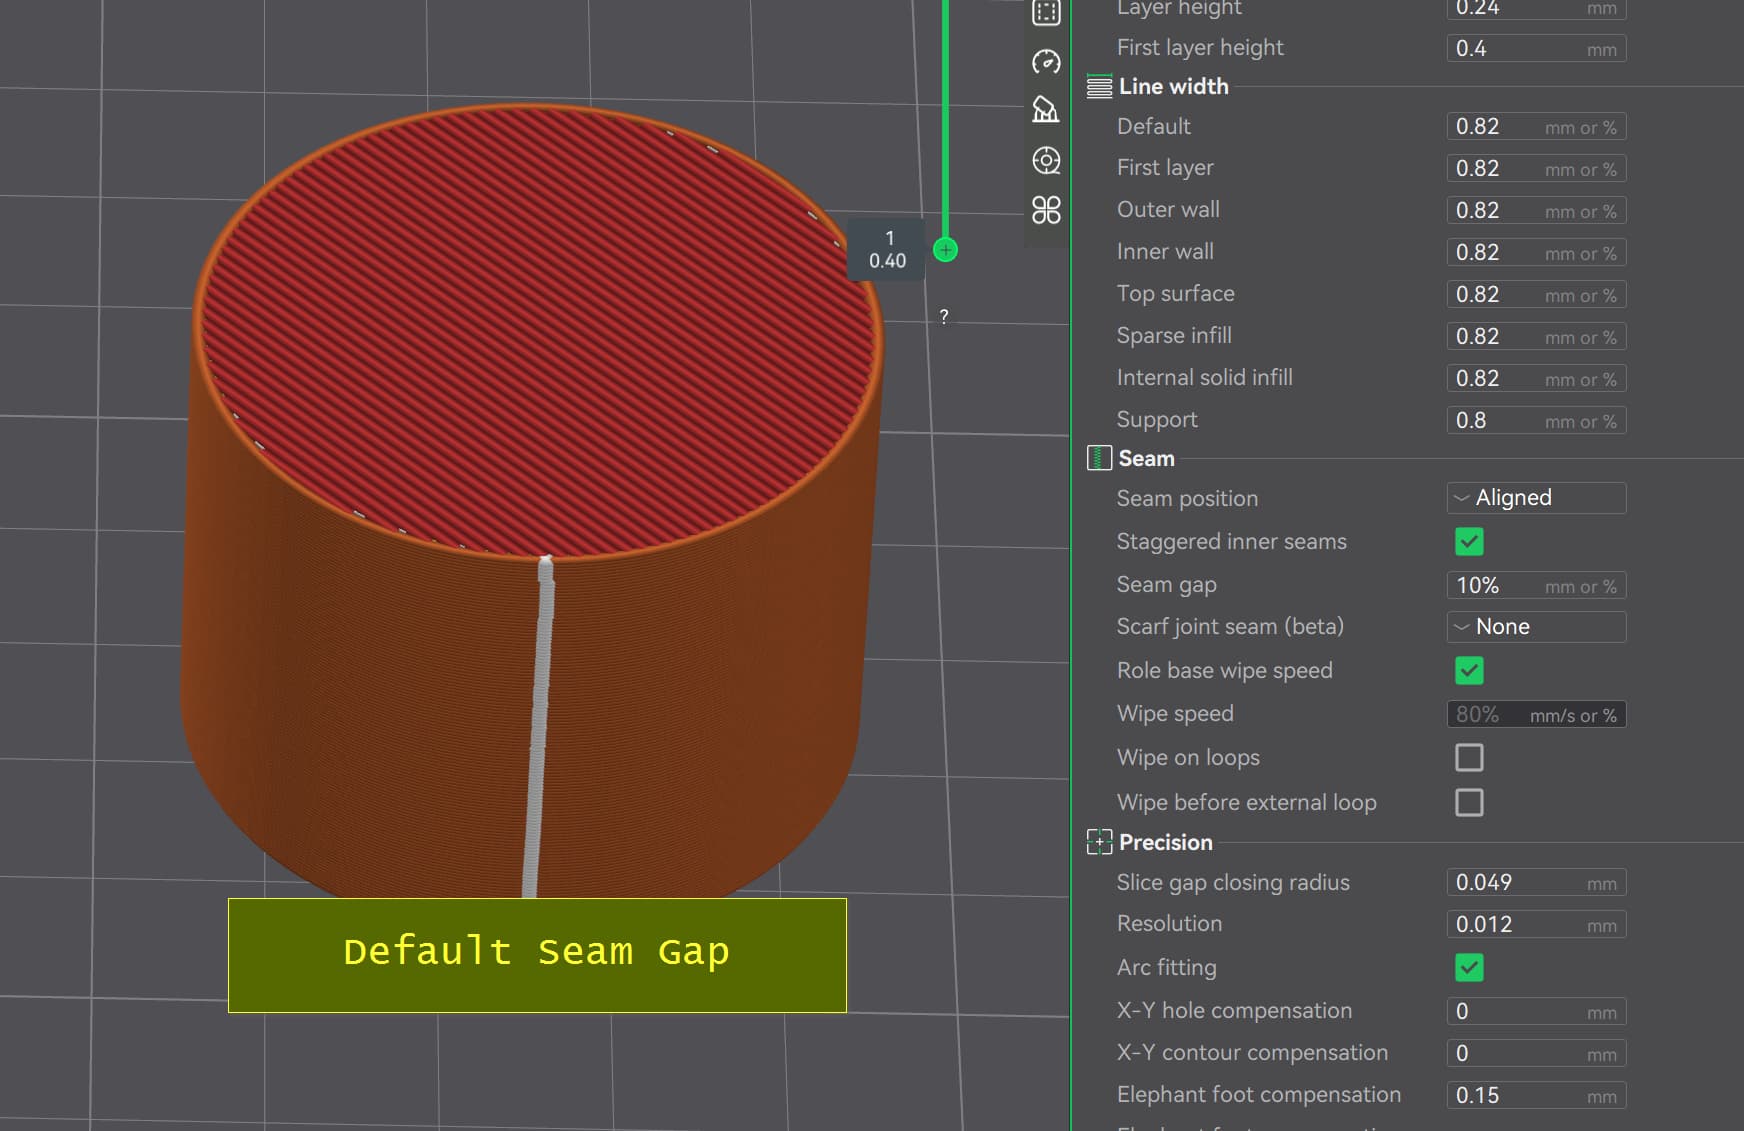
Pick the smallest gap that does not cause under-extrusion or visible holes.


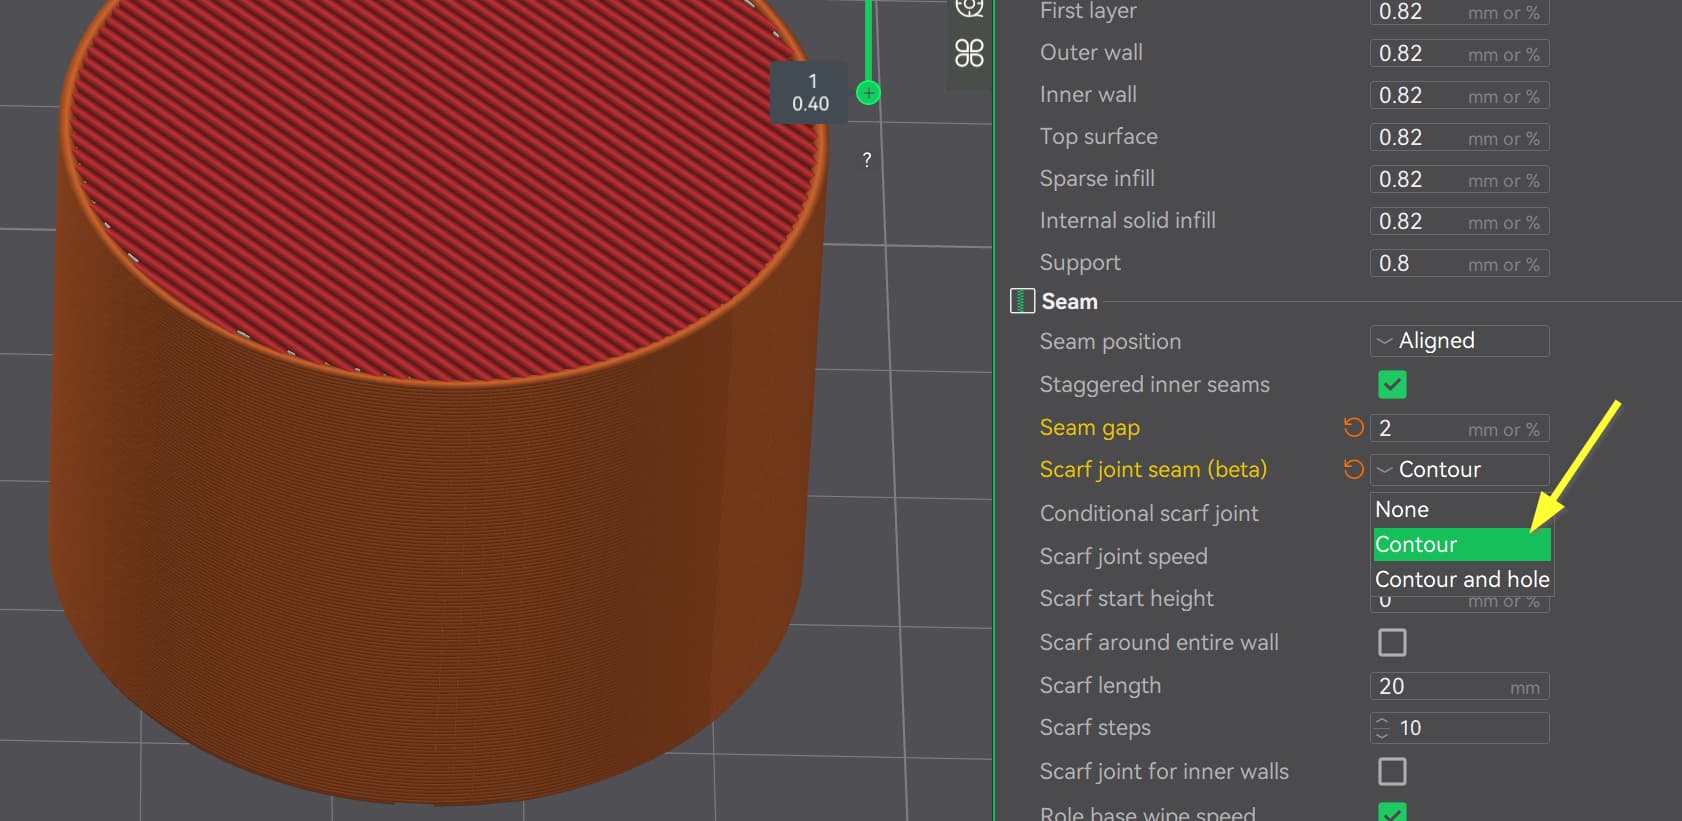
Advanced (optional): Scarf joints

Only attempt this after the steps above are working.

Scarf joints blend the start and end of extrusion over a short distance instead of stopping abruptly. This feature came from Prusa Slicer and was added to Orca in v2.0. It is still considered BETA.

Notes:

  • Works best with 3+ wall loops.
  • Often needs a longer scarf overlap than the default.
  • Most effective on curved surfaces.
  • Not a substitute for pressure advance or flow calibration.

If your seams are still visible after proper calibration, scarf joints can improve appearance further.

Reference:


Summary for beginners

  1. Lower temperature and flow slightly.
  2. Calibrate pressure advance.
  3. Tune flow rate just enough to avoid overfill.
  4. Adjust seam placement and seam gap.
  5. Use scarf joints only after everything else is stable.

If you follow this order, you will avoid chasing settings that mask the real problem and get clean seams much faster.

3 Likes

@JoeFriday just posted a very complete response, it covers everything you need to know :slight_smile:

2 Likes

On the slicer software there are a few of calibration tools. You can try to print those calibration models out and figure out the optimize setting you that specific roll of filament.

There are lot of good resources on YouTube as well. Google is your best friends. Don’t get me wrong we are here to help too.

When you knowing the theory / how is that works. It will help you in the future to troubleshoot the printing issues.

Hope that helps. Happy printing :+1:

1 Like

Thanks for this reply - most helpful. I will work through this and these tips and see where we get to :grinning_face: :folded_hands:

Thankyou for the reply, much appreciated.

Very informative with details. Thanks so much for the advice :+1:

1 Like

Many thanks for that. I did as you posted and all seems a lot better now. Thanks for your time to post that useful guide to calibration and settings

1 Like