I am trying to print with transparent petg. I am using Creality’s filament. I am looking for the best settings to get as glass like a look a possible. I have tried researching and most of the results and videos that I find are for other slicers and I cannot seem to finds similar settings inside of Creality Print and some of my initial prints are nowhere near what I am looking for or it seems like it just wants to print the outside frame of a test square I am printing. So if someone has successfully printed transparent and achieved an almost glass like look then can you please send every setting that you have modified so IU can try and duplicate. It would be much appreciated.
… forget it, it will never look like glass… there are many YouTube movies about this, take a look!
2 Likes
I have this notes from the last time I got transparent finishing
To print super clear parts:
- Change all layers to print in one direction.
- Increase temperature.
- Remove cooling.
- Slow down and increase extrusion multiplier.
Basically what you want to achieve is that the gaps between lines are filled in and that the layer below is still warm so the new layer can bond without gaps.
An additional step could be ironing the top or sanding it.
1 Like
Oh really? Can’t be done you say?
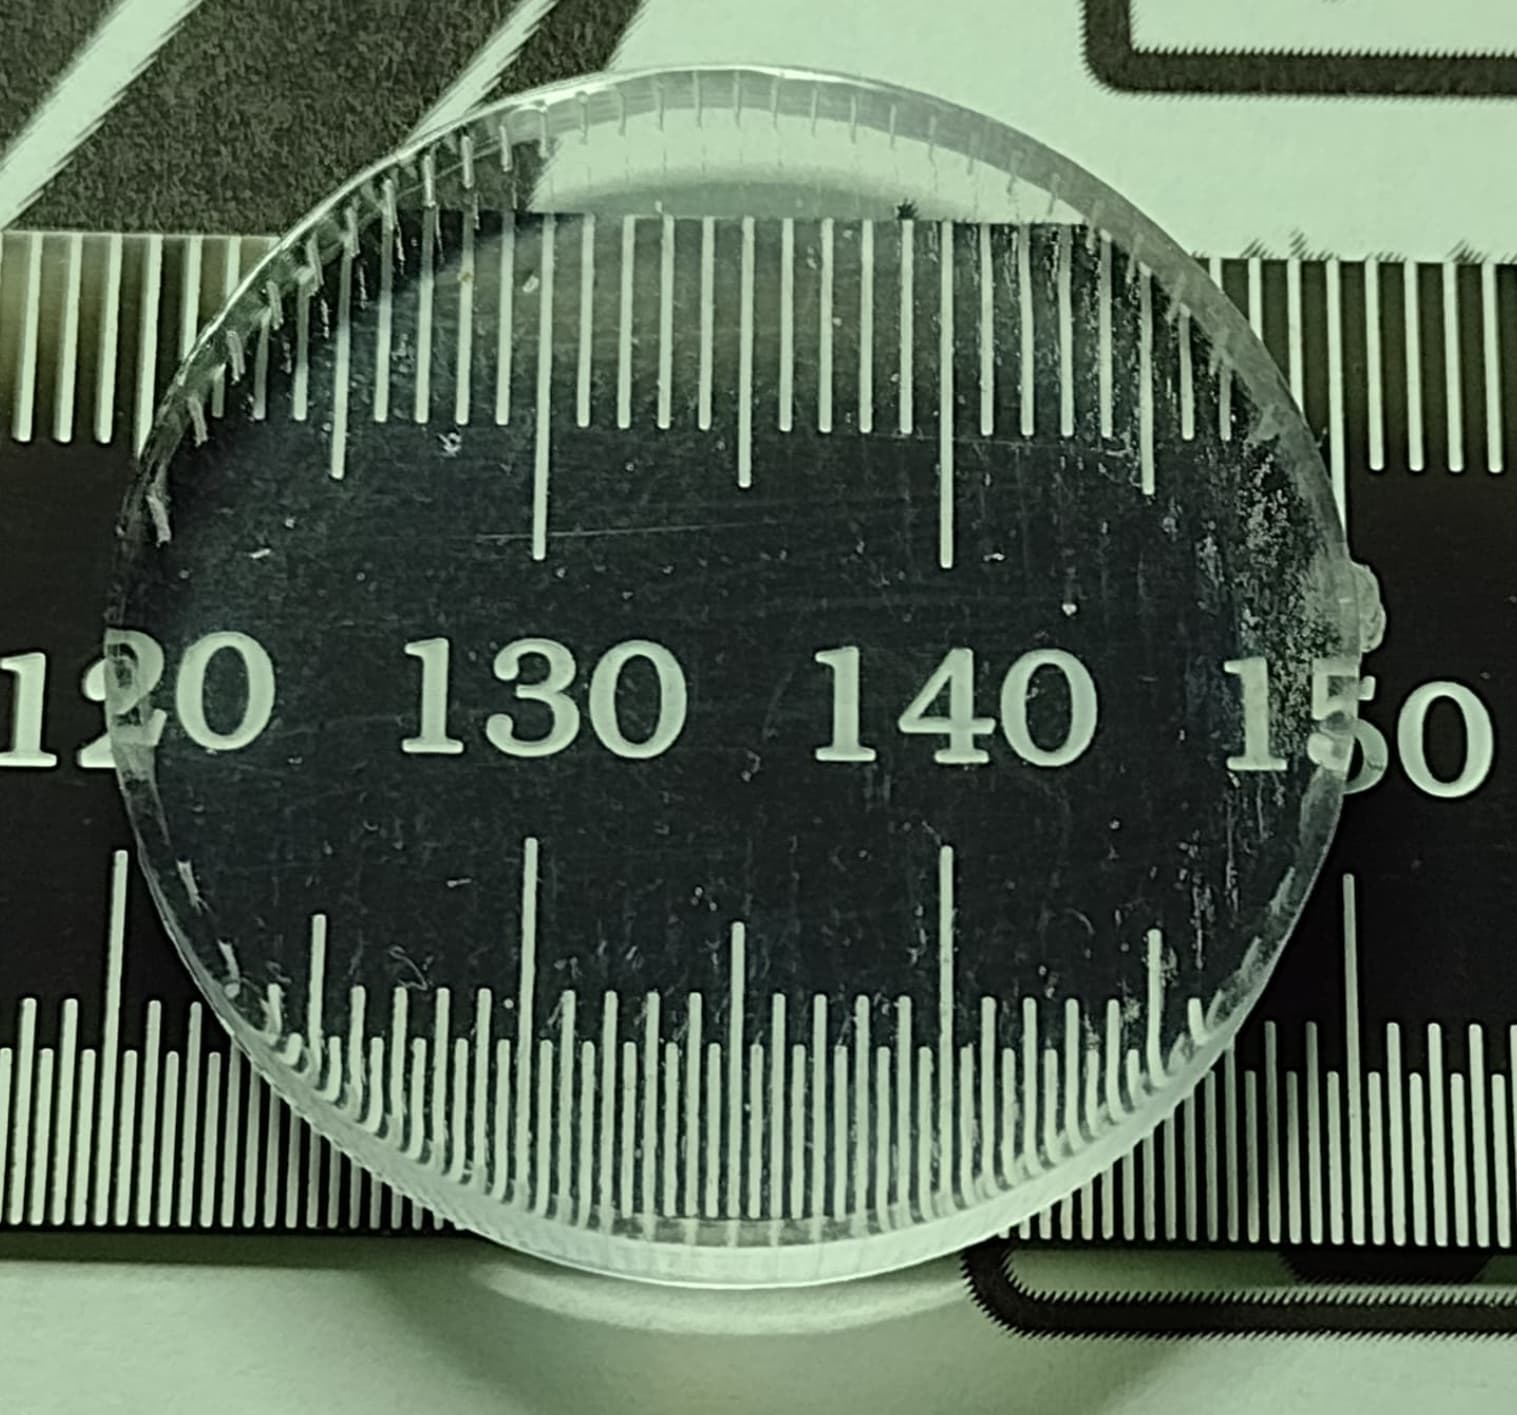
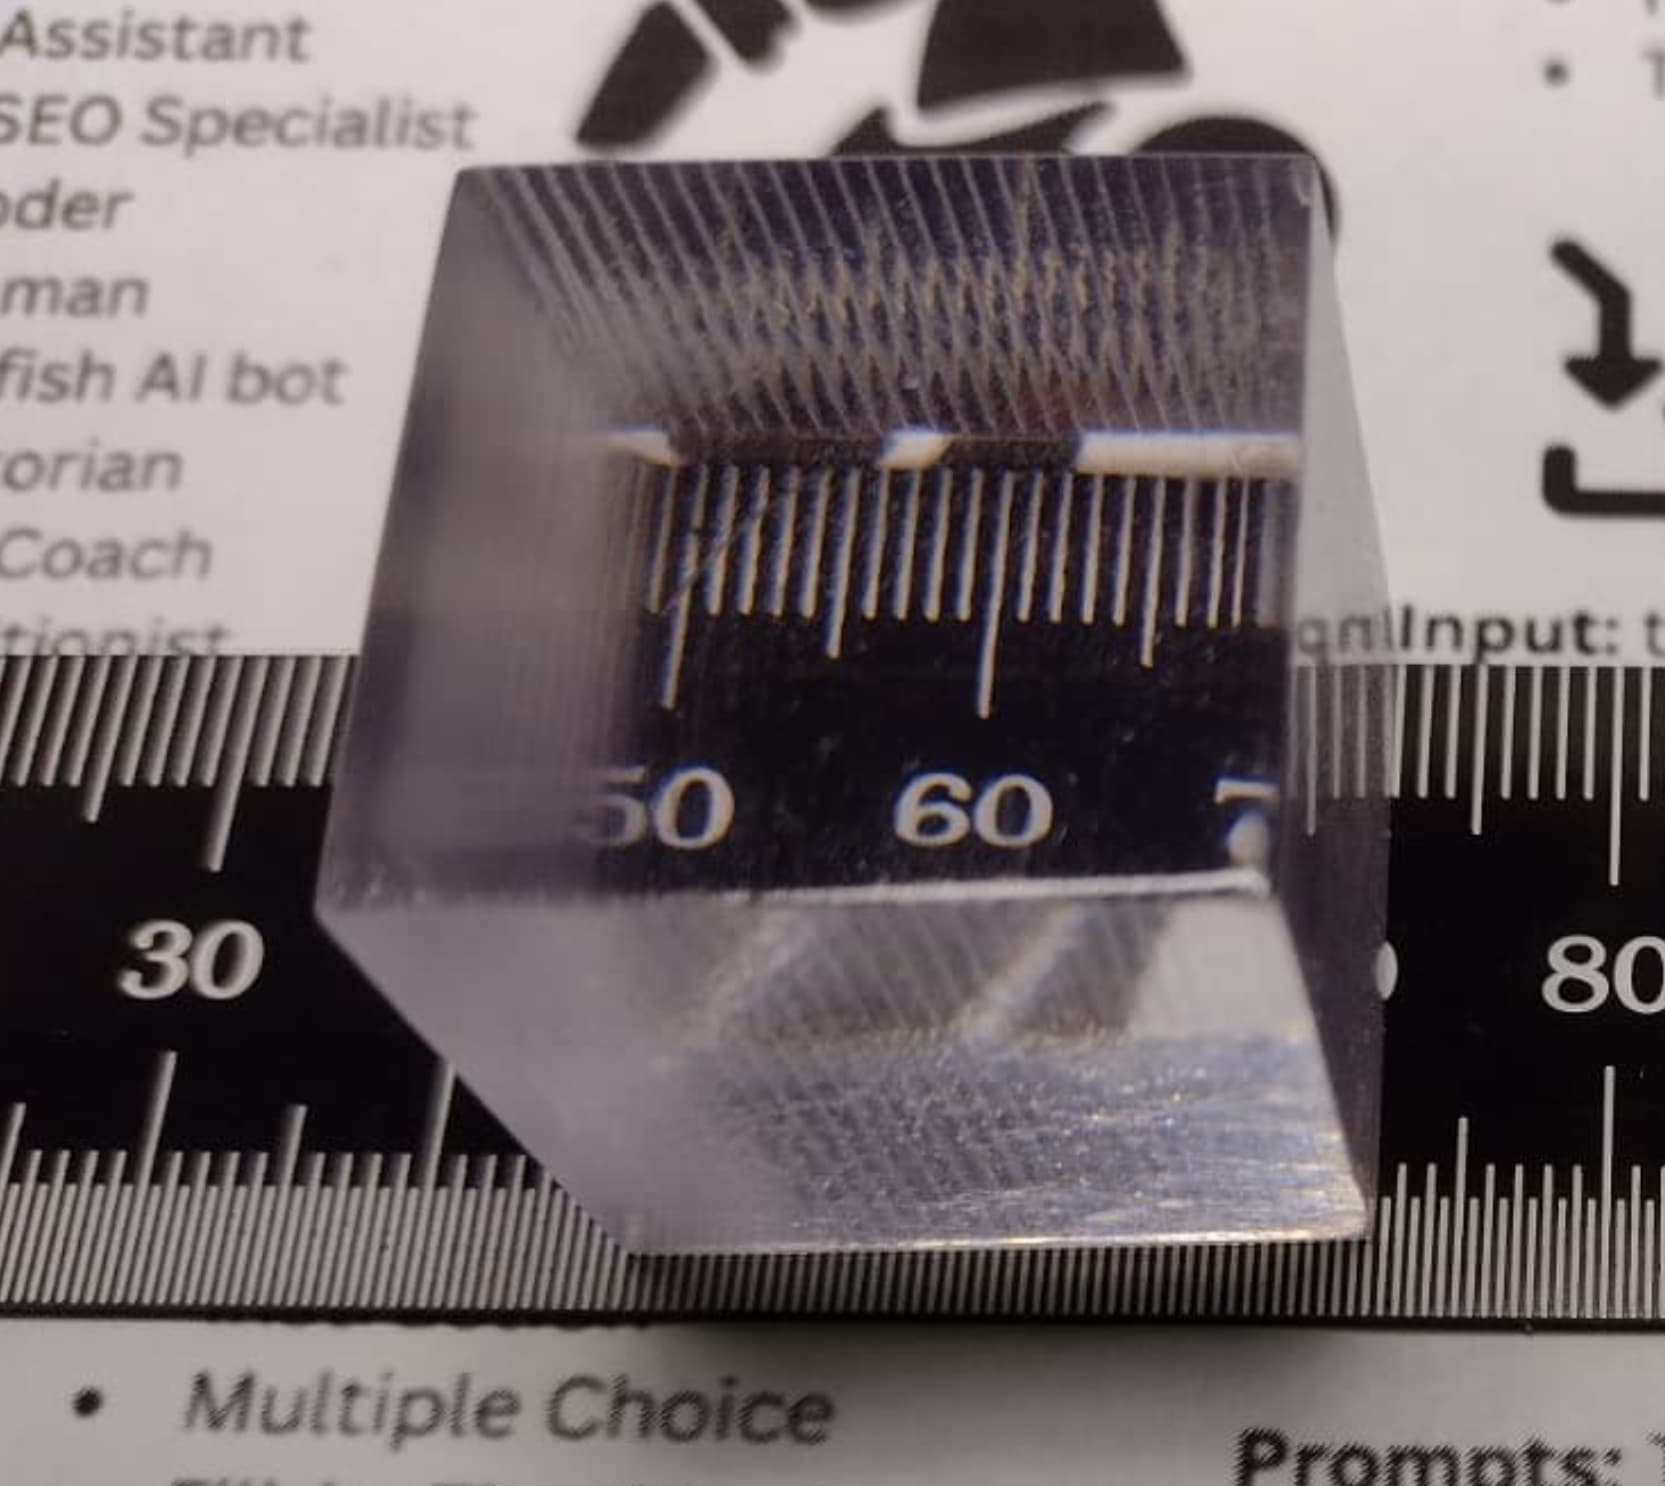
A lot of it relies on filament, shape and post processing.
If you give me a model I can tell you whether it is likely to be adapted to optically clear printing. There will be some post-processing invovled.
2 Likes
wow, could you please teach us?.
thanks a lot.
1 Like
I have no problem sharing, but the full version would go on for pages, so let me just hit the highlights.
I’ll admit this dense material and it is a long read but this topic is not simple and took me weeks and two dozen spools to fine-tune the recipe. Also, reproducing this reliably was not easy, it taught me to respect filament drying!!!
Everything below is based on what I tested many times on my Bambu P1P. I have not yet repeated it on my K2 Plus, but I may give it a try since I have not done this experiment in almost 3 years. Hopefully I can still get the one filament that made it possible.
NOTE: I originally went down this rabbit hole to see whether I could print my own Fresnel lenses and light pipes with FDM. My conclusion was that it was a fun science experiment, but not especially practical. To really make it useful, I would probably need a non-planar printer, and those are still mostly in the research stage. Still, it does show what is possible.
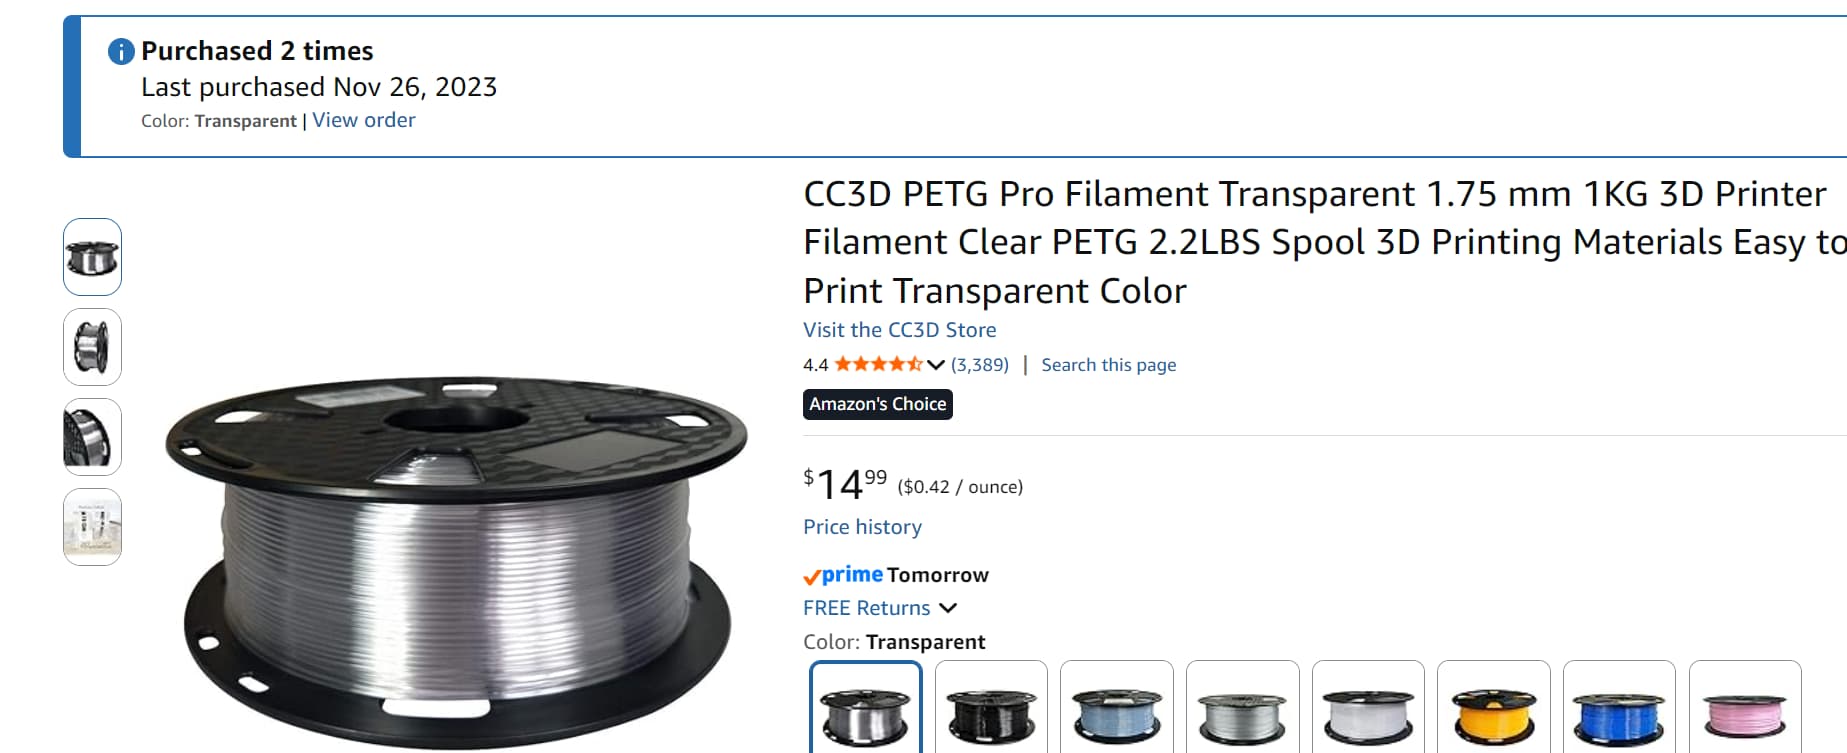
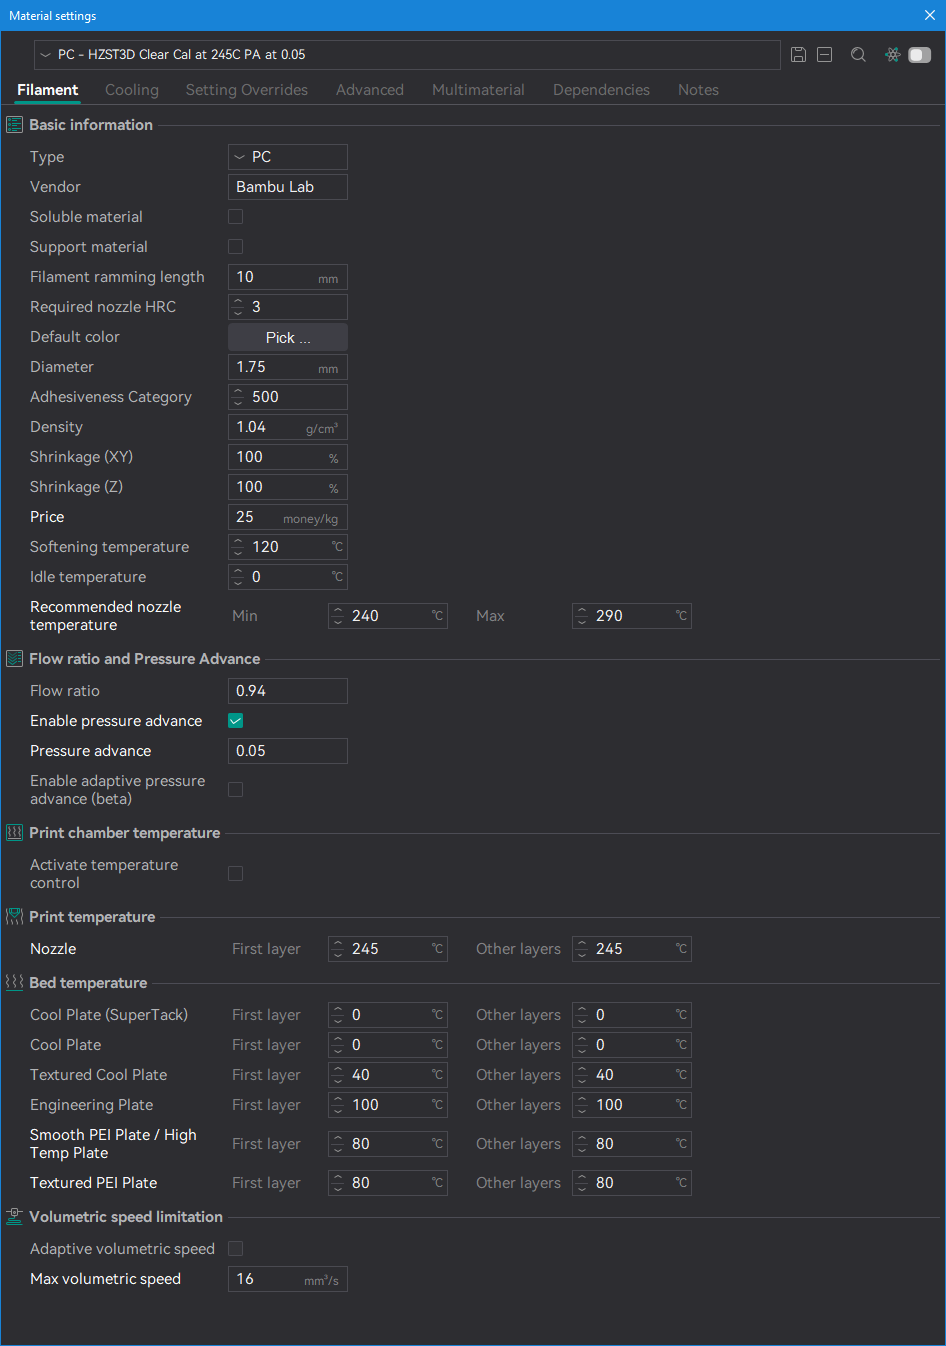
- It took a lot of trial and error with so-called “transparent filament.” Out of six different PLA and PETG options I tested, only one really delivered, and I mean only one. It is sold under two brand names, CC3D and HZST3D:
Amazon.com: CC3D PETG Pro Filament Transparent 1.75 mm 1KG 3D Printer Filament Clear PETG 2.2LBS Spool 3D Printing Materials Easy to Print Transparent Color : Industrial & Scientific
DRY YOUR ALREADY DRY FILAMENT!!!
I’m not kidding here, I went through two spools before I realized they were indeed still wet out of the dryer, I put them back in the dryer for 48 hours and the difference was night and day. Or as in this case, cloudy vs clear!
-
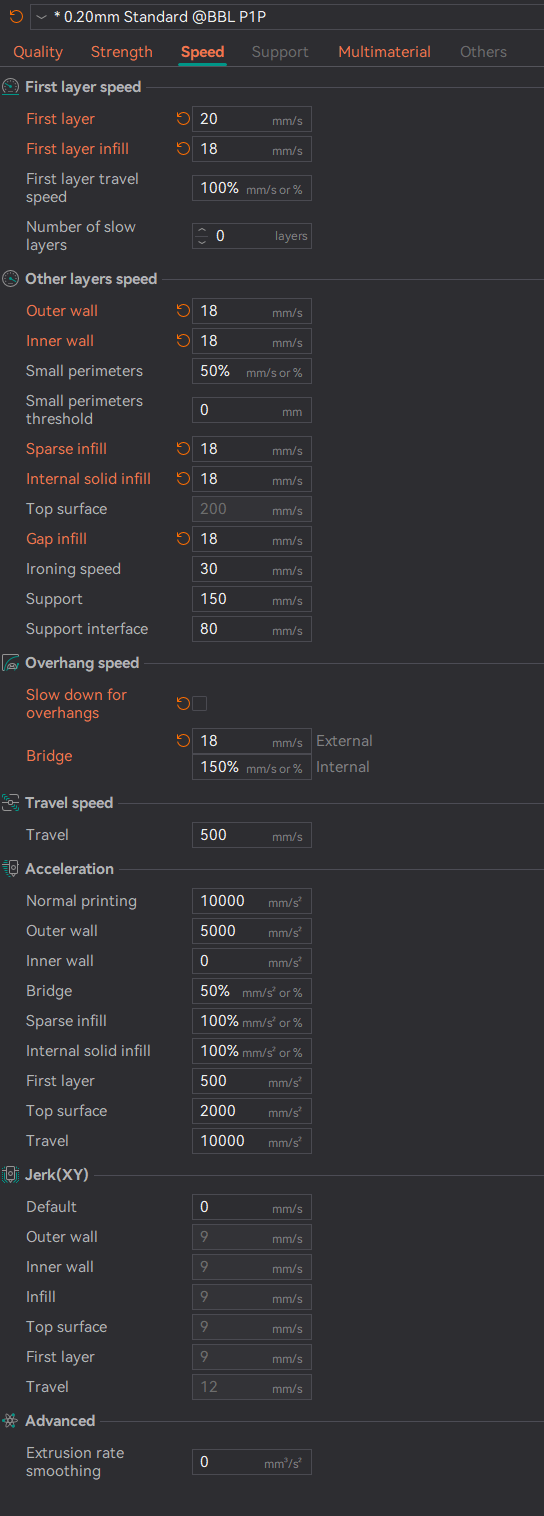
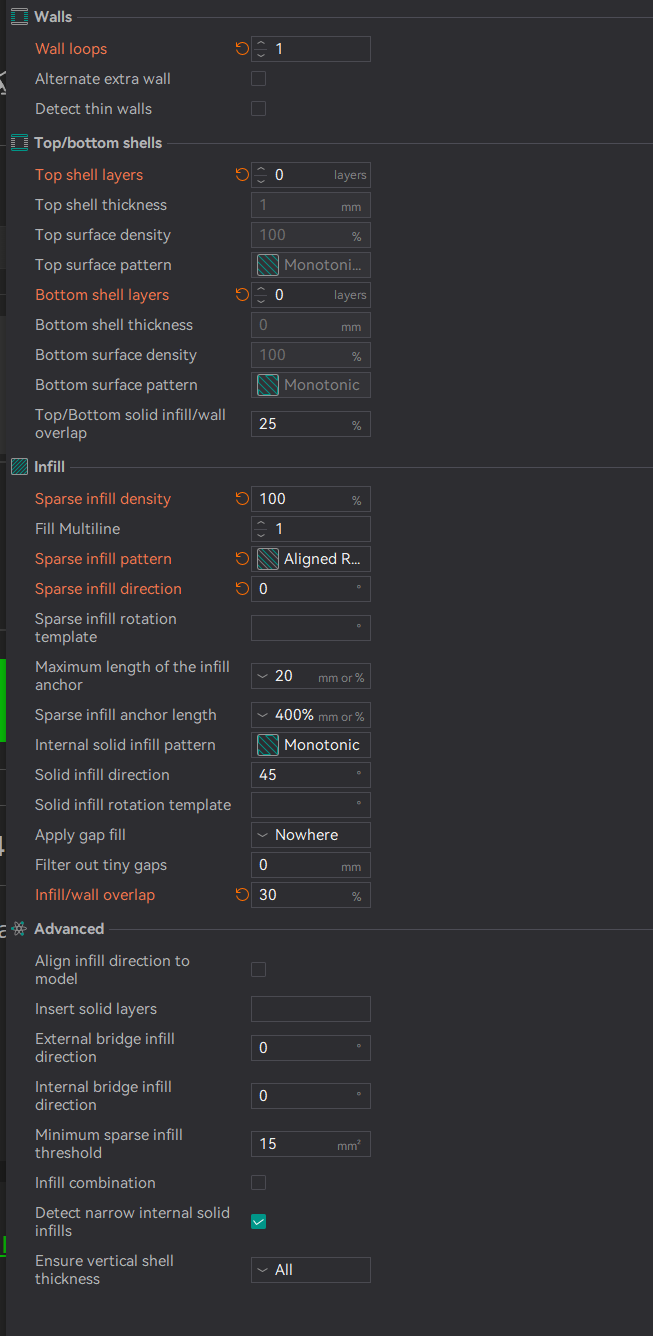
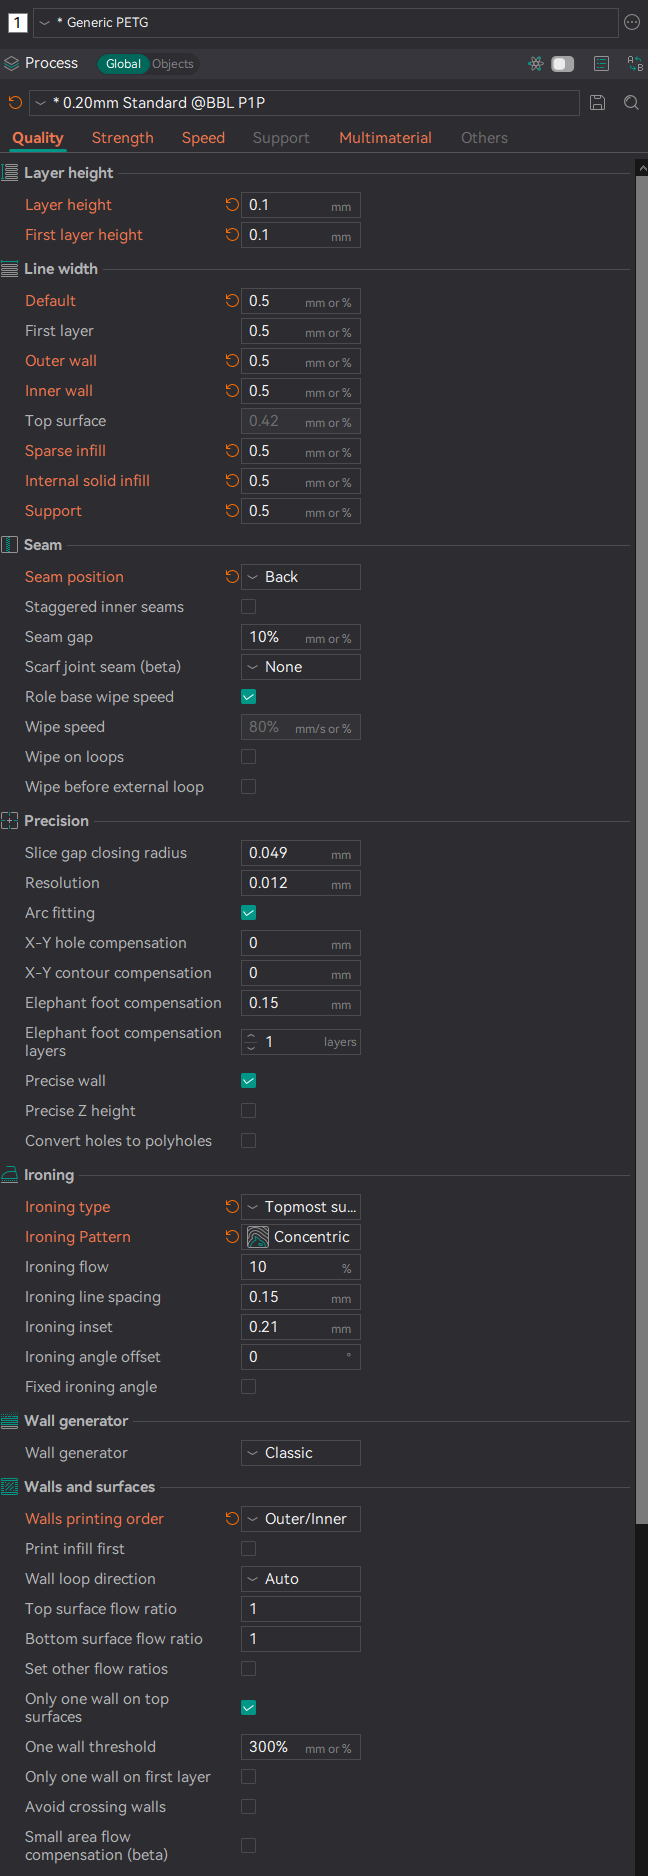
Good filament alone is not enough. You also have to slow the print speed way down(10% of actual full speed). Search MakerWorld for “How to Print ICE” and start with that 3MF profile. I will not direct-link it here out of courtesy to the forum admins since that is a competitor site, but I can at least show the image of the profile you should start with.
-
From there, I had to slow it down even more. The big trick is that all nozzle strokes need to run in the same direction on each layer, including the top and bottom surfaces. That seems to reduce internal turbulence, bubbles, and haze.
-
Print outer wall first and only one wall layer.
-
This is much easier on a smooth build surface. Creality does not make one. For my K2 Plus, I bought a Garolite G10 build plate, which is about as smooth as you can get short of a PEO or glass plate, and those are getting harder to find. For my Bambu P1, I use a smooth engineering plate.


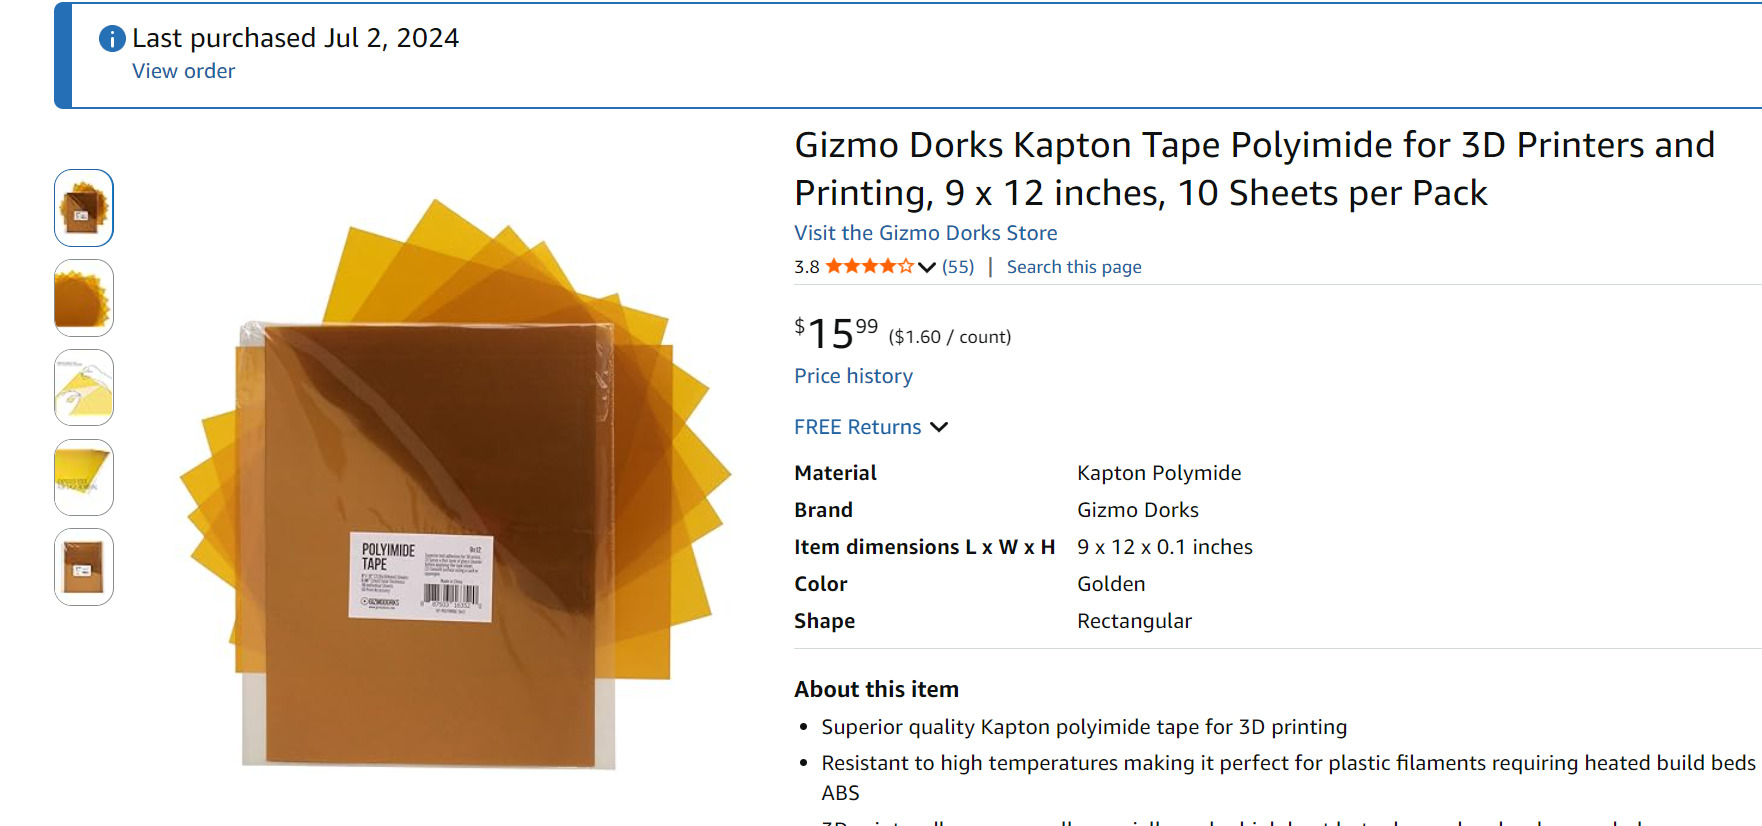
- A smooth plate with Kapton tape on top can also give you a glass-like finish where the print contacts the bed. Gizmo Dorks makes a good 9x12" sheet for this, but any decent Kapton tape should work. Just take your time smoothing out the bubbles when applyin the tape.
- I apply it using the wet method, similar to putting tint film on a car window.
- Amazon.com: Gizmo Dorks Kapton Tape Polyimide for 3D Printers and Printing, 9 x 12 inches, 10 Sheets per Pack : Industrial & Scientific
-
Speed is your enemy, it introduces turbulence and has to come down dramatically. See my settings below. I have never been able to print faster without ending up with a foggy interior. Maybe a high-flow nozzle would improve that, but I have not tested it. When I say SLOW, set your expectation for a 1 hour print to take 12 hours.
-
Forget about getting an optically smooth surface straight off the printer. I got my best results by post-processing with wet sanding followed by a final clear coat. Once you achieve good internal clarity by laying down smooth, consistent filament paths, sanding and clear coat are what give the part its final transparency.
For sanding, I started at 240 grit and worked up to 600. I also tried polish and jeweler’s rouge with mixed results. Clear coat was faster and gave me better results. Your mileage may vary, so it is worth trying both.
Theory of how it works
My suspicion is that most filaments marketed as transparent, whether PLA or PETG, are blended with additives that make them cloudy. So finding the right filament is step one.
You also cannot expect an FDM print to come off the build plate optically clear. Physics is not going to let that happen. The layer structure alone creates enough surface variation to produce visible ribbing along the edges.
Here is an unfinished project that shows what the part looked like directly off the build plate before post-processing:
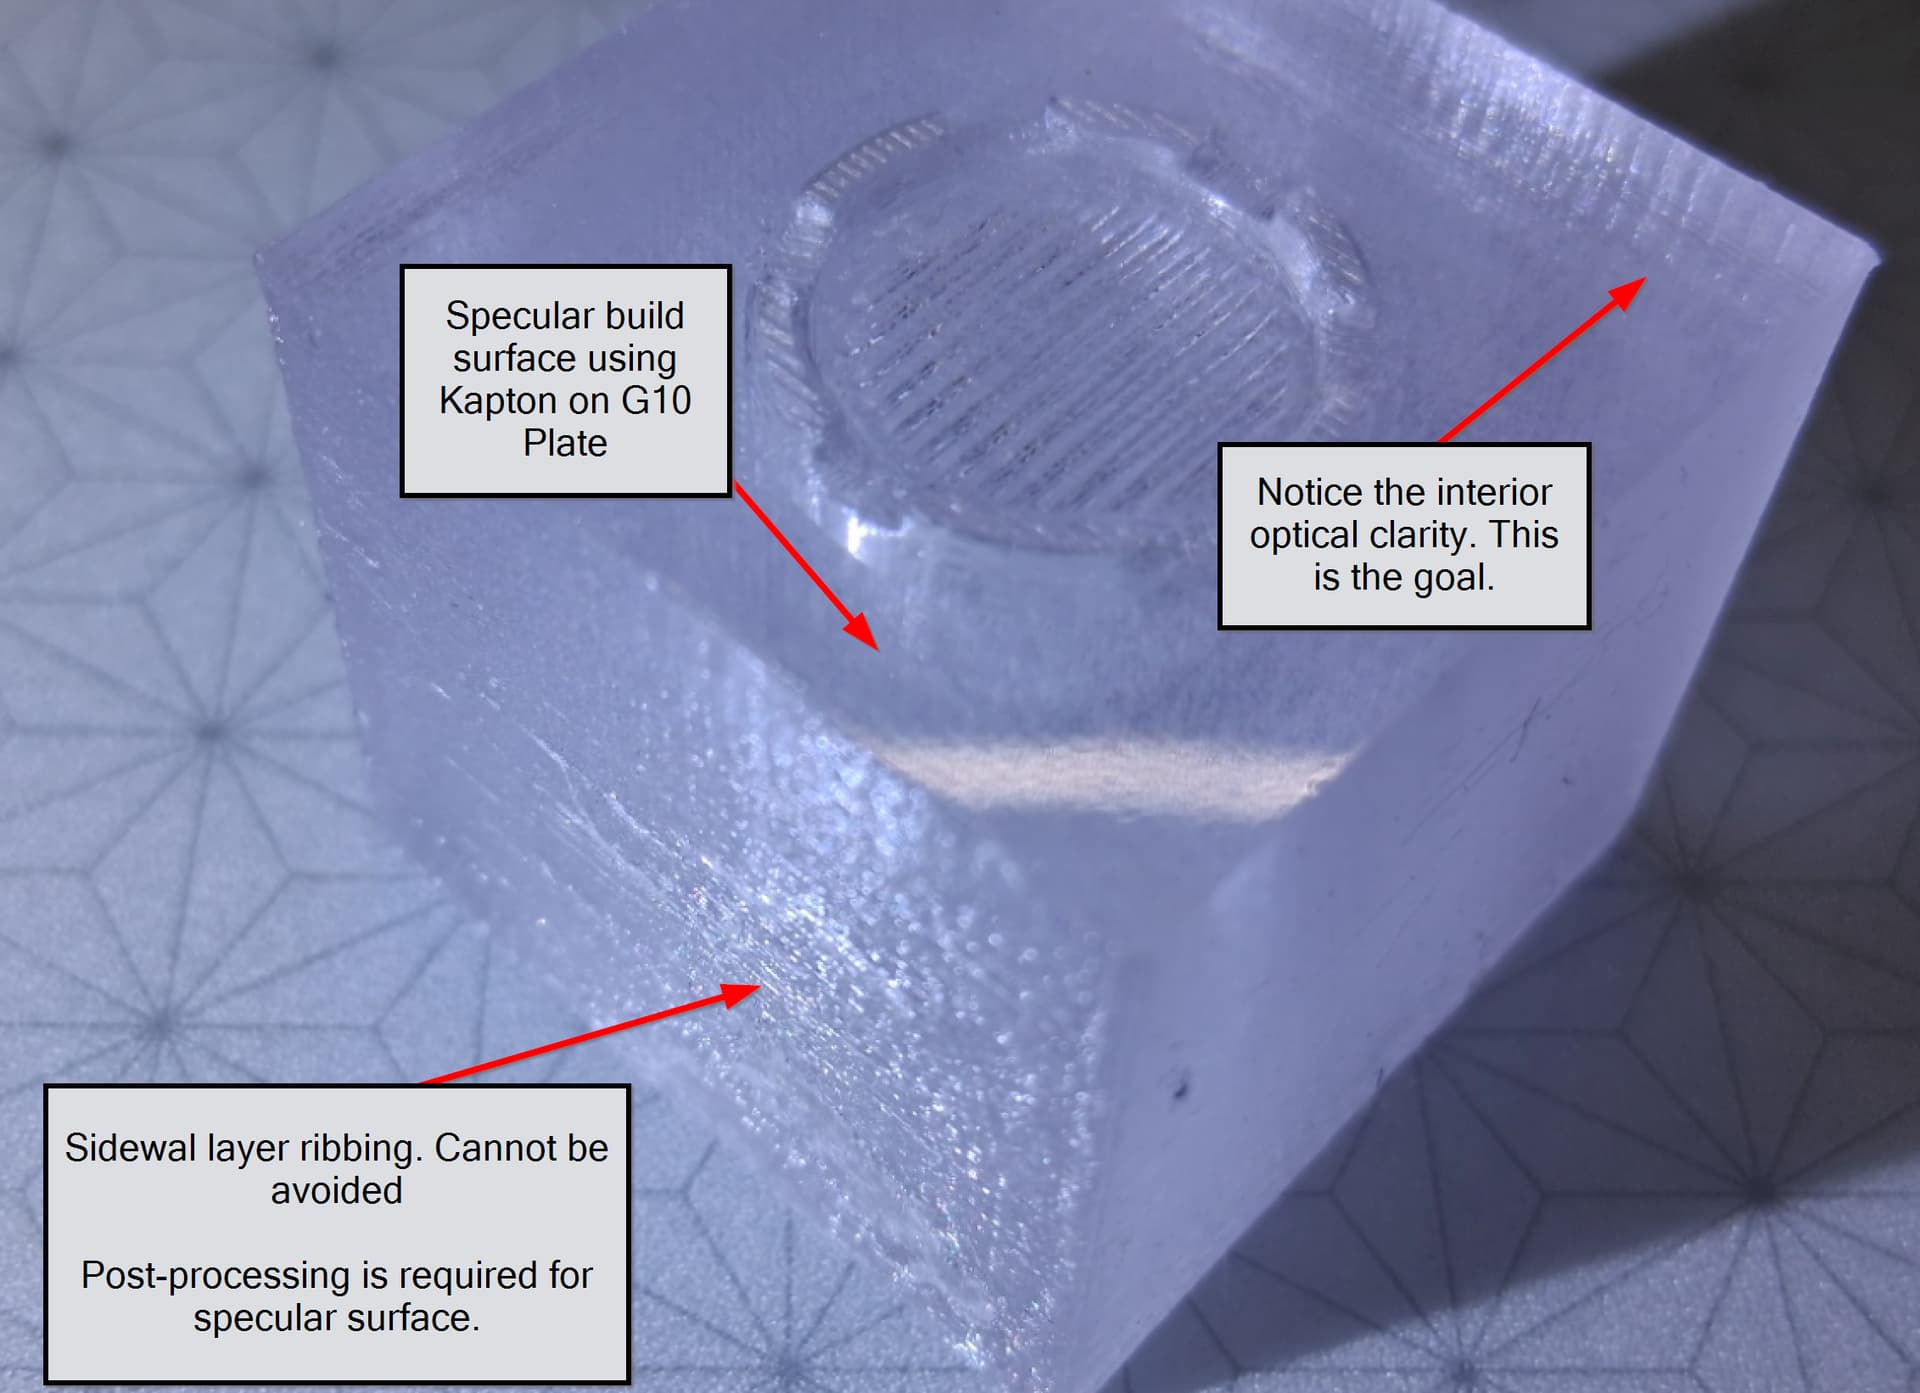
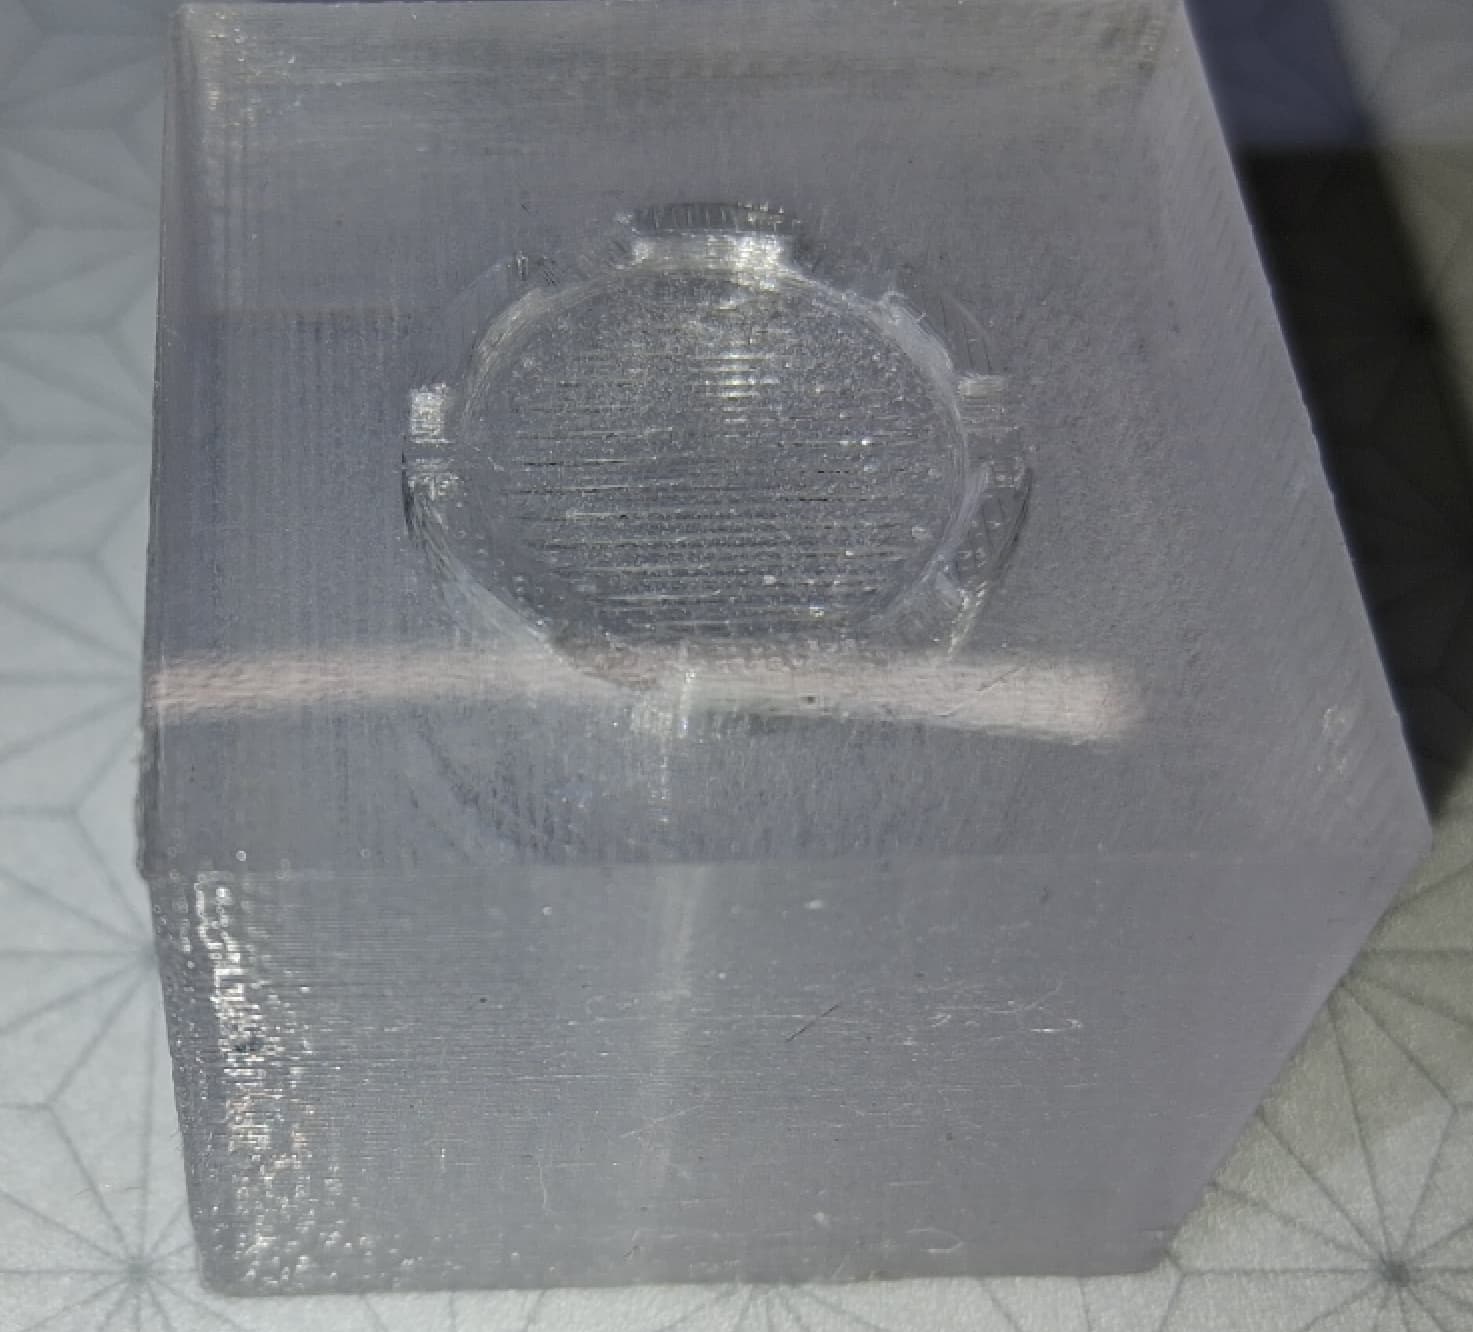
Once you get the interior as clear as possible, then post-processing can do the rest.
I do not own a sandblaster, but I have always wanted to experiment with one using different grits on irregular shapes. One fun side quest was trying to print a crystal chess piece. I used a rook for that experiment and, well… let’s just say those photos did not make the cut.
Prop makers cheat!!!
We all have our secrets. Now you know mine. 
I tried everything, including nail polish, and nothing beat this product for optical clarity, while there is no substitute for a properly sanded surface, this product covers up for a multitude of sin:
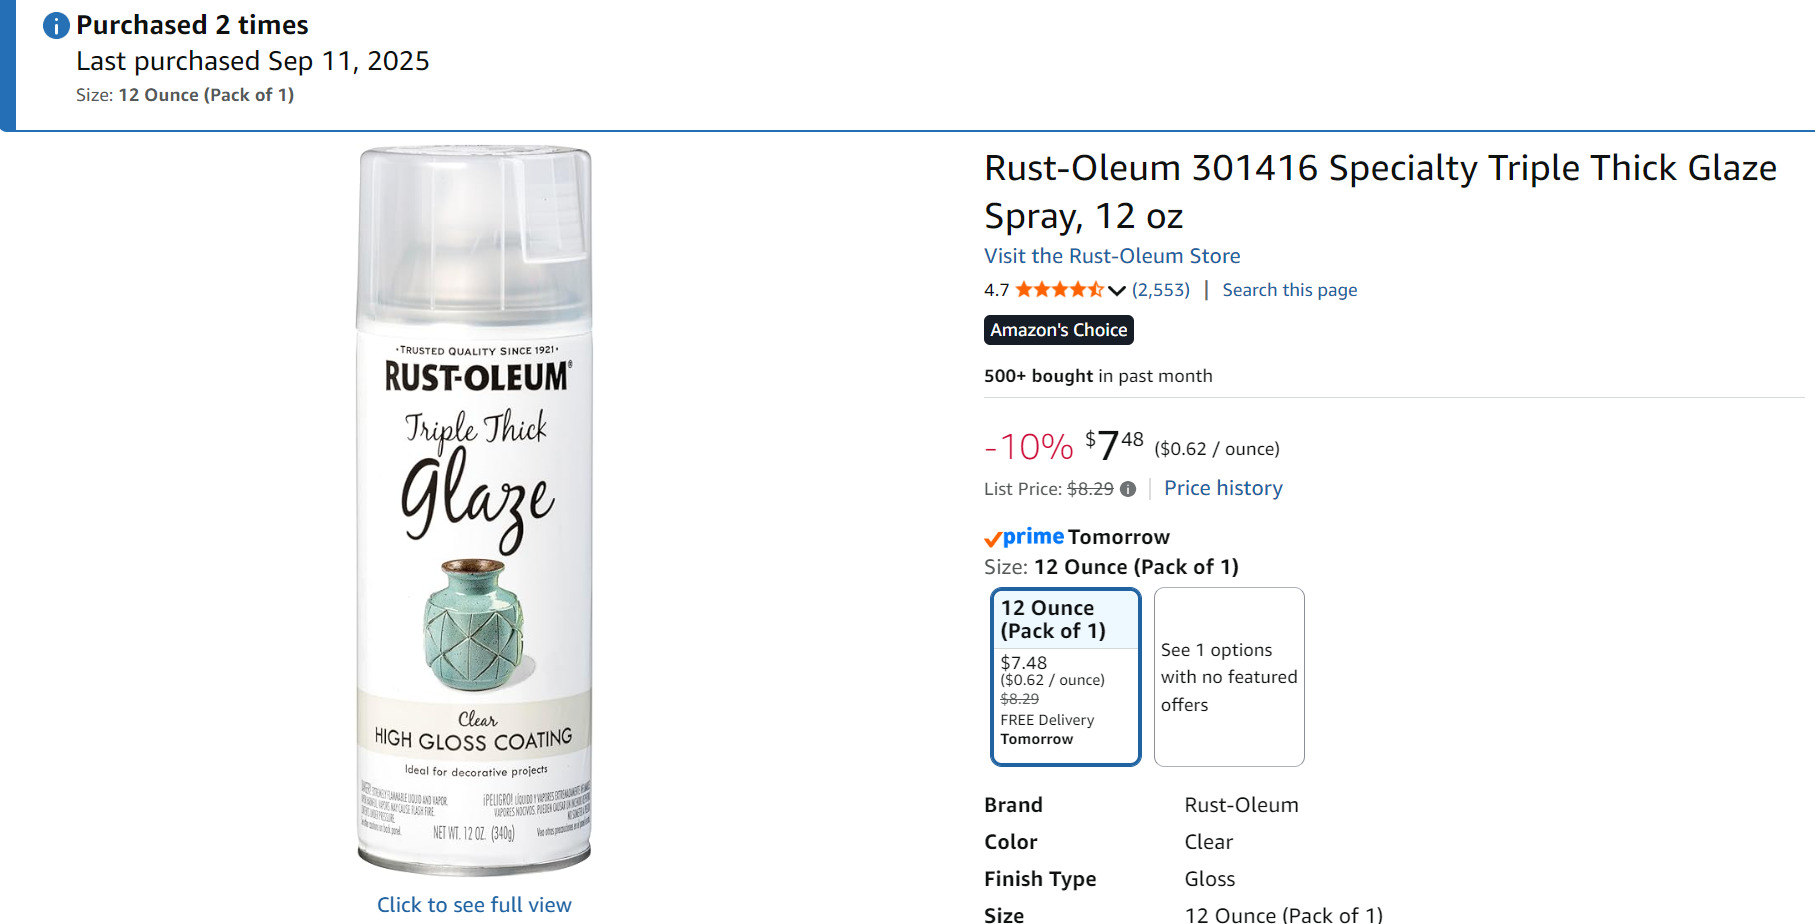
The trick is to apply one coat and then let it cure for a full week. I do not mean dry to the touch. I mean let it fully harden into a crystal-clear shell, which for me took about 7-10 days.
You can apply a second coat after that if you want, but in my testing it did not improve the result. If anything, it made the finish worse by adding mottling.
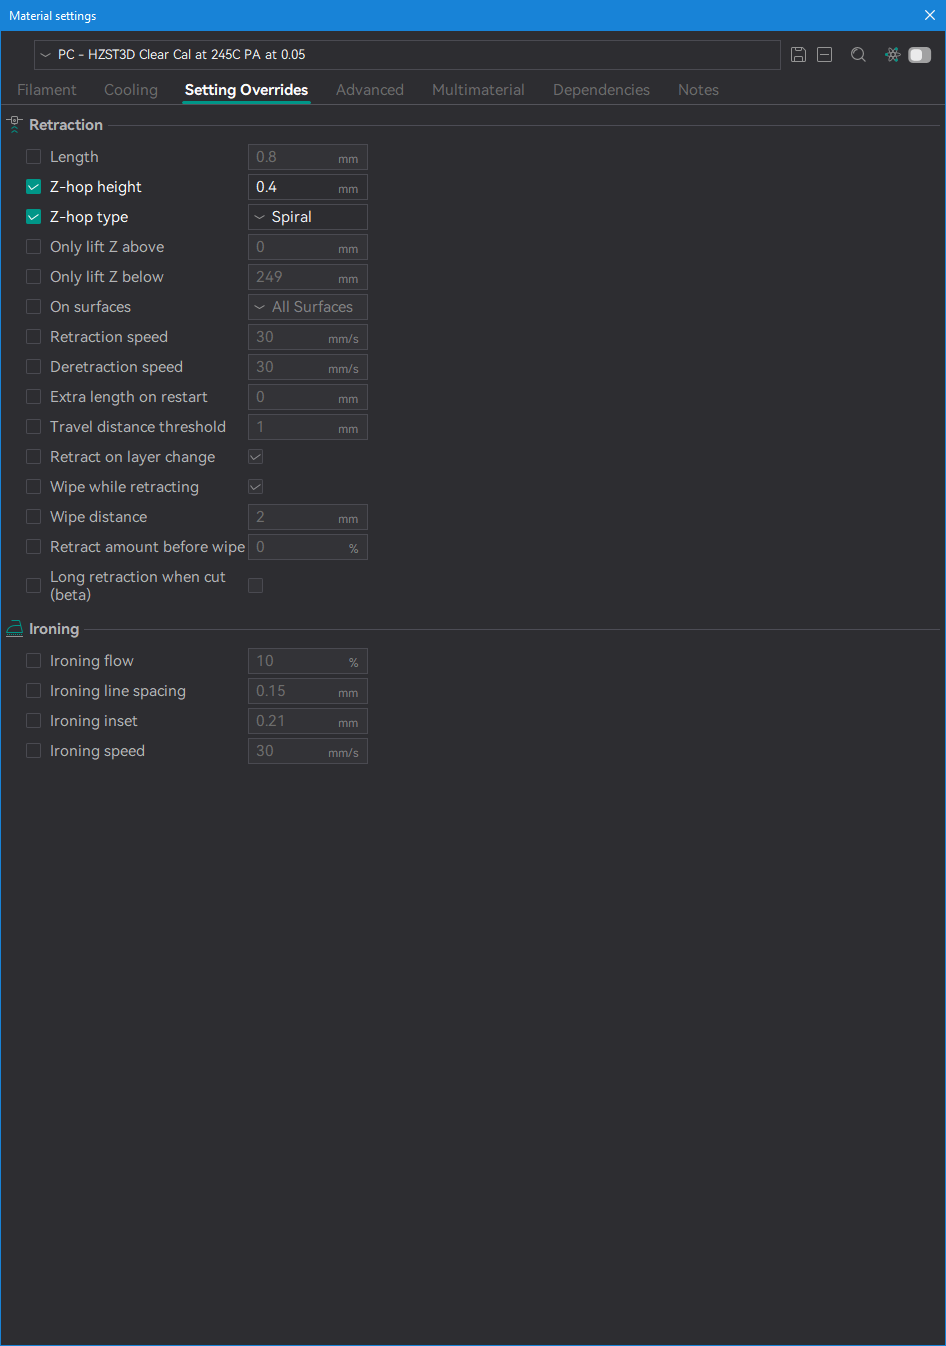
These settings have NOT been tested on a Creality printer. Use at your own risk.
This is a gallery. Click through for full-screen views of each image.

4 Likes
Impressive