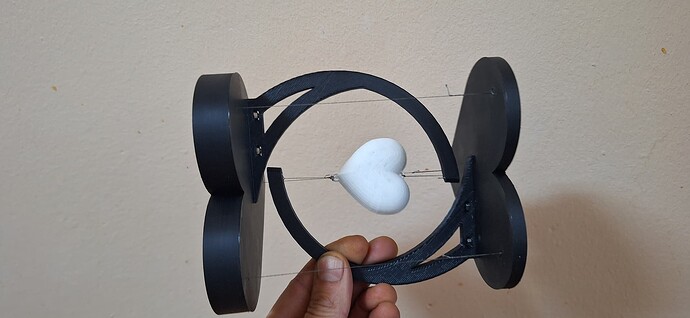
Perfect for Valentine’s Day, these digital blueprints empower you to construct a mesmerizing floating heart sculpture.
Embrace the challenge of assembly.
Each step brings you closer to a unique symbol of love.
Elevate your craftsmanship and surprise your special someone with a handmade marvel.
A touch of complexity for a truly extraordinary Valentine’s Day gift.
Printed in black and white, its all i had at hand. Printed with 4 walls, 40% infill, default creality print fast profile for my k1max.
I printed all the parts on my k1max, but the white heart it was printed on my ender3v2 with 0.12 layer height.
Total printing time arround 4 hours
Sliced with Creality Print for k1max and Cura for my ender.
Instructions:
It needs average skills to be able to assembly this.
The complete bom is:
All printed parts, parts with x2 or x4, it means you have to print 2 or 4 of those parts.
4 M3x10 allen screws
4 M3 nuts
4 M4x30 allen screw
4 M4 nuts
Wire, fishing line, etc
Assembly:
- Insert the m3 nuts in the 2 spaces of the bracket, then screw 2 m3 from base to the bracket. Do this with another bracket and with the top. You should have 2 parts now, base and one bracket, top and other bracket.
2 Tie the lover ring from the white heart(is made by 2 parts glued together) to the tip of the upper bracket(which comes assembled under the white heart). The distance between theese should be no more than 20-25mm. Ideal should be 20mm but is pretty hard to do all the knots, especially if you have big hands.
3 Tie the upper ring of the heart and pass it trough the tip hole of the lower bracket(base bracket), continue to pass the wire on the back channel of the bracket untill it reach under the base. All theese wires should be longer than needed to be easier for you to do all the knots, it will be cuted after the knots are made. Tie under the base a m4nut holder checking to have those 20-25mm from heart to the bracket. The nut it should be tied to be as close as possible at the beggining of the m4 screw so that you can have room for adjusting by turning the m4 screw.
4 Cut 3 wires and tie a loop on one end of each wire, then pass each wire trough each of the 3 holes on top. It is easier to use the wire with loop and pass it trough the loop, like this you have knotted all 3 holes from the top.
5 Pass each of the 3 wires trouch the base holes, make sure you have the heart top shape oriented as the heart base shape.
6 Tie one by one all the remaining 3 wires to the m4 nutholders, double check before and after each nut is tied.
7 adjust the tension by screwing the m4 under the base. Screwing increases tension, unscrewing releases tension.
All this assembly is pretty tricky but after you have done it once, it should be pretty easy for the next time.
It can sustain a wheight like a few hundred grams, i sustained even half kilo, it depends how strong are the printed parts and how strong the wire is.
I hope you like it. Enjoy
Link:
Creality Cloud -Levitating Tensegrity Heart From RCalin Home Decorations & Ornaments STL Download - Levitating Tensegrity Heartby RCalin
