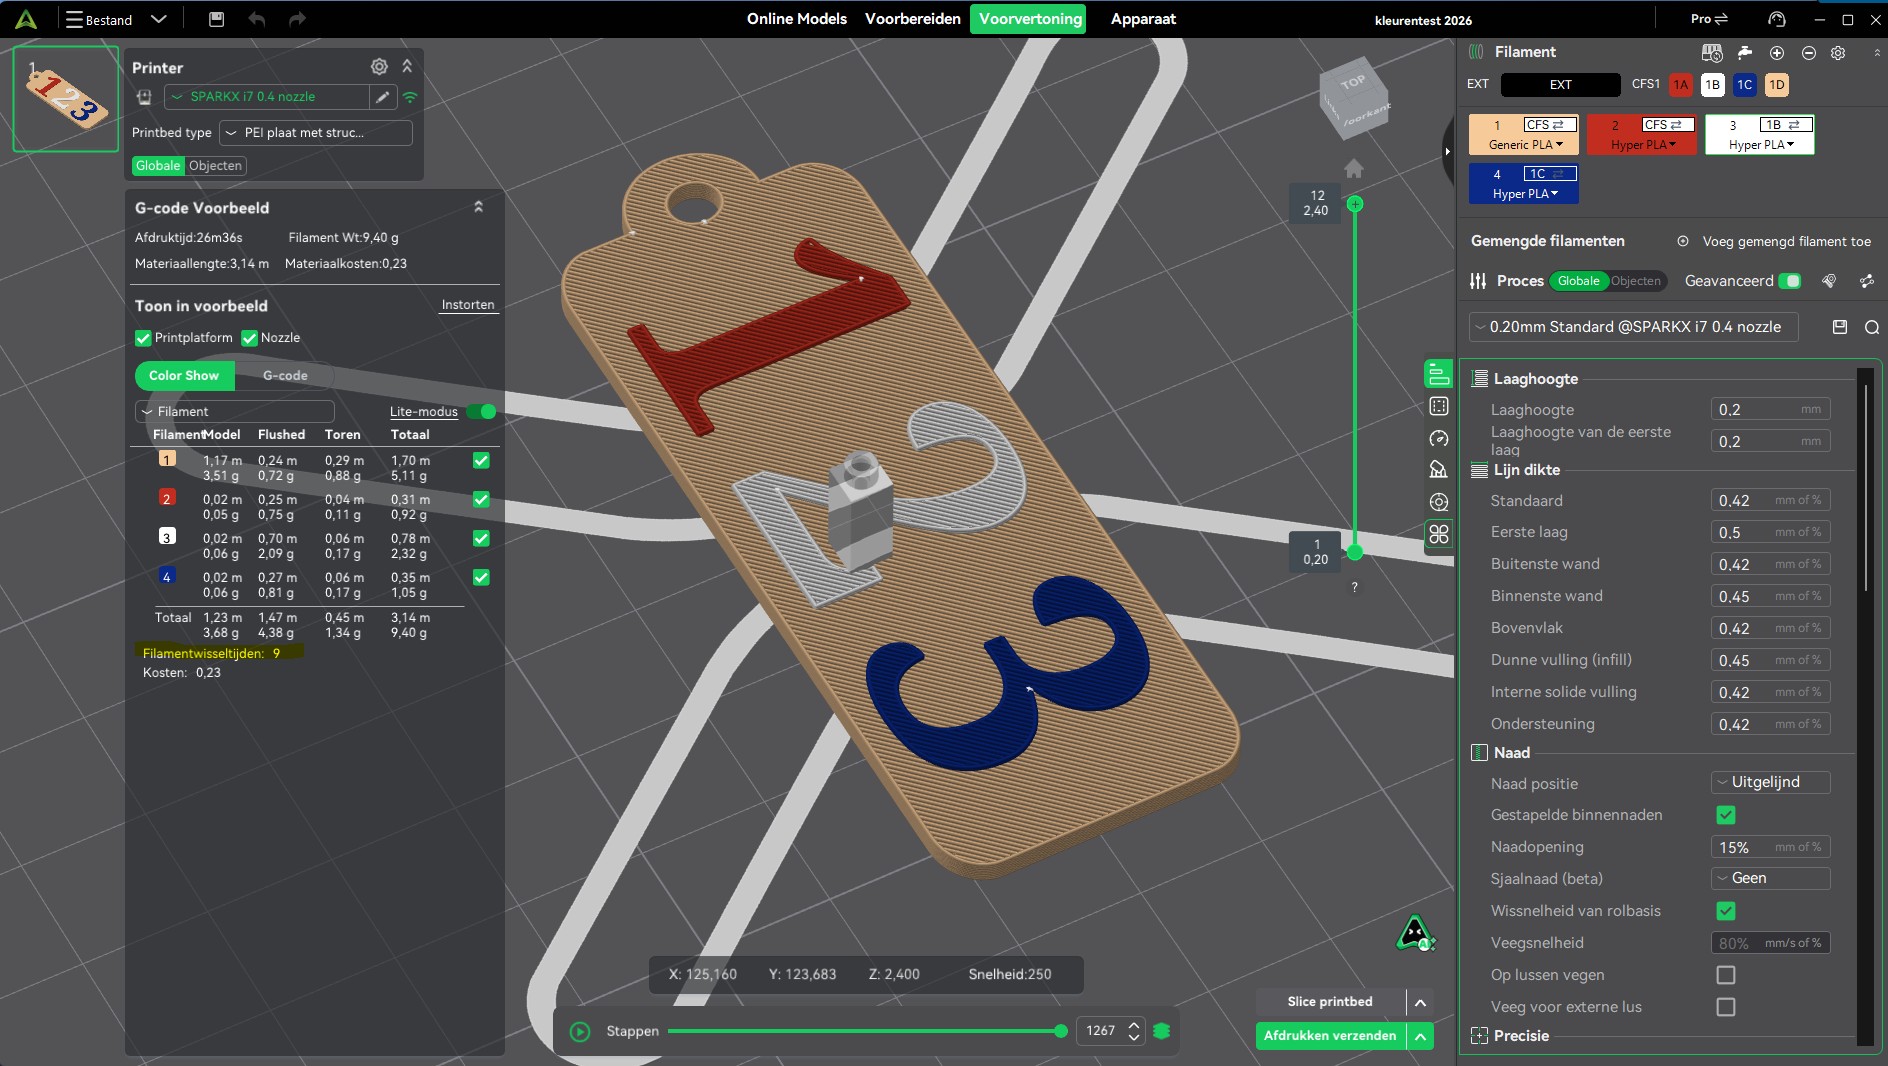
Hi, my first print on the new sparkxi7 was the sparkx keylabel in three different colours. A base in one colour, the word ‘spark’ in a second and the ‘x’ in a third colour. The last two have the same height on the base and I am wondering, with what settings in Creality Print I can achieve that on another model. Thanks in advance.
If the model already contains separate bodies for the base, “spark,” and the “X,” the process is straightforward. Import the model into Creality Print, then assign a different filament to each body before slicing. If the model is a single solid object, use the Color Painting feature instead. The Fill tool works well for isolated letters, while the Height Range tool is ideal when all raised text starts at the same layer, just like the SparkX key label. Creality’s official guide explains these painting tools and the complete workflow in detail: How to Create Multi-Color Prints with Color Painting in Creality Print. You can also find additional documentation in the Creality Wiki: Introduction to the Color Painting Feature. If you’re creating your own models, this Multi Color 3D Print project is a helpful reference because it demonstrates a pre-colored 3MF file with separate color regions, making filament assignment much easier before printing.
Thanks @alia_rifat Appreciate your helpful reply!
hi @alia_rifat still struggling with this issue. I have a testprint ready consisting of a 2mm flat base with on top the numbers 1,2,3 with a thickness of .4 mm (double the layer height). after colouring and slicing the result is a print with 9 filament changes. Is there an option to reduce the number of filament changes, in other words can i make a print where the base is printed in one colour first, then a filament change, then a two layer print of the number 1 in the second colour, then a filament change, followed by a two layer print of the character 2 and so on. Would save 6 filament changes.