Hi, This is a follow up from my earlier post, “Calibration issues Ender 3-S1 Pro”.
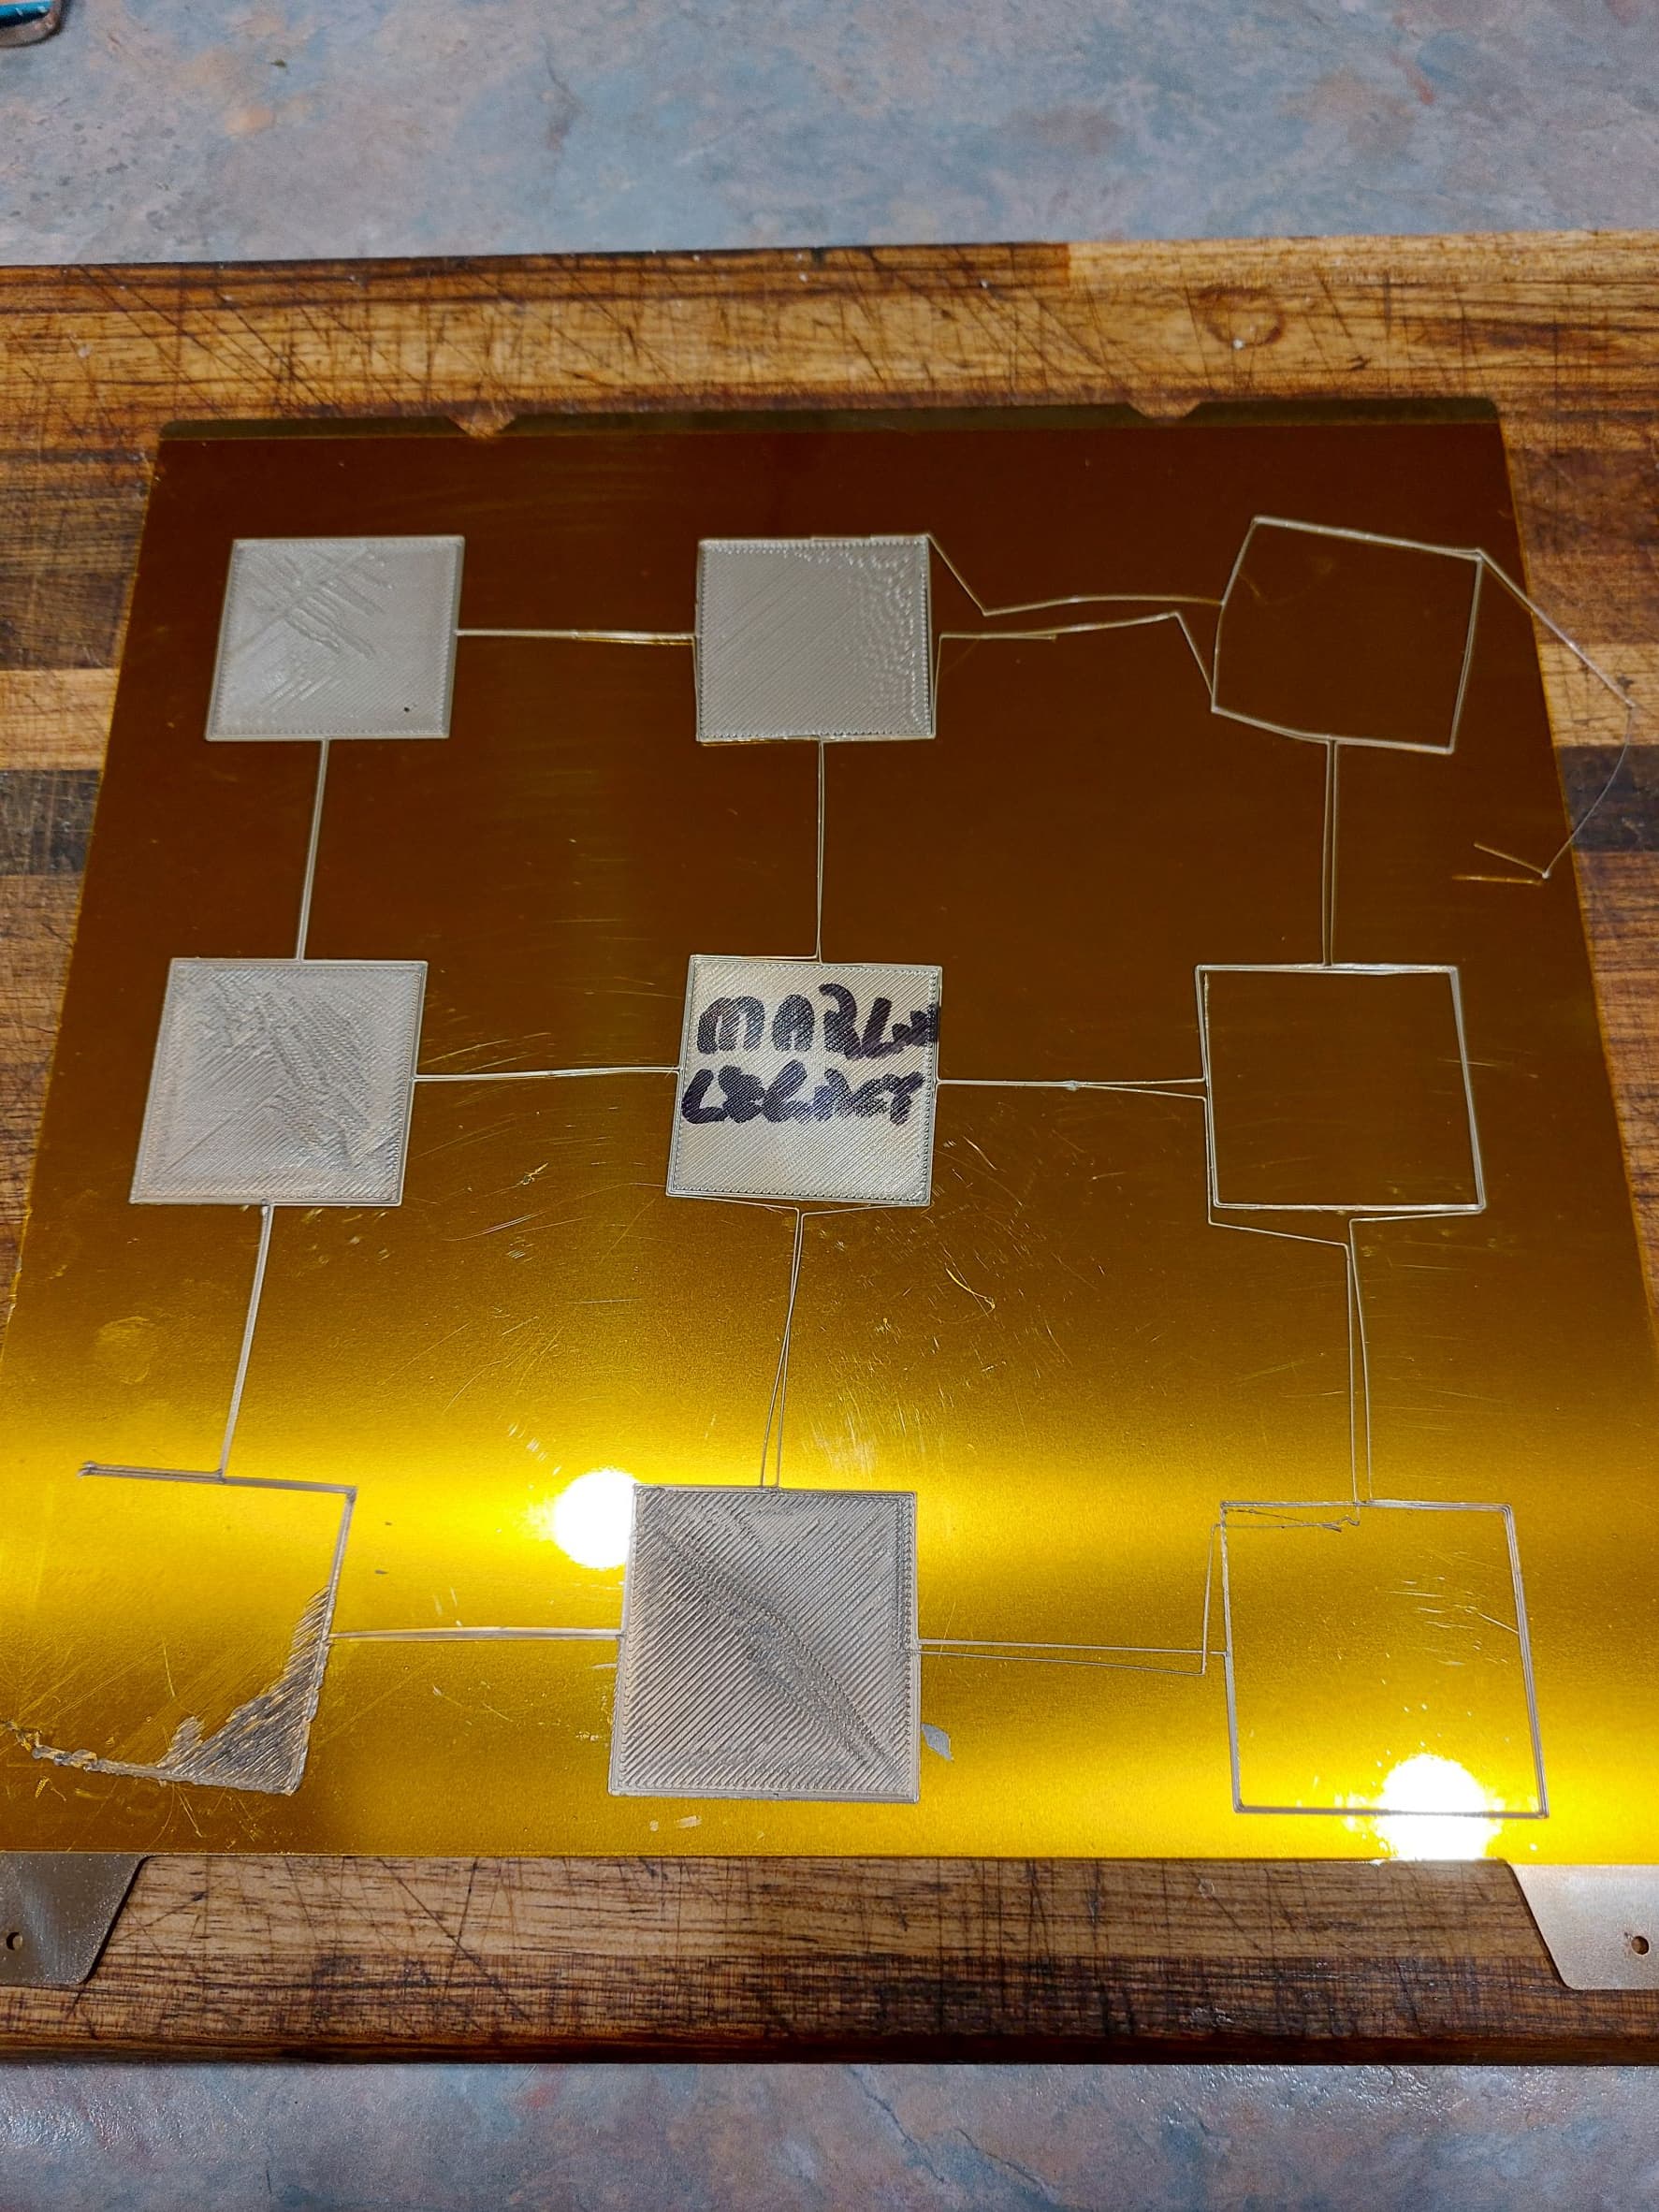
The battle with calibration continues. I figured when all else fails, go back to the start and start again. So I reset all steppers, except Y, back to default and tried another calibration print I put together to check the Bed_Mesh. Pic 1 shows the first attempt. PLA used.
I did this print with the “Firmware Flavour” set at Klipper. My original 3-S1 Pro seems to love that flavour. Not very successful, I think you’d agree. I watched the print and could see that the Z height was definitely changing, it just wasn’t working very well. Did another print, PLA again but used Marlin (Legacy) flavour. Absolute disaster, I had to stop the print on the front-left square as the extruder was actually slipping on the filament, it was printing that low. Pic_2 shows the results.
Sooo, I jumped into the config’ file of Klipper and found a couple of settings in the bed_mesh section were not set at default, (according to the Klipper documentation) I changed the following;
algorithm = Lagrange (from bicubic) and
fade_end: 0 (from 10) - I doubt this will effect much though and I’ll probably fiddle with that setting.
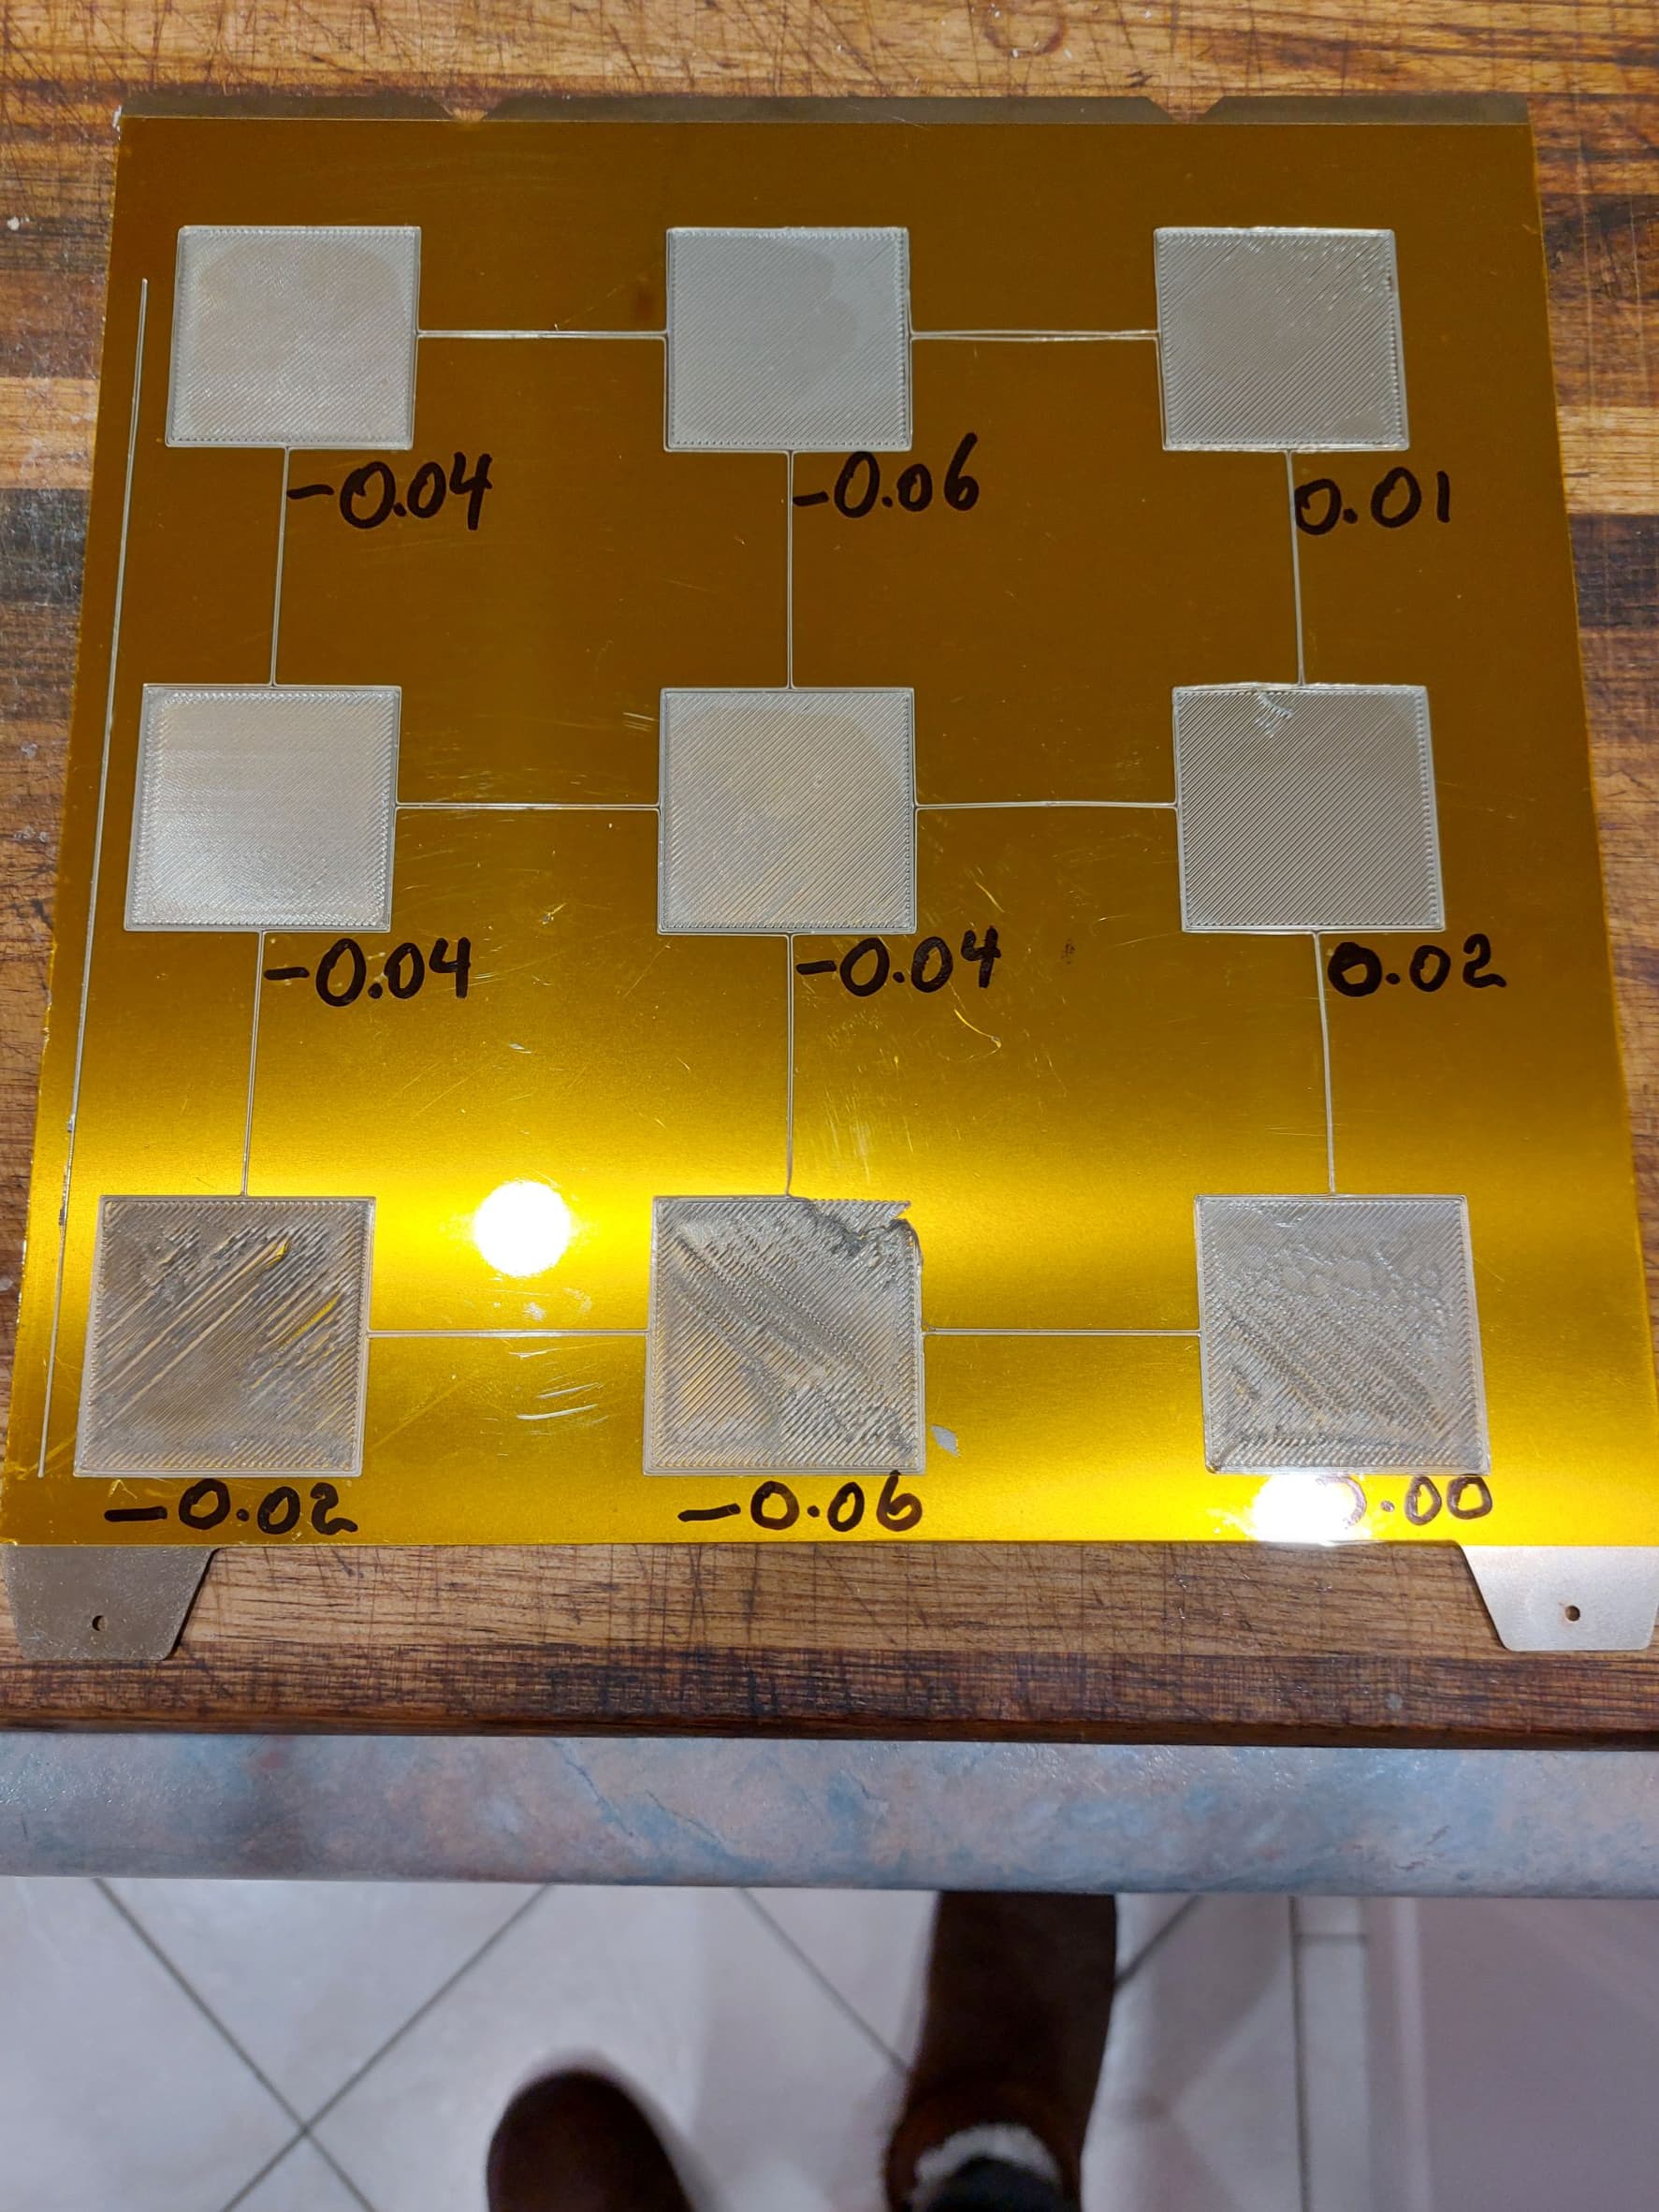
I then redid the auto bed leveling and low and behold, the height of the bed was WAY out and indicated the issues I had with the second print. The bed test at the square Left-front, showed +0.3 instead of the original test that resulted in -0.02. I hadn’t changed anything physically with the bed. So I re-sliced and re-printed the test print and Pic 3 shows the results.
I’m not sure what you are trying to accomplish as I can’t find your original post, but have you tried the obvious?. ie, restore the firmware and config to exactly as it was wen the machine was new (firmware and config) and do a self level procedure. What is it you don’t like about the results?. If the level is outside the range of your expectation or even outside the range it will auto level at, then I did the following -
Make sure both sides of your bed plate, and the heater surface are clean and free of dust. Get a good dial gauge, fix it firmly to the head with the sensing stylus vertically on the bed. Move the head around on an X-Y grid of your choosing and record the results. Now start adjusting the wheels under the bed, with the obvious target of getting the whole thing as level as you can. The more level you can get it, the less works the self levelling algorithm has to do. The way I got final success was to NOT adjust one wheel at a time, but to adjust a pair to restrict your adjustment to either just X or just Y. If you can’t get it mechanically better than, say, 0.75mm peak to peak then you may benefit from shimming the plate level, but the only true way you will measure that is with a dial gauge.
Optician,
Thanks for your comments. My bad for making two posts on the same issue. Your suggestion is exactly what I ended up doing, running a dial indicator (micrometer) over the bed. The bed was way out of level compared to what the auto level results indicated. I also found that the X axis was not square, so I did the X axis calibration adjustment as shown in a Creality info’ video on YouTube. The results are much, much better. In the pictures above and I agree it probably doesn’t show up very well, the front left square is a terrible print. Pretty well sorted now though. Thanks again for your input!
Ah, that’s great. I hope others read this thread in the future. A dial gauge indicator really is nothing to be frightened of if you haven’t used one. Just think of it as another one of the printers essentials tools. Expect around $30, less for really cheapo, $100’s for real good one.