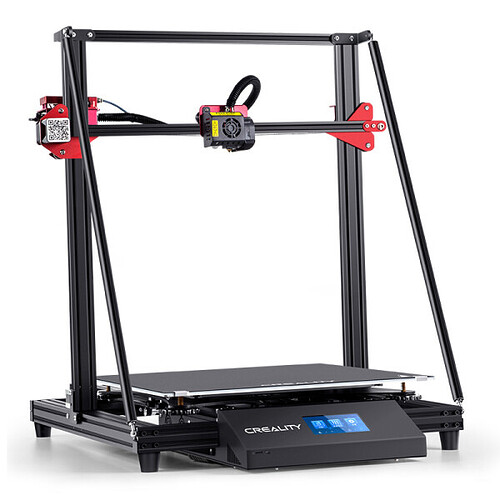
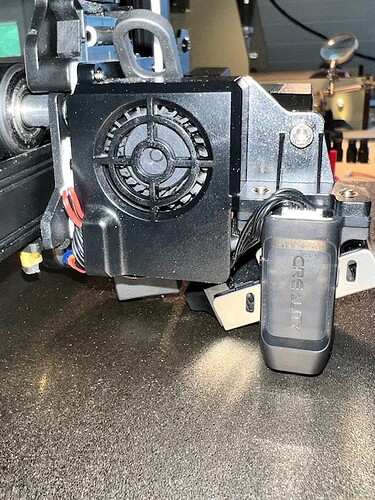
Creality CR 10 Max Pro.
I do not quite understand the bed leveling procedure although I watched a lot of You tube and read a lot here.
I do the following:
With power off , I measure the distance of the four corners between the bed and the horizontal x axis with a digital caliper and adjust the springs.
Power on and autolevelling procedure.
Then I print 9 squares of one layer in the corners and on the side.
To my surprise , some squares are perfect, and some are printed with the nozzle too low. But it doesnt seem that bad and I will accept that.
Now my real problem:
I start printing something with a first layer of 15 x 10 cm. The first 3 wall perimeters look fine. But some circles / squares in the middle get printed ok but some others (only a few cm further away) dont adhere to the bed at all. I increased the Z axis compensation with steps of 0.05 at a time. But when the inner parts adhere OK , the nozzle will scrape off other parts.
How can this be possible?
What is the exact way to use the auxillary levelling?
I used it before the autoleveling (to find the z axis compensation), but also i tried it after the autolevelling. When I do auxillary levelling after auto the distance between the nozzle and the bed isn 't the same anymore as it was before the auto proc ???
Thanks for any help
The CR-10 Max is an older and not so common machine, can you check anyway if yours is running the latest firmware? Auto-leveling should adjust for most of that, so if you see inconsistencies within the first layer while the Z-offset is correct for one of the squares, the auto-leveling is not doing its job.
For issues with higher up layers, it could also be overextrusion that causes issues. Then the nozzles scrapes over previously printed layers and pulls pieces off the build plate.
Thanks for your answer. I thought the CR 10 max pro was quite new.
I use the creality app to have the latest firmware.
Its not overextrusion. When the nozzle scrapes away something it is always in the first layer.
I also tried to move around the print on the bed, but I get the same issues again and again.
We are talking about this printer, right?
The only new CR-10 would be the CR-10 SE which is much smaller.
Did you run the auto leveling at the actual print temperature of the print bed?
Thanks. I have a CR10 Pro Max. I can not see the values of the 25 auto level points.
I have this one/ Looks the same but is called CR-10 Max Pro.
I did a factory reset. And an auto level. Then I tried aux level and noticed that on the left and front side the nozzle was tight on the bed, right back it was very loose (did not turn any red wheels).
When in aux level, the machine does not do anything with the 25 adjustement points it measered in the auto level procedure ? In that case I can understand this behaviour.
And the Z ax compensation. If I understand well , it is the difference between the place on the z axis where the machine measures the bed (with the sensor) ande th place of the nozzle/ So it should always stay the same? (as long I do not change nozzle)
Thanks
I do not understand bullet 7
How can i adjust it?
I do not see how to do that on my system.
Does anybody know why the first line , that goes from the left front to the left middle and back (to get the filament flowing) is always put right on the bed, but the start of the print can be wrong (not the right z height). So at first it knows where the bed is, but after that it doesn’t. I the z ax compensation would also be needed for that first line ?
Check mechanic aspect of machine. Make sure gantry stays level and there’s no back lash after moves. That’s a big machine it may need a lot of help to get square and true.
There’s settings in marlin that stop using the auto level after a predetermined height. Check if your in same range when anomaly happens.
Also my Ender 3 has a history of not saving the auto level if I don’t save to eeprom. You might want to google this.
As far as after a few layers, the extrusion is the most important aspect.
I’m running out of time here gotta get to work but google a lot. Please be patient and be safe. Also I’m sorry for being long winded but I hate not being able to find a clue on my problems. Maybe these will help you
1 Like
Thought I had a warped bed, but that is not the case. I did the levelling when the bed was cold, and that indeed makes a difference.
But after a ABL , I checked the corners with äux bed levelling" . Noticed that 2 corners were tied and 2 were loose. Very strange.
I drew a flat corner in the center and adjusted Z axis. Then I printed flat squares in all corners, small adjustments were neede with the screws till it printed perfect squares in the center and the corners.
Now I am sure my bed is level.
Back to my original print. Just a simple plate 10x3 cm with several tiny holes in it. The 3 perimeters were OK, the perimeters of the first holes also, but then the perimeters off other holes did not hold on the PEI plate.
So it had to be another problem.
It turned out that the PLA I used (had 190-220 on the spool) , I used 205, but after increasing to 220. No problem anymore.
Hope this info helps somebody else
1 Like


