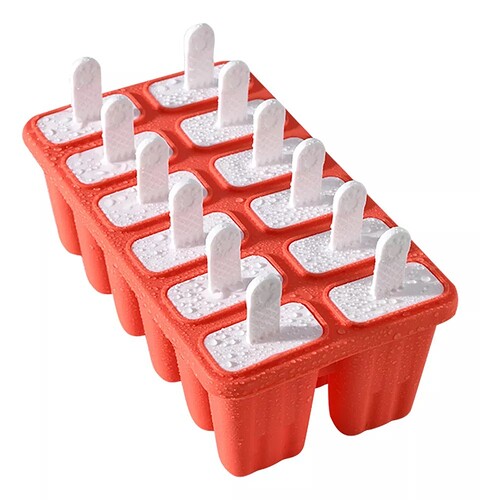
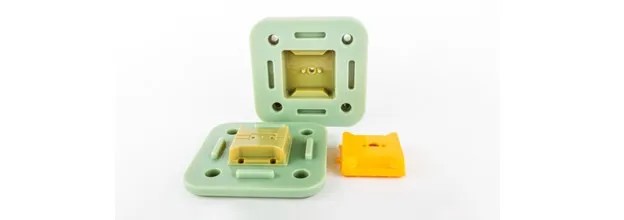
Molding is a common manufacturing process used to reproduce parts in various materials, making it ideal for a wide range of products. Traditional molds can be expensive, but 3D printing your own molds offers a significant cost advantage. A mold is essentially a cavity that you fill with material, much like making popsicles.
With 3D printing, you can create the mold, fill it, and reveal your part once it sets. This article will guide you through making 3D printed molds, focusing on casting with reusable two-part molds and two-part materials, which solidify when mixed in specific ratios.
Let’s started!
The Basics
3D printed molds share the same core characteristics as traditional molds, but with the added advantage of being able to create them at home with some effort. While there are numerous molding techniques, many of them require specialized machinery to execute. A common example is injection molding, where molten plastic is forcefully injected into a cavity and then ejected once it solidifies.
Casting, on the other hand, follows a somewhat similar approach but uses molds made of plastic or rubber, and the material is simply poured into the mold without additional pressure. In some cases, casting might involve placing the mold in a vacuum chamber to eliminate trapped air, although this step isn’t always necessary depending on the design.
There are two primary methods for creating 3D printed molds. One method involves directly printing the mold and pouring a softer material into it. Alternatively, you can print the part first and then pour a softer material, like silicone, around it to form a mold. In this second method, you’ll need to build a box—using foam board or another material—around the printed part to contain the silicone as it’s poured in.
3D printing molds is an accessible option for anyone interested in exploring this technique, but it’s particularly advantageous if you’re looking to achieve any of the following outcomes from your 3D printing endeavors:
1. Exact Copies: For those needing consistent replication on a mass scale, 3D printing molds ensure your designs remain identical without the need for recalibration between batches. While hobbyist 3D printers continue to improve in quality, using molds means you only need to perfect your design once. After that, you can easily reproduce the same part as often as needed, maintaining uniformity.
2. Starting a Small-Scale Manufacturing Business: If you’re aiming to launch a manufacturing business on a relatively modest budget, 3D printing your own molds can be a game-changer. Start-up costs are a critical factor for any new business, and investing in 3D printers is significantly cheaper than purchasing traditional manufacturing equipment. By printing your molds, you can keep initial expenses low, allowing you to start small and scale up as your business grows.
3. Batch Production: Although you need to create one mold at a time, once your set is complete, you can use them simultaneously to produce objects in batches. This approach accelerates production and frees up your printers for other, more complex projects, maximizing both efficiency and output.
Pros & Cons
Pros:
We’ve discussed numerous reasons why incorporating 3D printed molds can significantly enhance your manufacturing process. Here are the key advantages of making 3D printed molds a permanent part of your 3D printing toolkit:
- 1. Lower Cost for Small Batch Manufacturing: Getting started with 3D printed molds can be as affordable as $200, depending on the printer you choose. This is a stark contrast to the typical $10,000 entry point for industrial manufacturing. This cost-effectiveness makes manufacturing accessible to a broader audience, including those who previously couldn’t afford traditional methods.
- 2. No Special Materials Required: If you’re already familiar with general 3D printing, you can start immediately using standard printing resins and filaments for most two-part materials. Special materials or equipment are only necessary if you’re working with hot materials or engaging in “lost-print” casting, making the entry point even more accessible.
- 3. Easy Design Modifications: Traditional manufacturing molds are complex and costly to change once finalized. In contrast, 3D printing offers much more flexibility. If you identify a need for design adjustments after your initial batch, simply update your CAD file, tweak the design, and reprint the mold. This eliminates the need for costly new molds or lengthy waiting periods to test changes, keeping your production agile and responsive.
- 4. Expanded Material Possibilities: With 3D printed molds, you can experiment with a wide range of two-part materials, allowing you to produce a variety of items with just a desktop 3D printer. While the process may be slightly more involved, once you have a mold, you can effortlessly produce high-quality parts in materials like epoxy or rubber, expanding your creative and manufacturing capabilities.
Cons
While 3D printing molds offers many advantages, there are some downsides to consider before diving in:
- 1. Not Ideal for Large Manufacturing Batches: Although 3D printing molds allows you to produce multiple objects simultaneously, there are practical limitations when scaling up. For batches of 100 or more, 3D printed molds can become inefficient and labor-intensive. At this scale, the higher upfront cost of industrial injection molding starts to make more sense when comparing production capacity and cost efficiency.
- 2. Design Limitations: The requirement for parts to be removed from molds imposes certain design constraints, reducing some of the creative freedom typically associated with 3D printing. For example, parts cannot include encapsulated features, as the mold needs to be removed after the material has been poured. This means not every design is suitable for molding, and complex geometries may require significant adjustments.
- 3. Wear and Tear: DIY 3D printed molds are usually made from materials that are less durable than those used in industrial molds, making them more susceptible to damage, especially with frequent use. While a standard industrial injection mold might be capable of producing hundreds of thousands of parts, a 3D printed mold is generally limited to producing hundreds, depending on the materials used. Casting with softer materials can help reduce wear and tear, but durability remains a key consideration when opting for 3D printed molds.
Design Considerations
Before designing your mold, it’s essential to consider some key factors to achieve the best results. Here are some guidelines and tips:
- 1. Draft Angles: Incorporate draft angles into the faces of your design to facilitate easy removal from the mold. A minimum of 2 degrees is recommended to ensure that the part can be smoothly extracted.
- 2. Encapsulated Features: Avoid encapsulated features in your design. For instance, if casting a figurine, the hands should be either fully open or in a fist, not positioned halfway. This ensures the part can be removed without damaging the mold.
- 3. Air Vents: Include vents in your mold to allow air to escape during casting. This prevents air pockets in the final part without letting the casting material spill out. Proper venting is crucial for high-quality results.
- 4. Keying: Utilize keying to ensure the two halves of the mold align correctly. Keys are shapes that fit into corresponding spaces, guiding the mold halves to the correct position and orientation, reducing misalignment.
- 5. Parting Line: In two-part molds, design around the parting line where the two halves meet. This line will be visible on the final part, so plan accordingly to minimize its impact on the overall appearance.
- 6. Lifespan: The lifespan of your mold depends on the materials used and the design. For longer-lasting molds, print in a hard material and cast in a softer one. If necessary, you can extend the process by creating a rubber mold for casting harder substances.
Tutorial
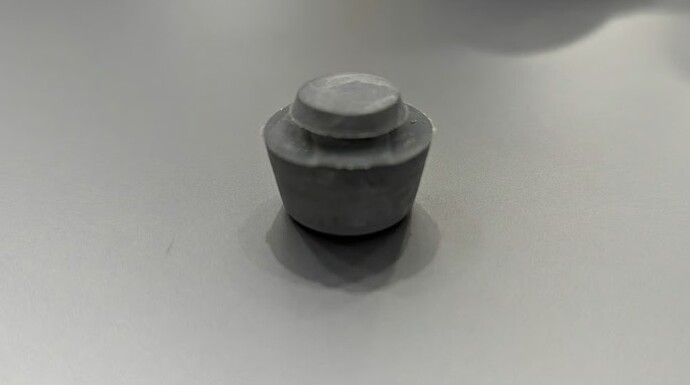
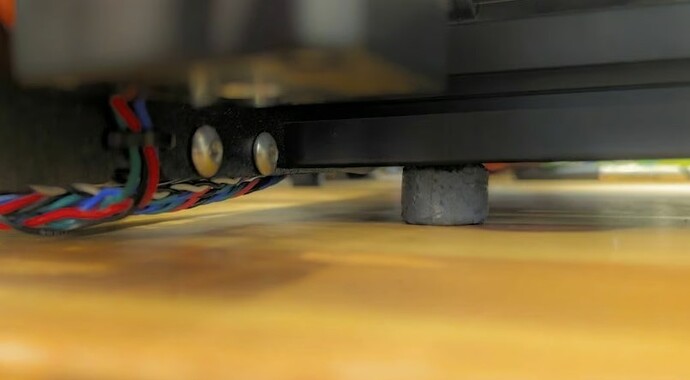
To illustrate the points we’ve discussed, we’ll create a two-part mold to make new silicone feet for the 3D printers. The MK3’s stock legs are too rigid, and we’re aiming to reduce the machine’s noise. We’ll start by designing the part and mold in SolidWorks, then print the mold and cast the final part. While we’ll use SolidWorks, these principles apply to any CAD software, including free options like OpenSCAD, which allows for some step automation.
What You Need
In this project, we’ll create a mold to cast urethane rubber parts, making the choice of 3D printing materials less critical due to urethane’s softness. The two-part mold will be designed to bolt together for easy pouring, and it will allow us to produce four feet at a time.
Since these feet are for the 3D printers, we’ll print the mold on the same machine. However, for higher-resolution parts, using a resin 3D printer is recommended.
Here’s a list of items you’ll need:
- A 3D printer: Preferably a resin printer for finer details.
- Gloves and goggles: For safety during the casting process.
- Scales: For accurately measuring parts A and B.
- Mold release: Essential for easier part removal. Slide is a good option, especially if painting the parts.
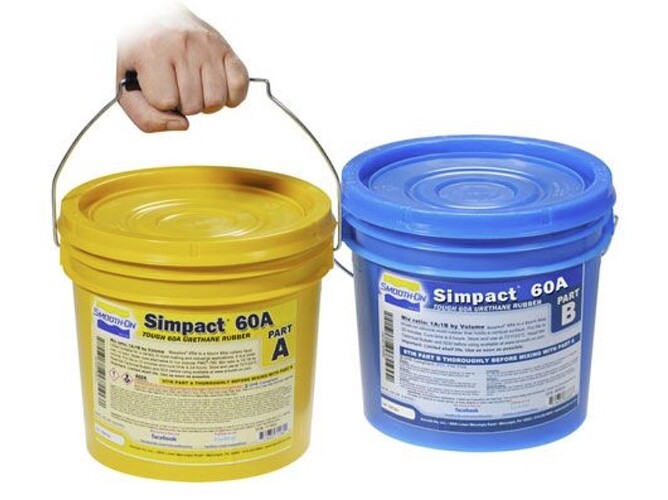
- Two-part urethane rubber: We’ll use Simpact 85A from Smooth-On.
- Mixing sticks: For combining the urethane components.
- Pigment: Optional for coloring the material; UVO colorants are used in this tutorial.
- Vaseline: Required for FDM prints to prevent sticking, but unnecessary with resin printers.
For optimal results, consider using a vacuum chamber and pump, although they aren’t used in this tutorial. These tools help eliminate air bubbles for a smoother finish.
Part I: Designing the Part
Manufacturing starts with a design. We’ll first create the custom feet for the 3D printers, addressing the issue of rigidity by making rubber feet for quieter operation. Designing the feet first simplifies the mold creation. You can find the mold design on Printables if you want to skip ahead.
About the Design
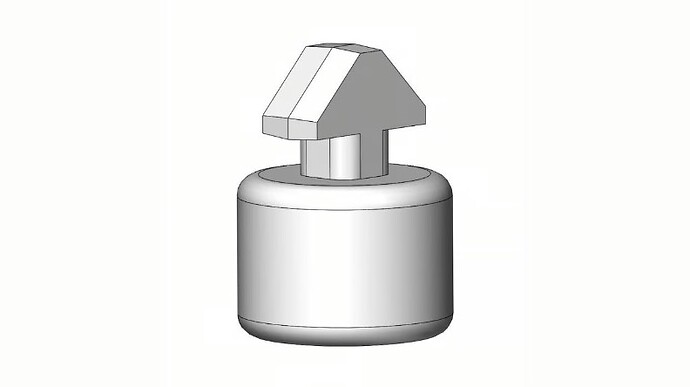
On the 3D printers, the legs slide into a 30-mm aluminum extrusion. The original design requires installing these feet before the faceplate, which can be cumbersome if they get knocked off. Our goal is to create feet that can be easily installed even when the Prusa is fully assembled, while maintaining a design similar to the original.
For accurate measurements, a vernier caliper is essential. The extrusion’s central channel is 8 mm wide with a 3 mm depth before it widens to 9 mm, featuring chamfers on both sides. The original feet are 10 mm tall, but we’ll increase this to 15 mm for better performance.
To reduce noise from machine vibrations, the new feet will be designed to dampen vibrations. This will be achieved by incorporating flexibility into the design, specifically with a larger barrel section at the foot’s bottom to absorb and mitigate vibrations.
Designing for Casting Molds
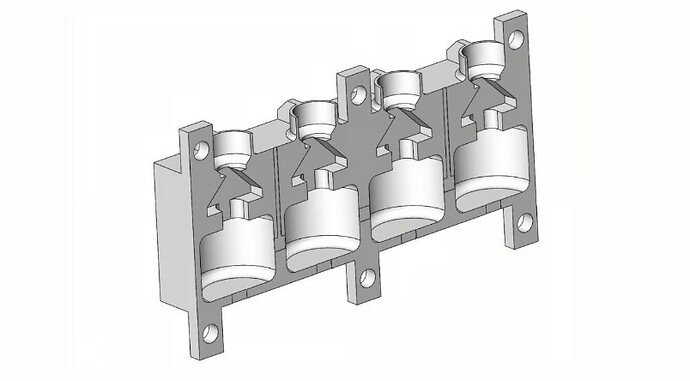
To ensure easy removal from the mold, we’ll maintain at least a 2-degree draft angle on our part. Since the part is mostly round, achieving this is straightforward, but it’s a crucial consideration for any design. For non-round sections, we’ll curve all edges and apply a 4-degree draft angle. The top section, which fits into the extrusion, features a T-shaped knuckle that aligns with the extrusion dimensions measured with a vernier caliper. This section also has a 4-degree draft angle on the mold separation faces to facilitate smooth extraction from the mold.
Designing the Mold
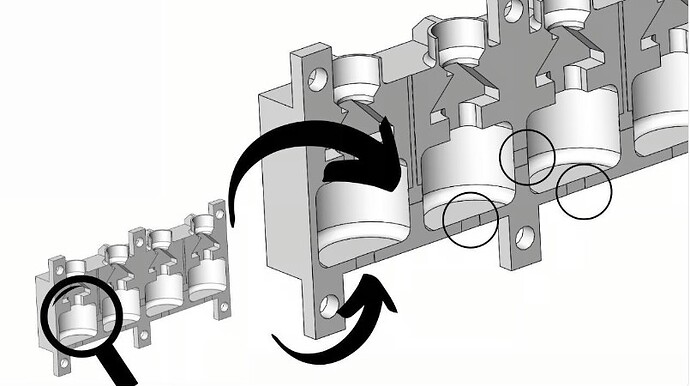
Step 1:Create a mold casing and spout. Draw a cube larger than the part, add a circle for the spout, extrude cut downwards, add a smaller circle at the bottom, extrude cut to the hollow, and chamfer the top edge. Duplicate for four legs.
Step 2:Divide the mold into two halves along a plane that aligns with draft angles for easy removal and to manage material seepage.
Step 3:Add air outlets by drawing 0.2 mm deep rectangular channels from the bottom and sides. Use short channels for easier trimming.
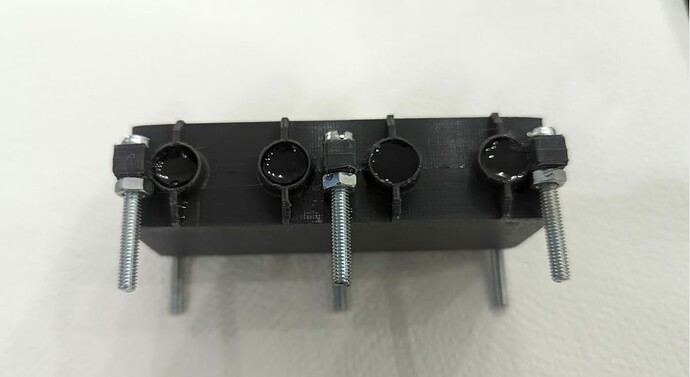
Step 4:Add keying and bolt holes to align and hold mold halves. Add extrudes and matching cuts on each half. Draw, extrude, and add snug holes for bolts at corners and center.
Tip: Consider using a vacuum chamber to remove air from the material before it dries.
Printing the Mold
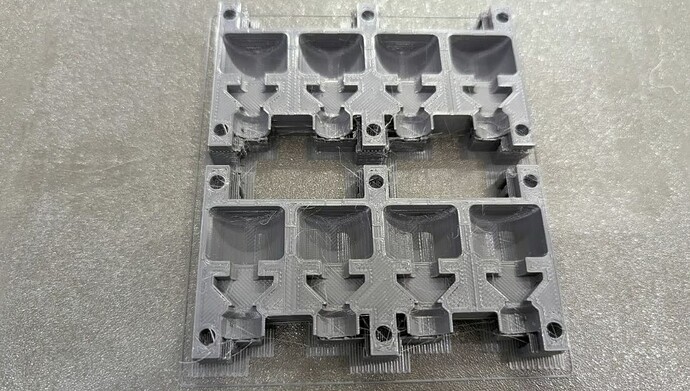
Now that our mold design is finalized, we’ll proceed with 3D printing it. For a smoother surface, a resin printer is ideal. However, since we’re making feet for an FDM Prusa, we’ll use the Prusa itself for the mold.
Keep in mind that FDM-printed molds may be harder to open once the casting material cures due to layer lines. Therefore, use the smallest layer height for the best results. A lower layer height will improve the surface quality and ease of removal.
We used standard PLA from RealFilament, with 15% infill and four perimeters for added rigidity. Four top and bottom layers ensure a sealed part, and we chose a 0.1-mm layer height. The print took 7.5 hours to complete.
Material Considerations
For most two-part materials, PLA is suitable for printing molds. These materials typically generate heat during curing, but it rarely reaches levels that would warp PLA. However, be aware that some materials might chemically react with PLA, so it’s best to use PLA molds for soft, rubber-like parts.
ABS or PETG can also be used if available. Most rigid plastic filaments work well with soft rubber-like casting materials. Just remember that FDM prints have visible layering, which can make mold separation more challenging and may affect the final part’s surface.
Casting
Step 1:Spray the mold with release agent or use oil/Vaseline. Bolt the halves together, ensuring seams align.
Tip:For FDM-printed molds, apply a thin layer of Vaseline to the inner faces (excluding air vents) for a better seal.
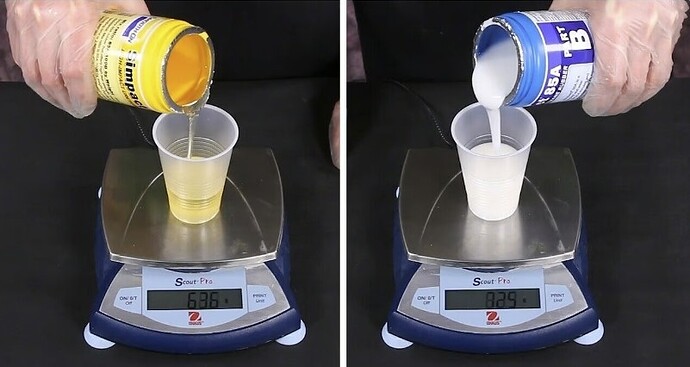
Step 2:Use Simpact 85A from Smooth-On. Mix 17 grams of part A with 20 grams of part B (8.5:10 ratio by weight). Stir thoroughly, scraping the container bottoms. Add color to part A if desired before mixing.
Step 3:Pour the mixture into the mold via the spout quickly (4-minute working time). Fill until the spout has some material. Let it set for 2 hours. Unbolt, separate the halves gently, and carefully pry out the part. Trim excess rubber with a sharp knife.
Conclusion
3D printing molds offers a cost-effective and versatile solution for small-scale manufacturing and hobbyist projects. It allows for precise design, easy modifications, and the use of various materials like urethane and silicone. Despite some limitations in durability and scalability, the benefits—such as lower costs, no need for special materials, and expanded material possibilities—make it an appealing option. Whether replicating designs, starting a small business, or exploring creativity, 3D printed molds provide a flexible and accessible method for producing high-quality, custom parts efficiently.
