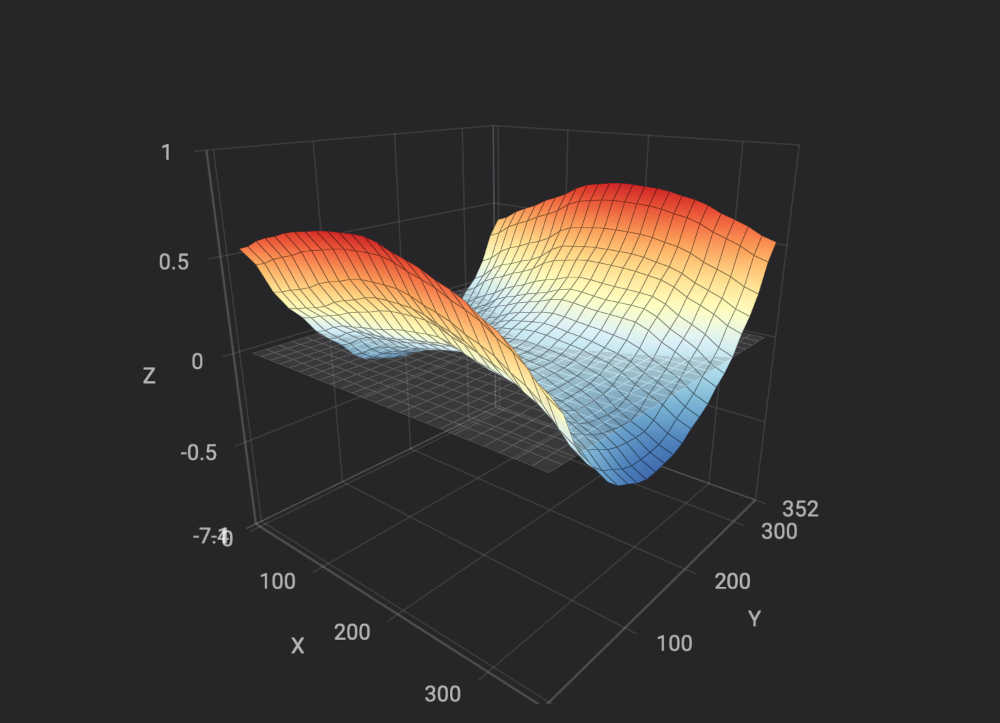
This is the current state of my K2plus bed flatness.
How flat would you rate it?
Is it able to be improved or should I just buy a Graphite bed?
If if can be improved any suggestions for “How to” would be appreciated.
Thanks
This is the current state of my K2plus bed flatness.
How flat would you rate it?
Is it able to be improved or should I just buy a Graphite bed?
If if can be improved any suggestions for “How to” would be appreciated.
Thanks
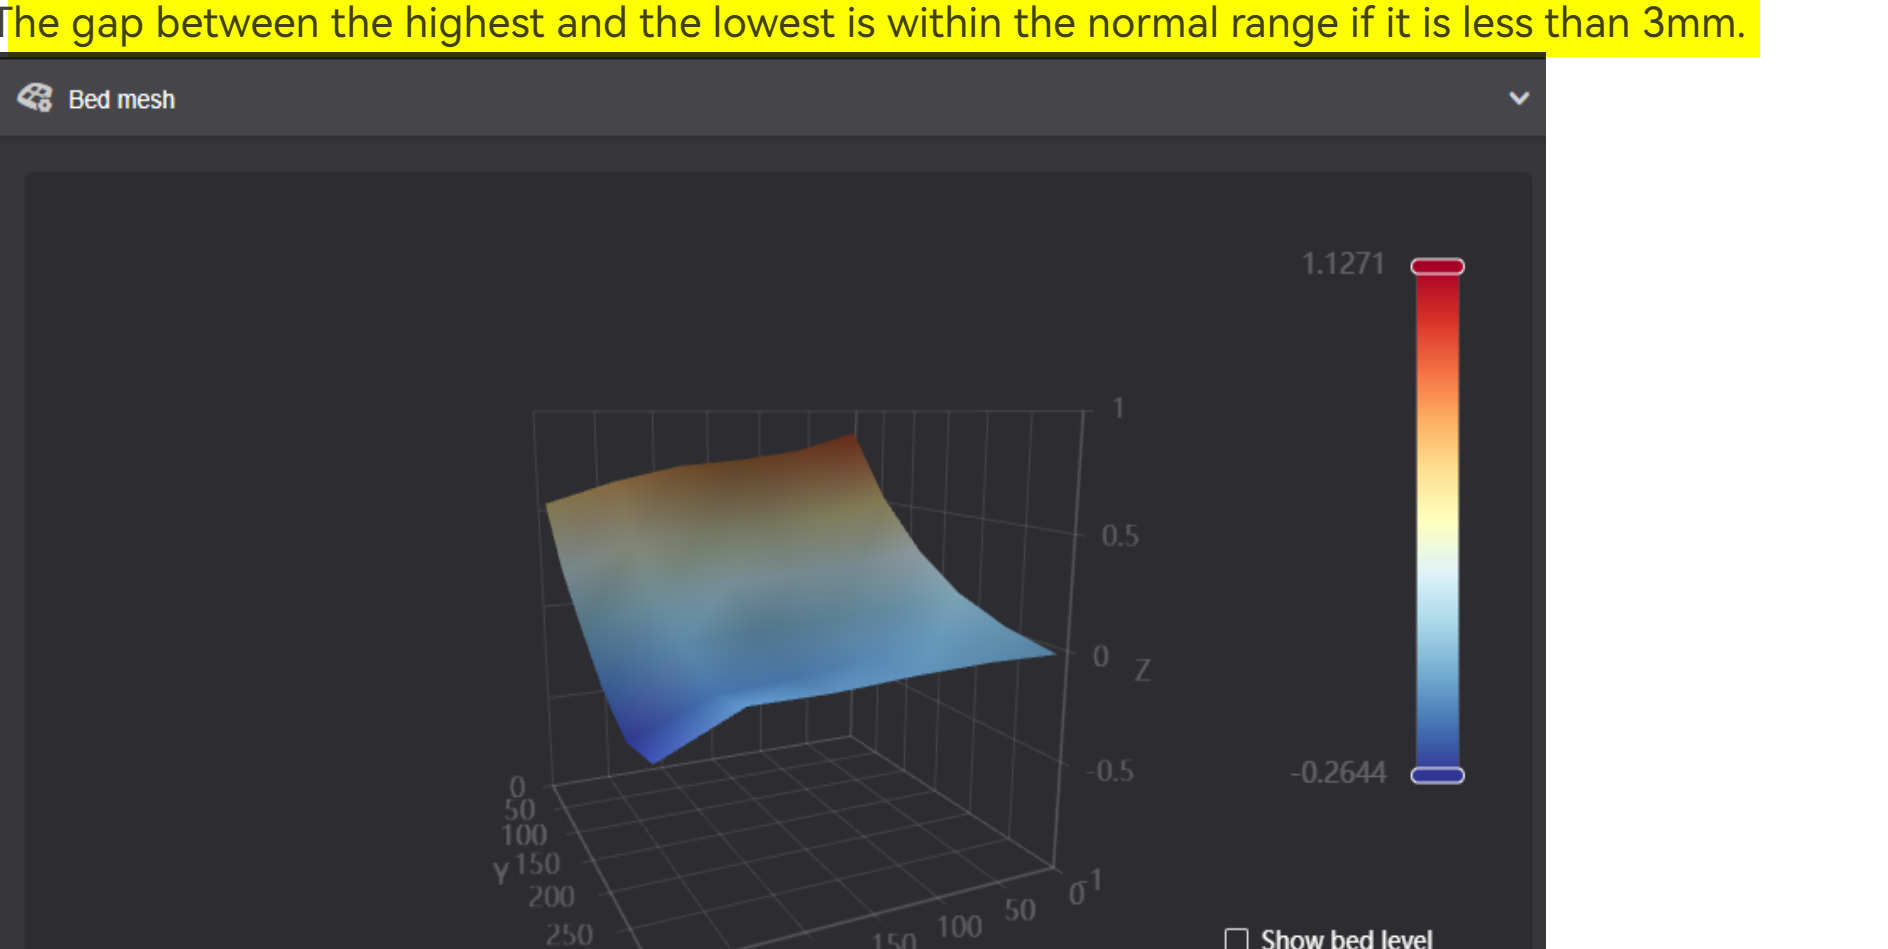
.5 variation is not bad - the mesh always makes it look worse than it is lol. Try doing a leveling with a heat soak - bring the bed to your print temp and let it sit for 15-20 minutes so the plate levels out at that temp. Then run leveling.
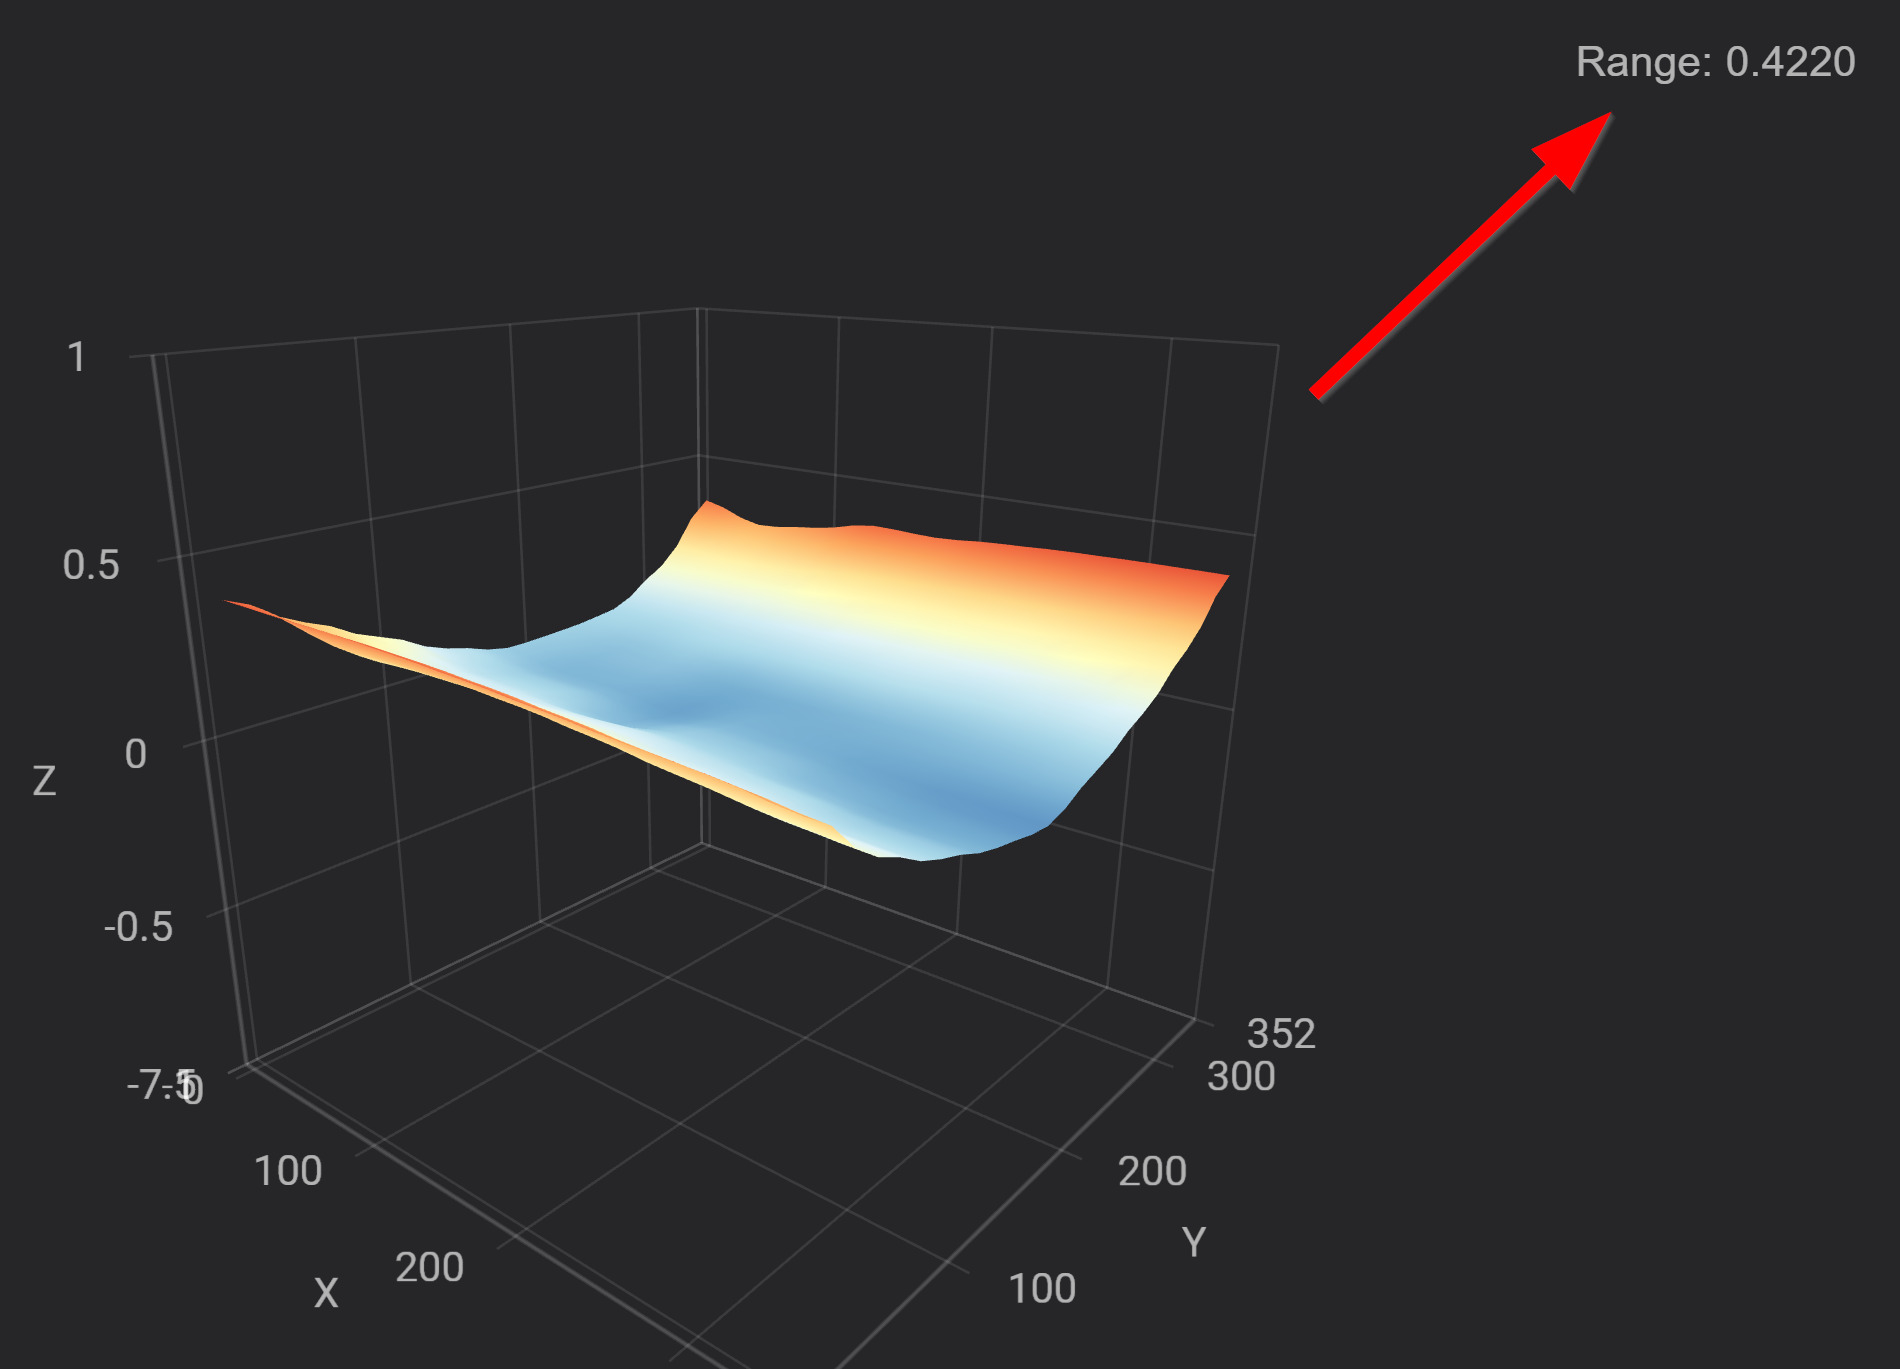
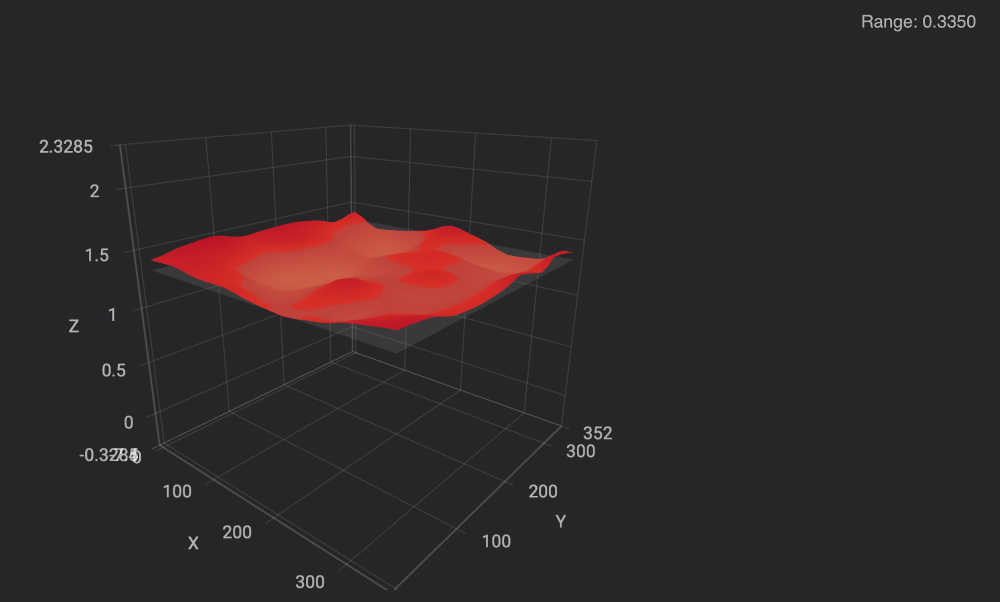
Thanks for the feed back and sorry about omitting the range - its 1.075!
Lori thanks for the tip on the heat soak test.
Ive been playing around with shims to see if I could improve my bed flatness.
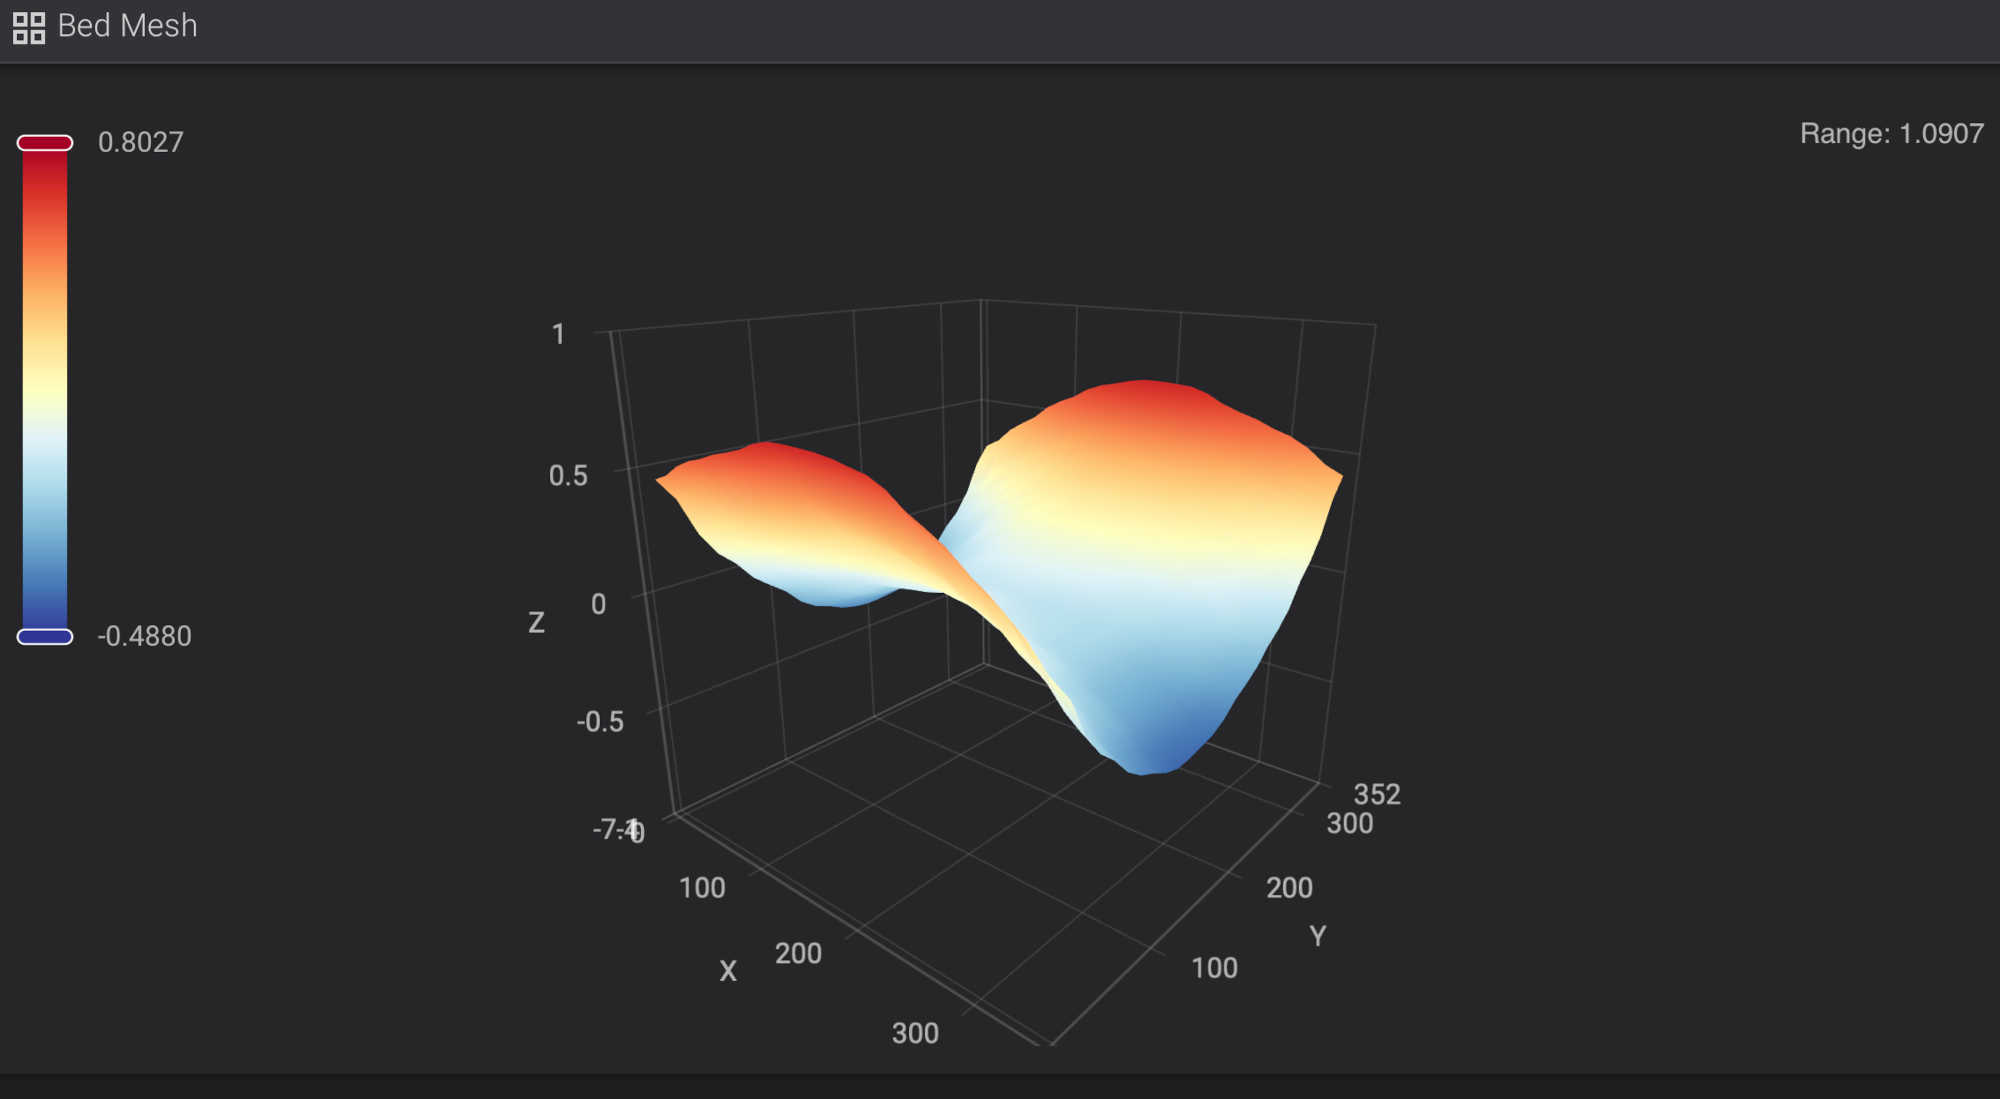
Just a reminder as to what I’m starting with - ie range stated as 1.0907;
The first thing I tried was layers of printer paper shims between the bed and the magnet which I found highly frustrating as the paper kept moving, but I managed to get the range down to 0.7m mm so about a 40% improvement. I think this was by sheer luck than systematic management.
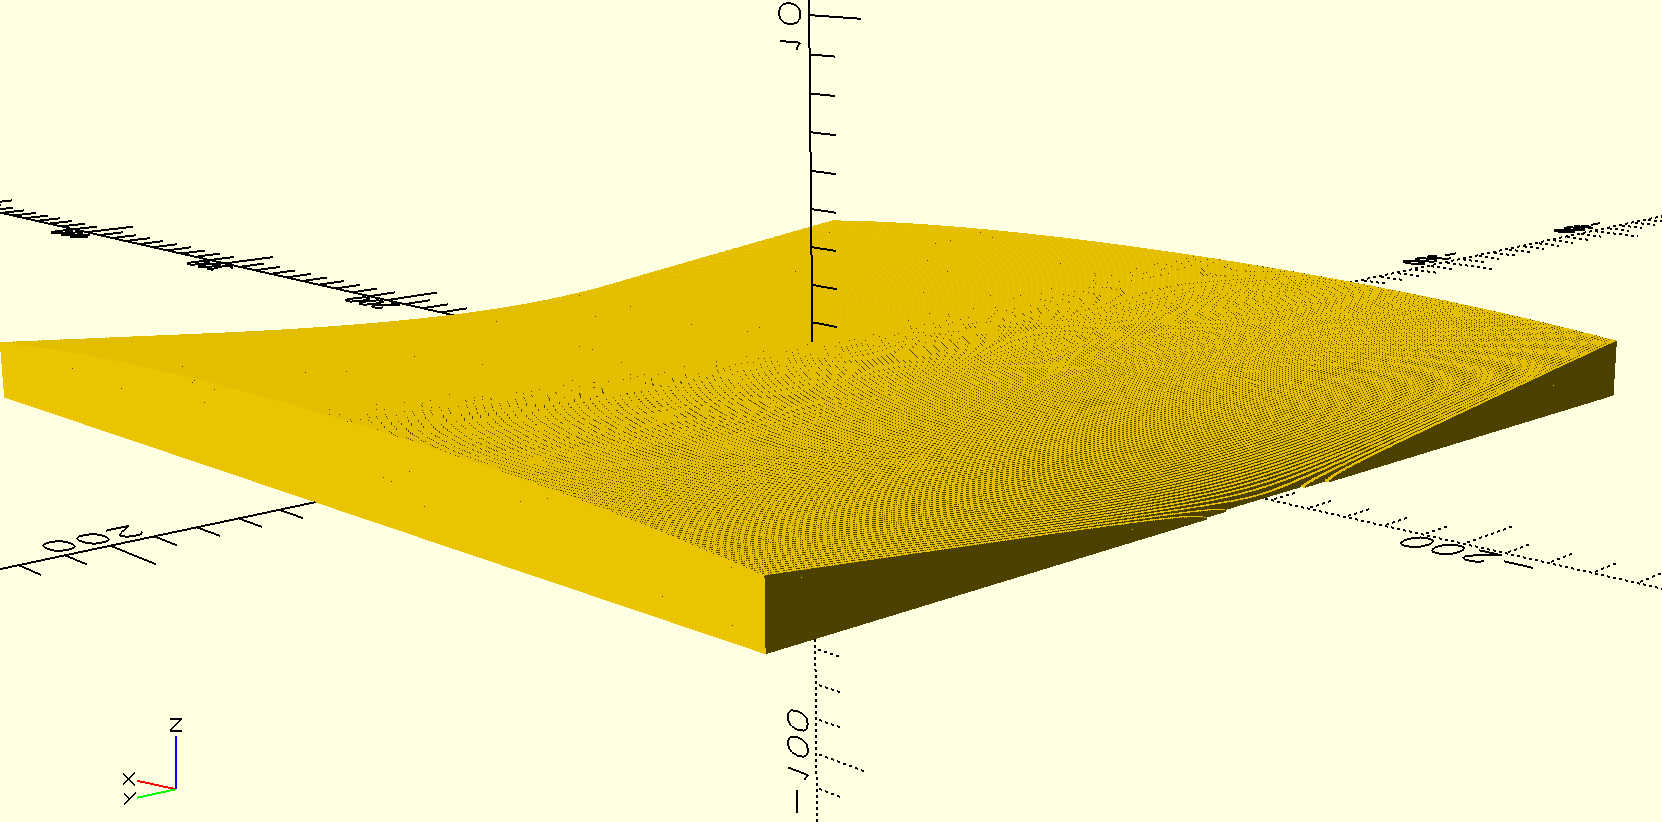
Then I tried designing a 350x350 shim using OpenSCAD using the saddle equation (z=ax^2 - ay^2 +k), where an and k a constants. Here’s the model in SCAD exaggerated x10 in the vertical. The model generates an array of 233 x 233 x 1.5^2 mm rectangles which look like this
I set “a” to 0,0055 and “k” to 1 so’s the thinnest part of the shim was about 0.5mm (ie 4 layers of 0.12mm) and the thickest part was 0.5 plus the required range (so ~1.6 in total
.
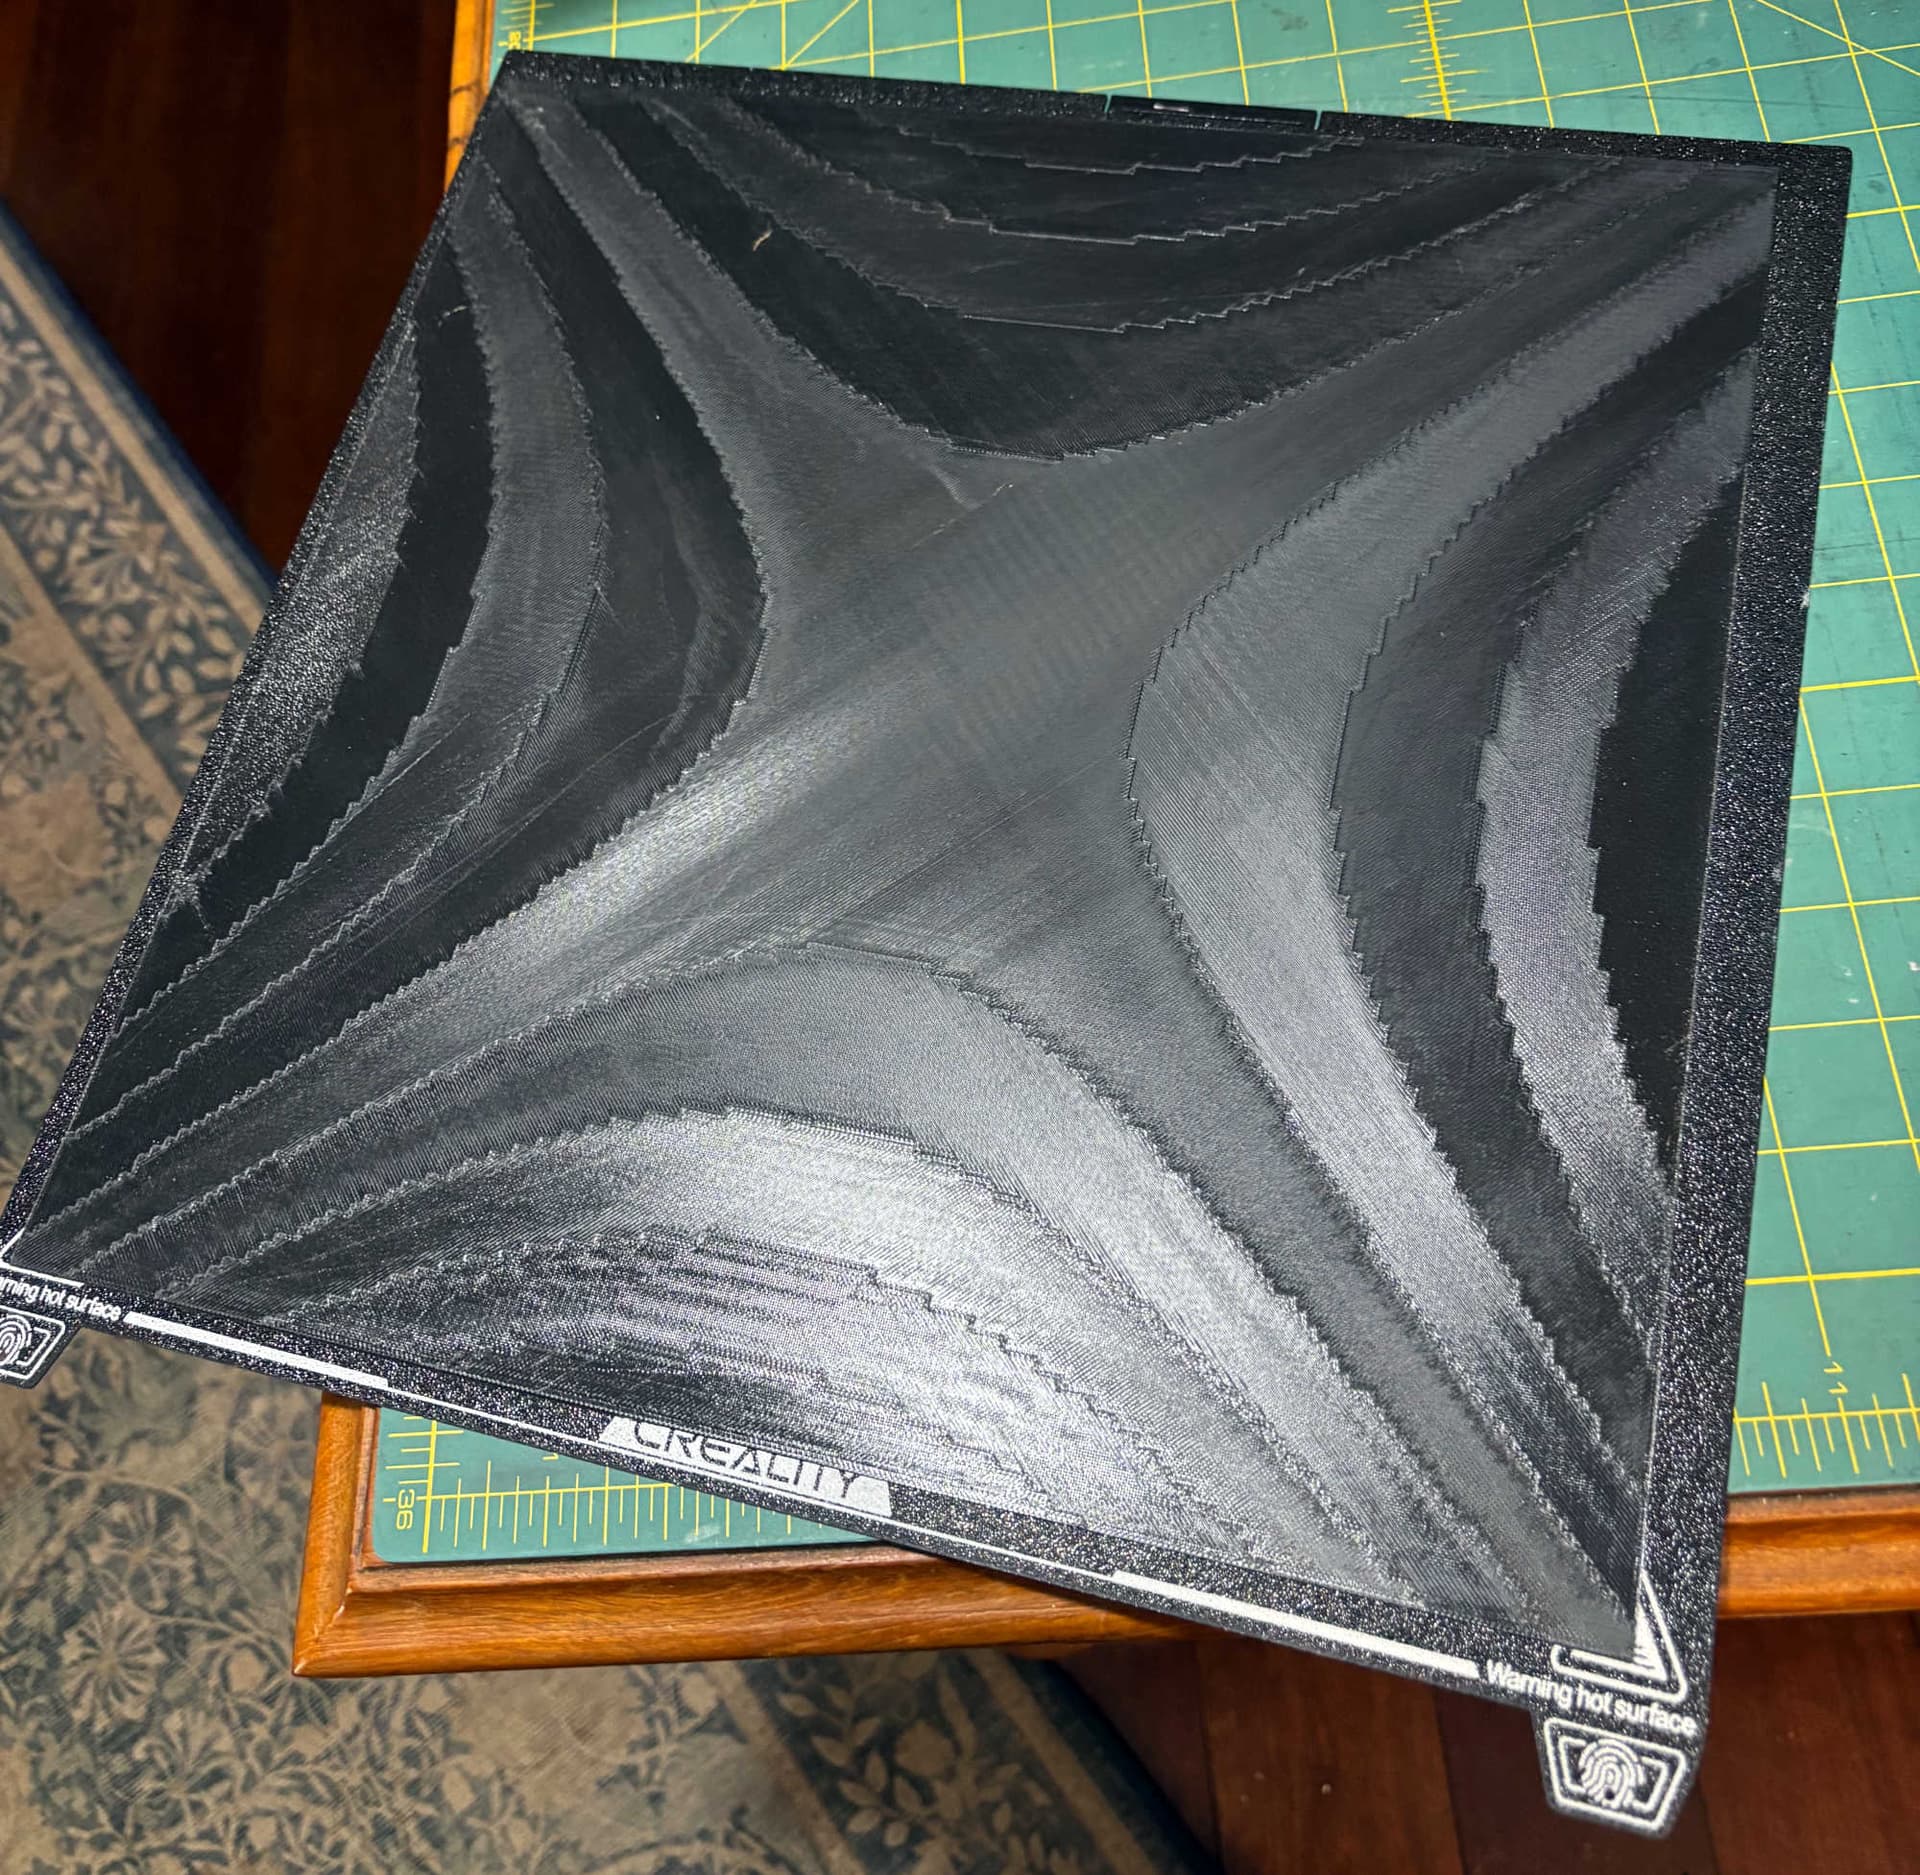
And here’s what it printed
I could tell right away it was only a rough approximation of the actual shape and while it was easier to handle than paper the final range was no better than using paper.
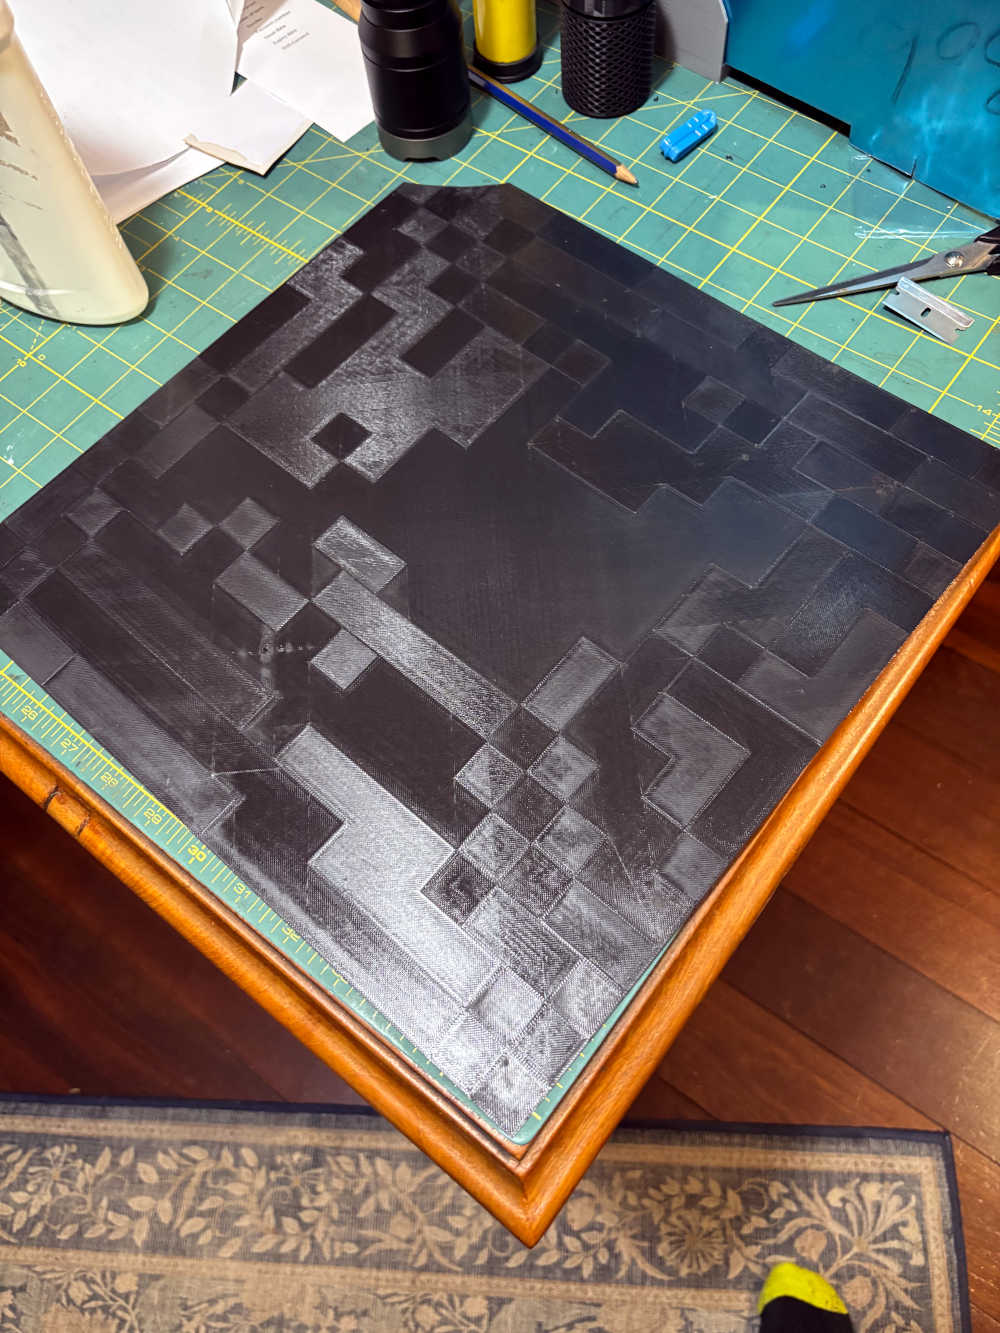
The next thing I tried was extracting the (9x9) 81 bed flatness data points from Fluid. I stuck these into a spreadsheet and interpolated between all the numbers to generate 17x17 (289) data points which I fed into OpenSCAD and then the slicer and it printed out as this. Note the top conner which came unstuck and lifted slightly off the bed so I cut it off for a quick test.
More points would be better but I tested this out even with the missing corner I got a range of 0.477 so a 56% improvement.
I then added just one piece of paper and got this, a 70% improvement..
Of course I don’t know when to stop fiddling with this- probably as soon as I need to print something real out but I’m going to at least print out this shim again and hopefully I can get it to stick in that corner.
The shims are printed using PETG and provided they are thin enough still allow the plate to stick quite firmly to the magnetic bed.
If needed, dedicated Shims could even be made for different temperatures. just a heads up that even though the shims are thin they do use about 130g of filament.
If anyone wants to play around with the OpenSCAD file (it’s only about 30 lines of code and 8 variables - only 6 matter I can put it on Thingiverse. Just be aware you have to extract the flatness data from Fluid and massage it around a bit in something like a spreadsheet or data processing App.