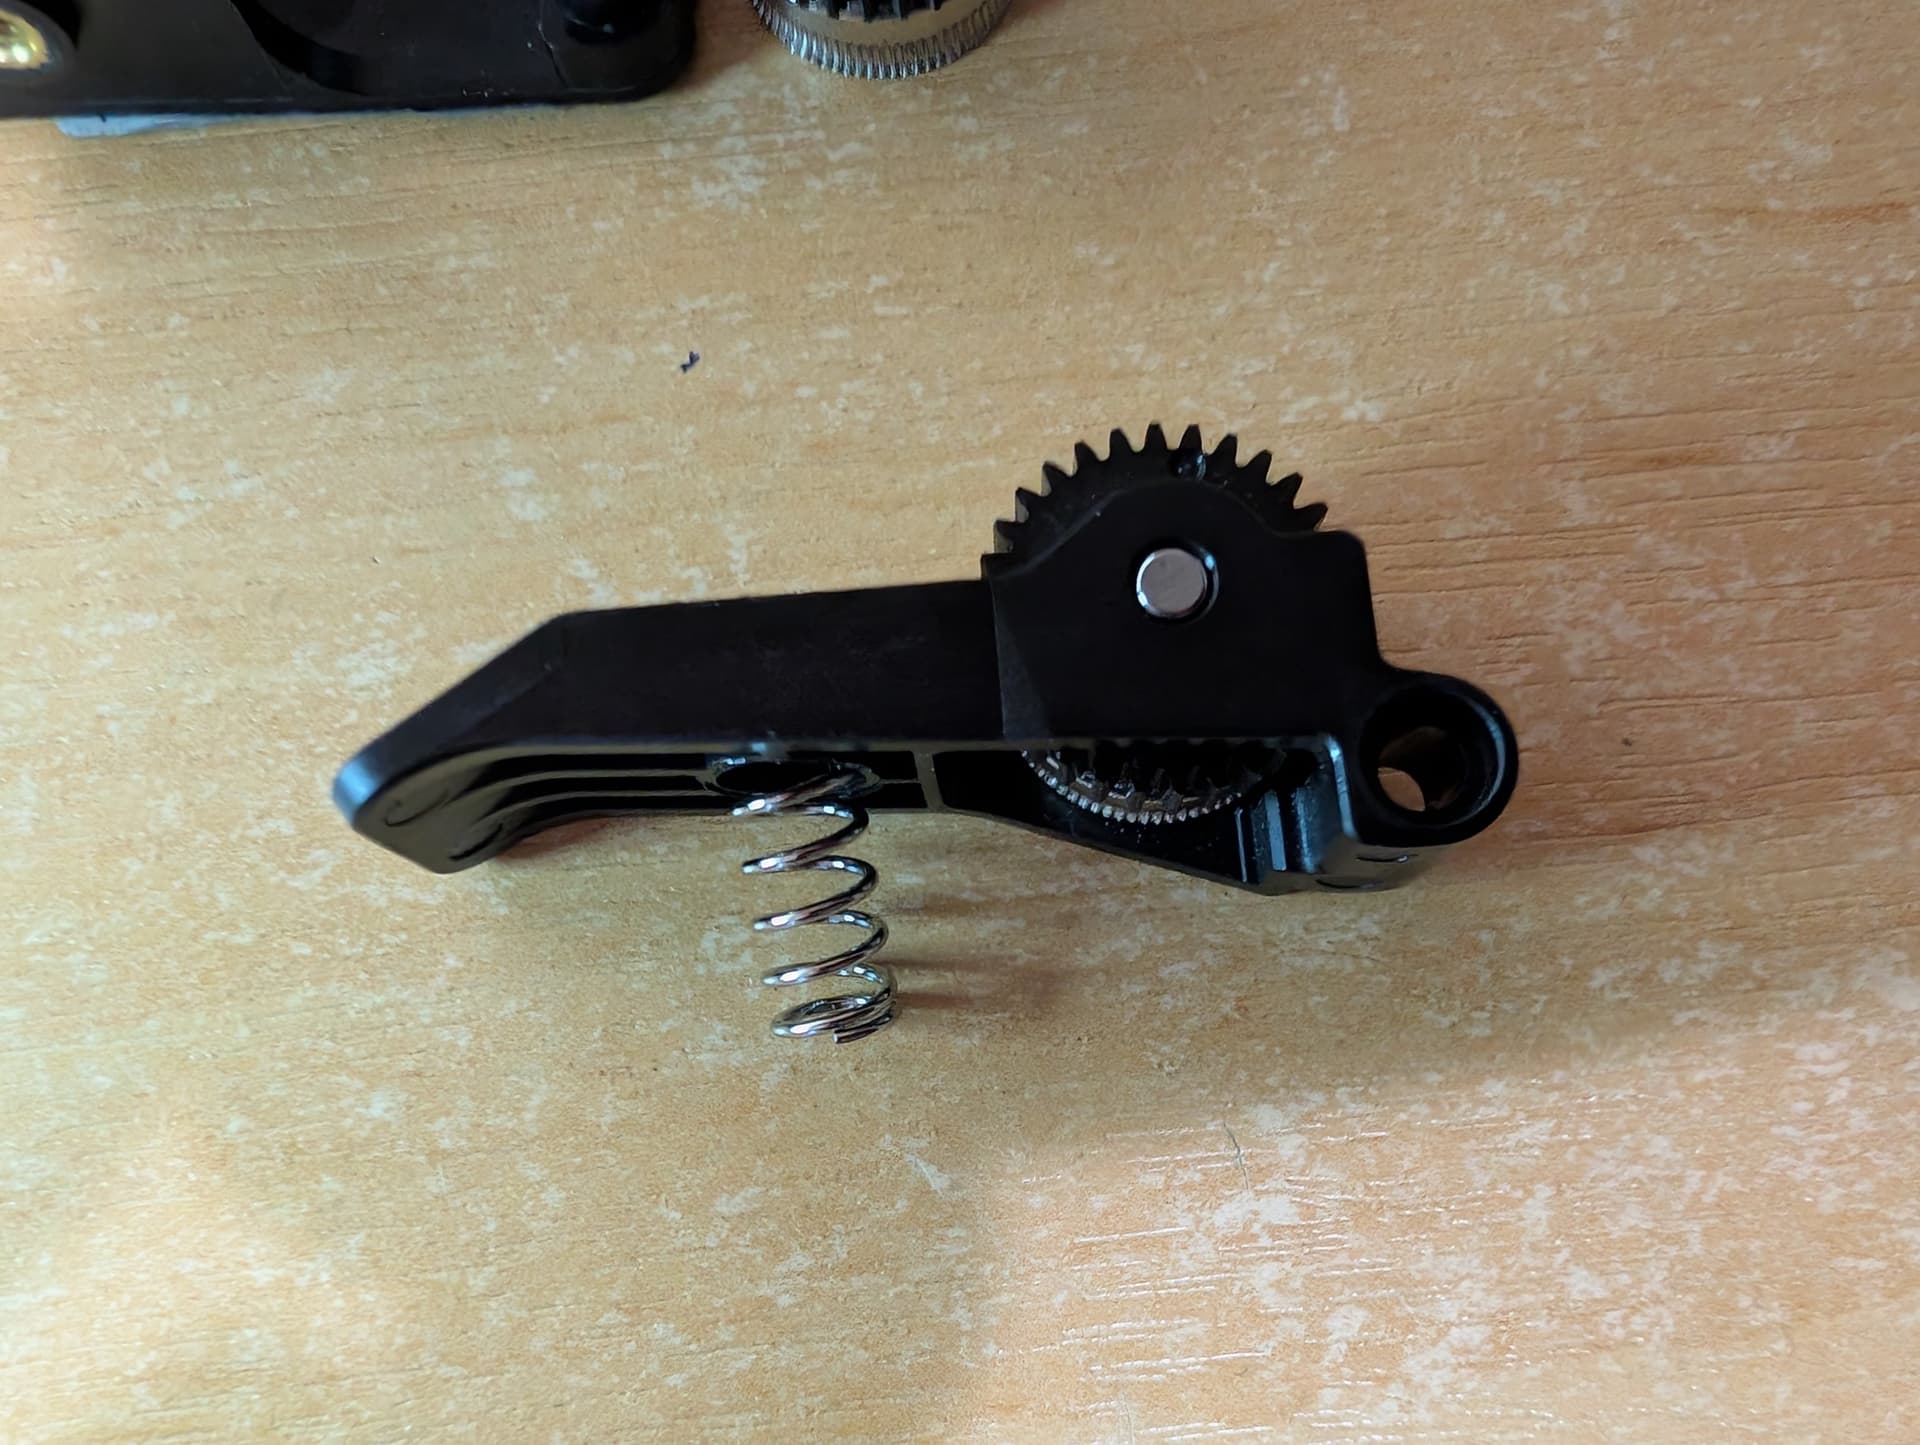
I have done this SO many times now (how did it get PETG to go THERE???) that I have “the knack” of removing the extruder arm and replacing the pin, with my bare hands - no tools. I thought I’d share as the first time it is a daunting task.
First, make sure when you pull the extruder housing of its mount that you pull as straight as possible. I have not yet had the extruder arm “ping” off when removing the casing, but the last thing you want is to have that spring flying around.
It’s also much easier if you can remove the bowden tube so the extruder housing is completely “free”.
Once you are looking at the opened extruder, it is still the case that if you can see the clog and clear it WITHOUT removing the arm do so. However, if you have either unmelted or melted filament wrapped around it, you’re probably going to have to.
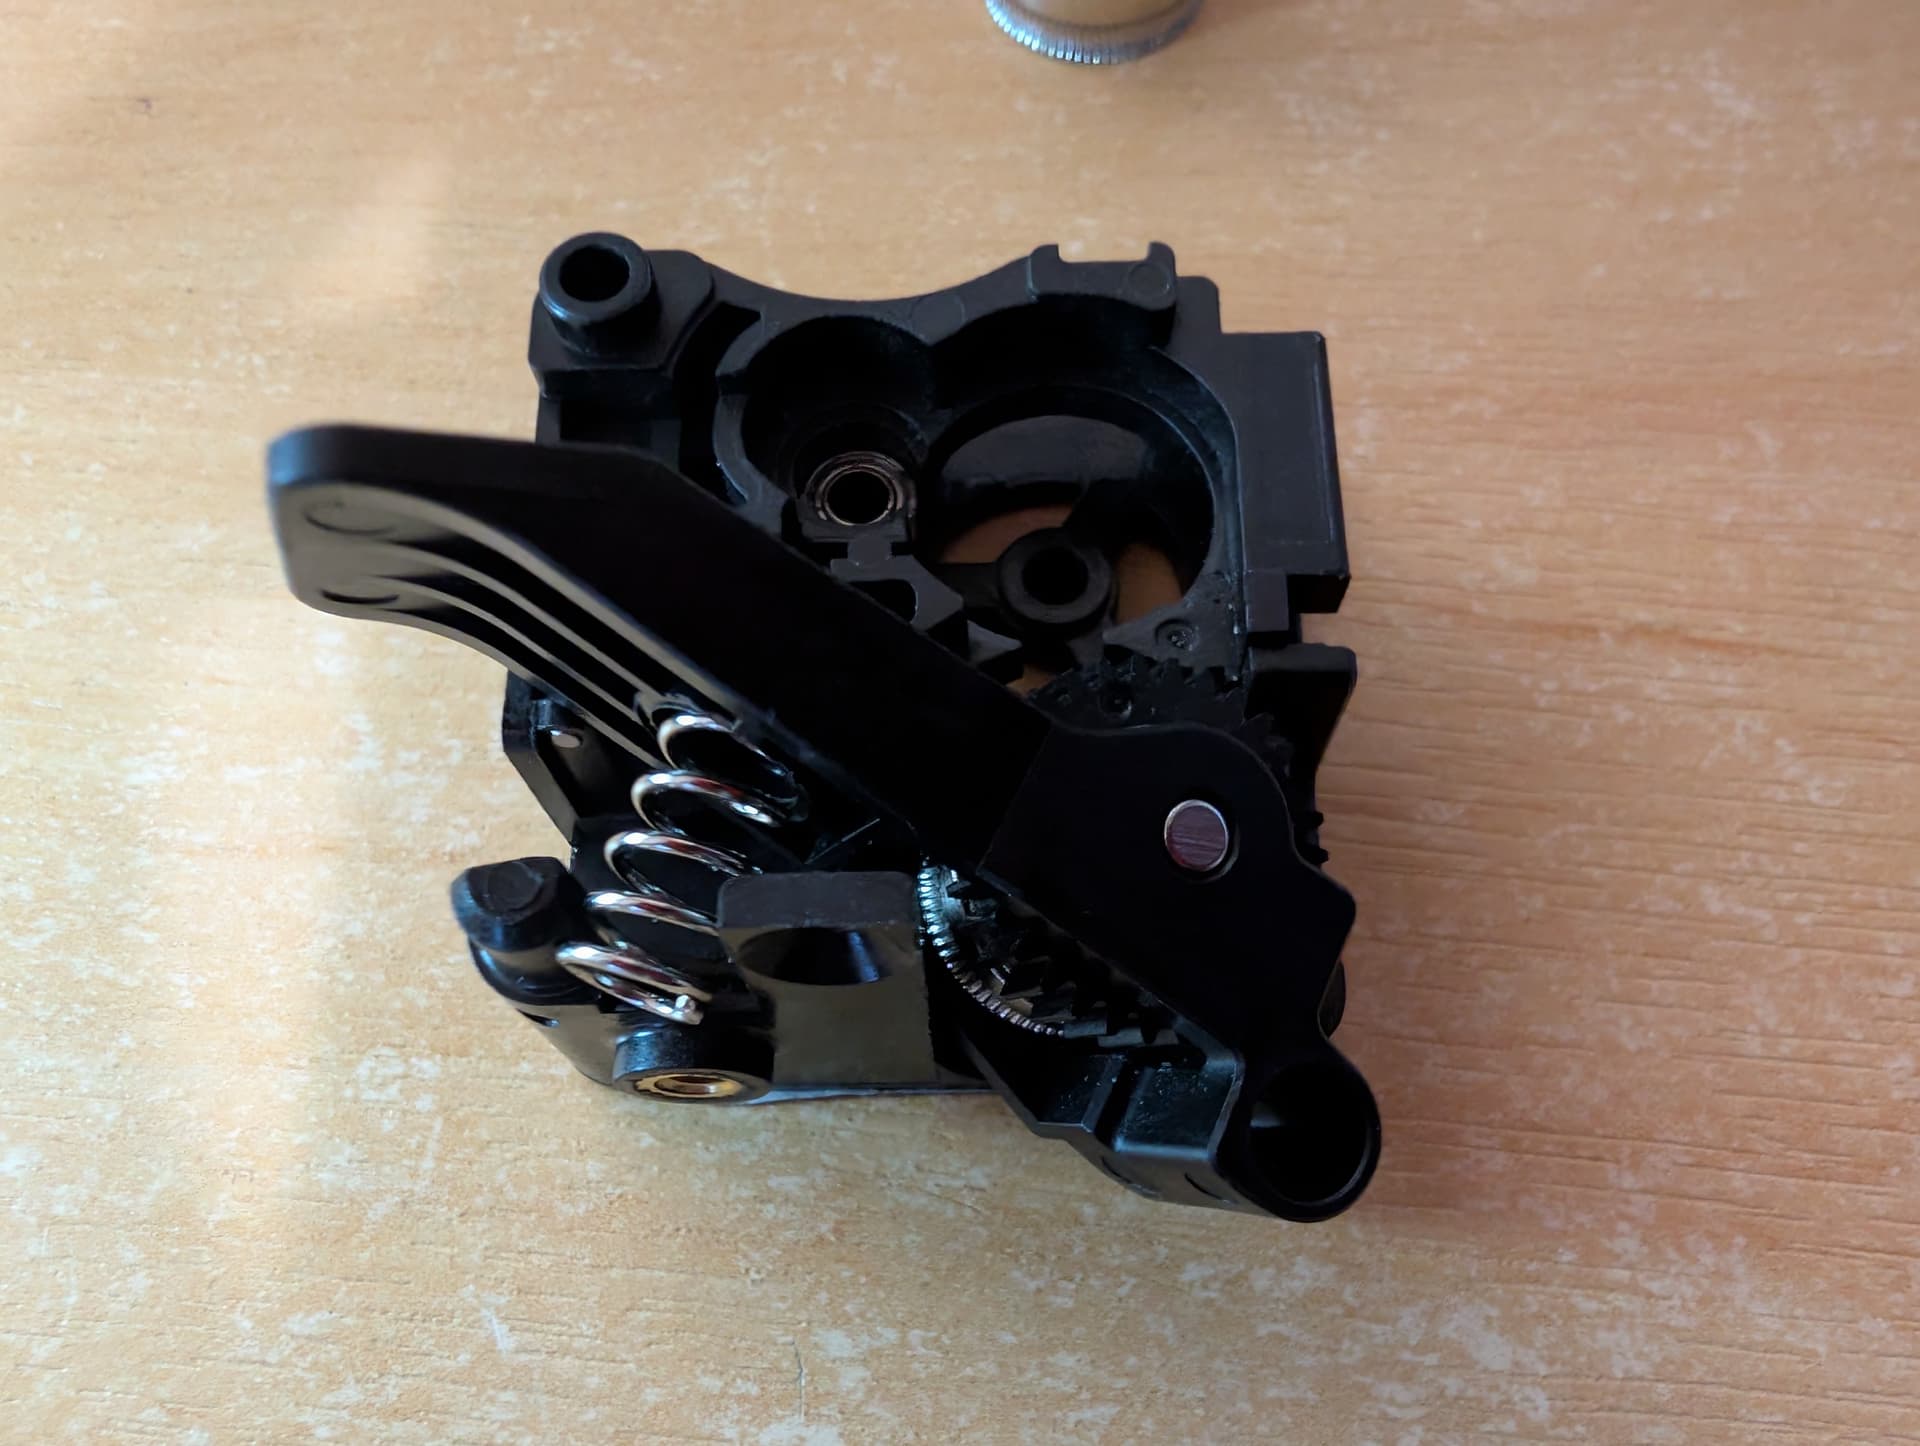
So - holding the extruder with the extruder arm nearest to you, put your right thumb over the gear, With your left hand, rest your thumb on the release lever and over the spring. Using your left index finger, and without moving your thumb from over the spring, pinch the release lever between your index finger and thumb.
Using mainly your left hand, lift the extruder arm and at the same time twist the top of it toward you. The lever may “ping up”, but as long as your thumb is over the spring, you should not lose it.
To reinstall, the trick is to put the spring in the lever, NOT the slot on the extruder body; it is more secure that way. Keep it in place with your left thumb whilst you “half-mount” the gear into it’s recess with your right hand.
Photos as promised;

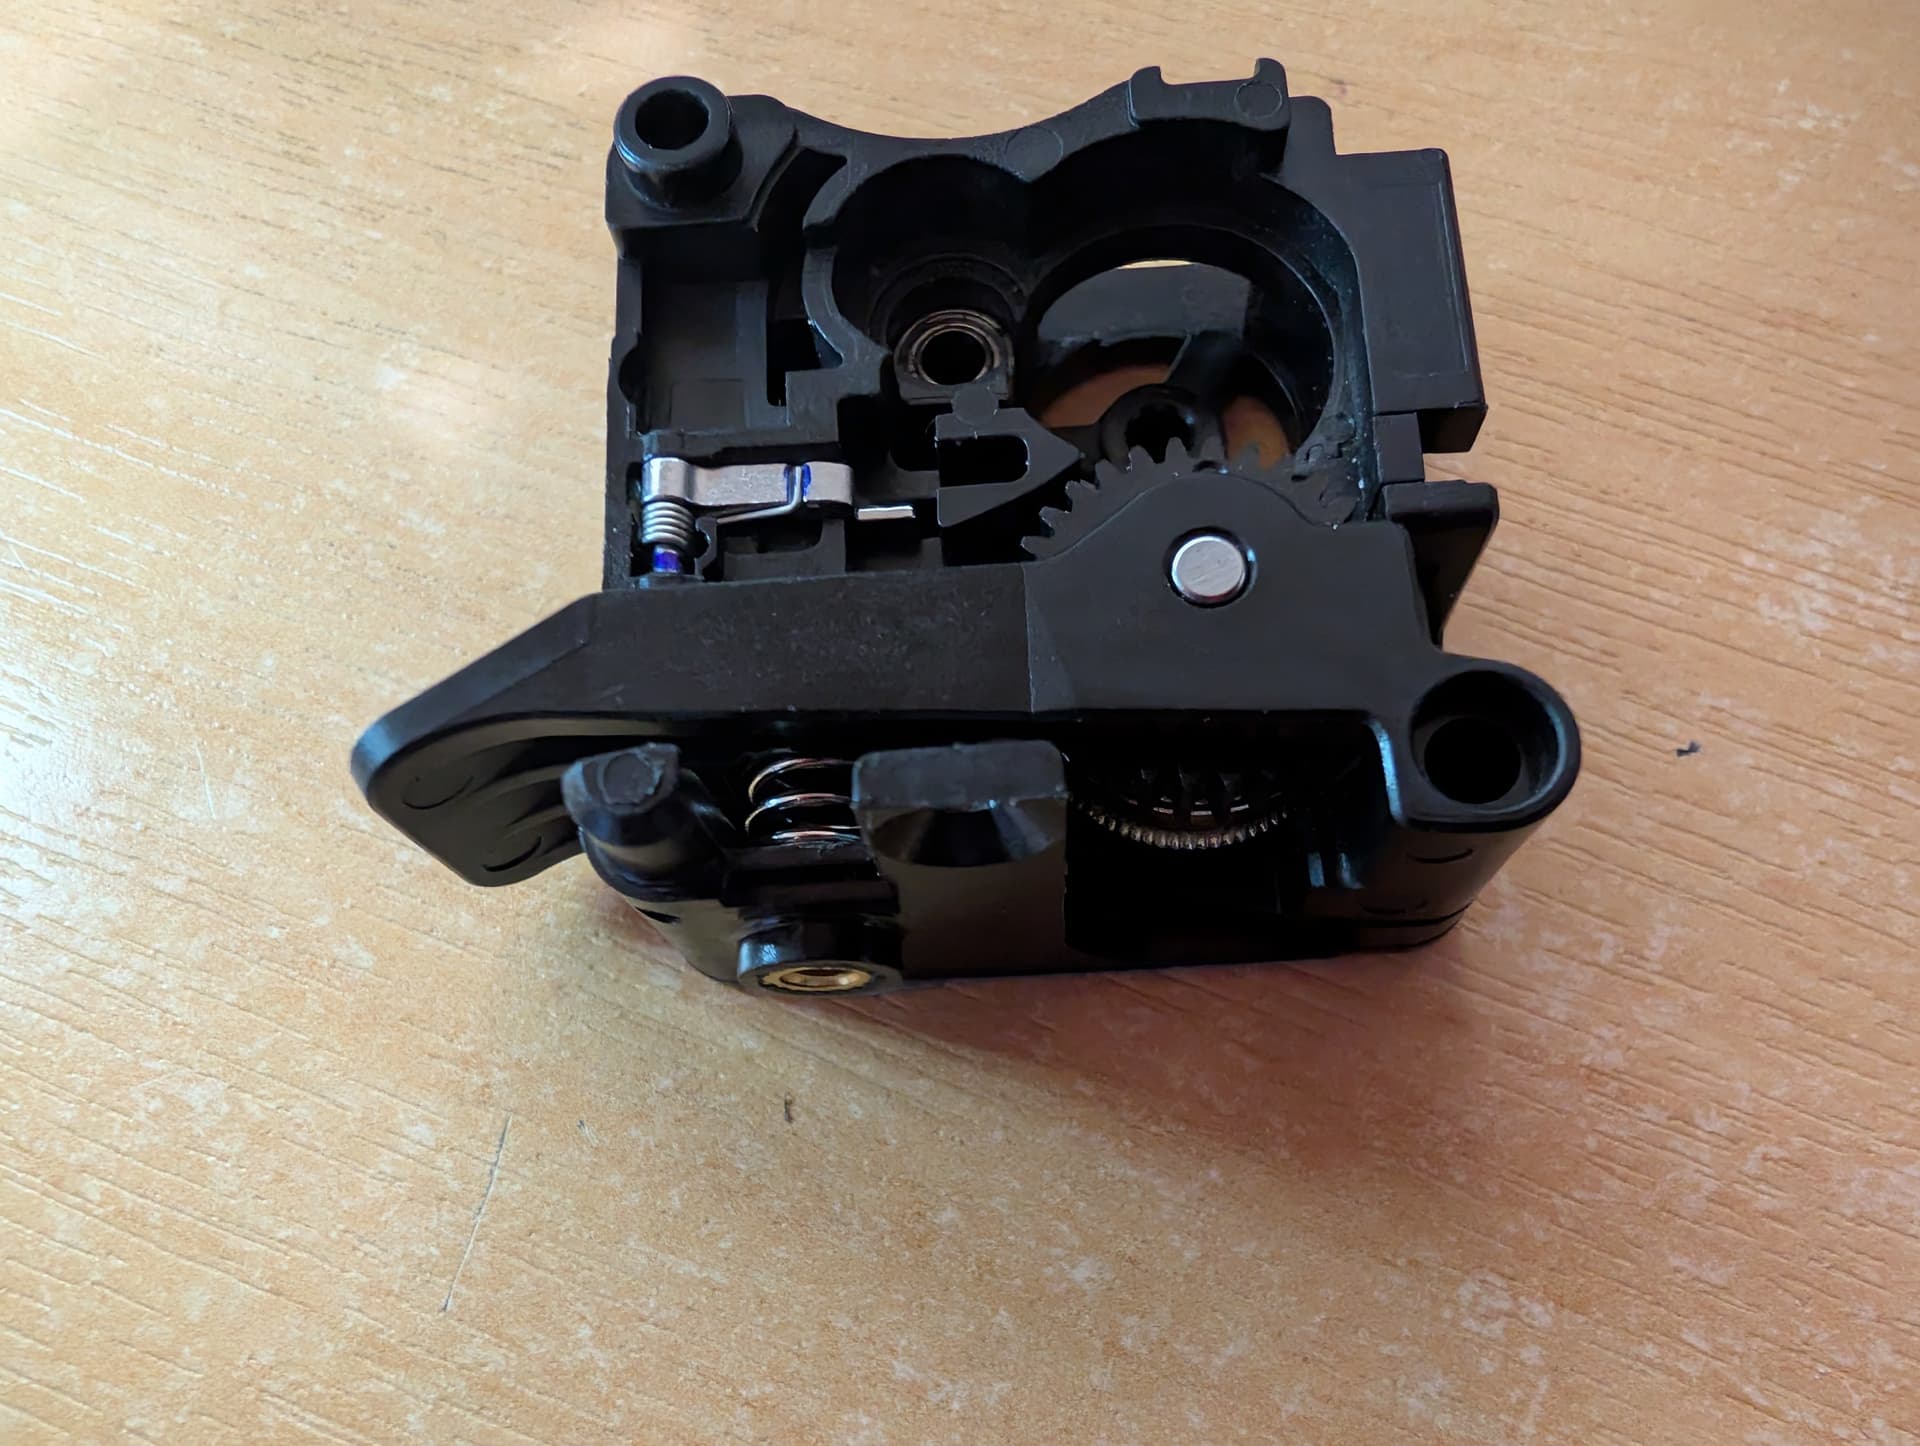
Then the trick is to bring the lever towards the body at a slight angle. With one end of the spring correctly located in the lever, you should be able to angle the opposite end of the spring down so that it rest inside the body where it is supposed to.
Using a reverse of the “lift and twist” method that removed it, you can “twist and press” the lever arm to both compress the spring into its spot and complete the mounting of the lever.
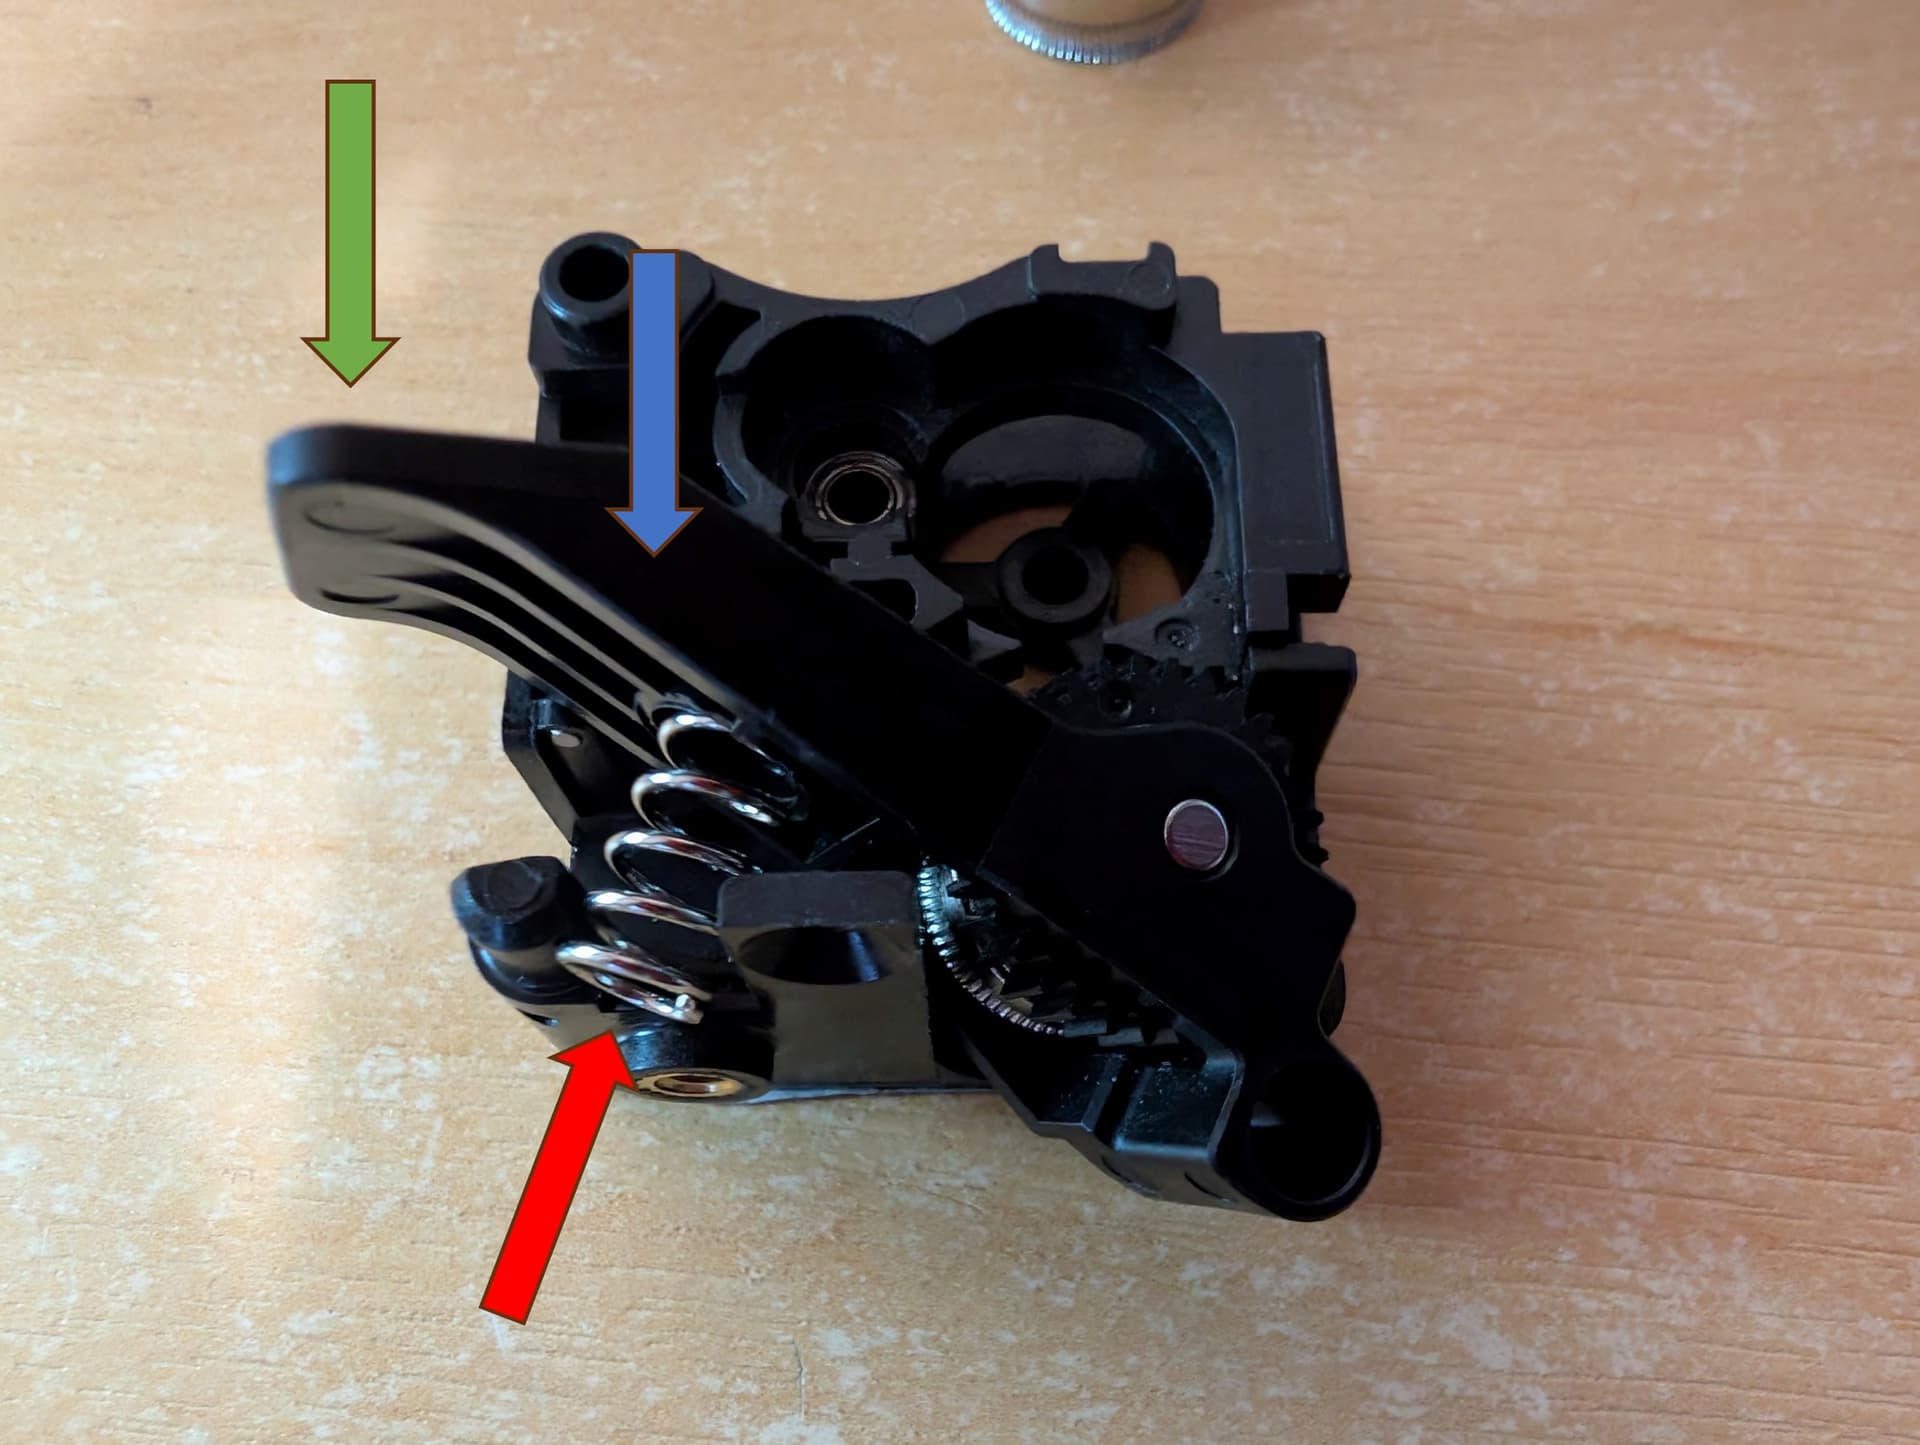
Additional instructions for following photo;
RED Arrow - use left thumb to compress spring and partially engage with slot.
GREEN Arrow - use left index finger to compress spring fully.
BLUE Arrow - use right thumb to press the lever down into the casing
It was surprisingly easy, but…disclaimer…I’ve done it once (Edit: twice! Yay!). The next time I have a clog (how I wish that was “if”, not “when”) I’ll try and video it. (Edit, no I won’t it’s impossible to do both!).
Closing statement; I have had Parkinson’s disease for ten years. If I can do this, anyone can!