I have set the z offset correctly. I have done the auto leveling for the bed and made sure to have the right printer picked when doing the slicing for my specific model (creality HI)
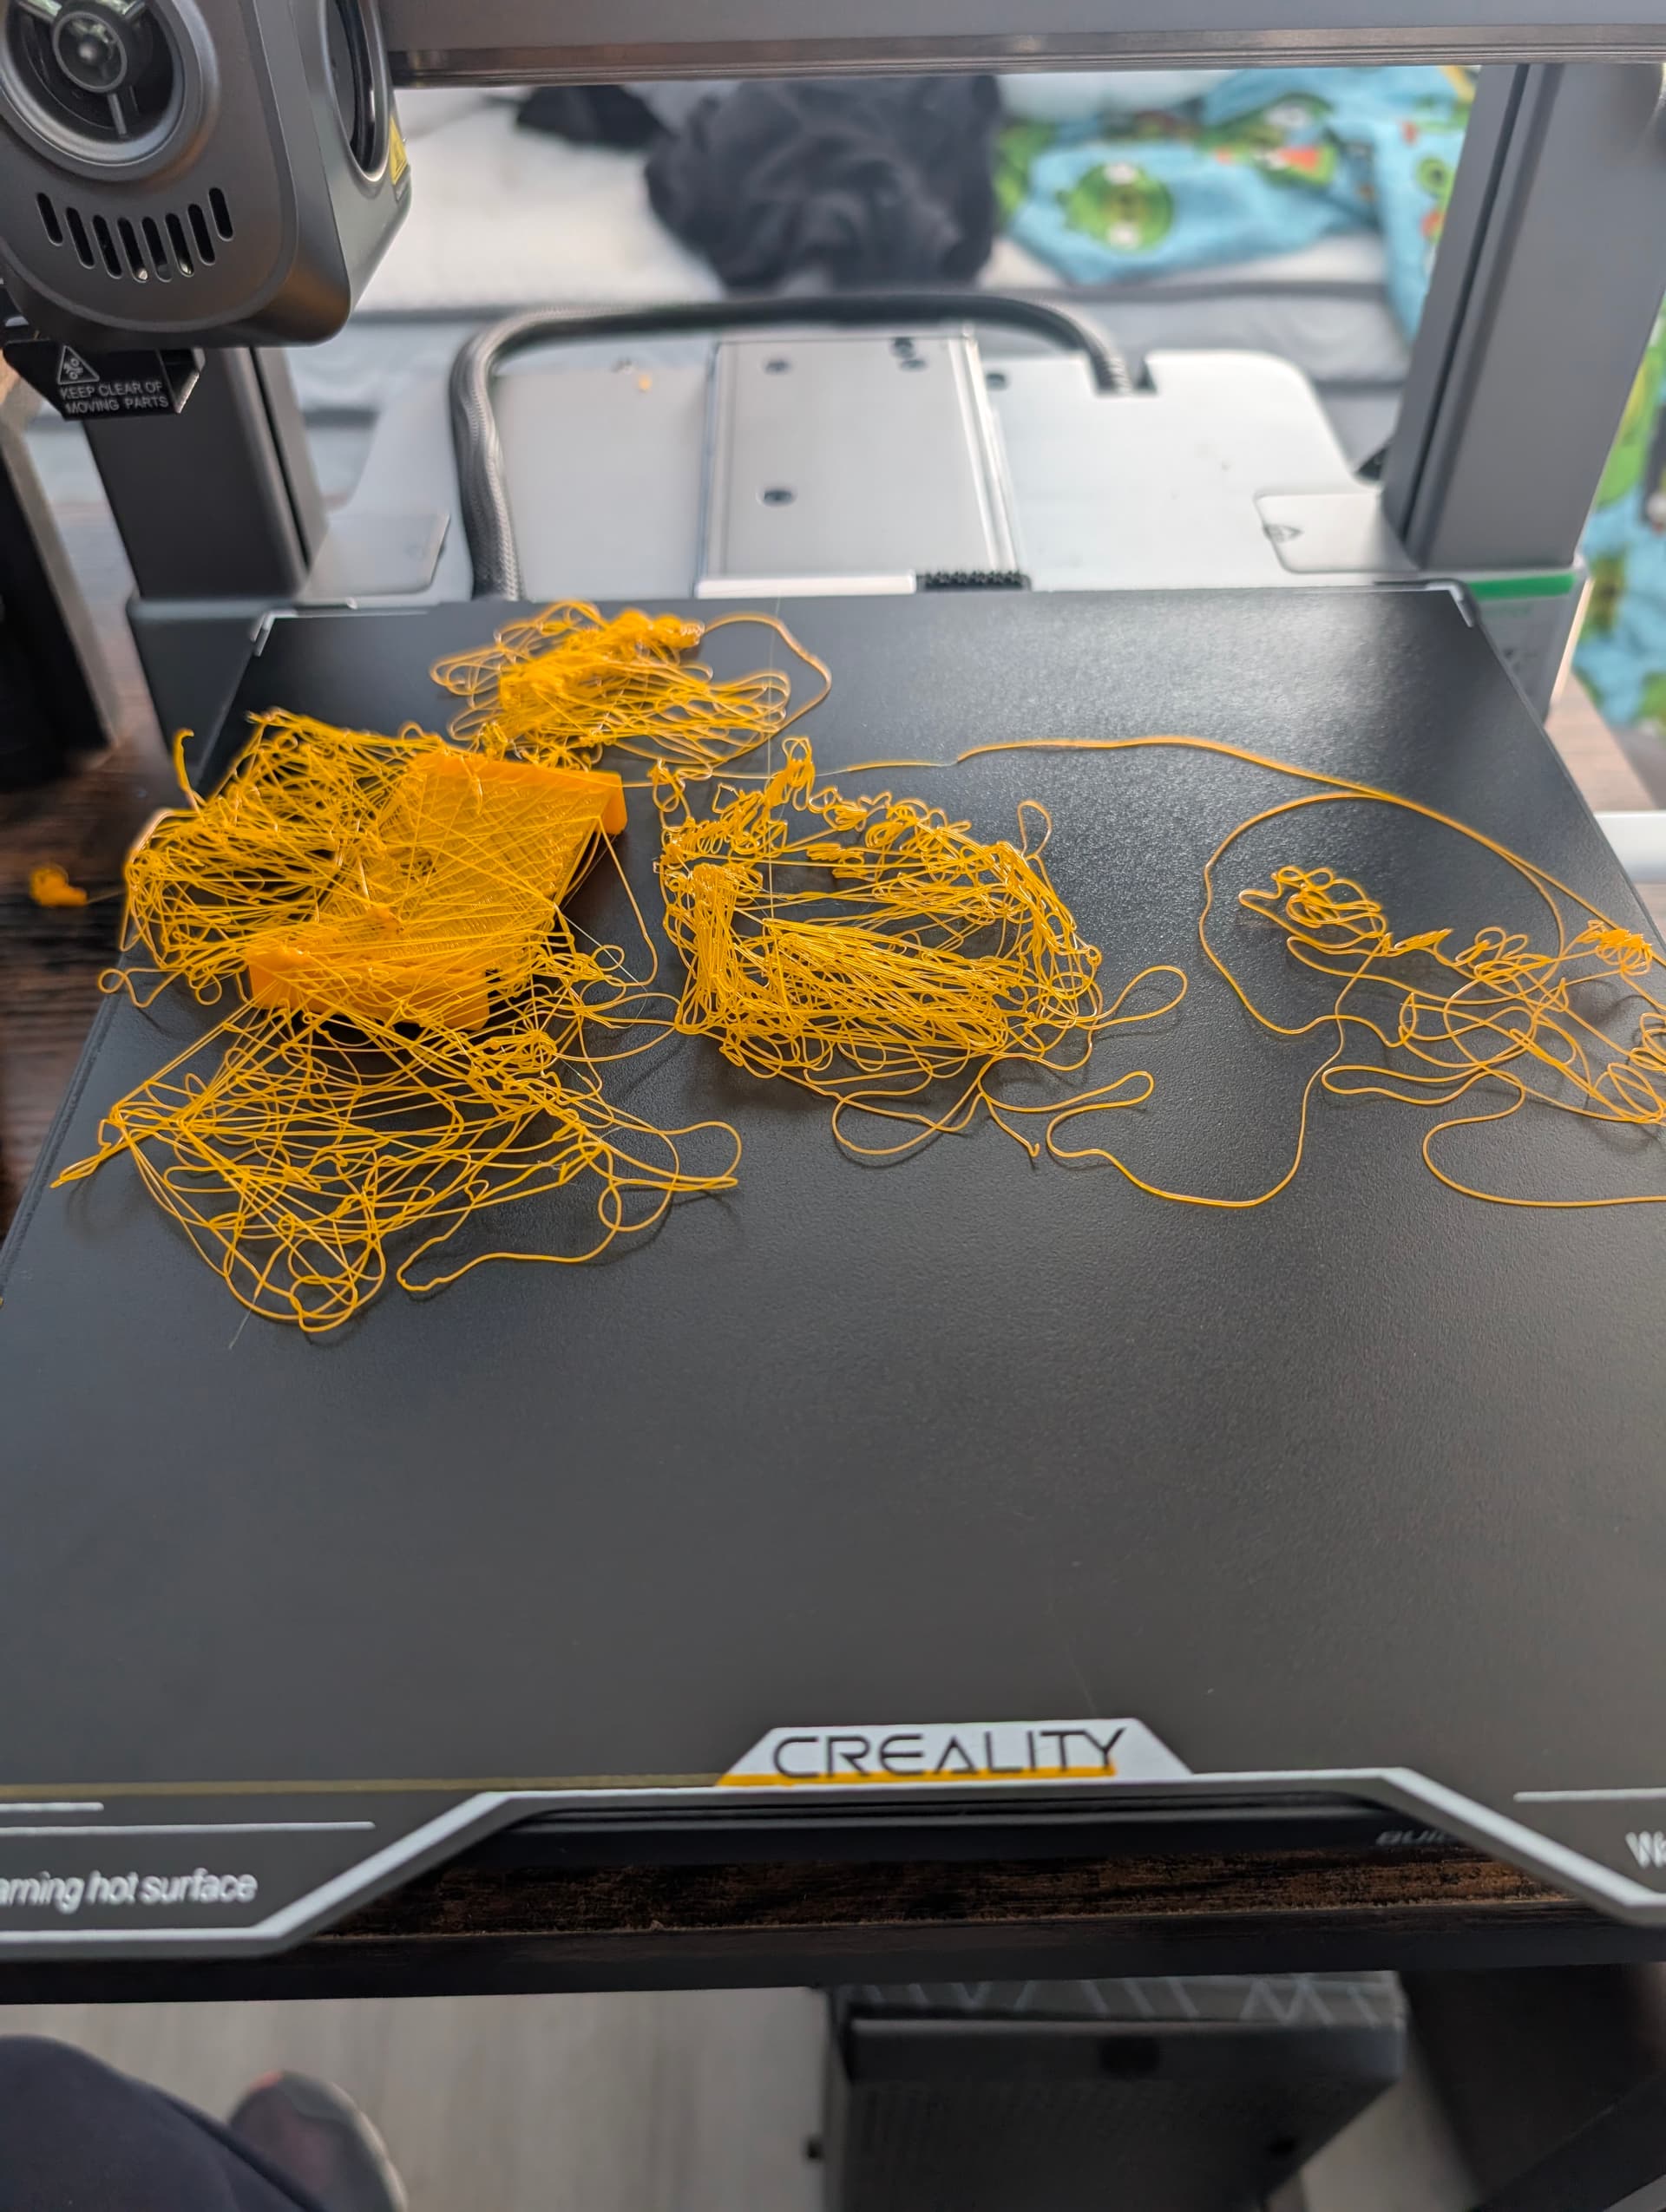
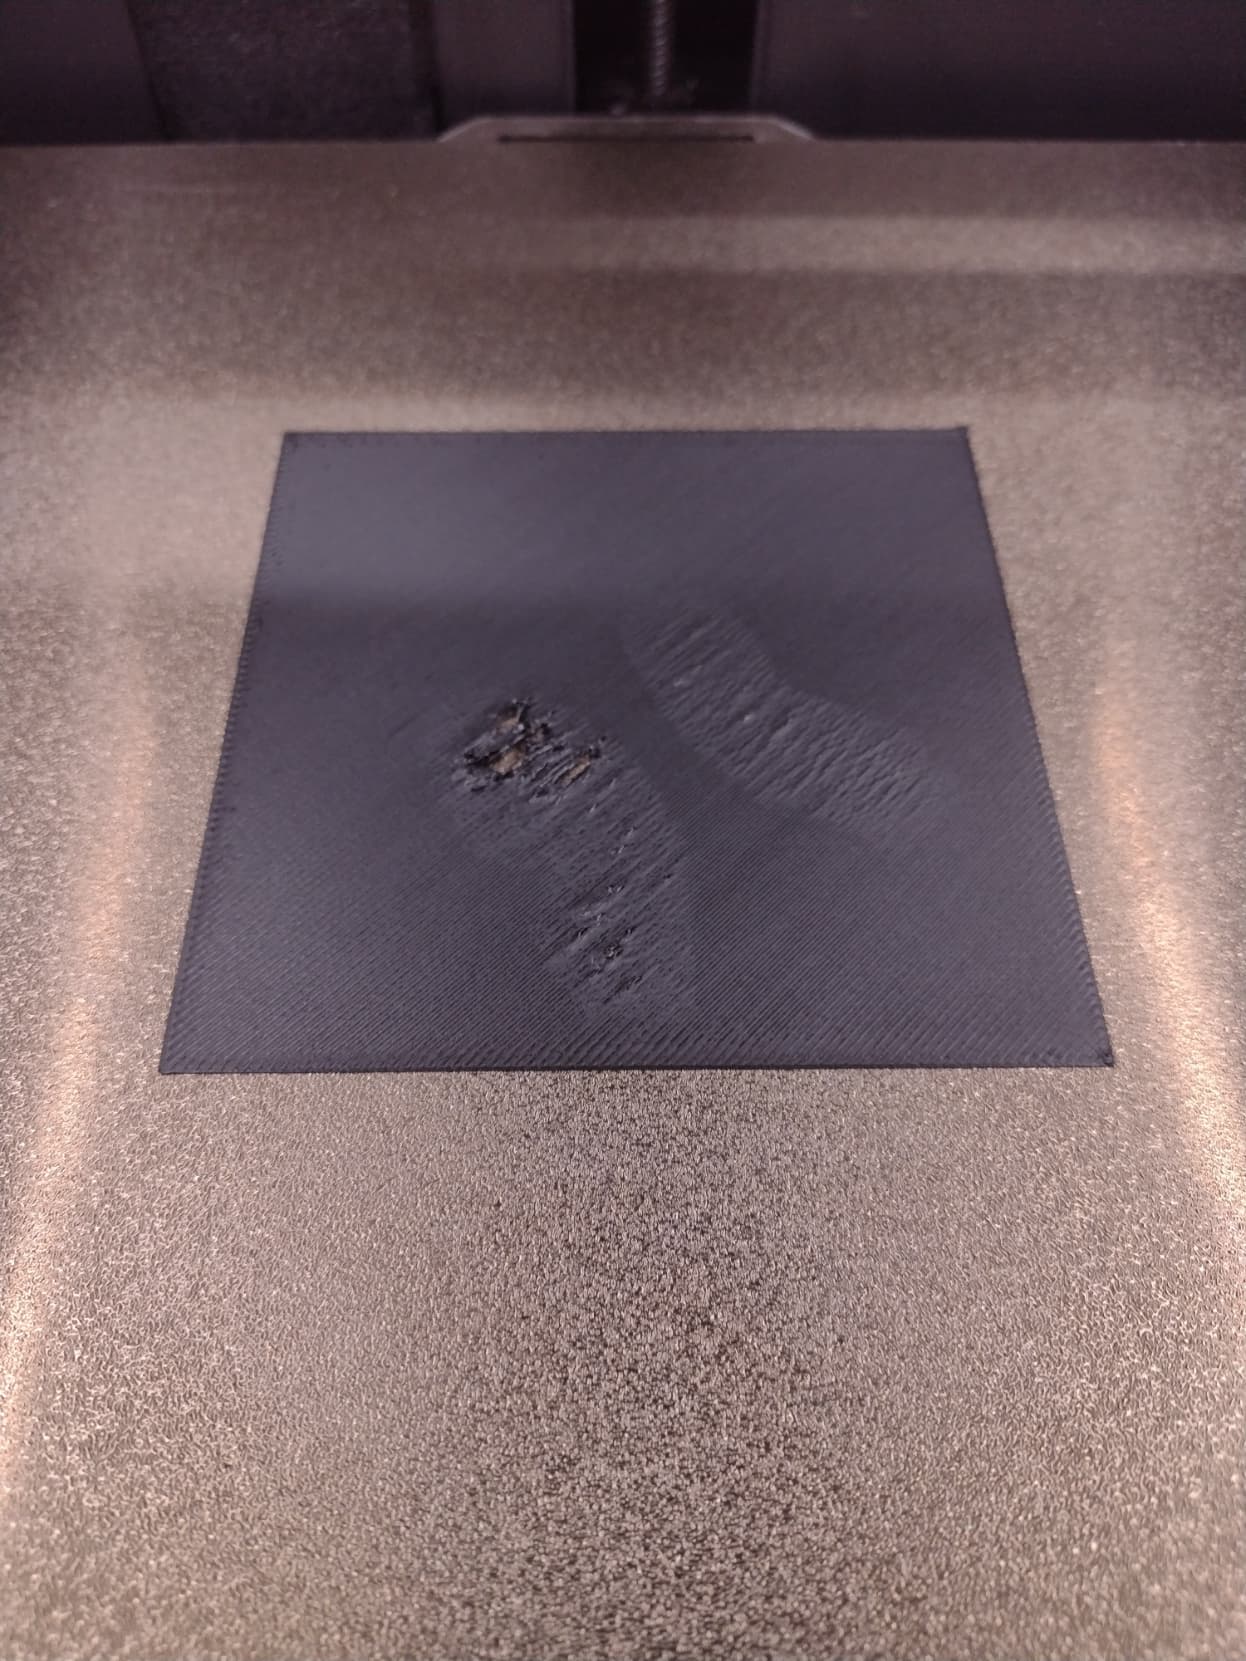
It starts to print the base pieces without issue, then gets to a point where it looks like the filament isn’t sticking to what is already laid down and just starts going everywhere.
Have attached what I’m trying to print and picture of what eventually happens.
Thanks
bottom.stl (402.6 KB)
Hello @George_Spalholz 
Welcome to the Creality Forum…! 
Can you give us a little more info..?
What is the bed temp..?
Nozzle temp…?
PLA..?
I would start with a test piece like a 100mm x 100mm flat square and watch how the filament lays down.
Make sure to clean the plate preferable with alcohol. Isopropyl Alcohol.
Sure, sorry for being vague before
Bed temp 55c
Nozzle temp 220c
PLA 1.75MM
I rolled back to firmware to .47 and am currently trying again so far print job has gotten farther than it did last time.
Fingers crossed
I think on that printer menu you also can adjust the Z while it’s printing. I’m not familiar with that one.
Also sometimes it’s better to bump up the bed heat as some of these printers don’t reflect what you set it at. I’ve had mine show 54°C when I’ve set it at 60°C
This is not a firmware problem. While it can sometimes be a calibration issue, the most likely cause is build plate contamination. A secondary issue is that the build plate isn’t come up to a high enough temp. But explore the build plate hygiene issue first.
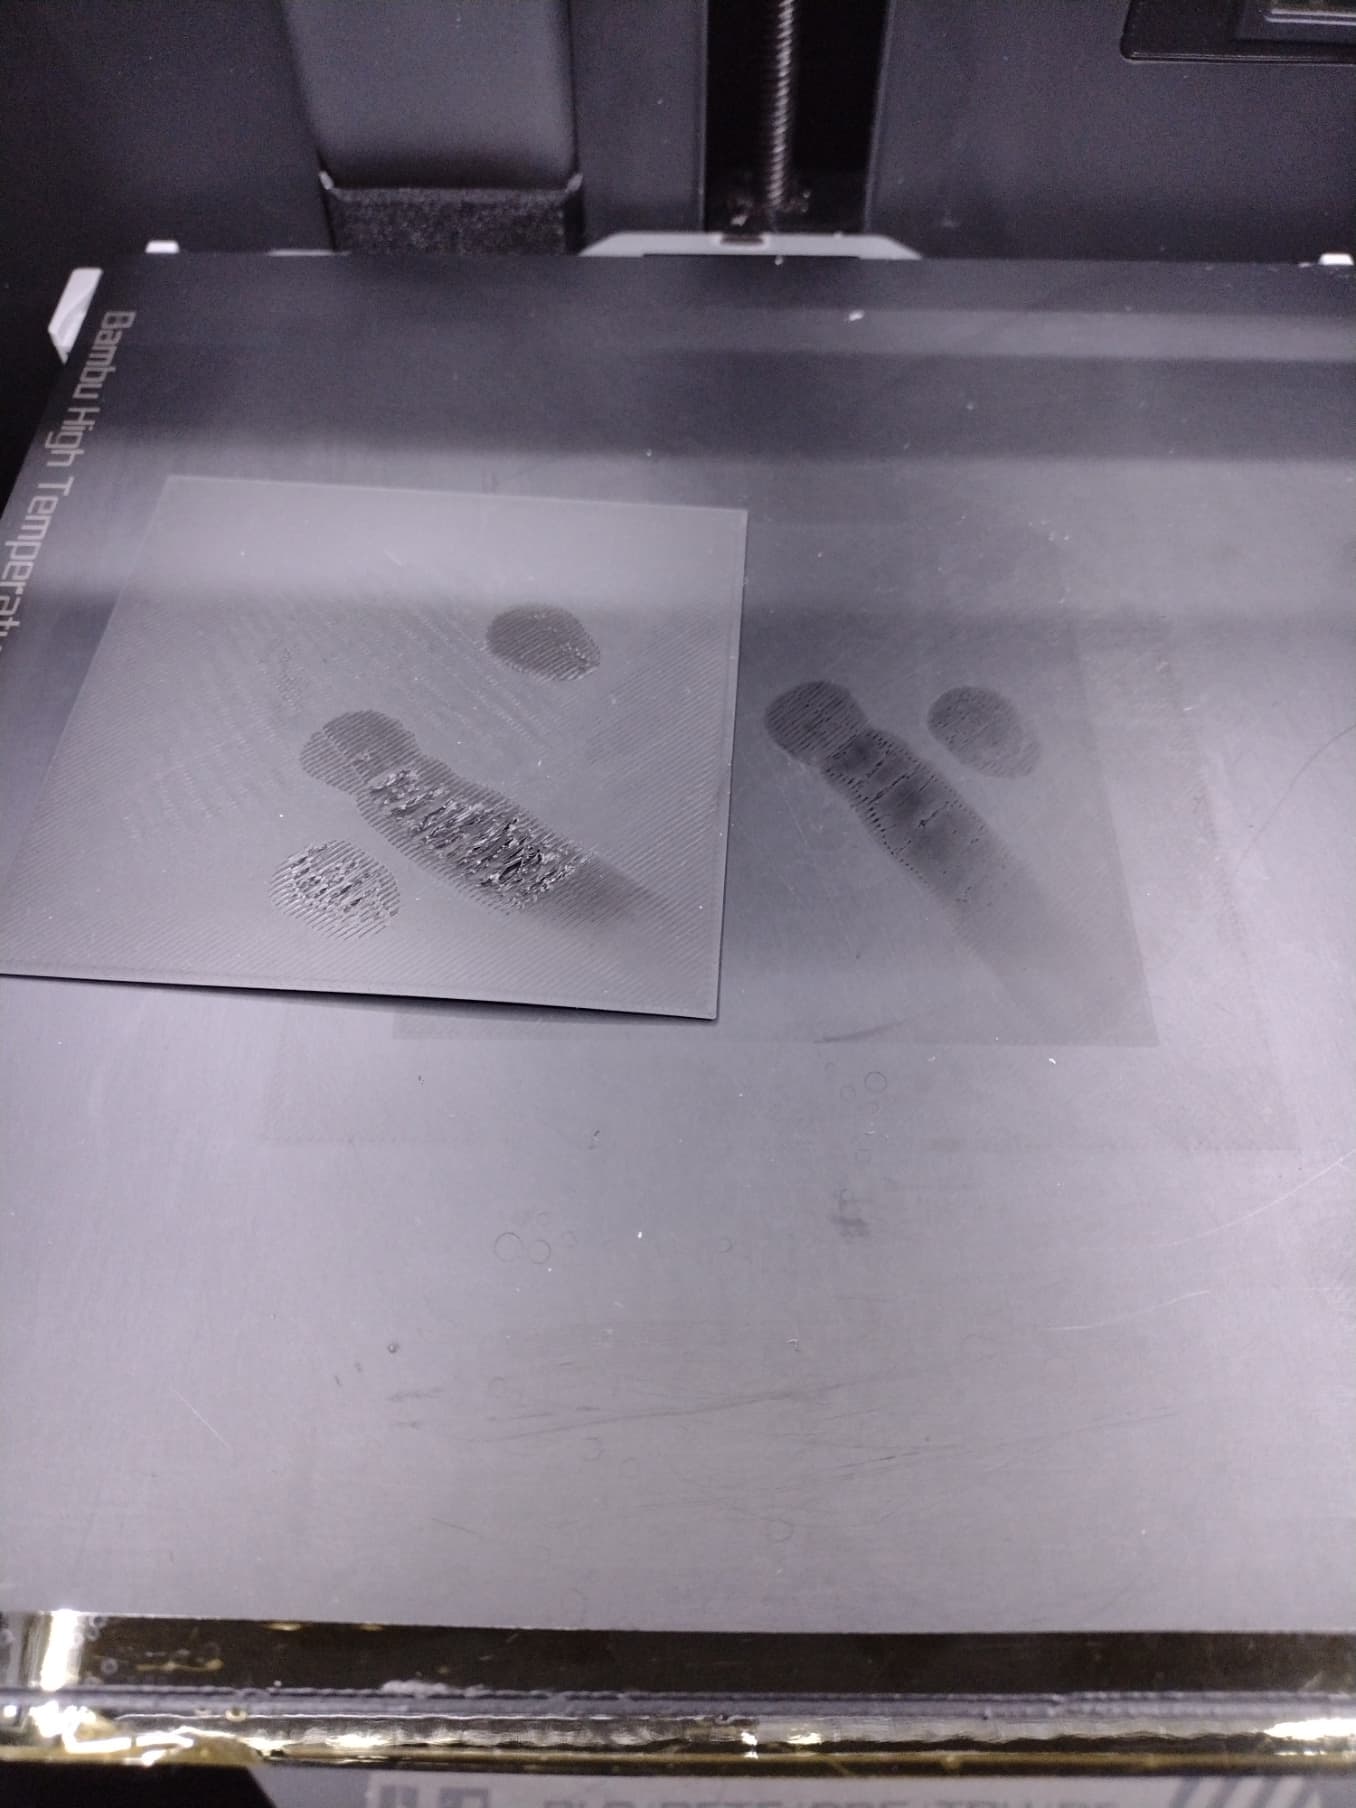
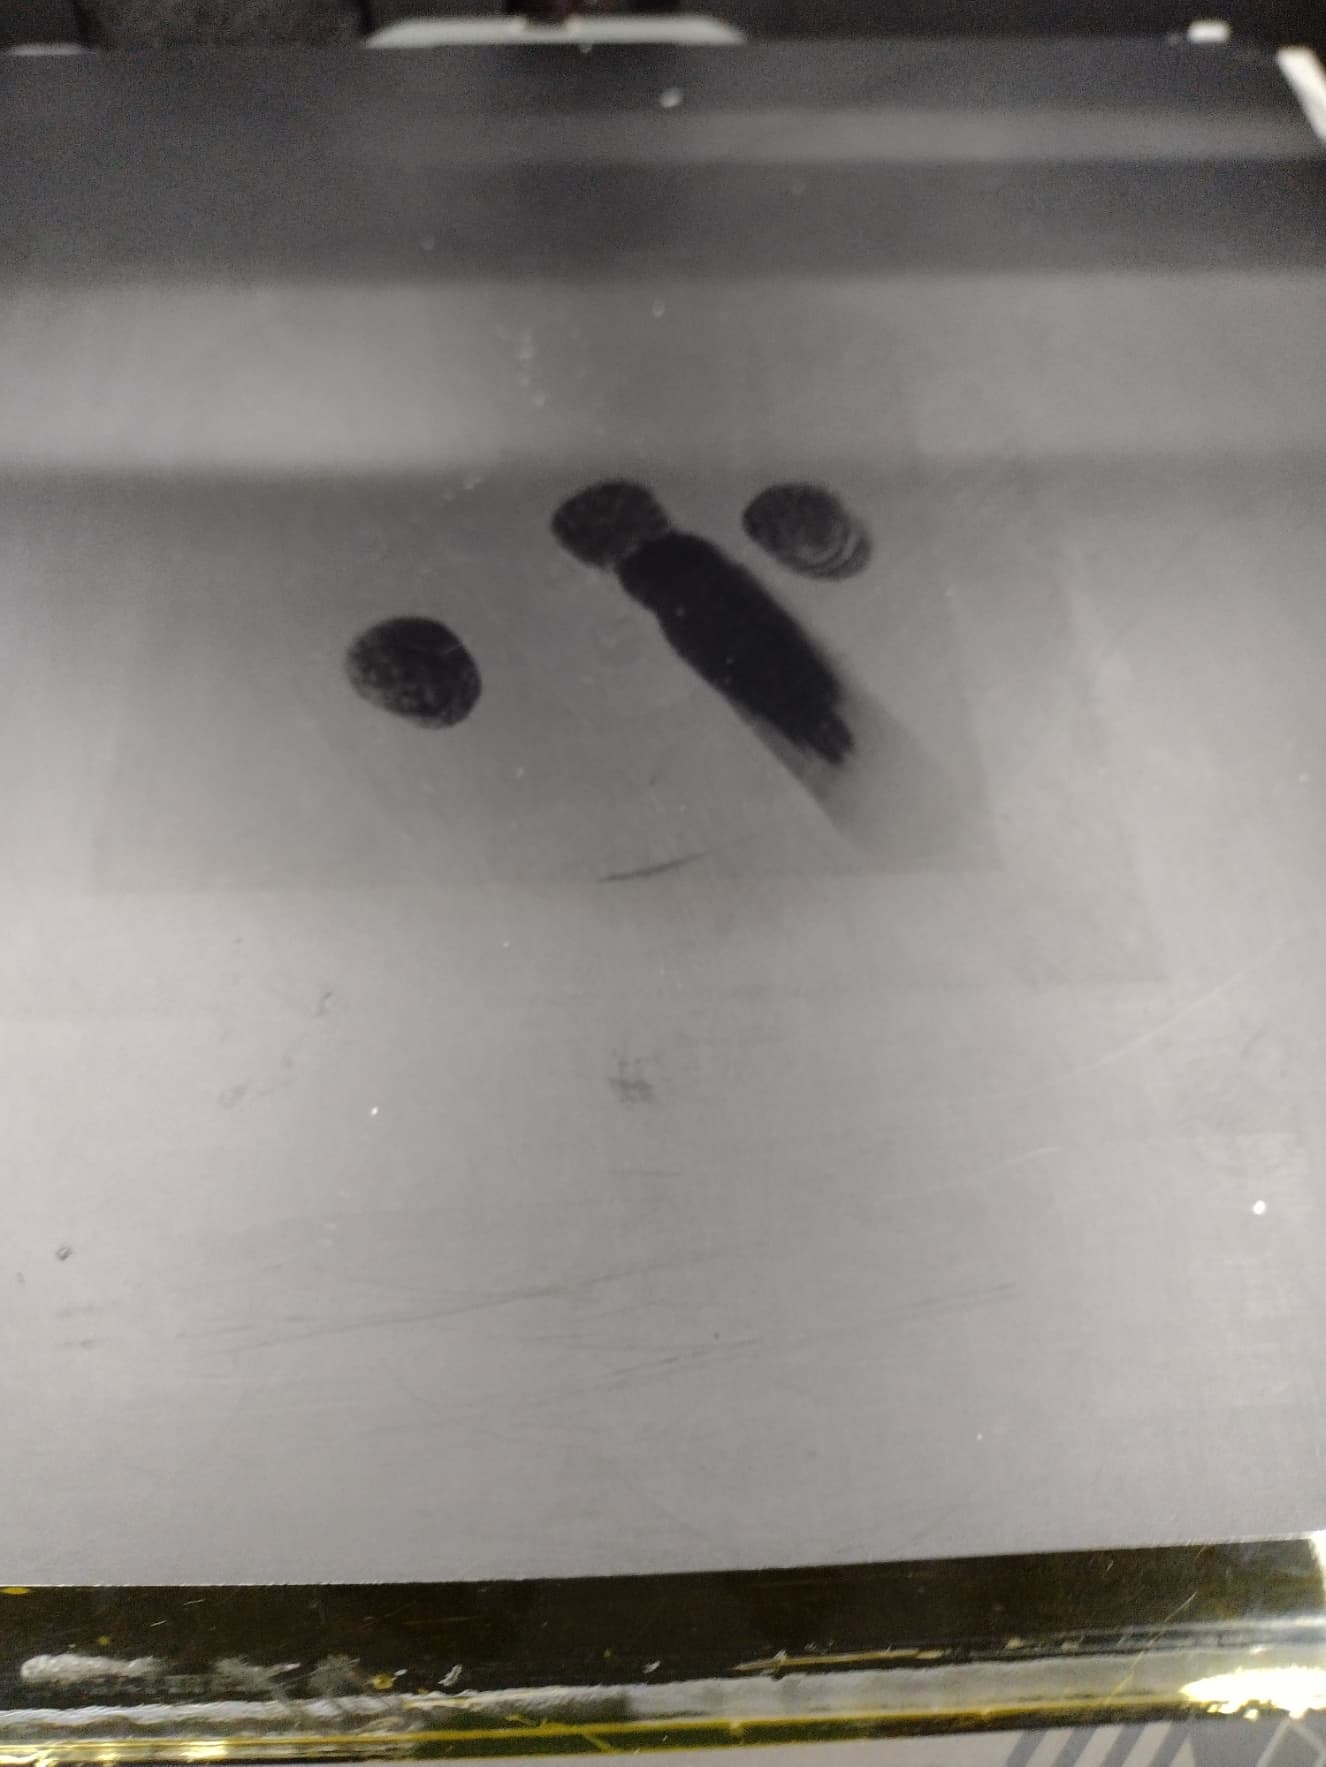
When was the last time you cleaned the build plate with hot dishwashing soap and water? Nothing fancy is required. Use very hot water and a good degreasing dish soap such as Dawn (called Fairy liquid in the UK and EU). Dish soap emulsifies and removes oils and grease that alcohol wipes often leave behind. Rinse thoroughly and use a paper towel to ensure it is completely dry before reinstalling it in the printer.
This is a classic first layer adhesion issue. While it can be caused by bed temperature being set too low, far more often it is caused by fingerprints or other oils contaminating the build surface.
A simple way to confirm contamination is to run a first layer test.
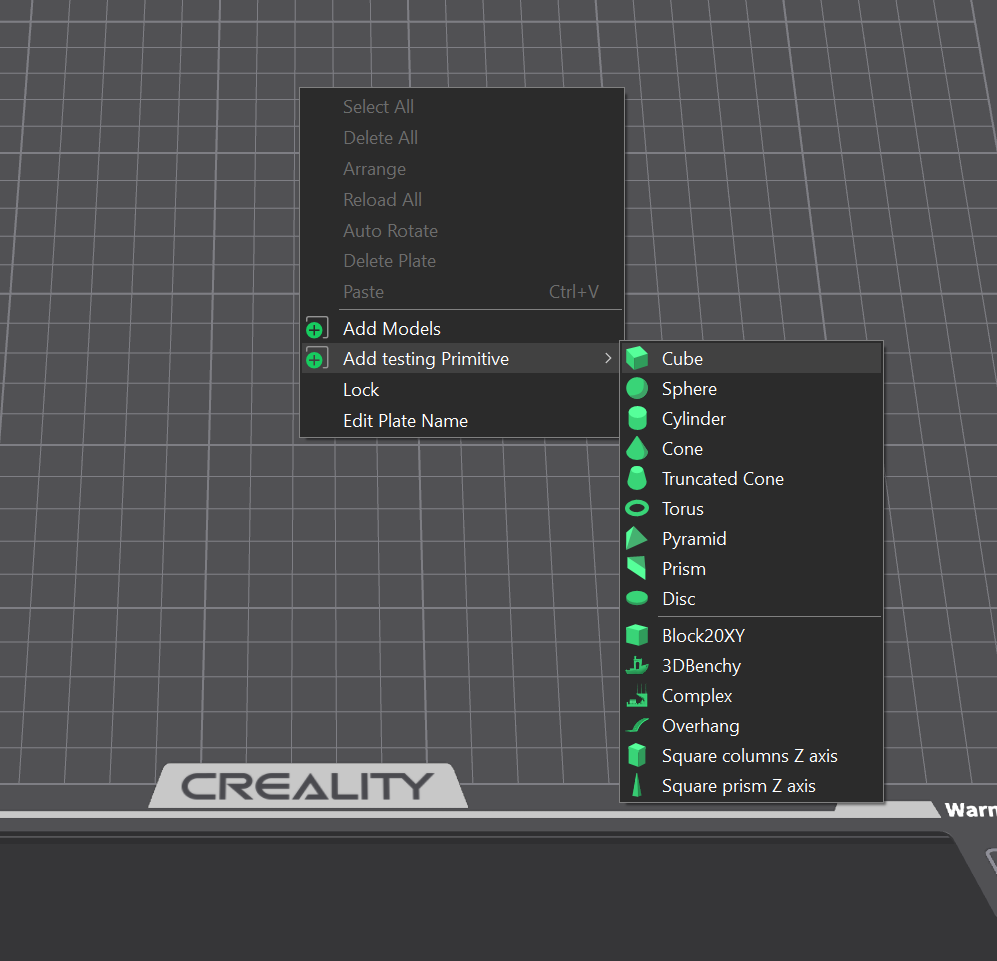
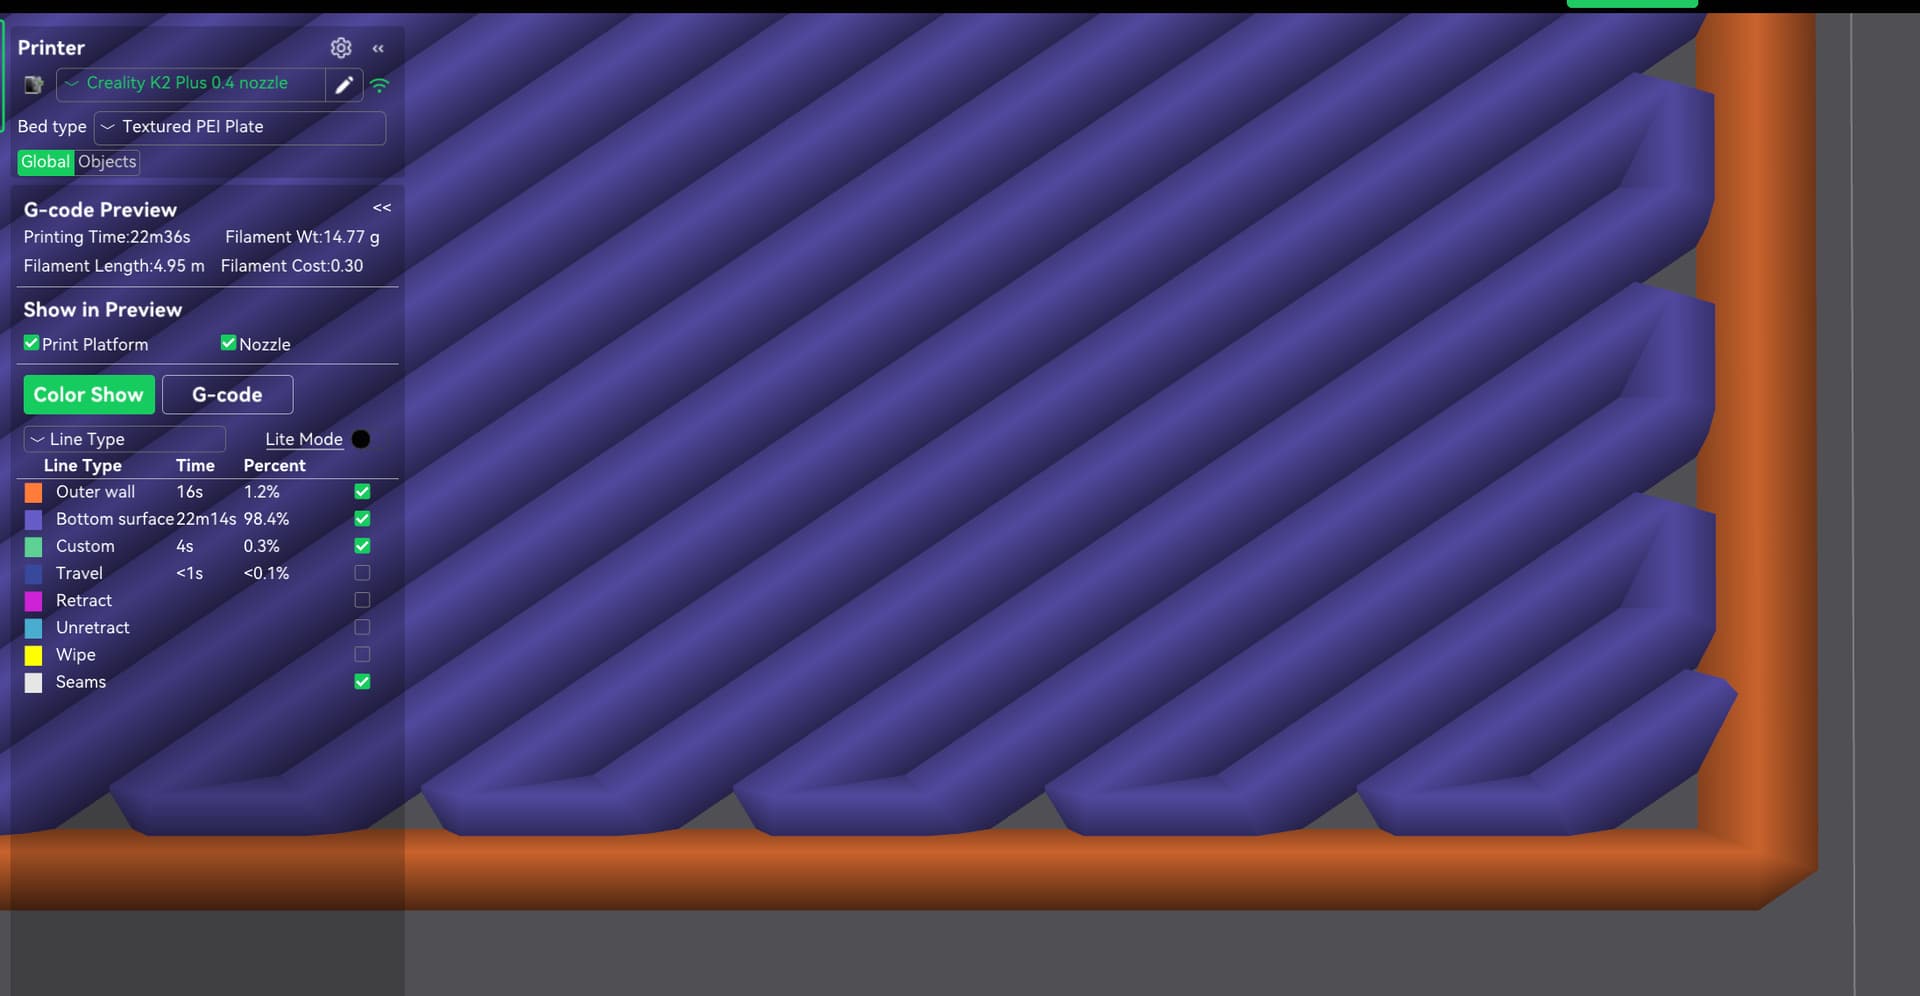
First Layer Test
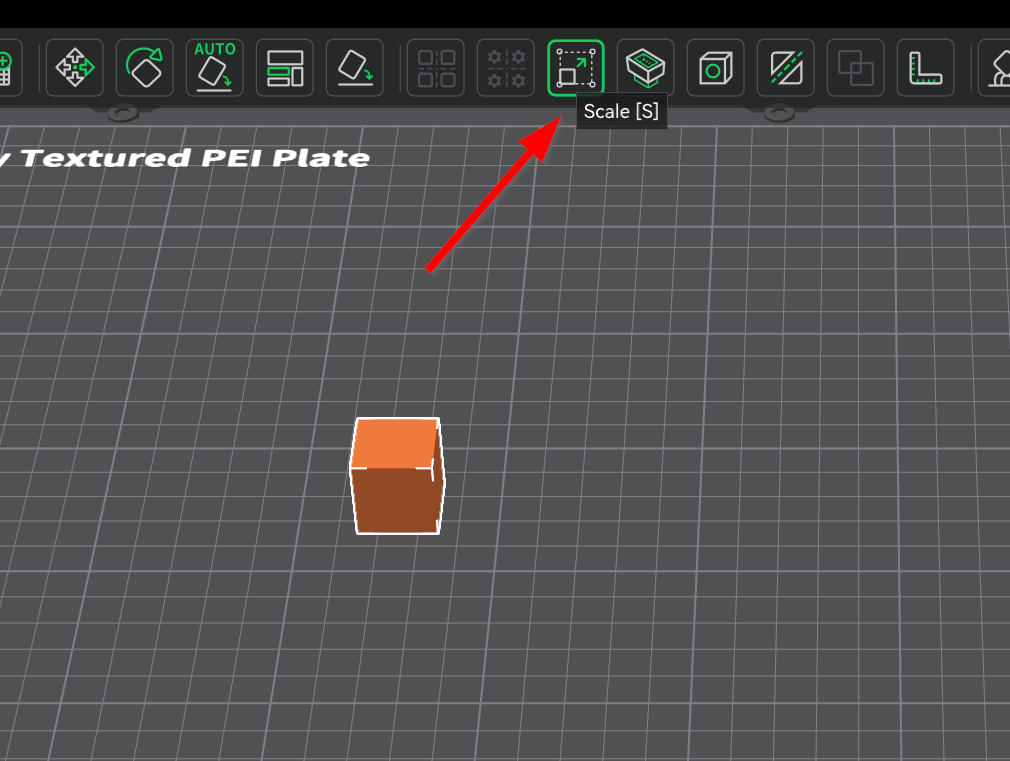
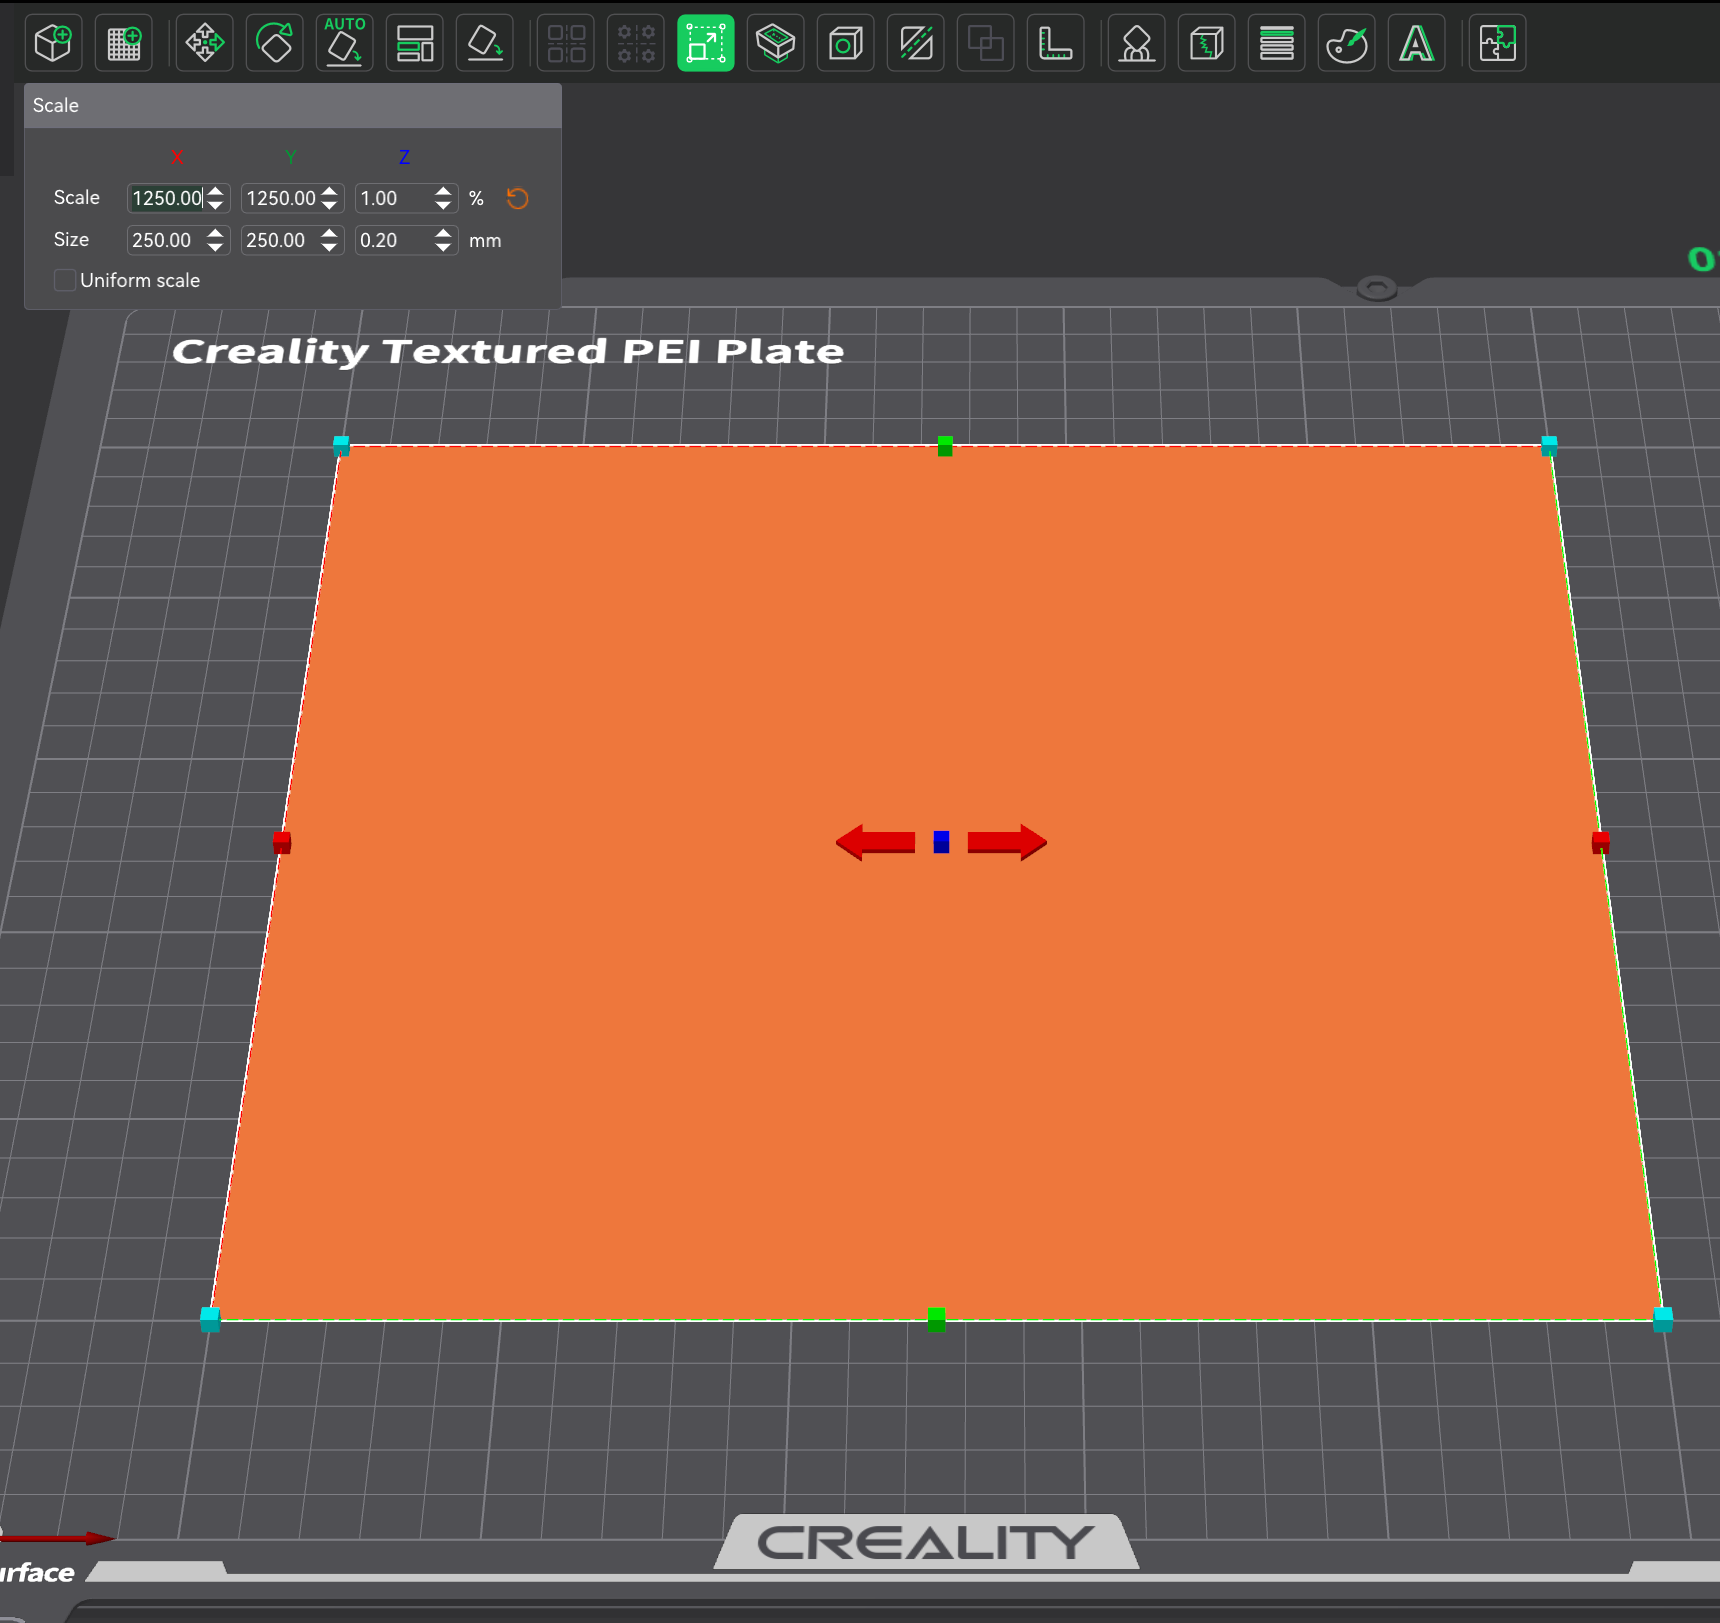
Create a cube primitive in your slicer. Scale it to a large footprint such as 250x250x0.2 mm. This produces a single-layer sheet across the build surface. If you want to test the entire plate, scale it to match your printer. For example, on a K2 Plus you would use 350x350x0.2 mm.
Steps:
-
Right click and select Cube
-
Select the model and press “S” or click the Scale tool
-
Scale the dimensions accordingly. The key detail is that the Z height must be no greater than 0.20 mm. If it is higher, the slicer will generate more than one layer.
-
If done correctly, zooming into a corner should show a single layer like this
Now print the model. This produces a very thin sheet of material. Areas with contamination will show up as blotches or irregular adhesion. If you do not see blotches but instead see one side thinner or thicker than the other, that points to a bed leveling issue, which can also cause first layer adhesion problems. In that case, run a bed leveling calibration.
Below are examples of contamination on a smooth PEI plate. Textured PEI does not visibly show fingerprints, but smooth PEI does, and the first layer test makes contamination very obvious.