Paper test. Move the z down to your current z-offset with the paper in place under the nozzle. If loose, step the z down by adding -0.01 at a time until the paper starts to drag when pulling on it. Each time you make a change pull on the paper. You’ll feel it get easier to move. Keep doing that until you can move the paper out from under the nozzle and back under it without resistance. You can actually see where the nozzle “embosses” the paper leaving little trials. You want the paper to move with little resistance as possible but still showing these trials. I’ve had good success doing it this way.
Oh Ya, is your filament dry? Do you hear popping and sizzling when it’s dispensing? That is a sign your filament is too wet and that will cause all kinds of problems including first layer sticking.
I also print PLA with first layer nozzle temp @210 and bed temp at 62. I reduce both after the first layer to 200 (and sometimes 197 if the print starts having strings) and 60 bed temp.
Remember each filament manufacturers chemistry is a little different so one setting on PLA might not work so well on another manufactures PLA. Once you dial in the PLA you have stick with that manufacture. And there are high speed filaments and “regular” filaments. On the “regular” if you print too fast it will cause all kinds of issues.
Use Elmer’s purple disappearing glue stick. I use it and it works good.
Latest on this, I was able to print a few things, then, it went right back to the way it was acting. I thought maybe it was an issue with the black I have, since white, blue and yellow seemed to print fine, but then, the blue wouldn’t print the second time I tried it, so I just don’t get it. It prints fine one time, and nothing the next. It’s beyond inconsistent. As for it being wet or damp, the filament is only about 2 weeks old, and, when I’m not trying to print, it’s locked in sealed bags with dessicant to keep it dry, and, no, I haven’t heard any popping or sizzling sounds. Actually, I barely hear anything at all from the printer, except the fans off and on. Today though, I ran a more than 2 hour print job with not a single issue, after a 35 minute one. I printed the trailer hitch part first, which took roughly 8 minutes, then, the white and then the blue gears, each of which took more than 35 minutes, and, then the rest, which took over 2 hours, then, it went right back to screwing up, and I haven’t been able to print anything since around 6:30 or so.
I just don’t get what the issue could be. It doesn’t get moved or bumped (I’m very careful around it because I’m on oxygen), I made sure it wasn’t cold or drafty in here (actually, with it running, I was sweating, and it’s winter here, and I’m in an old drafty house). I have even tried the glue stick, and so far still no luck.
I have done the paper method multiple times, same results, I have tried multiple suggestions from multiple sources, and, nothing I do seems to make it so I can consistently print with it. I have tried everything from letting it auto level before every print, to letting it calibrate before every print, to the paper method before every print, and it just won’t stay consistent.
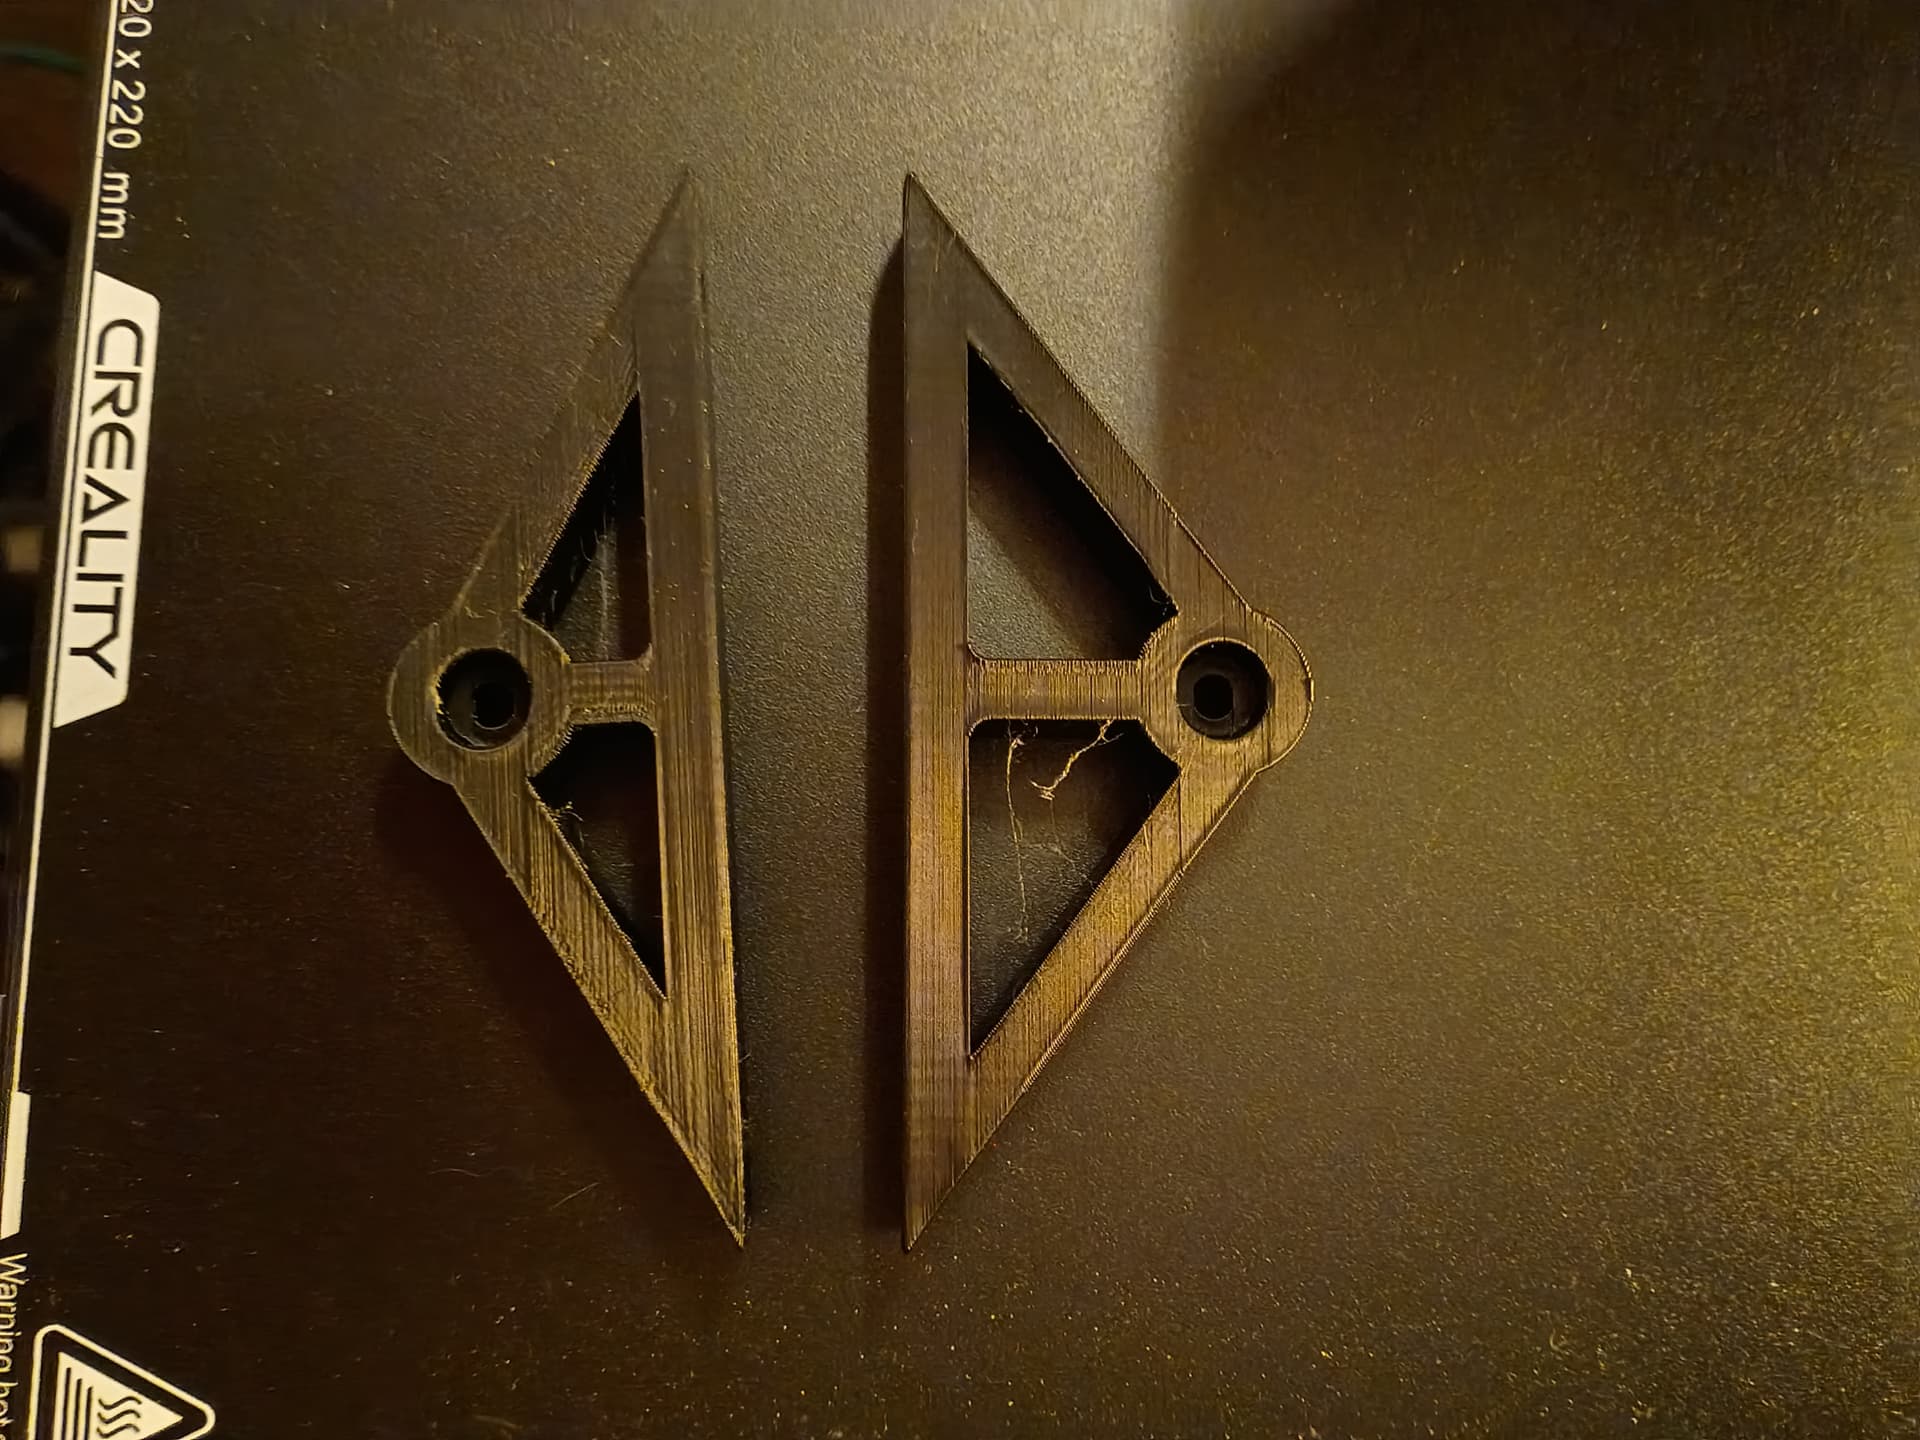
I think I finally solved this whole thing. Part of the issue is simply what I’m trying to print, another part is not really understanding certain things. Take the case currently of part of what started this post, which was, trying to print something only to have it fail multiple times. Well, thanks to a teenager, I am finally able to print the items I have been fighting with, and at the same time, frankly feeling kind of dumb. The part I’m trying to print is the suspension mount for a toy trailer, and, it would either not start at all (my fault for being leary of going too high on the temps), to it starting and then coming off the bed in the beginning of the print. Well, after he made one simple change to it in Creality Print, I have successfully printed both of the pieces I needed. When you first load the file in the slicer, it orients it so that the smaller round end is where it starts printing. He flipped (or mirrored it) so it starts with the larger end, and, victory. The second one just finished (except, I made a small mistake. There are actually 3 sizes of that part, depending on what wheels you are using, and, the second print, I selected the wrong one, so now I get to print a third one lol). The pic shows the part I mean. He also told me to set the nozzle at 210, and the bed at 65, and, in the last two days, I have pretty much finished nearly everything that was on my list to print. All I have left currently is the trailer body, which, according to the file, is going to take more than 5 hours, so I will do that tomorrow.
Good job. I’ve changed my first layer temps to 215 and 62 for PLA. Once I figured that out my fist layer not sticking sometimes went away. All other layers are at 200 and 60. Sometimes I have to lower my nozzle temp down to 197-198 if I see excessive stringing. Of course I’ve found with this hobby that you’ll still have spectacular failures from time to time. I just like the failures at the beginning of the print instead of the last few layers.
If you see bubbling, filament drooling, hear popping, etc. then it’s the moisture in the filament boiling when it hits the hot end. This will interfere with extrusion, suck heat out of the hot end, and interfere with adhesion (wet, cool plastic doesn’t stick; hot, dry plastic does).
Filament manufacturing runs it through a water bath to cool it. It should then be dried (isevery single spool of every batch fully dry?). Then it’s warehoused, shipped overseas in a cargo container likely humid), warehoused, distributed, etc. Then you store it. I found that at least some spools from some manufacturers weren’t dry by the time I put them in the machine, including spools I had just received, fresh out of the plastic pack.
I’d rather not figure that out partway through a print, or after repeated failures.
I just run every spool through a drier for a day, to ensure that it’s not an issue.
I actually dispense from my dryer to the extruder head while printing. My dryer reads 13-14% humidity when running. Of course I use the lowest heat setting while printing and not the “dry out wet filament” setting suggested by the manufacturer for different materials.