Coprint KCM Set

Hello!

I bought a Coprint KCM Set. I haven’t installed it on my V3 plus printer yet. I’m wondering if this system works with the Creality print slicer? Or just the Orca slicer? I’m interested because I can currently access it remotely via the Creality cloud, but I don’t know if it would work with the Orca slicer. If anyone uses one, could you share your experiences. Thanks!

Hi,

I have an Ender-3 V3 Plus and have been able to do multi color prints with CoPrint since a couple of days ago. So did you get it working in the meantime?

1 Like

Hi!

I still haven’t assembled it. Are you satisfied with it? Was it difficult to get it to work? How is its print quality and speed compared to the original head?

Honestly, it has been a mixed bag.

The hardware setup following the video from Creality Support channel (https://www.youtube.com/watch?v=F4hk6RIgWXQ) (or the same included setup manual) is fine - except it ends just before the trouble starts.

Initial setup was a pain due to confusing instructions and firmware issues. Over time some things have become out of date but gets looked as the info is sparse at the moment. Part of the issue is that you run into things that look different from what you see sampled. The Co Print channel video for instance is out of date - see its comments about config files being different. Also the official Wiki page from CoPrint does the same. Follow the hardware steps and then just guess.

After the hardware setup the next instruction is to use the USB drive to update firmware to some older version. My first firmware update failed when using the USB drive (but might not for anybody else). I finally got the latest firmware (1.2.3.63 as at todays date) from that CoPrint wiki page link specifically dealing with the V3 (Ender 3v3 KCM Set Setup Page | Co Print Wiki). That got the printer up and running and then I copied the config files for 8 colour (in my case) also from that Wiki page link. At this point I was able to print as usual from both Creality Print and Orca slicer, knowing that it will have an incorrect build plate size (turns out is becomes 290x283 for the V3 Plus, (minus what the purge tower will if doing multicolor).

At this point I had ended up in the general Kcm setup page of the Co Print wiki and I thought I would make the config changes described there but got completely lost as my system files looked different and as I don’t know mainsail I could not even find my printer menu items etc. trying to use standard V3 Plus interface. I ended up making my printer unusable and had to restore the firmware to factory settings (basically restoring the newly installed firmware to be what I had just a little earlier after first installing it). So I left out the config changes alone at that point.

I had Orca slicer 2.2 and it had a profile for CoPrint Chromahead, but only PLA filament. I downloaded Orca 2.3 and at least it had 4 machine profiles and the PLA profile (very limited).

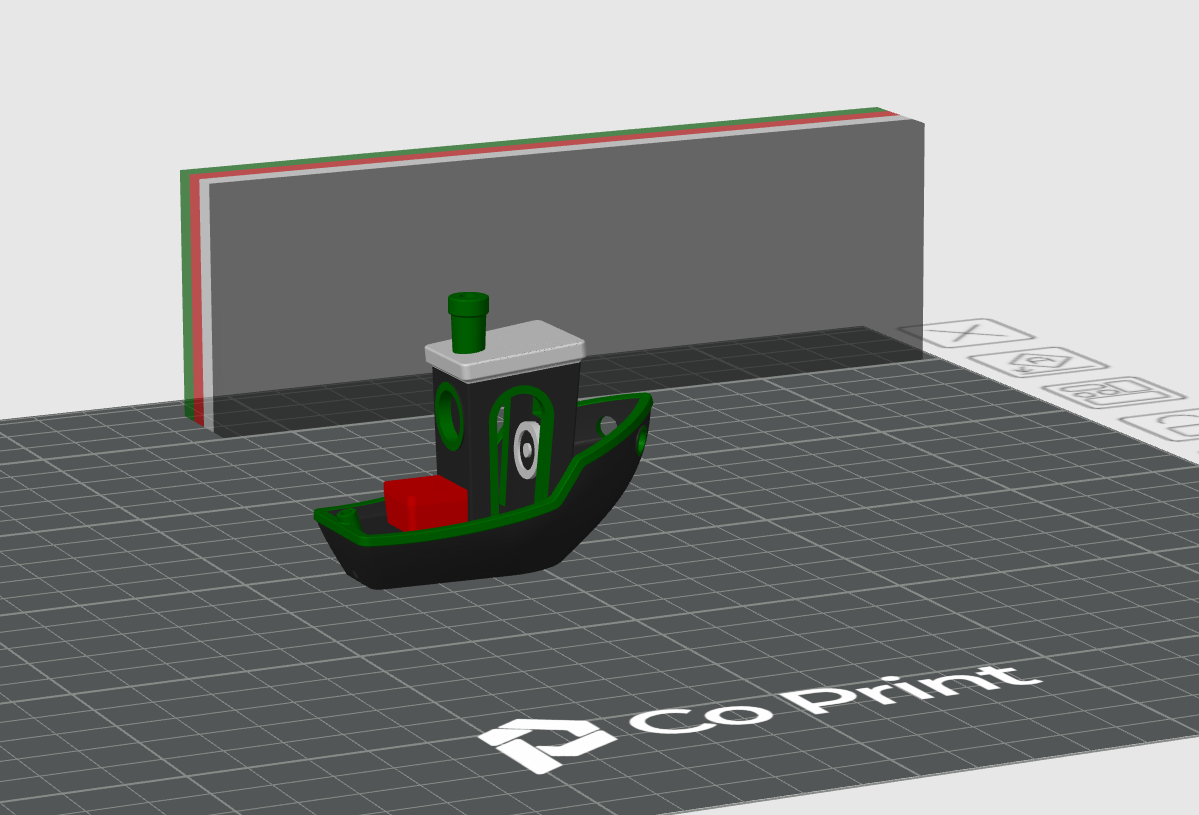
I was able to print a colour change model from Orca slicer right then. I copied the profile data to Creality Print - basically build plate size and including extruder number variables for machine G-code ‘start print’ and ‘filament change’.

Trying to print with Creality Print gives all kinds of issues though like losing connection to the print head mid print, nozzle staying on the print model while changing filament, which the Orca slicer gcode does not do - it always parks in the purge tower. Also found with Creality print it would just stop extruding close to the end of the print. So I will not use Creality Print for now - even though it appears the settings are all the same as my Orca setup.

Speed and print quality is just as good as standard V3 plus except it might be slightly weaker with the cooling but I have not been able to test and tune enough yet to say for sure.

I have not tried TPU yet, only PLA, silk and PETG. All print fine - extrusion is consistent.

So effectively all I needed to have done (which took close to 3 days) was :

  1. Build hardware
  2. Install firmware 1.2.3.63 and load 8 colour config files (not edit them too)
  3. Install/Update Orca Slicer 2.3

(I did design and print a model for installing the control boxes on top - my lightbar fittings got in the way and it seemed the homing of this printer (no longer limited to x=0 axis, could rip it off the top but that is personal taste mostly)

In all this testing and not knowing exactly what I used and in getting the know how things work I have ended up with some frustrations as often error messages on screen have no way to cancel them - turning off the machine is the only way. I must say though that it might be Creality Print - it seems to cause issues with commands that somehow the printer cannot handle. I finished a comparison of the same print today 2hrs each time, one with Orca which went flawlessly and was beautiful, and one with Creality Print which was just weird and ended up doing some things I have never seen before since my first Anycubic mega pro and a dodgy build plate heater and extruder (ended up being fantastic eventually).

I am now finishing an 8 hour multicolour PLS Silk print which looks very good and has no issues up to this point.

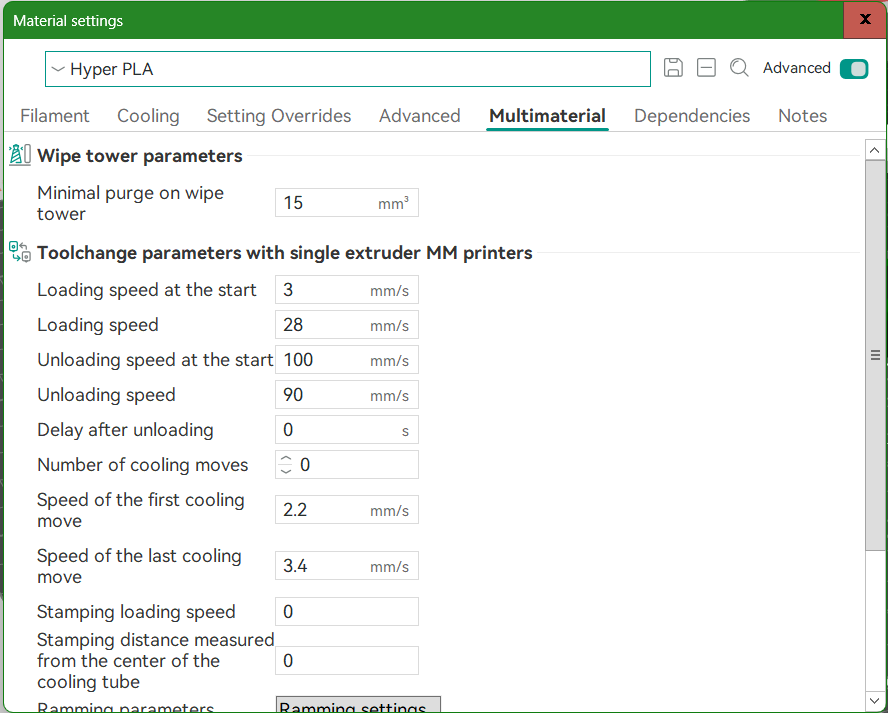
Also, I found you can set up filaments in multiple slots and use only number 3 and 4 for instance. It’s not like you have to start with extruder 1. There does not appear to be a way to map a colour in your slicer to a filament extruder in the printer, i.e. 1 is 1, 2 is 2 and so on. The tuning of the flushing volumes are also still a mystery, and so far my testing has taught me I need to waste more filament…(sigh)

One word of advice initially is to retract and extrude each filament you are about to use in your print before you start - just to make sure all the path ways are clear.

All in all I was very dissatisfied for a few days and had a few choice words I wanted to aim at Co Print - but now I am much more confident, using Orca mind you, that my prints will work. No issues at all with single colour prints.

A few issues to work through still - I have gotten into the habit of setting a lower speed than I intend print at in my slicer for certain prints with smaller footprints or when I am not sure how well a filament will perform for the model. I then speed it up on the printer screen or slicer monitoring interface if all goes well to save time - but I have found with multicolour here the speed adjustment gets reset each layer when doing the purge tower. Not sure why because on my A1 it keeps my adjustments - but I have not read up on that yet.

Now I have used my 1 000 words for this year so I am signing off.

1 Like

Thank you for sharing your experiences. Yes, I am also a little afraid of modifying CFG files, I read from many people that the descriptions are not accurate, which is why the system writes a lot of errors and they cannot get it to work. However, for those who managed to solve the initial issues, it works quite well. I also consider the object cooling to be insufficient, but we will see. Before I rebuild, I want to print out all the necessary consoles and fixing elements for the rebuild. If I understood you correctly, will the original 300X300 object table size be smaller? I will also have to modify the LED lighting, it will be in my way.

The usable print are is slightly smaller. The print head nozzle is not quite centered on the x axis so you lose a bit as the print head cannot move the nozzle all the way to X=300 as it hits the side on the gantry by 290. (or it would if you don’t limit it in the slicer - and then you have to restart the printer once you see an error message). The new print head has to be attached to the metal part holding the linear bearing, in a place offset towards Y=0 of where the stock extruder and nozzle were before, so you lose the final 17mm on that side of the plate. Slightly more than the thickness of the stock extruder. These numbers are simply based on what I saw in the Orca profile. When measured my new ‘cleaning’ line at the back it was 15 mm in front of the old one.

My solution for the (Creality) light bar was really basic in the end. I just removed the light itself from the two metal fittings, stuck some double sided tape to the underside of the lower extruder block and put the metal parts back - you need at least the switch after all. I then wedged the light on top of the extension arms (from the top of the gantry to the back of the printer) and under the extruder block. I covered both sides of the light bar by inserting a piece of squishy packaging material from the kcm set box. Quite a nice fit actually and the light is still where it was, just slightly lower.

1 Like

Yes, the extruder nozzle is really not where it was on the original head. I’m slowly getting myself to convert it.
Does the Creality cloud app work regardless of the conversion? I always use it to peek at what it’s doing from a distance. It would be nice if it would still work.

The cloud app works, however you get an filament out notification every time a print finishes and the printer unloads the filament. I have not bothered to dig into disabling that.
Have not tried it with Creality print. Printing from Orca slicer works fine.

As others have said it is not an entirely smooth experience. Even if you buy the kit from Creality as I did with all necessary hardware included, you need to tinker with it to end up with a product that could be described as finished.

The cable management is one area that is just not adressed by Creality. You have to figure that one out yourself.
The reduced print area is understandable, but not desirable.
I had a lot of problems getting a good first layer with the firmware version included on the usb-stick. (Which ended up corrupted after updating the firmware, by the way.) That problem disappeared after updating to 1.2.3.63 which is available from Coprint.

Don’t get me wrong. It works. It just does not feel polished to the level of the printer itself.

At least you can prints parts to make it better, right? I ended up making a mount for the kcm 4 color version to take care of the cable disaster and a new X-axis carriage to regain the lost print area.

After a few tweaks to this macro to do the nozzle cleaning routine in the front to maximize the print area, I’m pretty happy with it.

1 Like

I bought the KCM set from the Coprint website. There was nothing to it, but I was aware of it. I want to implement the support structure and cable arrangement that you came up with on the Printables website. I asked you how you combined the extruder holders with the KCM tray, because it doesn’t fit with the first version of the narrow Coprint extruder holder. Thank you again for your help there. What you came up with for the KCM, the cables, and the print head is fantastic. I will also add a front LED light and a side camera holder. I’m a little hesitant about the software side, I’ve never used Mainsail. And I wouldn’t like to modify the cfg either. But since I want to implement it, I’ll have to use the print head console that you also made to maintain the printable surface, so I’ll have to use it. Apart from that, with the new firmware it works without Mainsail, just with the Orca slicer. It would have been nice if it worked with the Creality printer, but if it only worked with the Orca, I’d be happy. Doesn’t Cromahead do a short auto-leveling before every print? It always does it for me with the original head. What did you do with the original head cable? In theory, it could be used to power the KCM, other than that, it’s not needed, you could just unplug it. I got a separate power supply for the KCM, in theory, Creality only gives a converter for the old head cable, and the KCM gets power from there. So, with what you came up with, this system becomes a whole, for which I, and I think many others, will be grateful. Thank you!

Im glad you liked my little modifications!

I’m sure you could make it work with Creality Print without too much work. However, for me, I don’t see the point. Creality Print doesn’t really add any functionality over Orca.

It behaves pretty much the same in this regard. The Creality kit does not include the Chromahead leveling sensor. It uses the strain gauges in the bed for leveling just as the original.

Right, the Creality kit does not include a mains power adaptor. Instead there is a adaptor cable for the original head cable to power the KCM and Chromahead. This is a nice solution, I think. There is plenty of space inside the base of the printer to hide the remaining slack. If you use the Coprint power supply you could just unplug and remove the head cable.

One of the reasons for making the KCM mount was to have a printer that is one unit that is movable without unplugging and untangling a bunch of cables. This is also why I routed the usb cable inside the base.

2 Likes

If you don’t mind, can you tell me whether you took any steps to do with the config files after getting the firmware version sorted? As I said in my previous post here I could not work out what to change when I found scripts looking different from what I saw on my system.

Are you having a lot of issue with errors from the firmware? When I upload a print from Orca for instance with a gcode file name that already exists, the standard firmware used to replace the file if it was already there, now it adds a second copy, but when the print starts it gives me a ‘Communication with the main MCU is abnormal’ or something in that vein. This type of error seems to occur a lot for me. I am wondering whether the usb hub is the issue as I have two connections for the CoPrint system and also the camera. I think I’ll run without the camera for a while and see what happens.

I sometimes have prints that seem to start ok but just stops at some point, often at the start while cleaning the nozzle or extruding the filament line at the beginning and so on. Other times filament just does not feed correctly once the print starts, even if I just extruded a bit to test. Then after restarting the machine and the print it works ok again. Very infuriating - feels like I have been abused after having had a machine that was almost perfect most of the time. Now I seem to struggle with 3 out of every 5 prints. Other times the nozzle just leaks filament for no reason after starting with a clean nozzle and then it gets in the way of the bed levelling so the first layer is way off and everything just floats around on the bed.

EDIT FOR Richard1 since I cannot add another reply**
The CoPrint kit from Creality includes a 4 port USB hub, so you can connect both the KCM (and ECM box for the 8 color kit) plus a camera into it and still have a port free. Perhaps the 4 colour kit does not include a hub as you will then use the port for the KCM box. It seems to be just a regular hub. I spoke to CoPrint support early on before I ordered to clear up the camera issue and they told me any hub should work. take note of my comment above though relating to the usb.

1 Like

My kit has an external power supply and a leveling sensor in the head. This may be because I bought the KCM set from Coprint. That’s why I have to print everything myself. Which I’m glad about, because this way I can make the solution you made, for the same reason you made it. This way I’ll have a unit, and I think it looks really good. I’ll start rebuilding it this weekend, I hope there won’t be any problems and it will work.

How did you solve the USB distribution internally so that the external port remained free and usable? I was planning to plug a hub into the external port.

I didn’t get a USB hub. Frause distributed the USB inside the Ender 3 v3 plus case, leaving the factory external port free. At least if I understand things correctly.

USB hubs can cause communication problems, in some cases a hub that also receives power from an external power supply may be needed.

1 Like

The (Creality) firmware update 1.2.3.63 available from coprints wiki contains all necessary config changes to get it working.
I’ve not had any firmware related issues after updating to 1.2.3.63.
I’ve seen the ‘Communication with the main MCU is abnormal’ message after making config mistakes like crashing the head into a model after accidentally calculating the park z-position at print end wrong or printing outside the print area.

Trying without the usb-hub sound like a good place to start. I print with the KCM connected via a usb hub and I’ve tested printing with a camera at least once without problems.

1 Like

I used a octopus-style USB hub like this connected to the original usb-port on the inside. I then printed a bracket to mount one of the female USB-hub connectors in place of the original port.

      {"src":"https://forum.creality.com/uploads/default/original/3X/e/1/e13b63a41d01195a5e32ca8ed68cfd9b37216588.stl"}