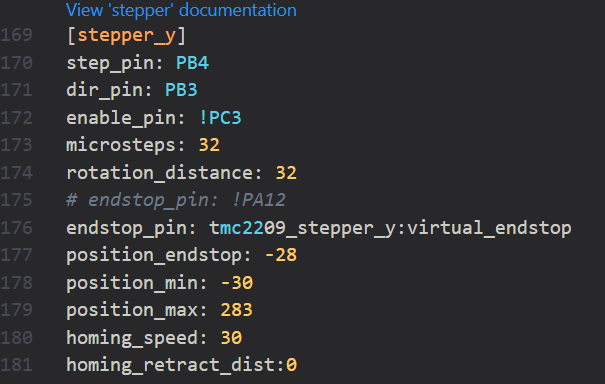
Yes, I changed this to 300x300, but in reality it doesn’t allow me to print in such a large area, the printer says that it has reached the software limit. I solved the filament replacement simply, I changed the purge value from 15mm3 to 100mm3. To replace the head carrier, you have to disassemble the linkage and the belts. https://www.youtube.com/watch?v=ANjP5GNdMNc
This video will help if you choose this in the end.
Thanks! I’ll try it when I get home from work. I tried the Coprint version, where you have to write 4409 after the IP, it doesn’t work for me. The page not found message appears. With Frause’s mod, I have to say, this Coprint stuff is better than I expected. At least that’s what I think now.
I’m very happy even without the mod ;D
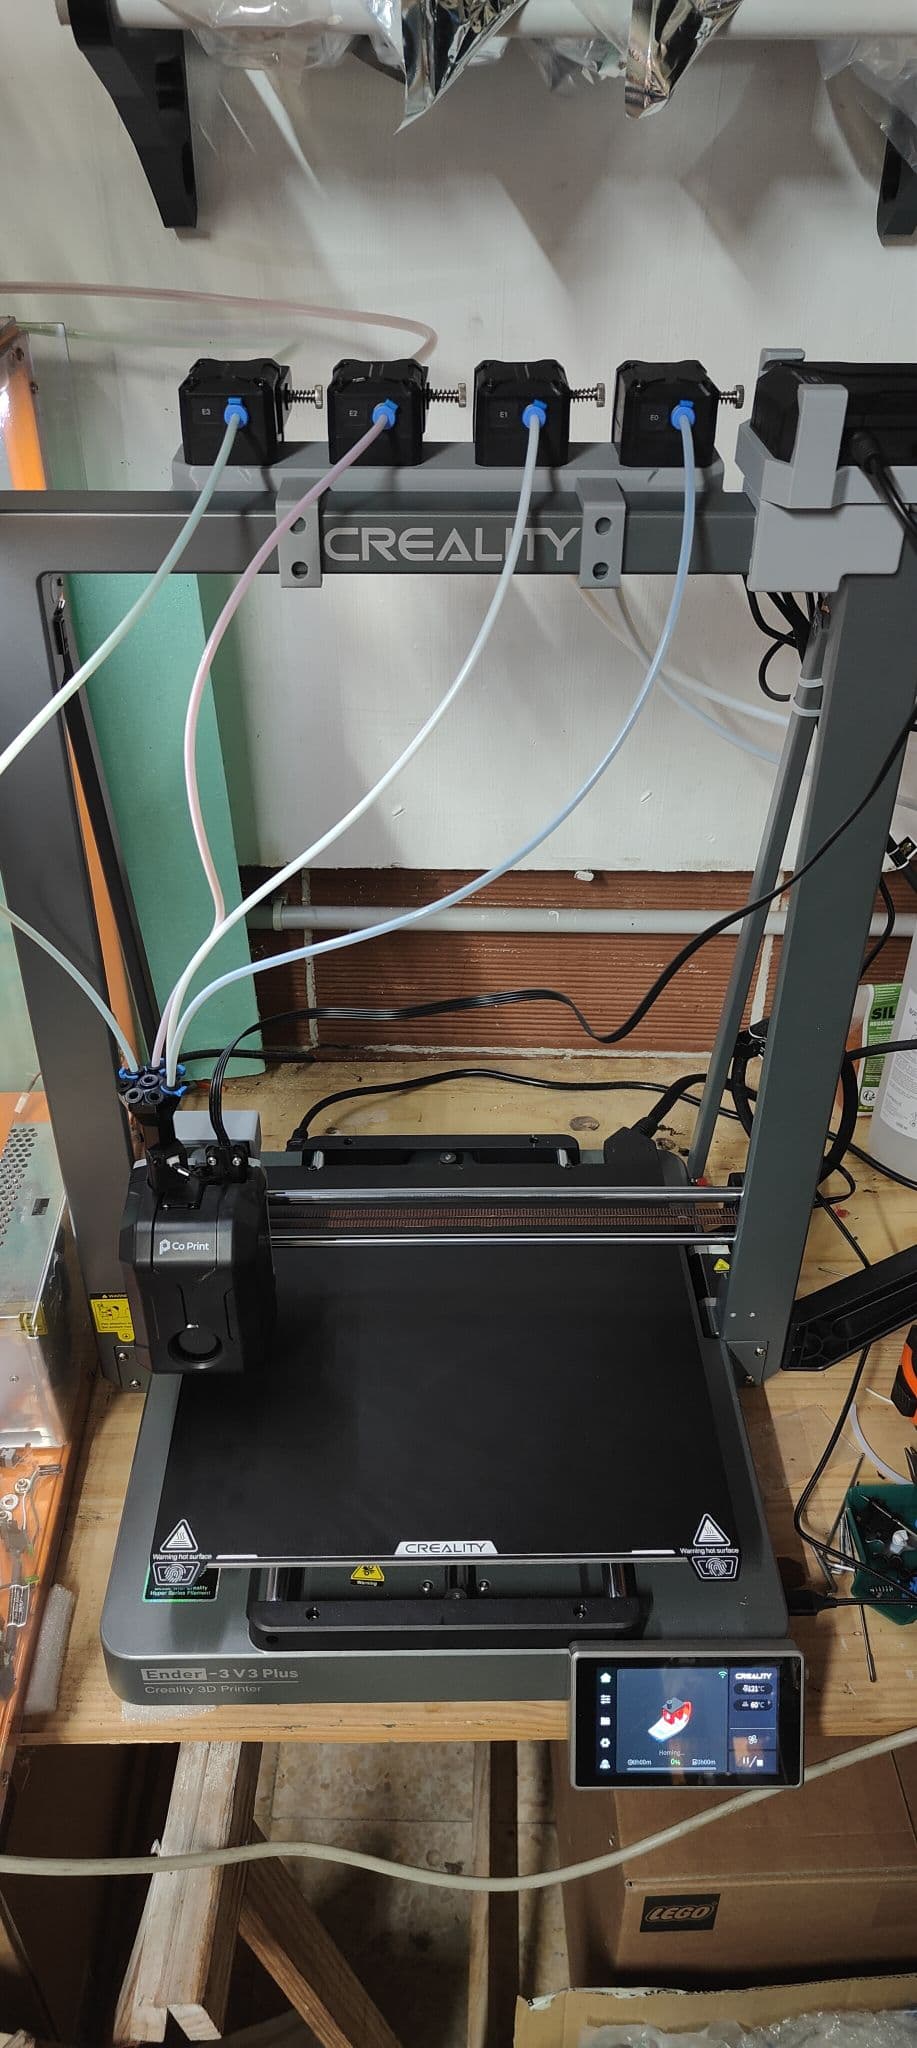
I’ll consider dismantling the gantry potentially for the head carrier mod, I’;m printing the KCM holder mod and clips. I didn’t mind the mess, but I had nothing else to print today and I wanted to try a new roll ;D
It works perfectly. Thank you all. I’m still making an LED light, installing a + power supply in the bottom of the Ender 3 V3 Plus for the KCM and the LED, making another camera holder, and it can go in the Creality enclosure instead. I’m very happy. The print quality is better than with the original printer head. The threading is almost completely gone.
Hi, can I hope yall don’t mind me joining this conversation. I bought the kcm set and I’m trying to install on ender 3 v3 plus. I installed the fw 1.2.3.63. Then I installed the hardware. When I turn it on it takes forever to boot then I only get zeros on the temps and nothing works. The instructions end at this point. Do I do anything else?
Did you buy the KCM set from Coprint or Creality? Does the KCM have an external power supply or is it powered by the Creality printer cable? Is the USB cable connected? The first power-up takes longer, and restarting helps in many cases. If the KCM is not yet powered on when you turn it on with an external power supply, or the communication via the USB cable is faulty, for example due to a bad hub or a poorly connected USB cable, the printer will boot slowly or not at all.
I bought it from co print. It has its own power supply. I had it semi working on an ender 3 v3 but the bed size was too small so I installed it on my plus. Had similar issue and was told to change serial paths. Do I have to do this or should it just work with fw.
I noticed the following on my ender3 V3 plus (1.2.3.63) with the KCM kit
Orca 2.3.0
SOMETIMES (but very often)
when a filament change occurs, the following happens;
current filament cut
current filament retract
E0 retract
E1 retract
E2 retract
E3 retract (even though E3 filament isn’t used in the print)
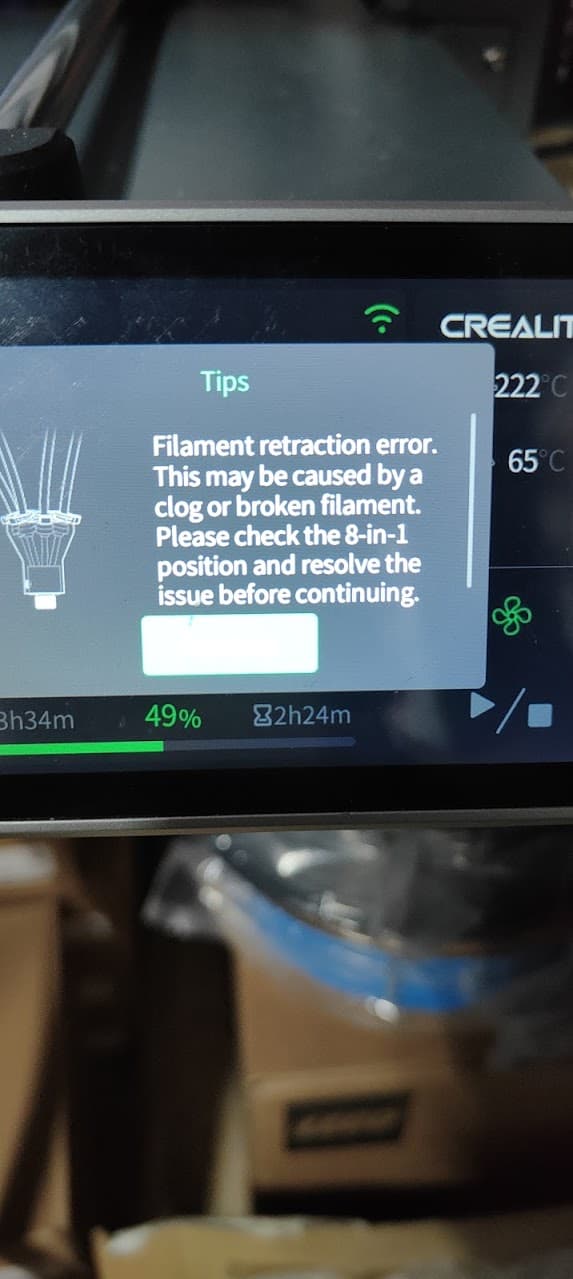
then error message : (see photo attached)
Filament retraction error.
This may be caused by a
clog or broken filament. Please check the 8-in-1 position and resolve the issue before continuing.
This is strange as loading hasn’t happened when the error message occur, it happens after unloading and before loading the next filament
I have to guess which filament is the next, manually push it through the extruder into the 8in1 funnel and resume, and keep pushing it until the head extruder catches it
Normal filament change is
current filament cut
current filament retract
next filament extrude
purge in tower (as per orca flusing volumes)
continue print
I’ve sent an email to co-print support, but I thought I’d asked here.
Should I completely unload E3 if I don’t use it in the print ? Is there a filament sensor inside the extruder ?
Has anyone an idea ? I’ve contacted co-print, no answer yet, Creality support through chat sent me a bench ngcode (same issue) and has escalated the problem.
I only used the fw, nothing else. I modified the printer cfg and a macro (mentioned above) to keep the printable surface. I replaced the printer carrier with a modified one.
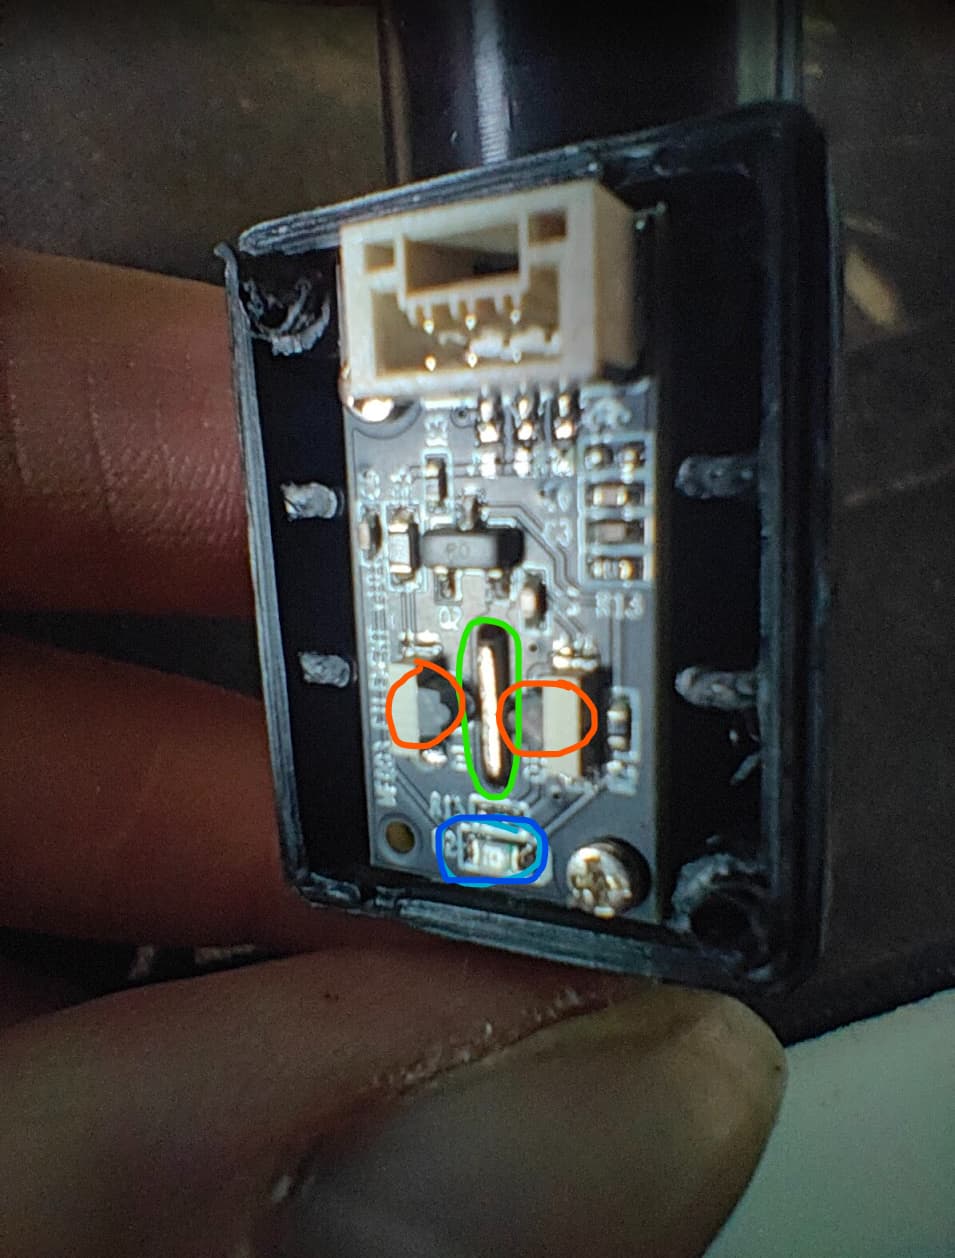
There is no sensor in the 4-feed extruder, but the 8-in-1 has a neck joint. Check to see if the blue LED lights up when changing the filament. If there is filament, it lights up, if there is none, it doesn’t. I tried this unit when installing it, and it got stuck for me. It has a small metal tab with a spring that the filament presses in, and after pressing it, it also sticks inside, sometimes it comes out, but typically it gets stuck inside. It stayed inside because the spring got stuck in its housing and couldn’t push the metal tab back in. If I had used it like this, the same error could have occurred when changing filament. When changing, pull it back until the sensor detects the filament, and a little longer. If the sensor indicates that there is still filament in it, when there is none, then this phenomenon can occur. Check to see if the filament sensor can get stuck. However, I also had filament breakage once, and the feeding extruder was unable to retract it.
I’m glad I could help! The spring hole needs to be enlarged very slightly with a slightly larger drill bit or a multi-grinder so that it can move freely in the hole. Before doing this, the base plate needs to be removed. It is held in place by 2 screws. If the spring can move freely in its socket, then it will be able to push the metal plate back in, and from now on every filament change will be fine. Of course, if the filament can break, then this can still happen, but this is not the case here.
Just be careful, and the only problem will be with the spring hole. You’ll see that it’s stuck in the hole. I could actually blame this one mistake on Coprint, because if you look at it, this small part is in a 3D printed housing that was made a bit too snug, and the sensors weren’t checked during assembly. Of course, they could have done what Frause came up with and sold it that way, but let’s not be greedy.
The only difference is that for the set purchased from Coprint, you have to print the extruder and the KCM console, and there is a separate power supply for the KCM. The print head has a leveling sensor if you bought it from Coprint, but I noticed that it does not use it but levels in the same way as the original head. If you buy from Creality, they give everything to the given printer, and there the KCM is powered from the original head cable with a converter, and there is no leveling sensor. There is no difference in firmware or anything else.