3D scanner calibration is critical. It ensures accuracy, maintains consistency, and improves data quality. Proper calibration minimizes errors, reduces post-processing time, and increases the reliability of scanned data, which is essential for precise measurements and seamless integration into various workflows.
But do you know when does a 3D scanner need to be calibrated, how to perform the calibration, and what factors to consider during the process? In this article, we’ll use the CR-Scan Raptor as an example to demonstrate the details. We hope this calibration tutorial will be helpful and useful for you.
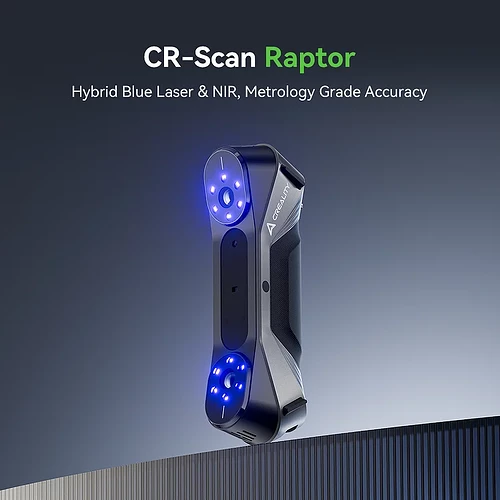
CR-Scan Raptor 3D Scanner
Hybrid Blue Laser & NIR, Metrology Grade Accuracy
【7 Blue Parallel Laser Lines】
【Metrology Grade Accuracy, up to 0.02mm】
【Scanning Speed up to 60fps】
【Objects between 5-2000mm】
【Anti-shaking for Smooth Scanning】
【Light and Compact(215mmx50mmx74mm), only weight 372g】
- When Does CR-Scan Raptor Need to be Calibrated?
- How to Calibrate the Raptor 3D Scanner?
- Raptor Scanner Calibration Considerations
- FAQs About Raptor Scanner Use
Part1: When Does CR-Scan Raptor Need to be Calibrated
To ensure the Raptor performs at its best, providing accurate and reliable data, it should be calibrated when the following situations occur:
- Initial Setup: Calibrate the scanner when setting it up for the first time;
- Regular Maintenance: When the scanner has not been used for a long time, such as more than 1 month;
- Environmental Changes: Changes in temperature, humidity, or lighting conditions. For example, significant change of ambient temperature (+10°C/50°F);
- Relocation: The scanner drops or falls accidentally, a lot of vibration during long travel;
- Noticeable Errors: model accuracy decreases significantly with the same object, The point-cloud is missing or no depth map when scanning;
- Post-Update: Calibrate after any firmware or software updates.
Note:The 3D scanner is a high-precision device, please handle it with care, keep it in a safe place, and avoid collisions or drops to prevent damage or loss of accuracy.
Part2: How to Calibrate the CR-Scan Raptor
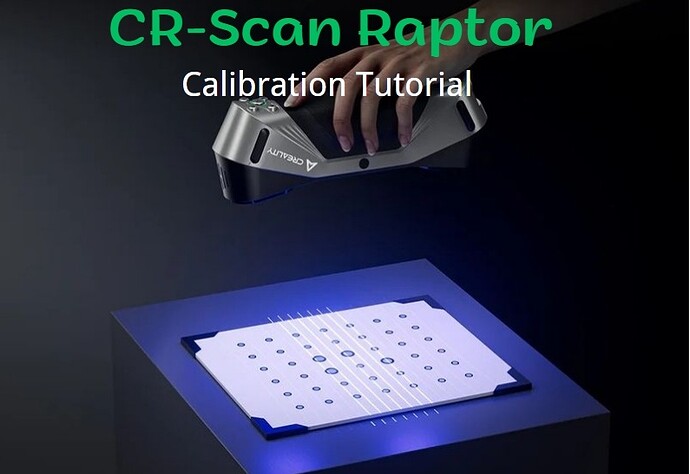
Before calibration, ensure that the calibration board model is CBR1, as the Raptor can only use the board designed specifically for it. Each scanner must use the calibration board that comes with its package (e.g., the Raptor cannot use calibration boards designed for the Otter.
Related article: CR-Scan Otter 3D Scanner Review: Small to Large, Scan It, Make It
During the CR-Scan Raptor calibration process, ensure that the direction of the scanner aligns with the direction of the largest raised maker point on the calibration board.
- Pill off the camera film before calibration, connect the Raptor Scanner to the computer, go to the 【Device: CR-Scan Raptor】interface, click on 【Calibrate】, and perform calibration by following the animated instructions;
- Scan the QR Code: align the scanner with the back of the calibration board and scan the QR Code, click on【Calibrate】,
- Flip the calibration board with the marked side facing up to prepare for vertical up calibration;
- Tilt the Raptor 15° to the left relative to the center axis of the calibration board, then slowly move it vertically from low to high. Repeat this process tilting to the right, forward, and backward.
- Please be patient during the calibration calculation process, the more score the better accuracy. The calibration score should be more than 90 points.
Part3: The CR-Scan Raptor Calibration Considerations
Here are some common factors to consider during the calibration process:
- **Lighting Conditions:**Avoid extremely dark or overly bright ambient lighting;
- Environment: Calibrate indoors to avoid uncontrolled variables like sunlight and wind;
- Movement: Don’t move fast, move the scanner slowly and steadily;
- Calibration Board Condition: Ensure the calibration board is not bent and markers are undamaged.
- Marker Integrity: Calibration will fail if one or more main markers are damaged, and accuracy decreases significantly if two or more adjacent markers are damaged.
- Reflective Surfaces: Avoid high reflective surfaces near the markers during calibration.
- Connection Stability: Ensure a stable connection; if it breaks, calibration must be resumed after reconnection.
Part4: FAQs about CR-Scan Raptor Use?
1. How to achieve better model details?
① The blue light mode is more precise than the infrared mode;
② Adjust the exposure time of the lR camera during scanning to ensure moderate exposure. Overexposure is shown as red, while underexposure is shown as blue. In blue light mode, you also need to adjust the appropriate laser intensity;
③ Try to maintain the optimal scanning distance. Generally, the closer the scanner is to the object without losing tracking, the better the details;
④ During point cloud optimization, use a smaller point distance. For example, when the object size is small, the point distance can be set to 0.1mm.
⑤ When meshing, ensure that the number of model faces is sufficiently large.
2. How to scan the bottom of an object?
① CrealtyScan provides a multi-project merging feature, allowing you to obtain the complete model of an object through different orientation and merge together.
② Scan the visible part of the object first to obtain a partial model, pause the scan, then change the object’s orientation, and continue tracking the previously scanned part to get the complete model.
3. When do you need to use a scanning pad?
When scanning smaller objects (such as small parts, small figures, etc.), you can put marker points on the scanning pad and select the marker point mode for scanning.
4. When do you need to use the marker point mode or texture mode?
Blue light mode requires reflective marker points. When the geometric features on the surface of the object are not prominent, you can apply the reflective marker points included in the package to the object and use the marker point mode for scanning. When the surface of the object has rich textures, you can directly use the texture mode for scanning.
5. When is calibration necessary?
Calibration is necessary when the device has not been used for a long time (such as 3 months), or when the device has been accidentally bumped.
6. Can calibration cards be swapped for each other?
Each calibration card is unique and corresponds to each scanner. They cannot be swapped. When using a calibration card for the first time, it needs to be scanned once to bind to the scanner using the QR code on the back, Otherwise, it may affect calibration accuracy.
7. What should be noted when storing calibration boards?
After each use, please carefully store the calibration card in its original box for proper storage. Avoid contamination, scratching, or heavy pressure on the calibration card to prevent loss or damage.

