The issue I am having is that after a few prints my first layer is way too close to the bed. Nozzle is nearly dragging on the bed during the first layer.
I have been watching the beginning of the print and adjusting the Z offset.
I cannot find a setting to permanently adjust the Z offset in setup or maybe a hardware adjustment to make the self check/calibration start the print at the correct height.
Any info is appreciated. Any documentation on how it is measuring would be nice too. i.e… On the Prusa i3 you can just turn the capacitive sensor back a half a turn to tune your first layer… Graduated from ender 3 pro all the way to ender 3 V3 this weekend!
I assume you’ve run the calibration and is everything stock on that…? The printer should compensate for that during the calibration..
Have you changed the bed or nozzle…?
It’s not permanent but you can get an idea of how much to set the Z offset in the setting in the printer menu.
It’s not in front of me now but I think it’s under settings / expert settings / Z offset.
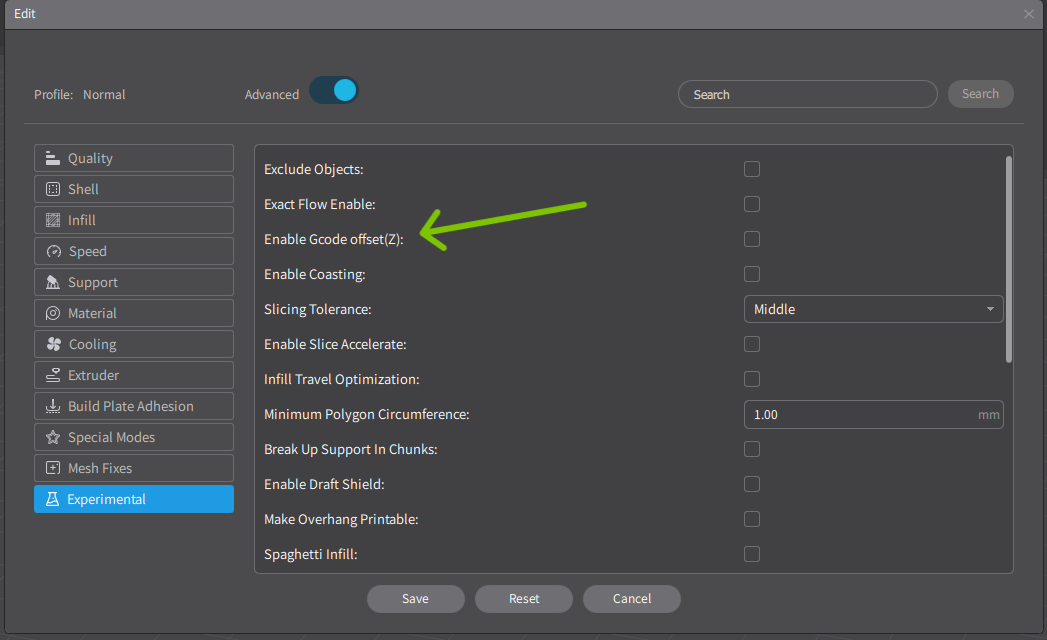
Also… I do not see first layer height as a setting in Creality Cloud slicer in the settings. Which is probably a post for another forum area, but seems like it should be there.
To be honest I don’t use Creality Cloud so I don’t know… Sorry.
As far as the bed level there are sensors on each corner under the bed to sense when the nozzle touches. I think it checks at 36…? points on the bed and creates a mesh so the printer compensated for any low or high spots.
I’ll check back here later to see how you are doing…
There will be good advice from our users here also to help…
Strain guage seems pretty fool proof. Being an FDM printer it does seem a bit odd not having a setup option that is obvious in the printer touch screen and just Z offset… Not the one that you must do while printing, but a permanent one… or a hardware adjustment of some sort. Also not having that in the slicer settings in creality cloud… because it is pretty cool to just start some fun prints from your phone and initial layer settings tend to be what makes or breaks a good quality print.
I’ll update later how it goes from the PC slicer and/or maybe someone will show up here and know just what I’m looking for and have missed.
You’re not the only one with this problem. The solution provided by our colleague, as indicated, is temporary.
Print a first layer print test.
Adjust the Z Offset in steps of 0.005 until you achieve a good first layer and note that number.
Print test again but this time from Fluidd (192.168.1.XX:4408), and adjust the Z Offset from Fluidd.
If your measurement was, for example, 0.035, use that figure in Fluidd. When you finish the test, click Save & Reboot.
It likely won’t save the configuration (I don’t know why), but it will create these two parameters in the Printer.cfg file: #z_offset: 0
And this one at the end of the file:
## [prtouch_v2]
## z_offset = 0.000
In this last parameter, enter the measurement you made earlier and save the file. MODIFY ONLY IN THIS PARAMETER
In my case:
#*# z_offset = 0.035
This will store the parameter and include it in all future prints. This is the best solution I found, as the alternative is to set the Z Offset in the printer configuration of the program you use (Orca, Creality…).
I hope this helps you and others.
And sorry for my English.
Sounds like the pair of you are recalibrating every print. Personally I calibrate once, dial in the Z offset with either the Nebula pad or Sonic pad, depending what printer and leaves it as that. No need to calibrate every print, once you have tuned it in, leave it until it noticeably goes out. Doing it every print is chasing the printer.
I agree with the notion of not calibrating every print. The issue is that any manual settings are missing entirely from the calibration pages of the user interface on the Ender 3 V3. I know I require a Z offset from where it is calibrating to of .225… There is nowhere to put this in. The default behavior of the printer is to auto home and calibrate each print… There is nothing to “Dial In.” It does its thing then prints. Nowhere to adjust anything.
It’s interesting to say the least, and the only printer I have seen that this is the case. Going to try the above and see what I see in Creality slicer this evening.
The Z offset from the printer cfg works quite well.
Out of curiosity I did a self level afterward. It does comment it back out when you do a level. I wish there was a better way to access that, but until there is an update that allows it I guess this is the way.
This get me up and running. If anyone knows a more permanent solution for initial layer Z-offset issues… Feel free to chime in.
You say it rewrites the Z Offset configuration in printer.cfg when you level again?? When you create a mesh level or when you use the calibrate option before printing?
For me, it does keep the z offset at 0.0035 in the cfg file.
It was still there as I had set it, but after a self check it comments it out by adding the # back in which makes it do nothing.
I really wonder if I there is possibly a hardware issue I need to adjust somewhere but quality is otherwise so good I doubt it. I printed a “silver dragon” last night from Creality Cloud by using the manual Z offset adjust during the first layer from the touch screen. It came out amazing! But when it started the print the skirt it printed was so thin it was nearly transparent and not extruding. Still concerning there is not obvious first layer troubleshooting anywhere…
I do appreciate the advice to get some prints going here. What I am hoping we ultimately find is that there is a permanent solution not a “per print” solution. If I run the calibration and start a print with a 0.2mm layer height on a properly tuned printer… That should be what I get every time. I know it is a new machine so I hope my trials end up helping or someone has already done this.