Even with an almost perfect calibration, I have a taco heat bed. In addition, I do not understand why the heat bed adjustment threats/ knobs come with applied blue Loctite.
A variance of 0.6mm is not bad. Try heatsoaking the printer and disable the chamber heater for the first few layers. This thread is having a simmilar issue, althoug not exactly the same: 1 & 2 layer strong problems
IMHO, difference upto 1mm is acceptable for this printer. It will be compensated by firmware when prints.
Please check and tight screws on the rail, on the hotend, on the strain gauge.
And for now maybe something wrong with z-offset when printing from slicer directly. Please try to print the same from printer’s memory.
In general ~0.6mm would be OK, I had problems with >0.9mm only and never get below 0.3 as well.
With the standard print plate (which is one sided) you can try to add tape as described here to flatten it. I did that on one of my older printers and it worked to get the level variation < 0.5.
I used capton tape which is heat resistant!
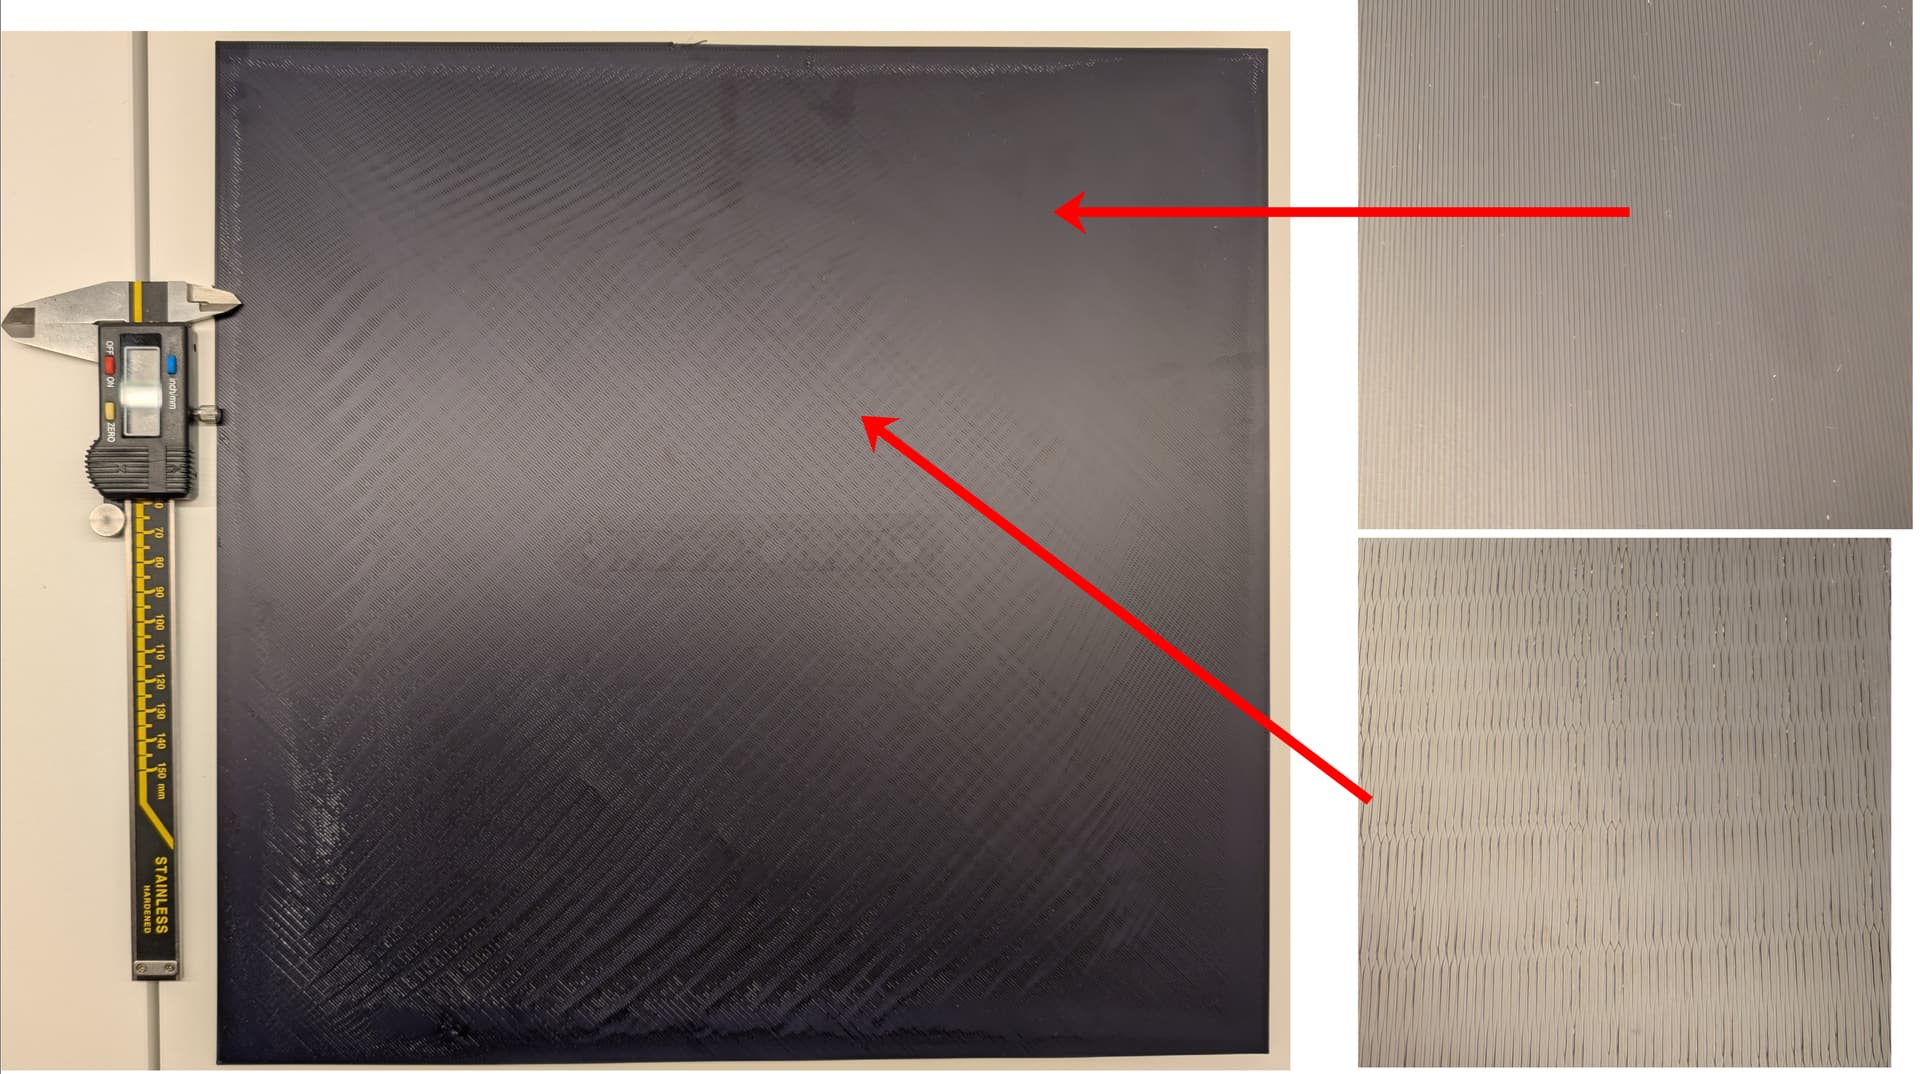
0.6 variance is a three-layer difference. I don’t understand how you can evaluate this as acceptable. This leads to a very inconsistent first layer. It might even be the reason why you can’t buy a smooth-build plate.
You can clearly see that the compensation algorithm is unable to compensate for this amount of variance; the wall thickness is inconsistent on the first layer.
To replicate print the first layer of any bigger object.
The firmware is “translate” every gcode command (if everything working well), and compensate, more or less, even for a big objects.
But they have a bug if you print from slicer directly. It works OK only if you send to printer and than print from his display.
But on your pictures above i see results most probably due to loosen screw(s) somewhere.
Made this big movable plate stable for a different temeratures - is a challenge. It cannot be 100% straight. In this case, i think, Bambu still havent big printers.
At least you were able to print something… after manually leveling the bed, adding kapton tape, and still warped more than 0.35mm (varies greatly each cal), Creality Hyper PETG will not stick without manual Z offset adjustment. Even then, layer quality is very poor and mesh-leveling is only about half as effective as it should be. Results are different if printed from slicer, or printed from printer. Reverting to old firmware and CrealityPrint5 - no go. Adding M28 to end of start gcode - no go. Frequent firmware crashes / bugs. Retraction issues, CFS/EXT issues… I’m sending it back - not going to wait months for vaporware support on a product not ready for market. Maybe I just got a “bad” one but this thing is useless.
Every PETG needs z-offset adjustment. Creality still not have it in the filament profile - its bad.
I’ve do it manually every PETG print.
But you’re right - product isnt ready for the mass market. See my post with issues.
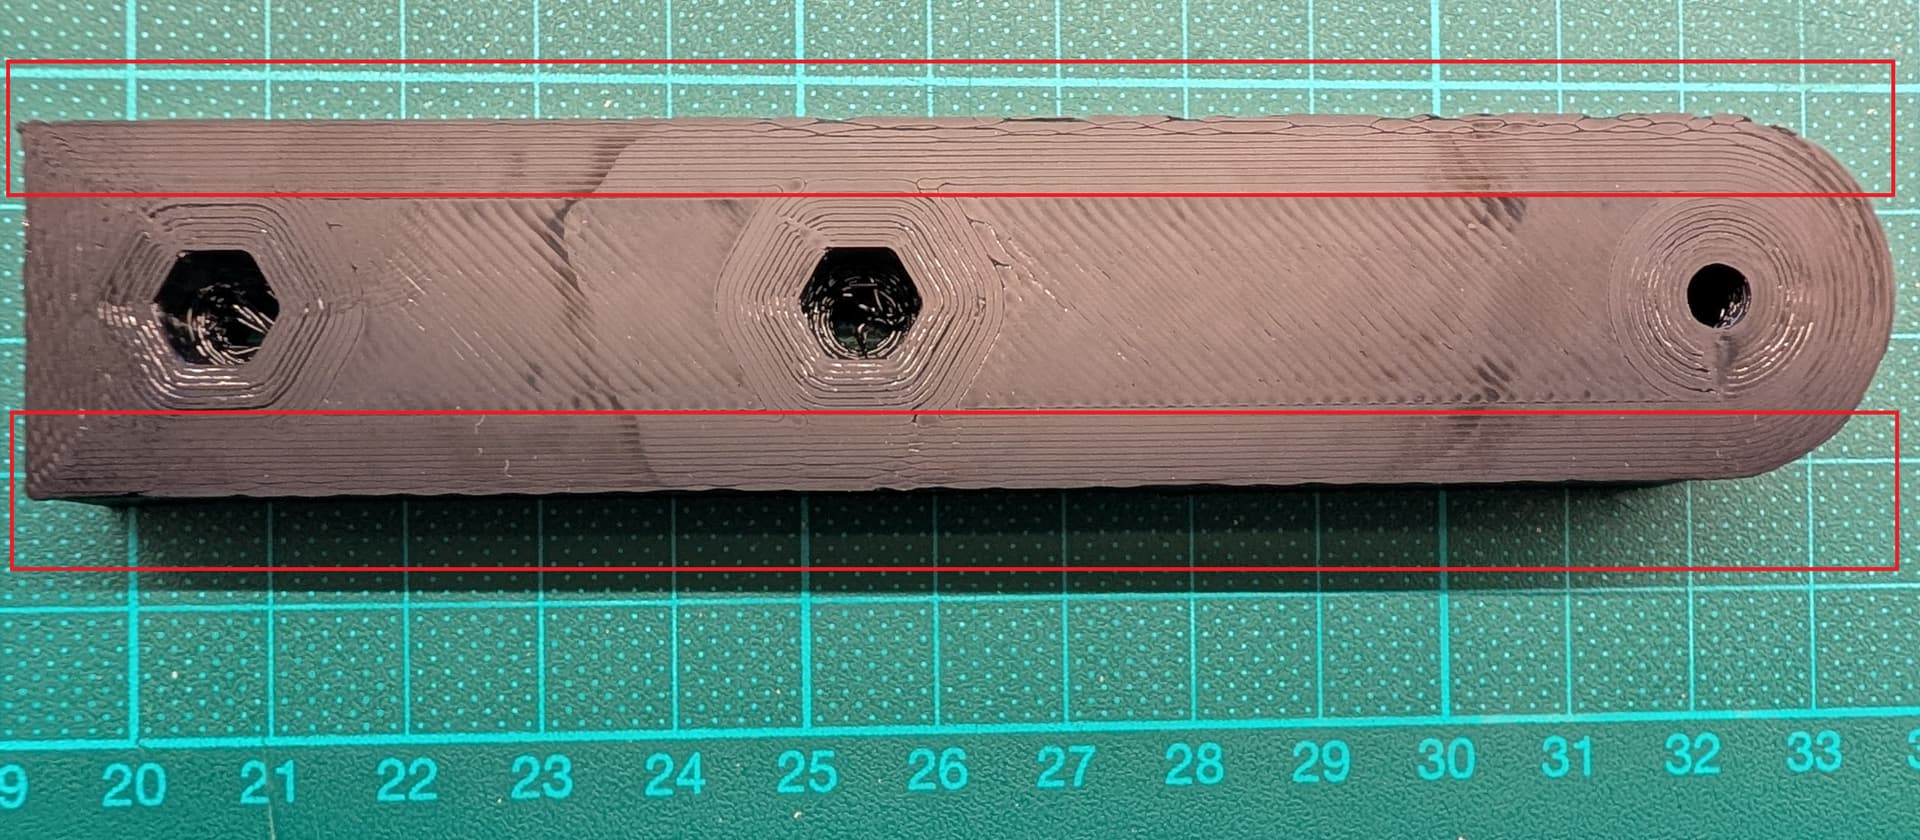
This is the same 1st layer gcode, printed directly from slicer, and than from printers memory :
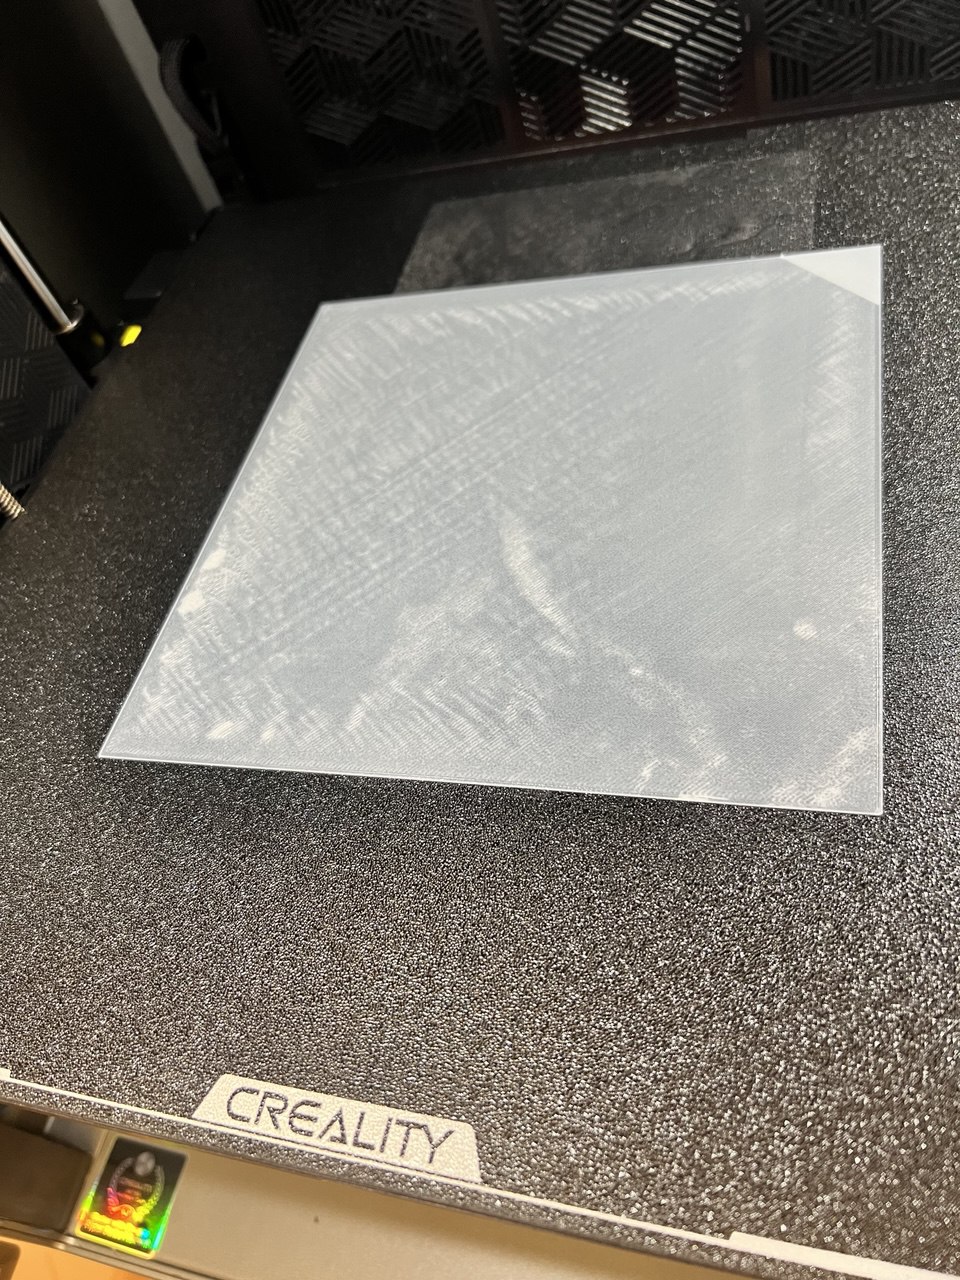
This is my today’s test of the new epoxy resin plate.
After printer’s power cycle (but normally i’m not switching it off) it starts first print OK from the slicer directly.
First layer very dependable of the ER plate temperature, better 40 C for Hyper PLA and 60 C for a cheap domestic PETG.
And anyway necessary to add z-offset every print, even for Hyper PLA.
0.050 for Hyper PLA and 0.090 for a PETG and 1s layer is OK
Sure. Not every plate shape can be compensated. IMHO, it depends of smoothness of bending. Sharp bends is a problem.
This is PETG? Did you test the flow rate?
Try to print a cube 10-20mm 100% infill (this is the way to check).
BTW, it can be a fake Creality filament. But almost any PETG possible to print, just slow and with a very different parameters. And better to give the full info about material and temperatures. I cannot wath the tube right now, sorry (Russia).
I reached out to the support for a new plate. I would even pay for one, but local dealers and the EU store do not have any in stock.
Yes, it is PET-G and it is genuine. I played the z-offset and flow rate to the extreme. Besides a new heat plate, the only solution so far is to heavily increase the probing resolution points, which come with an even longer calibration, which is not a long term solution.
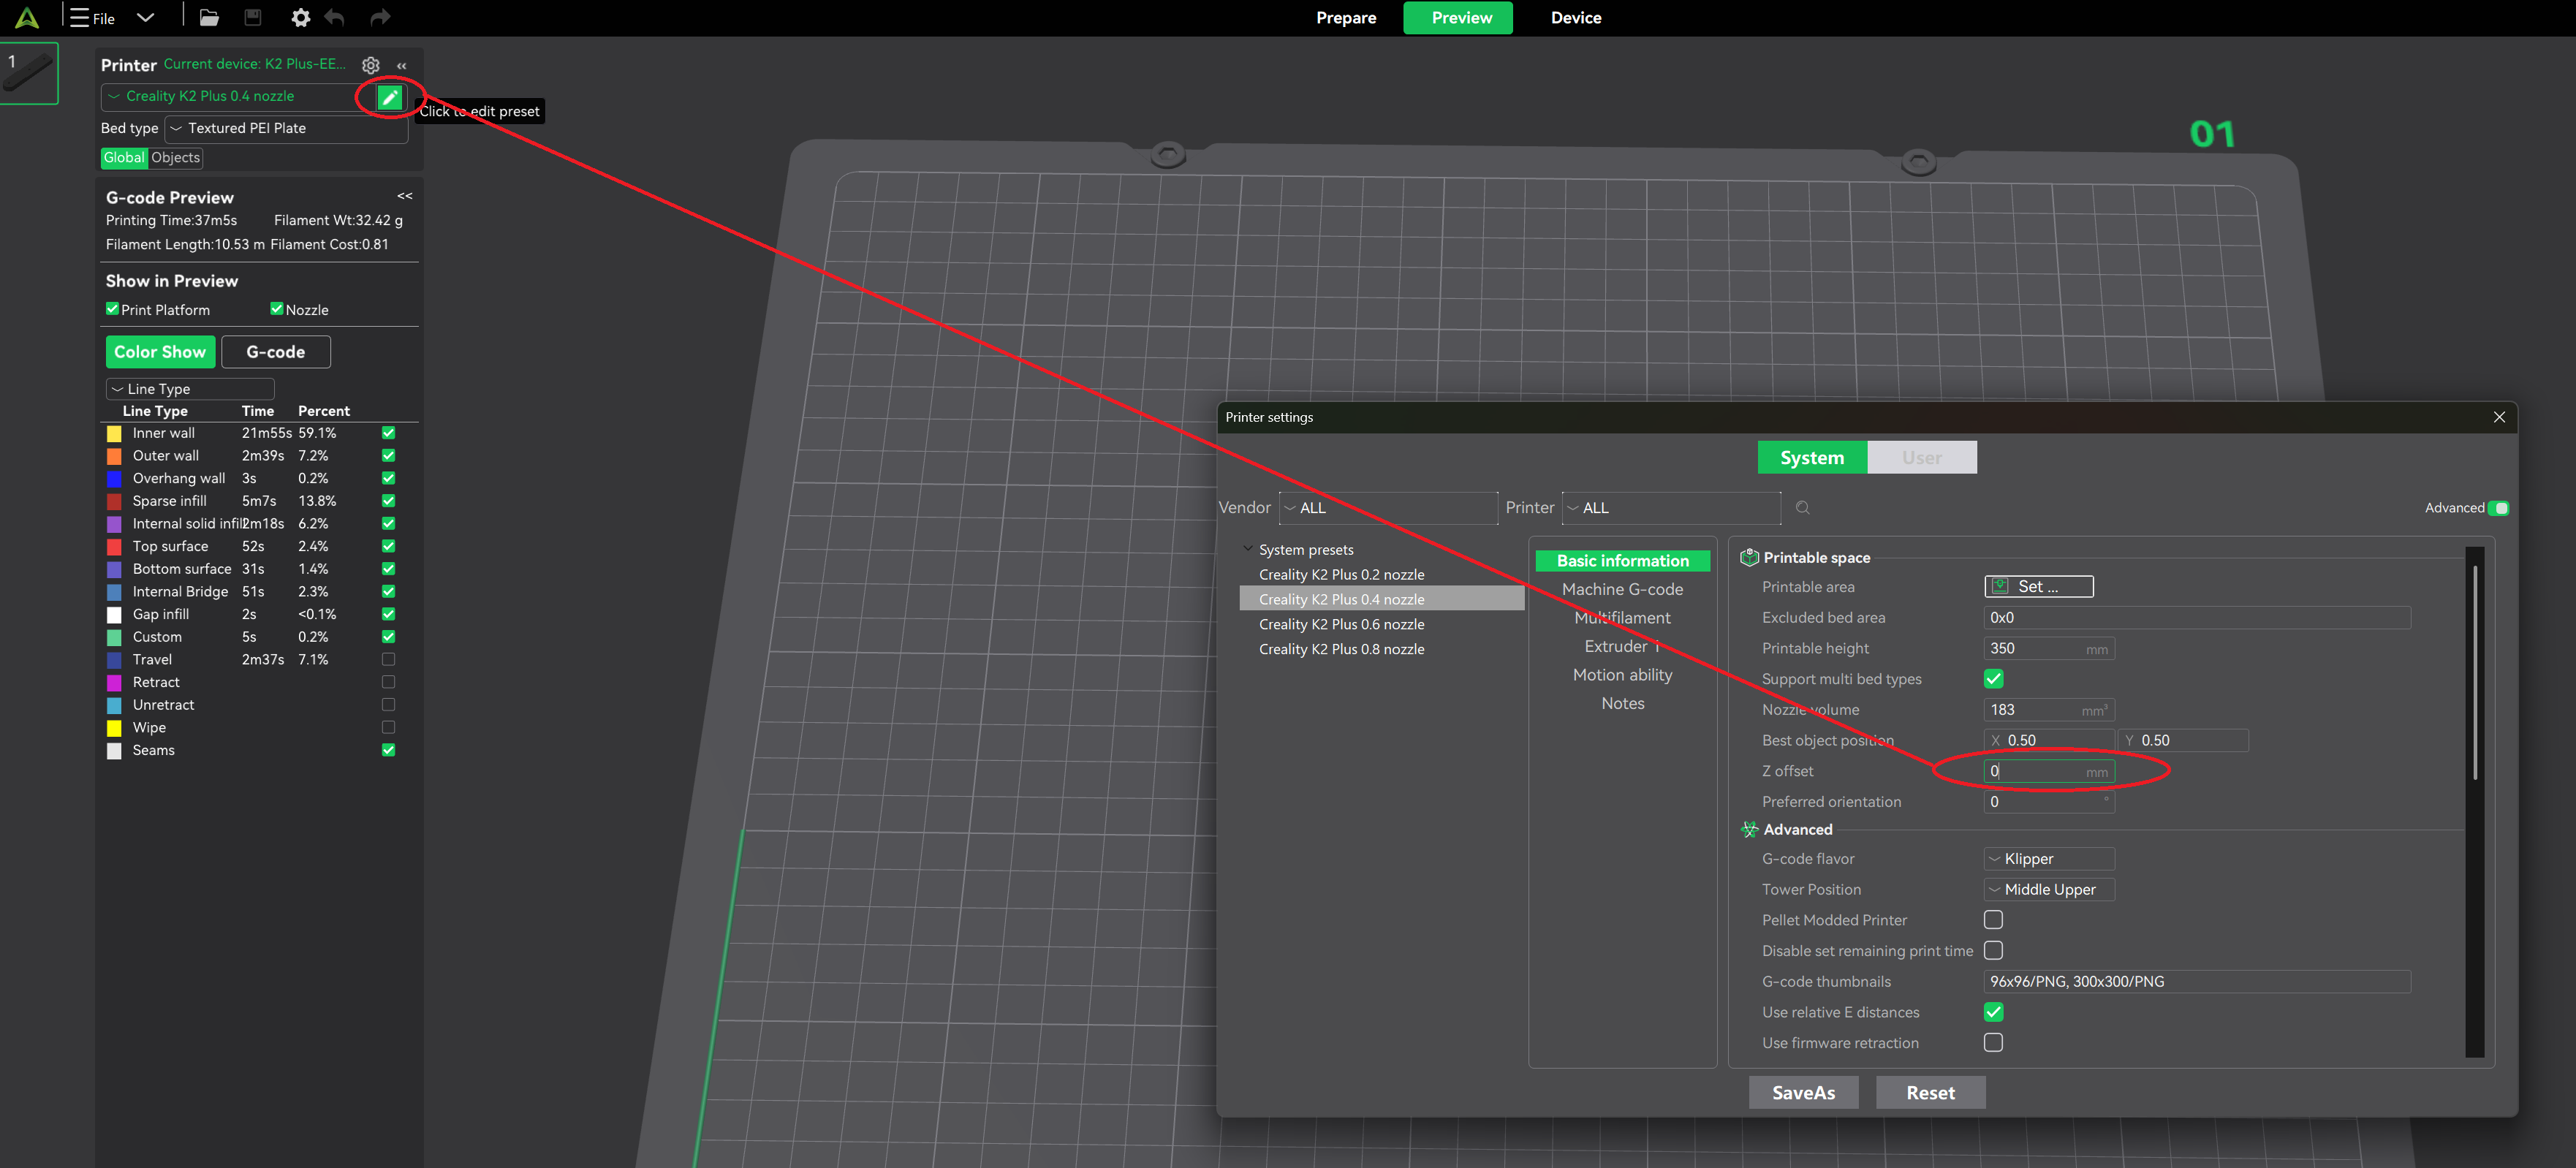
By the way, many people are complaining about the slicer, but there is a z-offset configuration
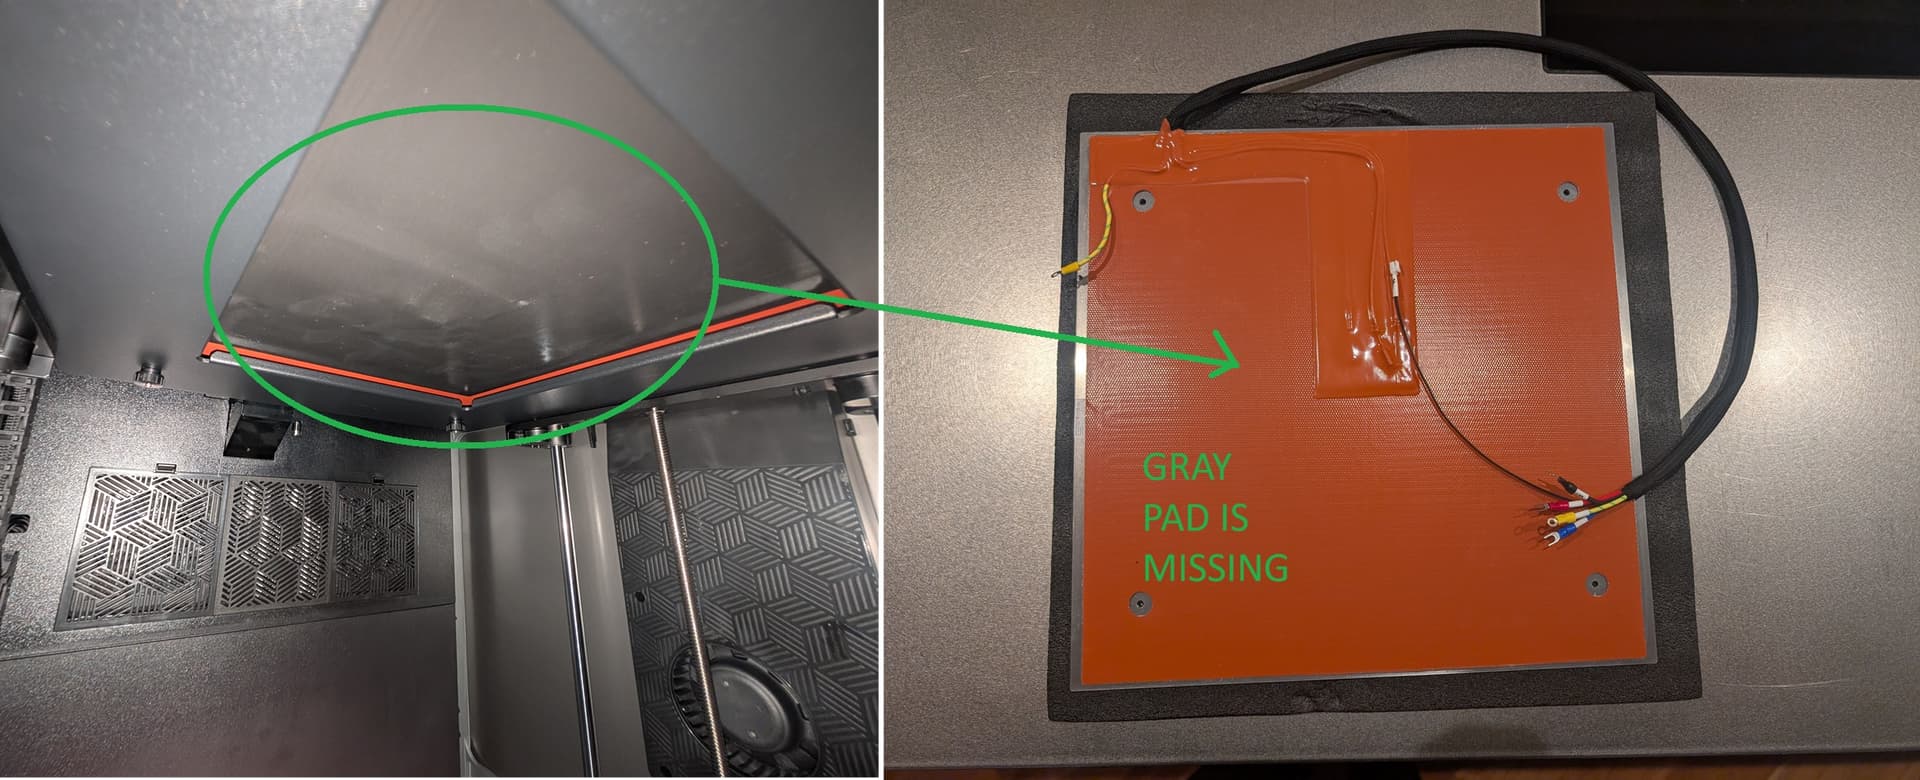
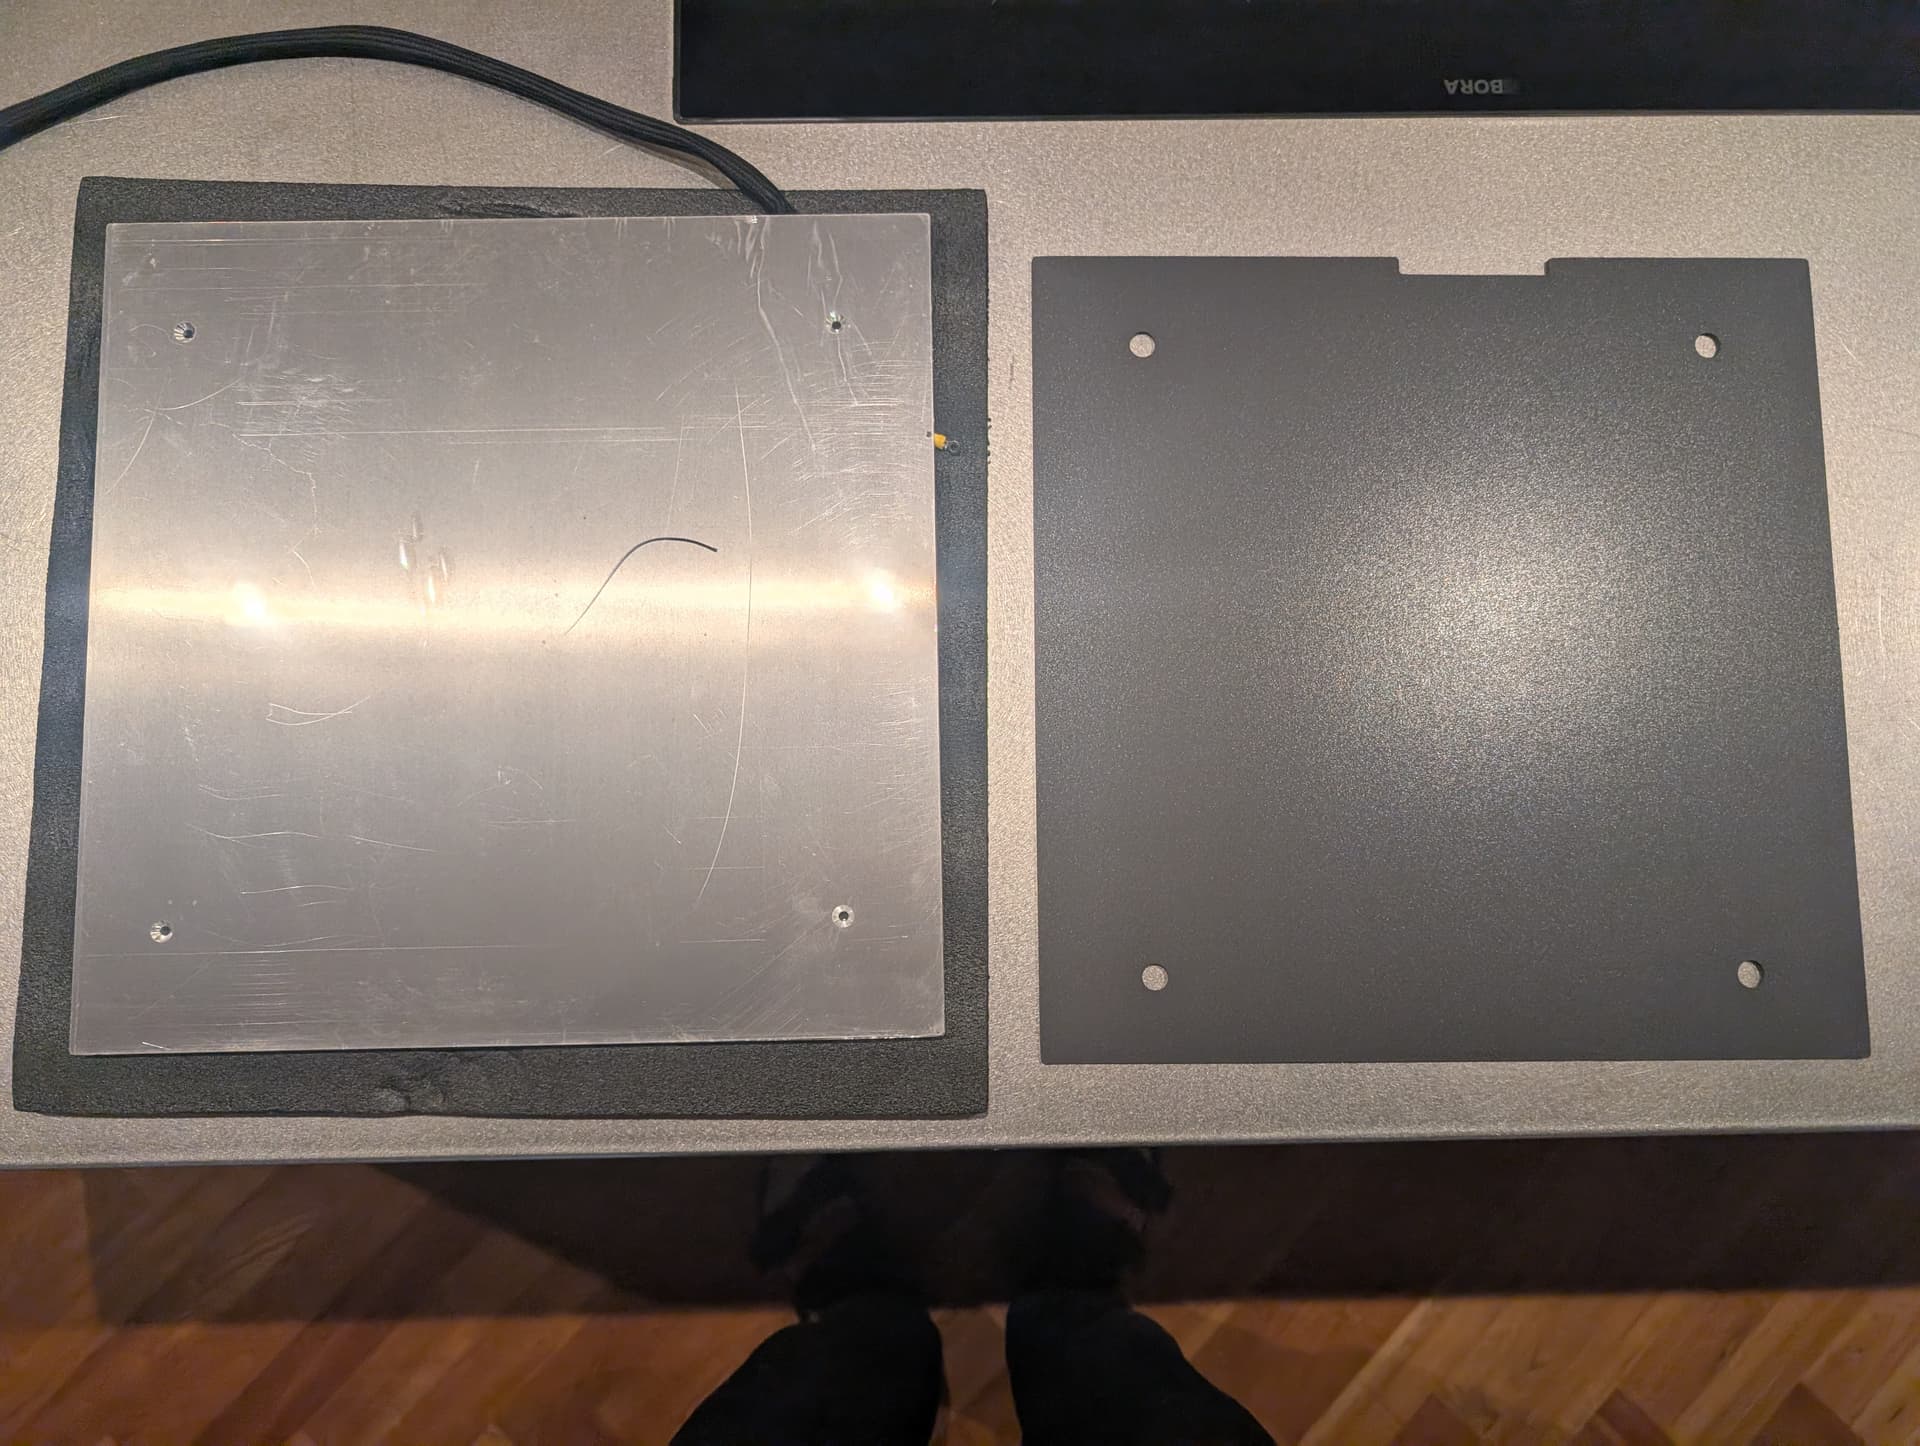
I just received my replacement bed. It’s even worse… The gray pad over the silicon is missing, its bent, and the magnet sheet is not installed. Does Creality any quality checks?! Never had such a frustrating experience in the last few years of 3d printing
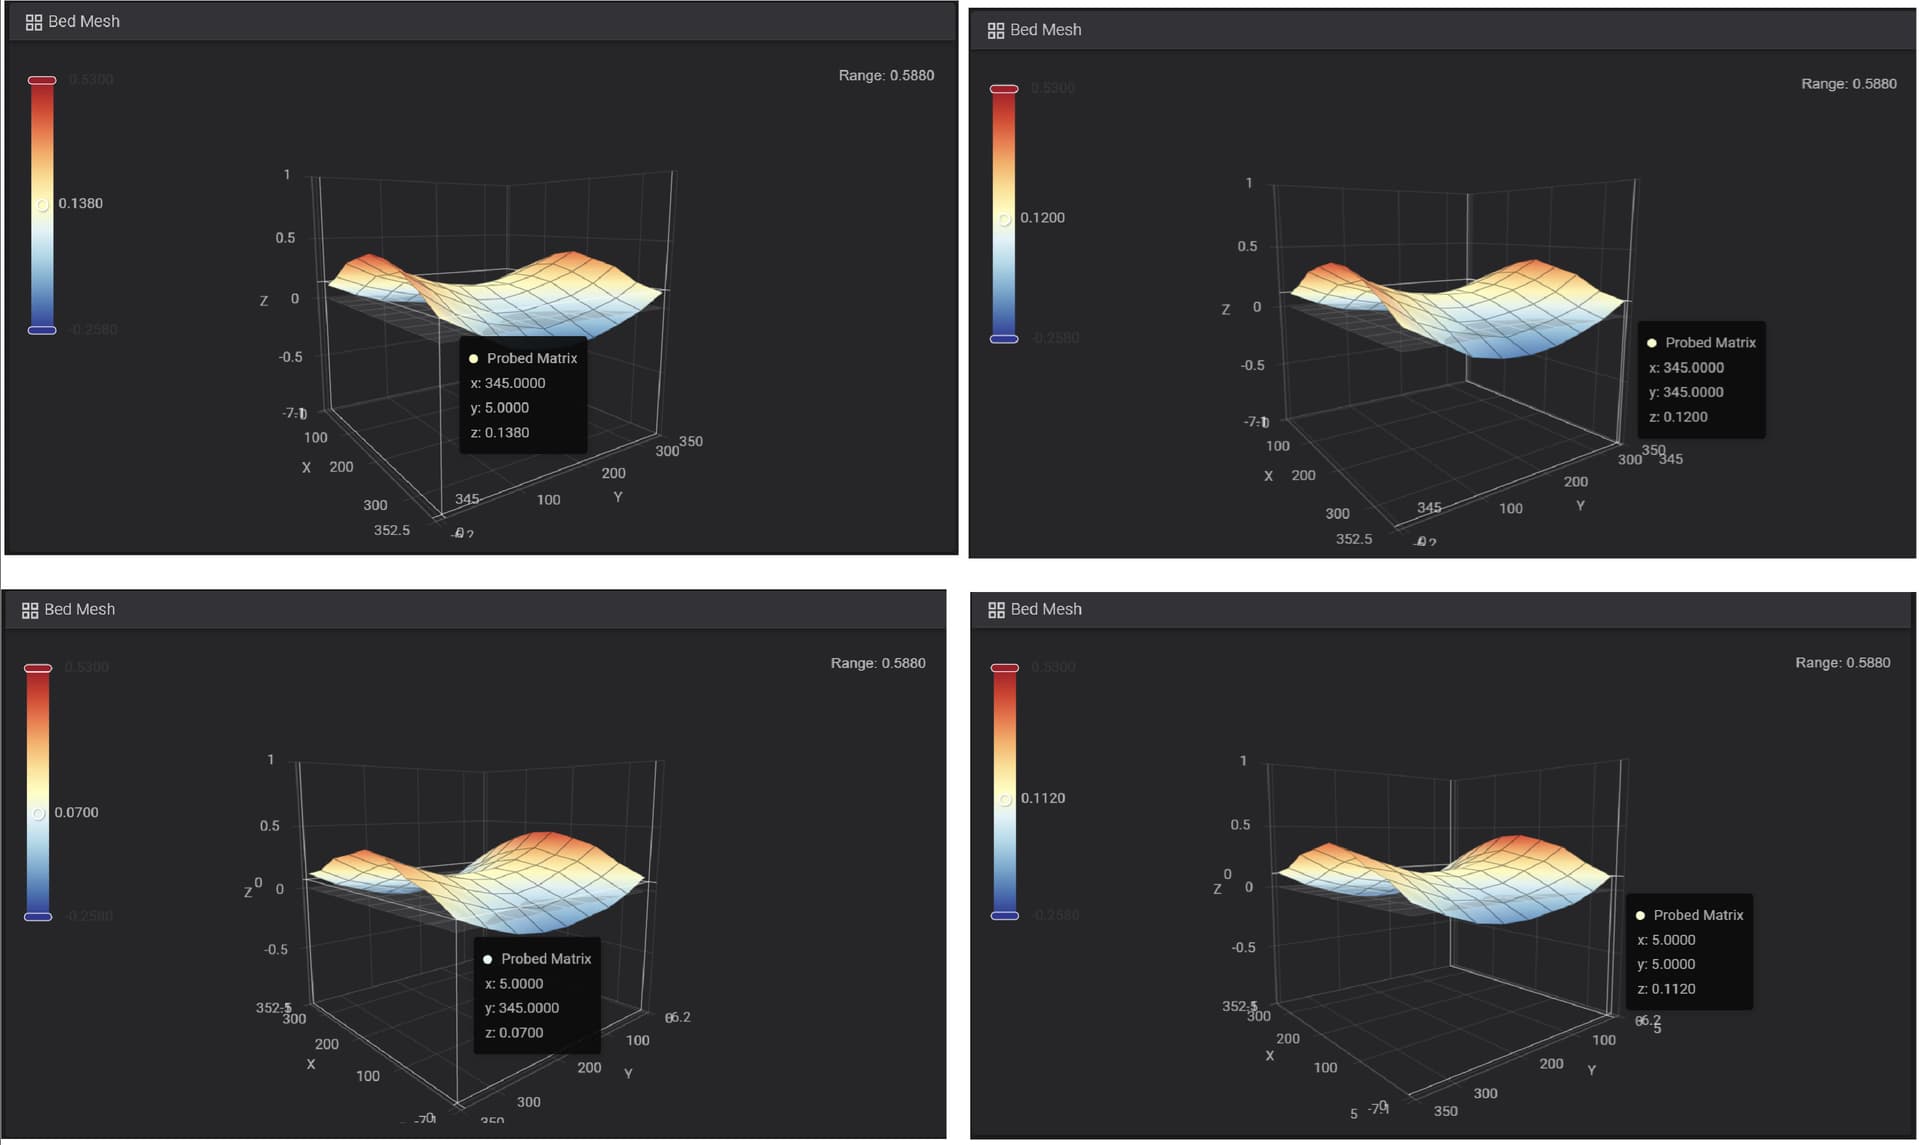
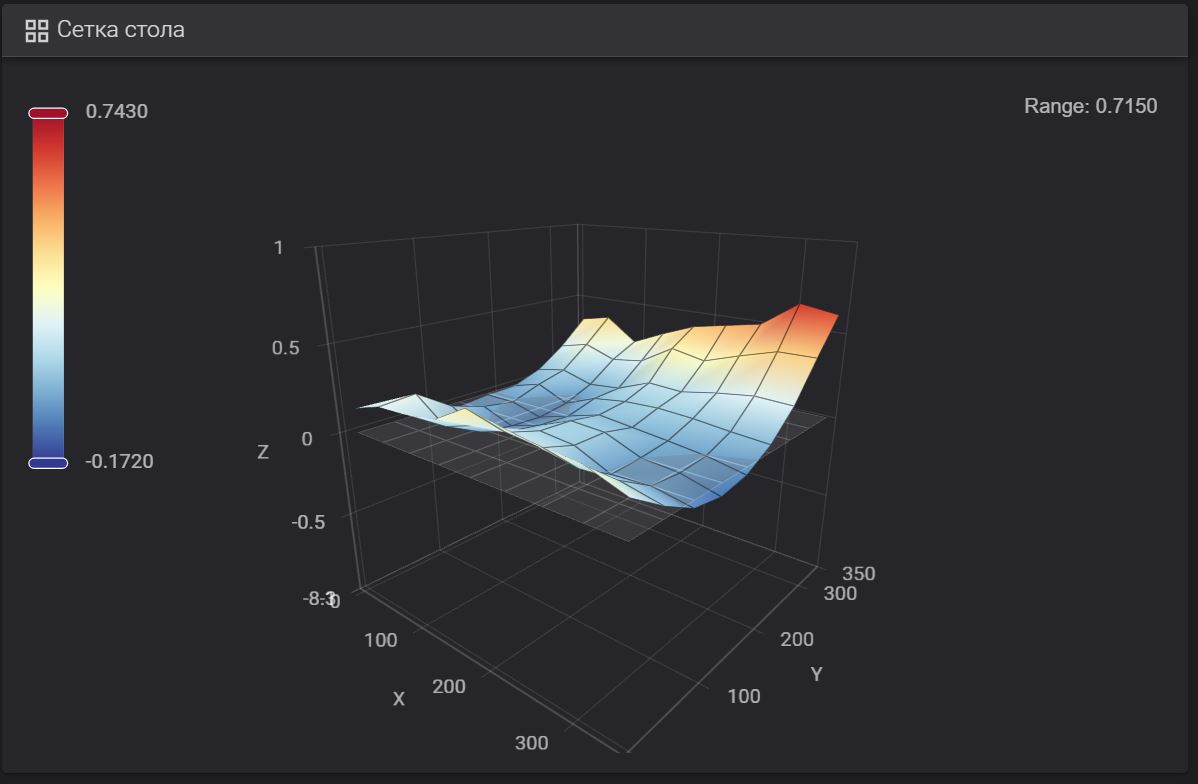
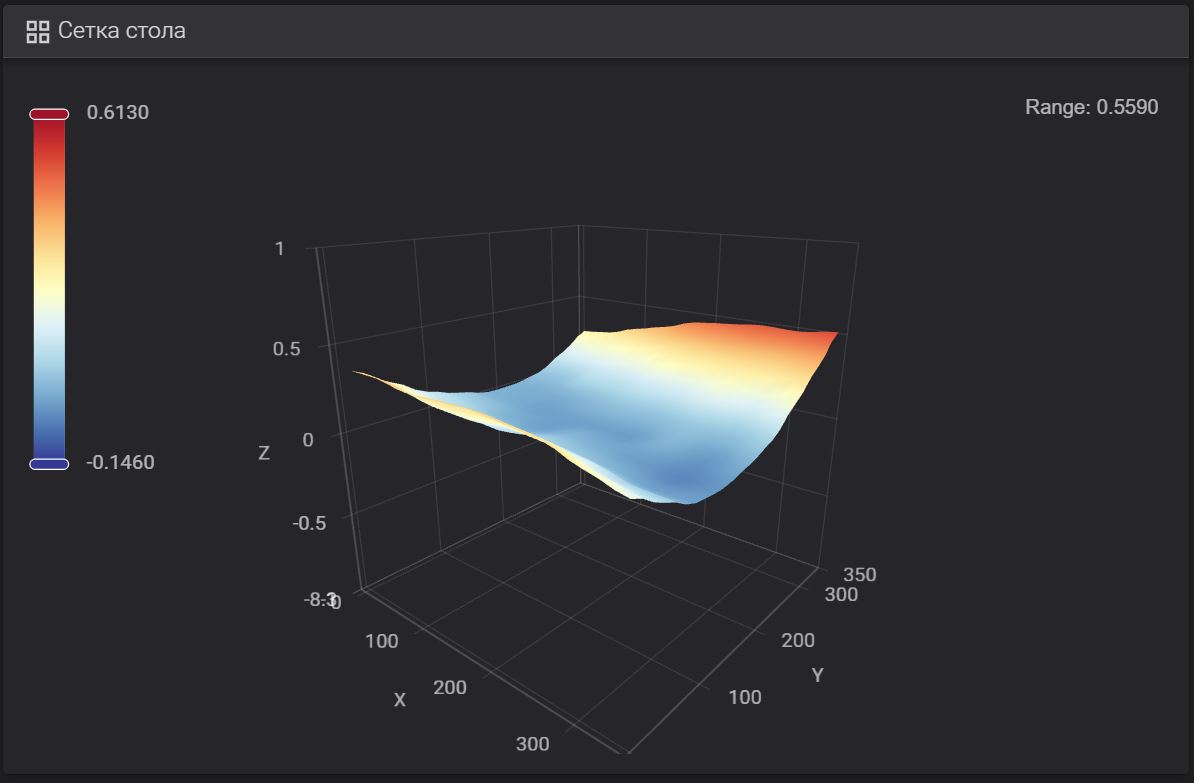
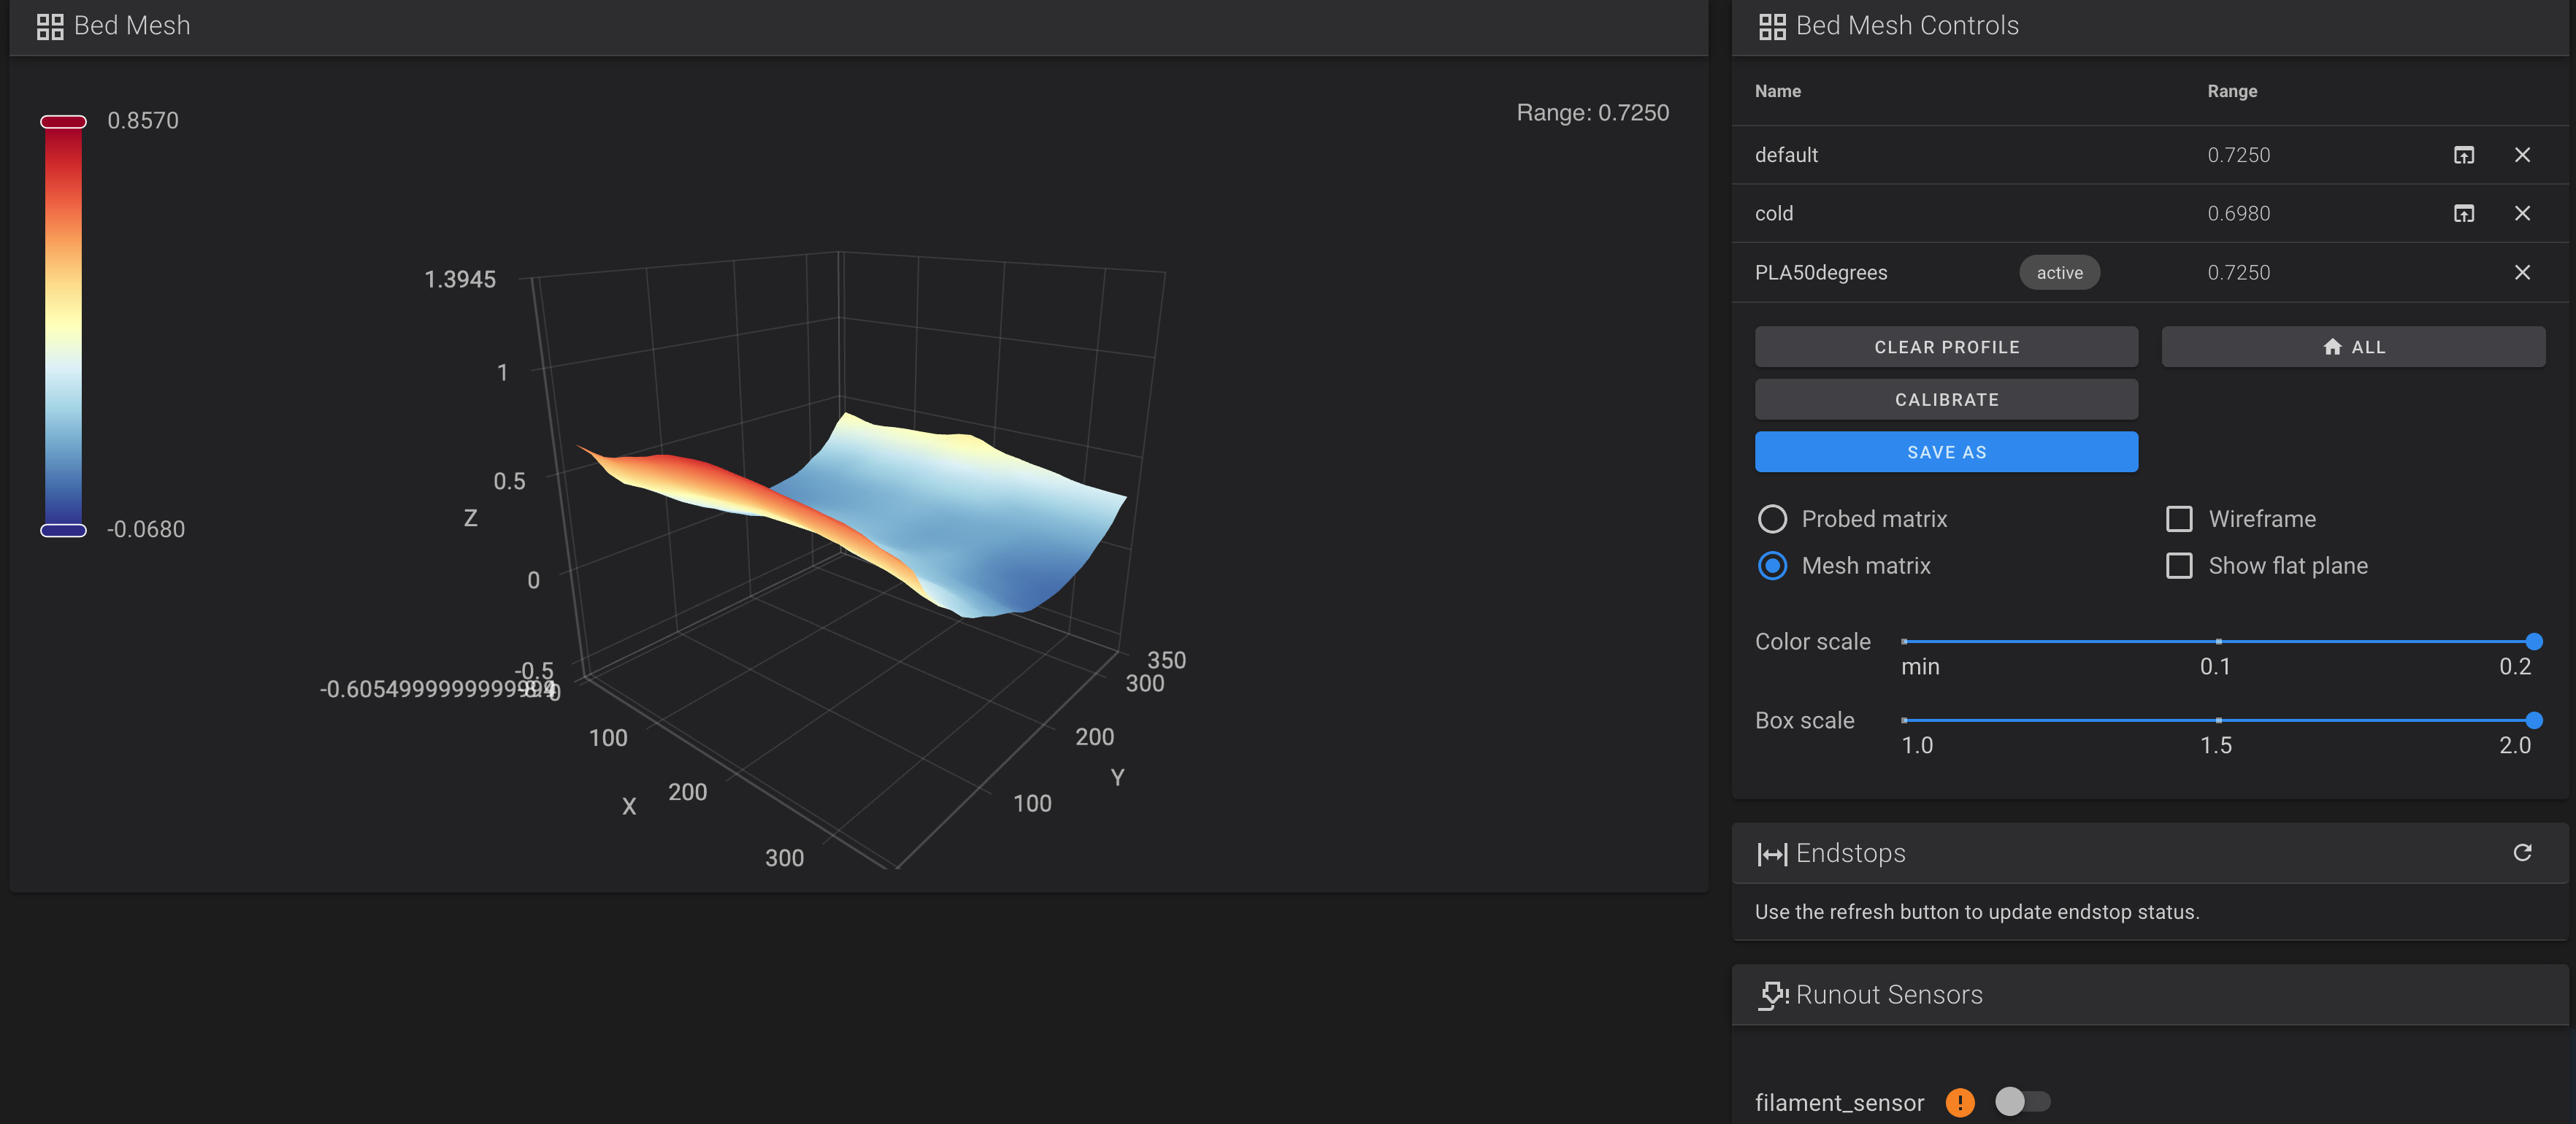
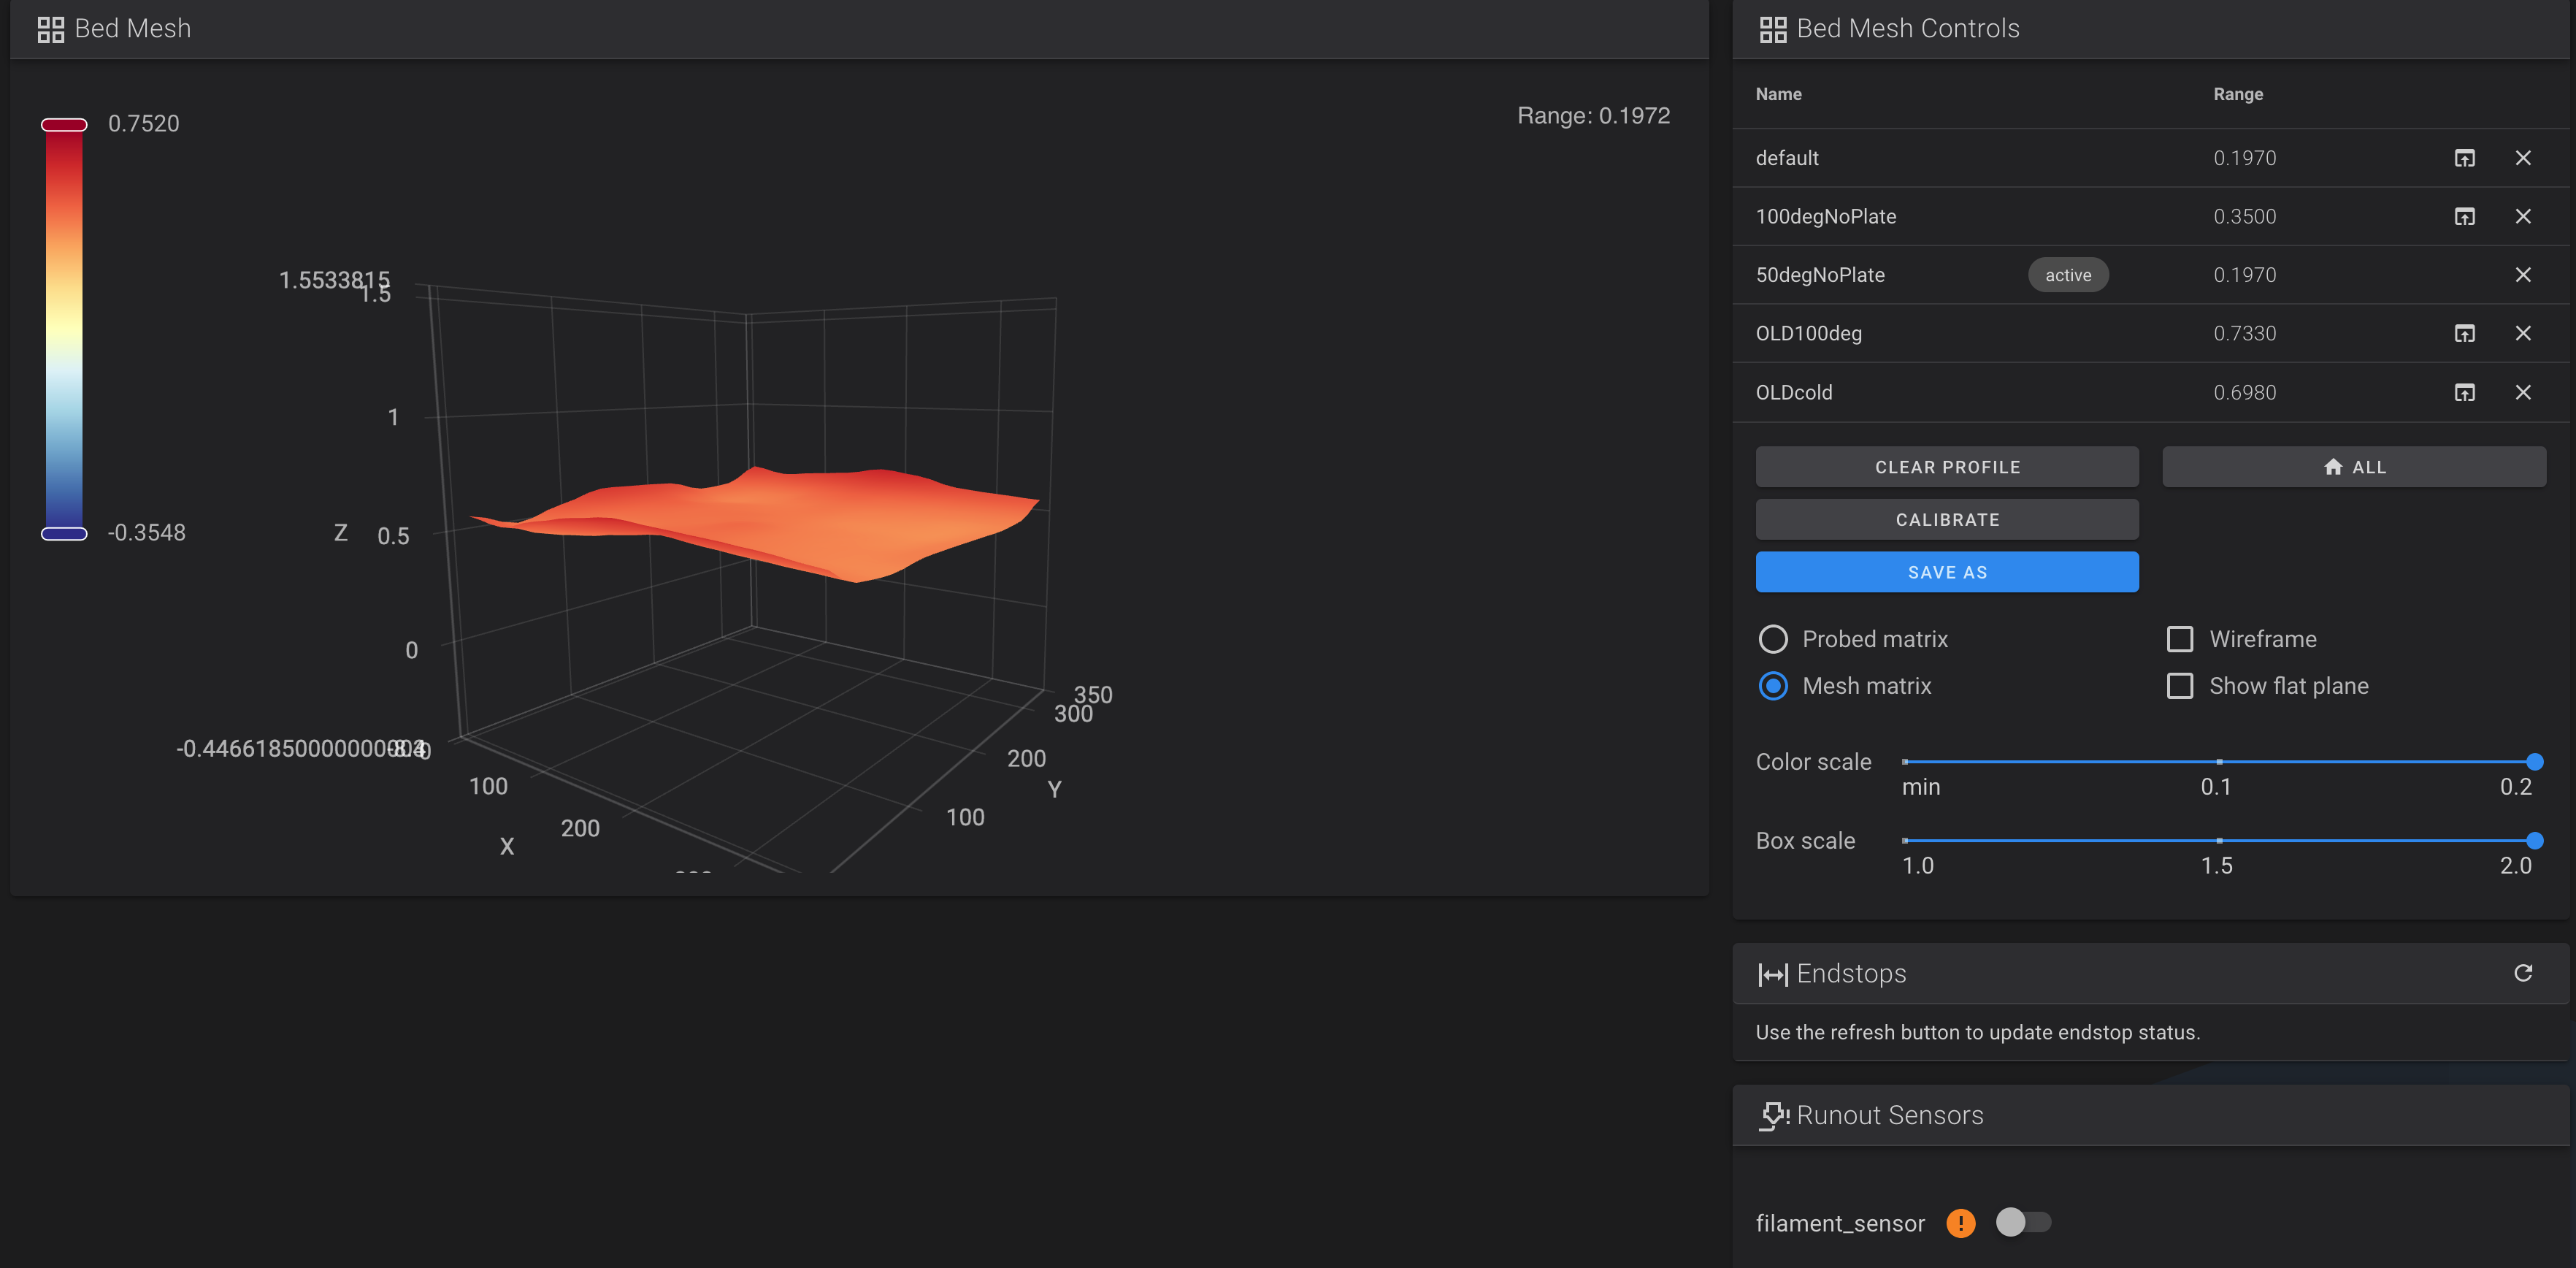
My bed was also curved, front to back (taco shape) - I suspected it was warped due to the weight of the CFS that ships inside the printer. However from your experience with a brand new plate, I’m now thinking it may be simply a manufacturing issue. Anyway, I fixed my plate by inserting a shim between the plate and the steel cradle on either side, half way from front to back (mid-way between the bed spring-loaded corner screws). Here are the before and after bed mesh shots:
I’ve had the same issue since I got my K2 Plus in January and finally got fed up wasting time using all “fixes” I could find on this forum and contacted Creality support. After a couple of emails they’re sending out a new bed to me, but I don’t have much hope and I’m not looking forward to dismantling have the printer just to replace the bed.
Oh, something I tried that I never saw mentioned anywhere else, I replaced the springs with similar but longer ones so they would still fit in the small spacers but lift up the bed a bit more. I was hoping that as the best adjustment I could get was when the rear of the bed was with the adjustment screws fully tightened (so sitting on those spacers), the extra might give me a little more adjustment. But sadly no, and I’m not sure when I replace the bed whether to stick with them or put the original ones back - I might try without the spacers.
In my case, the bed warping appeared to get permanently worse after running it at high bed temp (110c in my case). I have PETG print sample from when it was brand new (and only printed PLA and PETG), and it was not as bad as today, after many ABS and PA-CF prints.
Now I just realized that taco bed is a new extra feature, courtesy of K2 Plus (sarcasm).
So I eventually gave up and contacted Creality support. After a few emails they shipped me out a new bed, which arrived the other day and I installed today. Took me 5 hours for various reasons.
Time will tell if it lasts. I have done no adjustment and when installing I tightened all the bed screws right down, so I wonder why there are springs there at all - same question for the 4 main mounts of bed carrier which also have springs yet they are full tightened.
However that wasn’t really the first mesh this was
Then I realised I’d forgotten to remove the corner extensions I had installed for when I had the bed sitting much higher and needed something to guide the plate placements It was of course hitting those before the bed and completely throwing it off.
Maybe Creality have sorted the supply of bad beds or I was just lucky.