This is driving me insane;; I am printing a circular grid. I have set Raft with 3 layers and a Grid pattern. It prints fine, but when I try to remove the grid from the raft it turns into thousands of tiny strings that will take DAYS to remove.. I need the raft to be a SOLID layer so it will come off in one piece.
I am somewhat inexperienced so I don’t know how to do this in Orca. For the love of all that’s
holy… HELP!!
1 Like
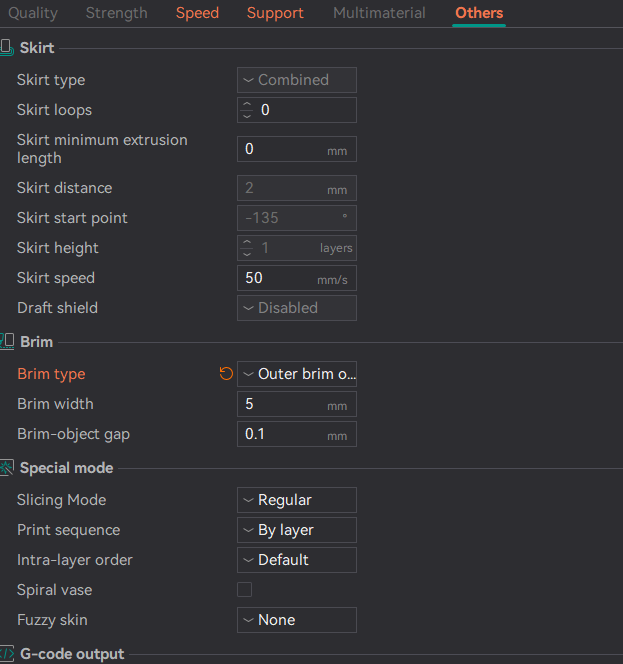
Why not use a wide brim rather than a raft? Rafts are horrible to remove. Worse come to worse I would increase top Z distance to 0.25 and change the interface layers to zero.
Thank you for your advice, but your suggestion is a bit beyond my understanding. Since I’m working with a “grid” pattern, I need support throughout the entire structure. I thought a brim only supported the outer edge—am I mistaken?
Also, when you mentioned, “Worst case scenario, I would increase the top Z distance to 0.25 and change the interface layers to zero,” were you referring to a brim or a raft? I seem to remember a type of support that provided a solid layer underneath the entire model, as opposed to what a raft provides.
Could you help clarify this for me? Please explain it in simpler terms, as I’ve been using Orca Slicer for about six hours now since I bought a K2.
Worst case scenario, I would increase the top Z distance to 0.25 and change the interface layers to zero, That is what I use for supports to make them easy to remove. A raft is not easy to remove so i would try those settings. A grid should stick to the bed even without a brim, perhaps with the aid of gluestick. Personally not a fan of raft because it is hard to remove.
Hello CaptainObvious,
Pretty much as Bonfireman said.
Looking at the print you are doing, I would say there is enough surface area to hold by itself.
This being that the Z offset is good.
I don’t use rafts myself as they generally become near impossible to remove.
I use a brim mainly to make sure I am going to get a good print to start with.
Never be concerned to use a glue stick; it can save you a lot of wasted time and filament.
Cheers from a crouton .
1 Like
It’s clear you and Bonfireman know more than I do… Therefore I shall do as instructed and try a brim with a decent gluestick base… Will report back when it’s done.
1 Like
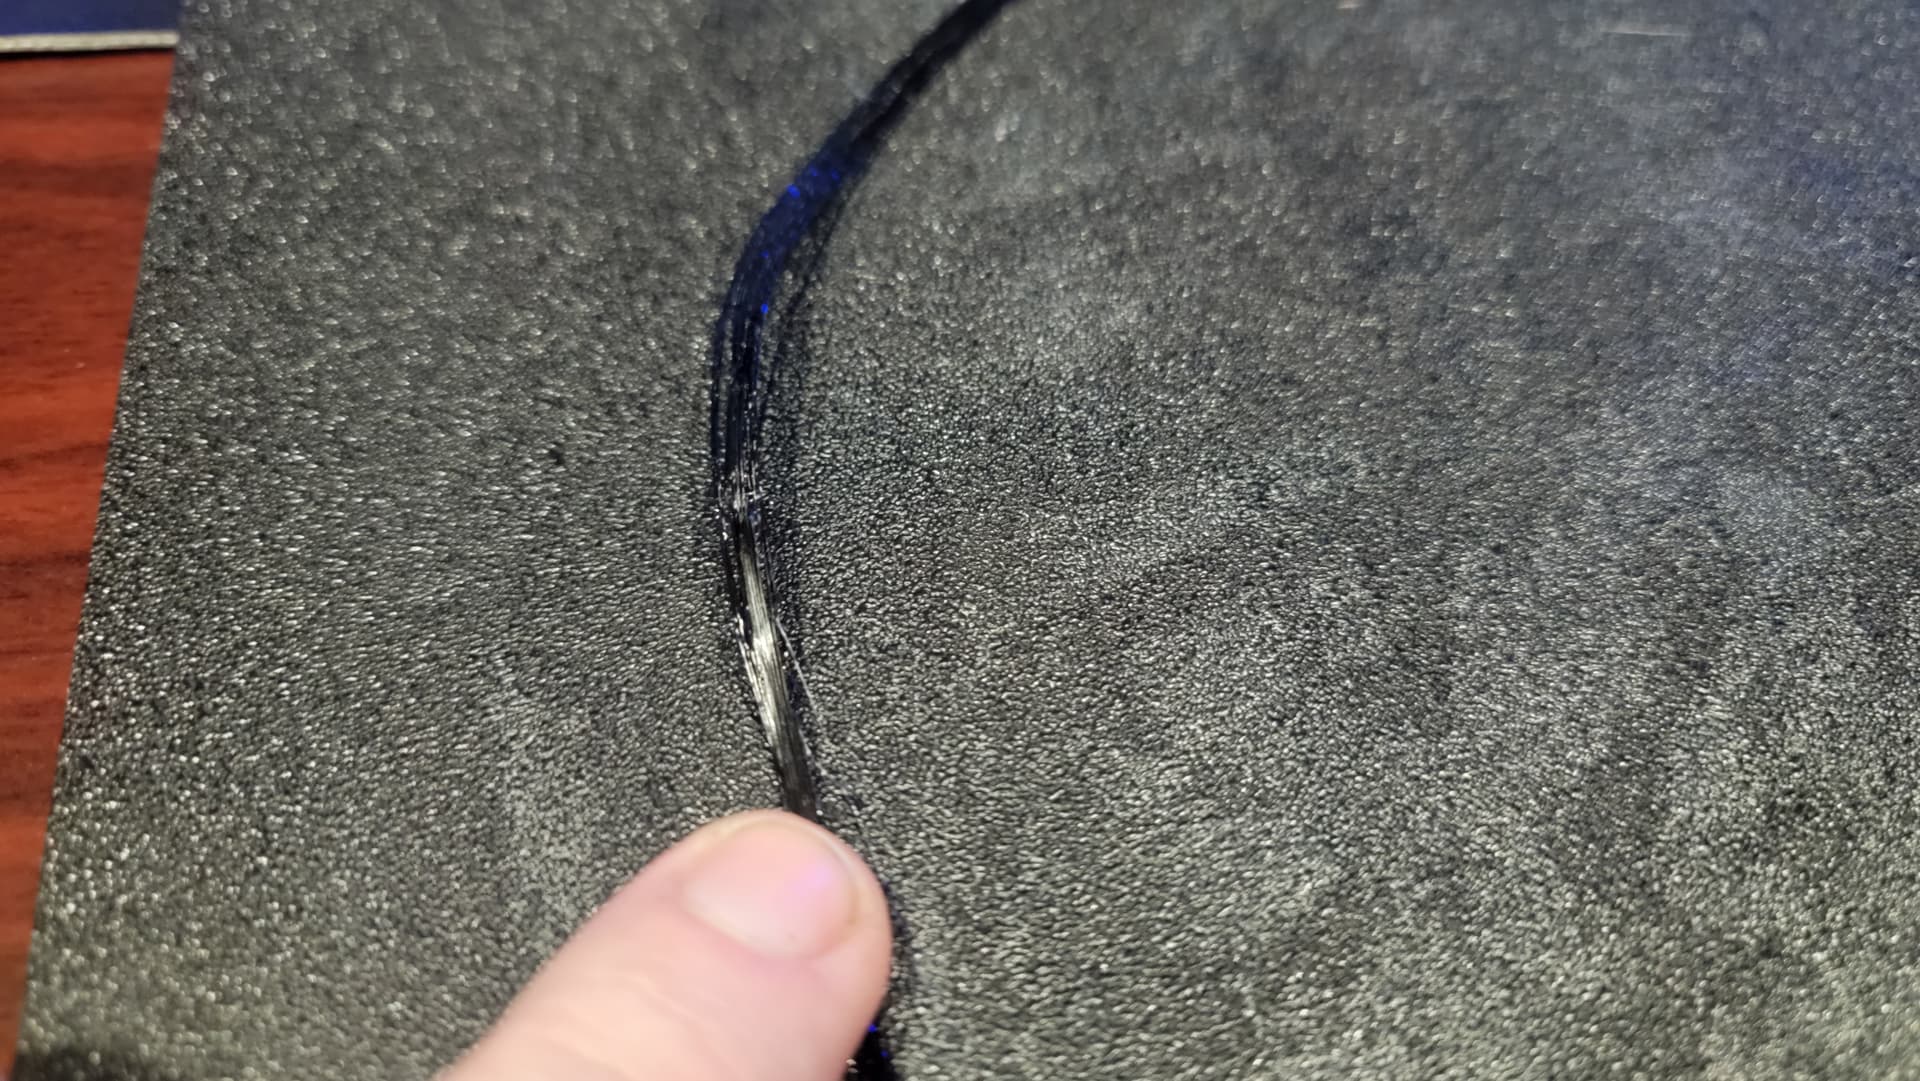
Hey everyone, here’s what happened. This is what motivated me to use full support on the bottom in the first place. Since I purchased this printer, I’ve been having issues with the first layers either bubbling or not sticking at all. When I first got it, the printer was tearing the first layer to shreds. I somewhat solved this by leveling the bed at the printer interface and adjusting the offset to 0.3mm. If I manage to lay down a complete first layer, it’s not perfect, but it tends to hold up.
However, using a brim with complex models that have lots of holes is challenging. I could really use some help with this. Also attached settings of project file
.Video of build plate
Dehumifier Screeen Mk I v1.3mf (247.3 KB)
Willing to work through this if anyone can help me out.
You need to tweak that z-offset when it is laying down that brim, it is too high
Can you please direct me to where and how that is done? I’ve found the brim menu but there is no Z-offset
UPDATE:
Currently doing another print. This time the first layer is doing far better. The brim is perfect, and there are no errors on the squares just yet.
I made two main changes / fixes
1: I think I was starting the print while the glue was still wet… A youtube video educated me that the glue must be dry before you print.
2: (And I think this one made a huge difference) I SLOWED the first layer down to 20mms from around 300) youtube made the argument that this gives the filament time to adhere to the plate.
I may have overdone it and set it too slow, I can tweak this over time, but I’m not a commercial builder so a long print time doesn’t bother me right now
This is the best print quality I’ve had since I’ve purchased this thing… Yes it’s slow, but I’m okay with that for now… Just happy to see a good print. Hold…
Yeah so far it looks amazing… Thanks for the help everyone!
I guess the advertised speed vs the actual speed are 2 different things. I have to do a couple copies of this… So on the 2nd one I’ll increase the speed a little.
1 Like
It was very kind of you to help me out… Thanks!!
First layer is looking perfect!! So happy I am on the right path.
Either it was the glue (Doubt it) or the print speed (I think this was it)
As I usually do not have such (big) problems I can only make recommendations based on my workflow.
- Your print plate is far too dirty! I have the printer since ~ 12 weeks and the print plate is like new, I clean it EVERY day (with 80% IPA but you can do it also with window/glass cleaner). By the way, I never had to use glue stick or the spray so far with any PLA, PETG, ABS or ASA filament I printed so far.
- Did you look through the post First Layer Issues with textured PEI plate ? I posted there also several pictures, one where you see that I have one spot on the build plate which came just from removing previous print from build plate by hand. If I would have seen that before I would have cleaned build plate in between but luckily part was not touching this area.
- Didi you also read through Is Bed Leveling Actually Working on the Creality K2
- On your print you don’t need Raft or Brim at all! The only things what I would set is
Concentric Top and Bottom surface in the process settings because this may print better for all these small squares. I printed once a basket with similar patter in PETG as well and did not need anything more!
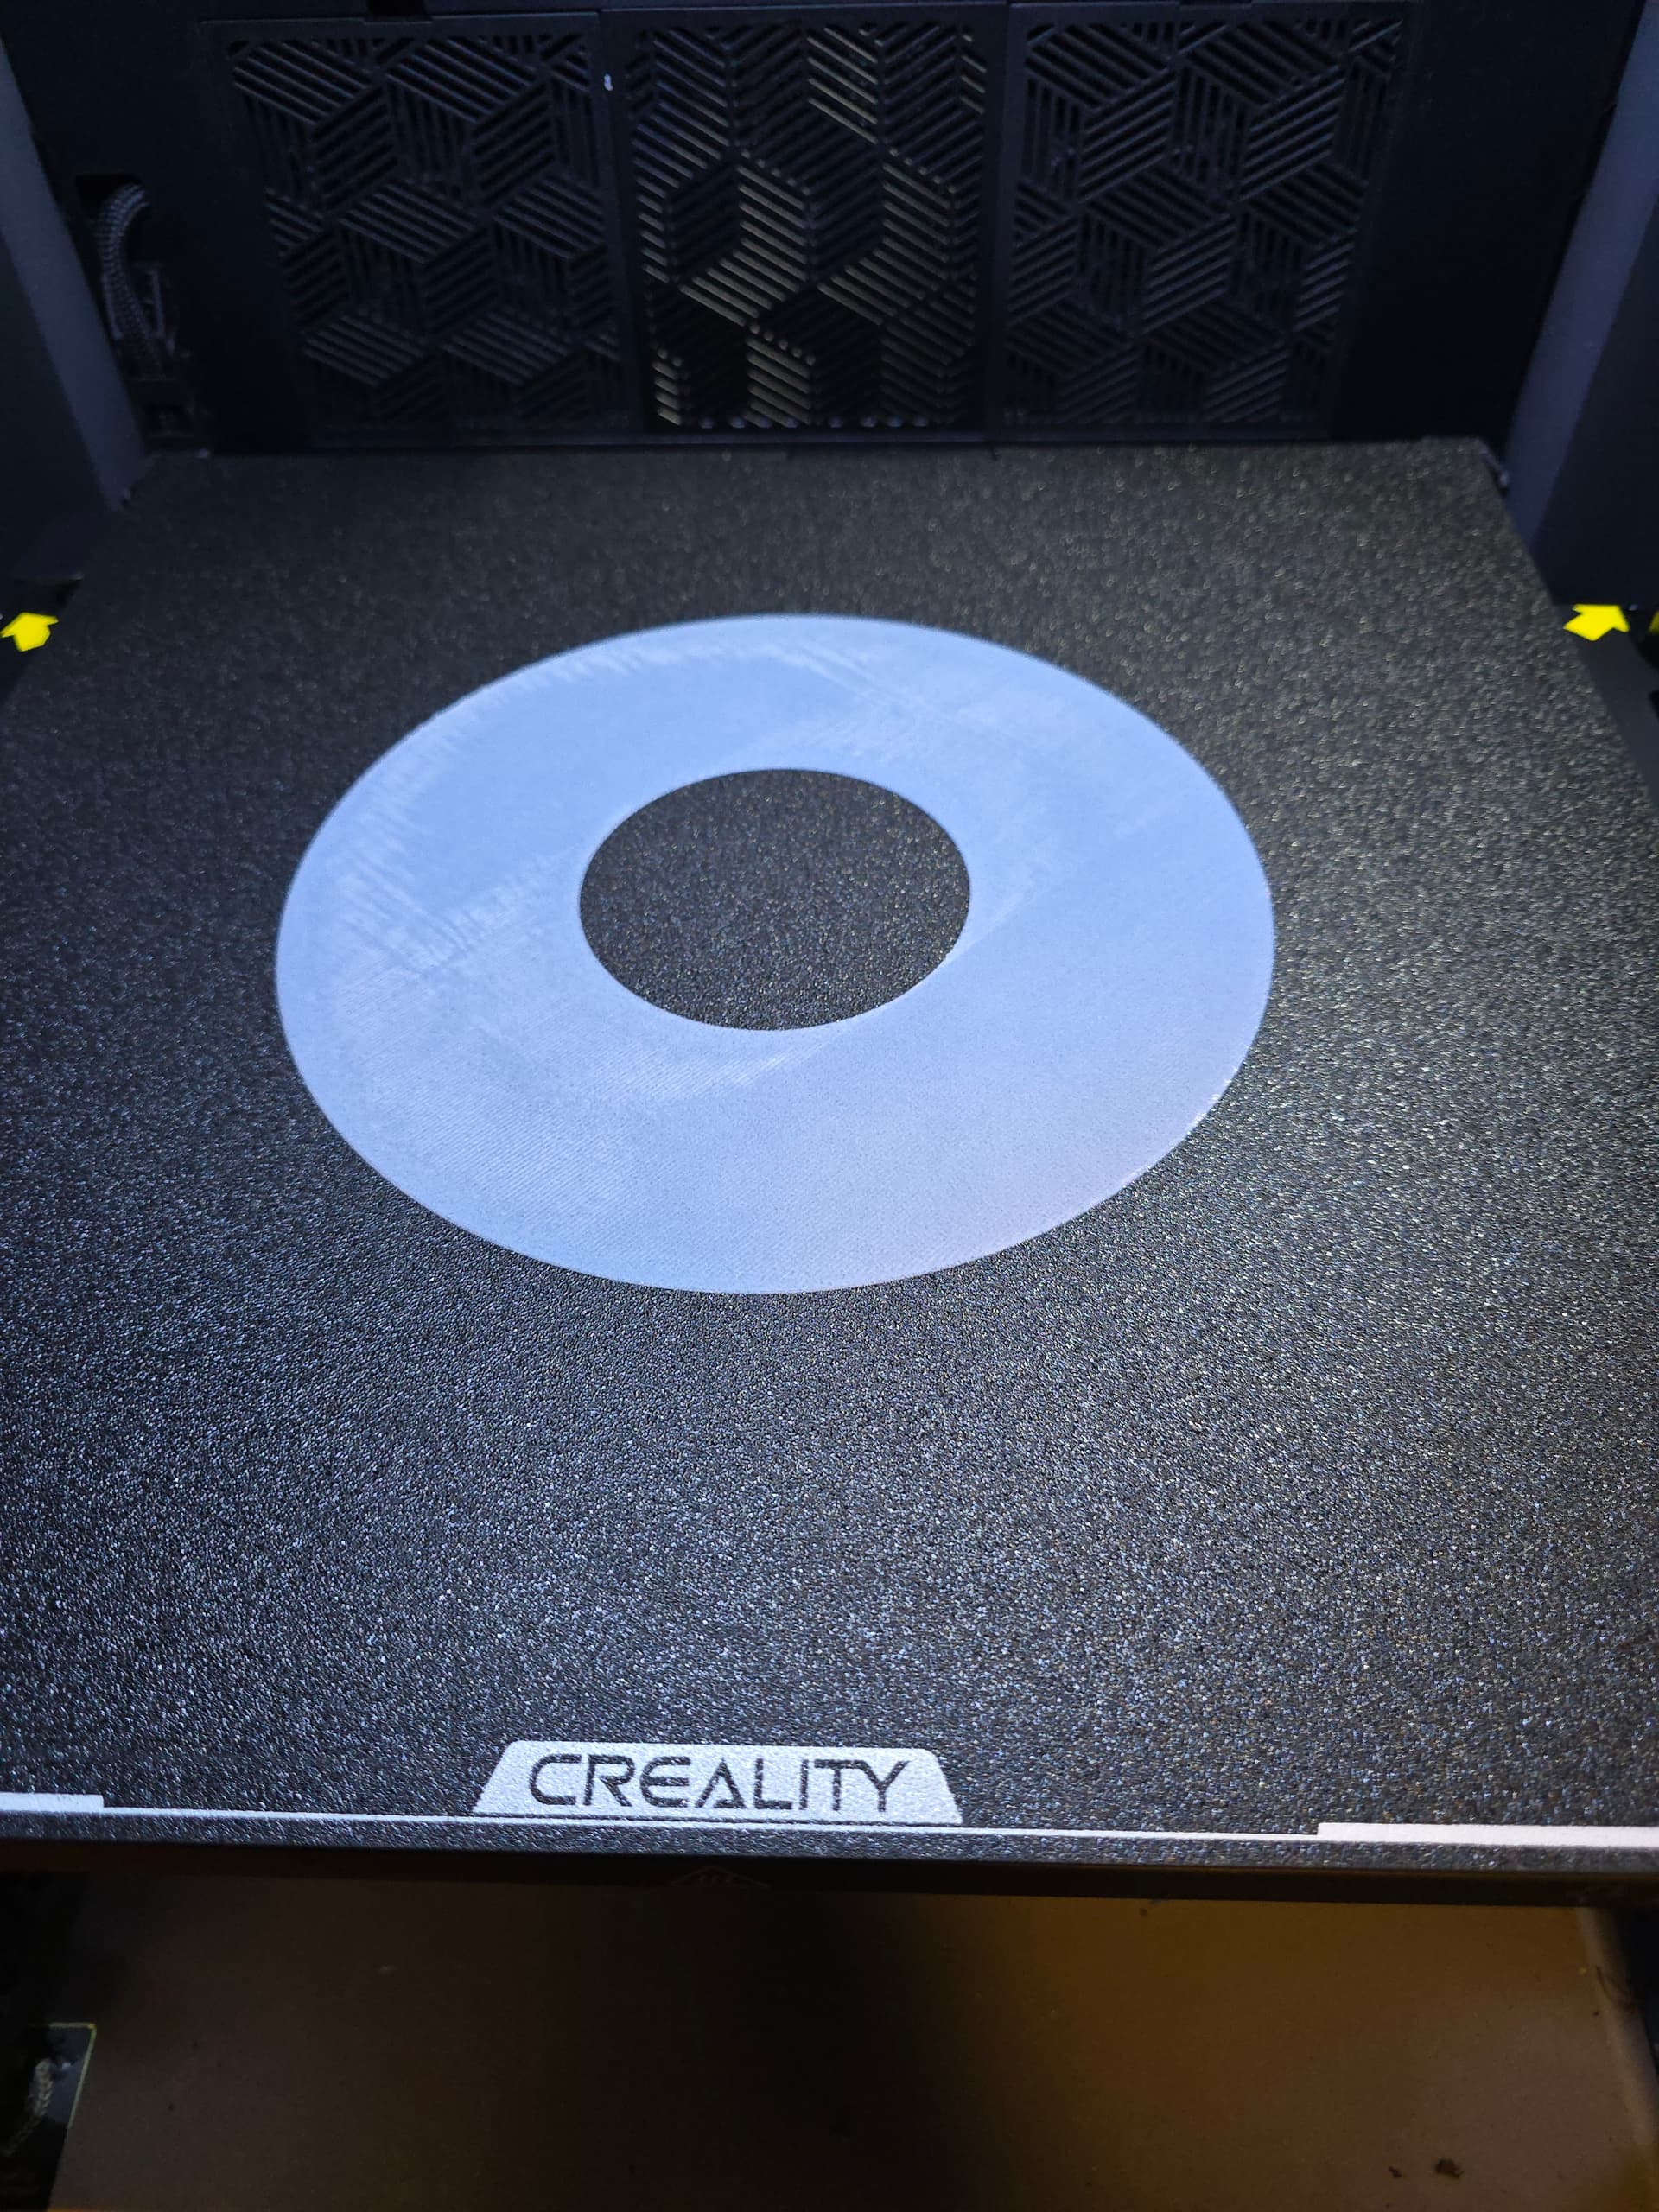
- Did you check your board leveling with such a print TestPlateDisc.3mf (72,5 KB)?
- I just switched on my printer and took a photo of the print bed:
Because I will have to print now a big part I deceided to print this test print before to see if everything is OK. I had only PLA in CFS but started above test print (is only 10 min) just to show you how it looks for me. For some PETG I had to adjust my Z-Offset by 0.015mm or so but if you need 0.3 then bed level or bed level sensor is not right!
The result of the print: The result was not so good for PLA:
You see on middle left and back sides the ripples which mean that the nozzle need to get maybe 0.03 - 0.08 mm higher there. Overall on a real part it might not be so problematic because on bottom side of print you cannot see these problem at all:
That’s why I checked in fluidd the bed mesh:
Here I saw that i was close to the maximum 1 mm range which is twice the factor I normally have.
The back left corner is too high, it means that I could have put the print plate onto the guide corner instead of the magnetic bed?
If I re-insert build plate again, did a manual bed adjustment according to what I referred to earlier, and printed again:
Now it’s acceptable again, on both sides of this only 0.2mm high print!
Hope this example helps you to correct your problem as well!
Thanks for the feedback… Since I’ve now had a successful plate I can remove some variables and see what’s working… I will do the same print with the same settings and NO glue stick.
We’ll see what happens.
Ok so I reprinted with No glue… The small squares stopped sticking… So I thought “NEED GLUE!” But before I did, I kept digging and discovered for reasons I do not understand the bed temp was in the 50s C… Too low… Orca had it between 65 and 75… Not sure what happened.
Anyway I overrode those settings on the printer and put the temp at 78C on a 3rd attempt. Now it’s about 98% as good as it was with the glue stick. I think the first layer will be fine… The errors are tiny.
We’ll see and I’ll let you know once the print is far enough along for me to be sure.
Thanks for the suggestion
1 Like
Hello CaptainObvious,
Happy to see it coming together for you.
Cheers.
Ok, I mentioned before that I have to print a large part today, here is the first layer of it!
After the test prints in the morning I had to print several PLA projects and now I had to get back to PETG, and I used an 10 year old PETG here. there was no glue whatsoever used and print bed was neither removed nor cleaned since the morning test prints.
As PETG is much less forgiving you see a dirty spot of print bed (right of middle) and that print head ist still maybe 0.01mm too close to bed on the back.
The bed temperature is 75° and 250° for nozzle and max flow rate is 12 mm³/s (which will not be reached on first layer but will limit speed of standard 0.2 process thereafter).
The silica bag you see on the left is the pack which I put aside the filament in a bag to store the filament (do this for all PETG or other filaments which could grep moisture). I put it alwas next to the print (which will last ~4h) to dry out again.