Printer: Creality K2 Plus + CFG
Filament: Creality CR-PETG
CFS Humidity: 5%
Print Surface: Mirror
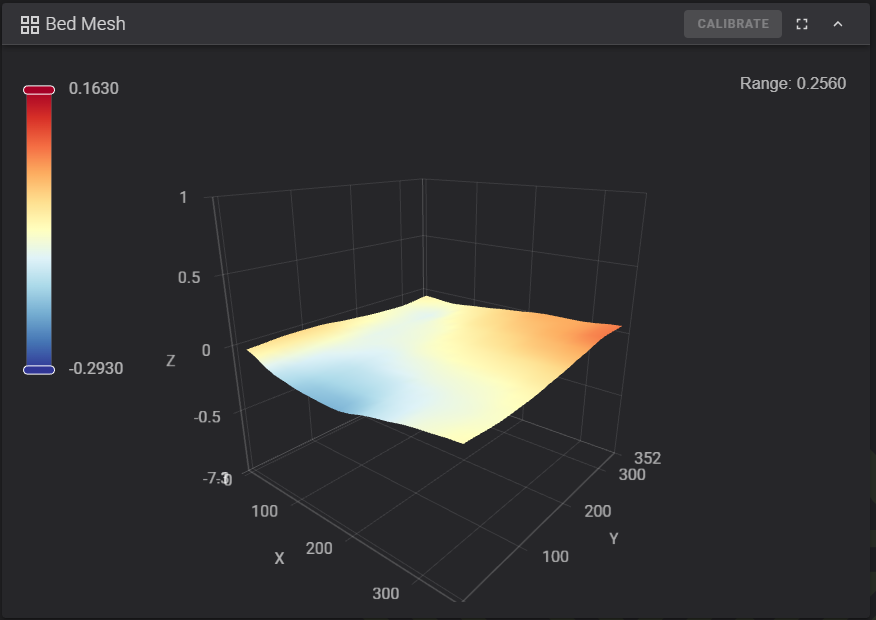
Bed Mesh Range: 0.2560
Bed Temperature: 70c
Nozzle Temperature: 250c
Nozzle Size: 0.6mm Hardened Steel (Creality)
Layer Height: 0.36mm
Line Width: 0.62mm
Z-Offset: 0.055
Z-Hop 0.5mm All Surfaces, Auto
Slicer: Creality Print V6.1.2.2458 Release
Slicer Profile: 0.36mm Standard@Creality K2 Plus 0.6 nozzle
Printer Profile: Creality K2 Plus 0.6 nozzle
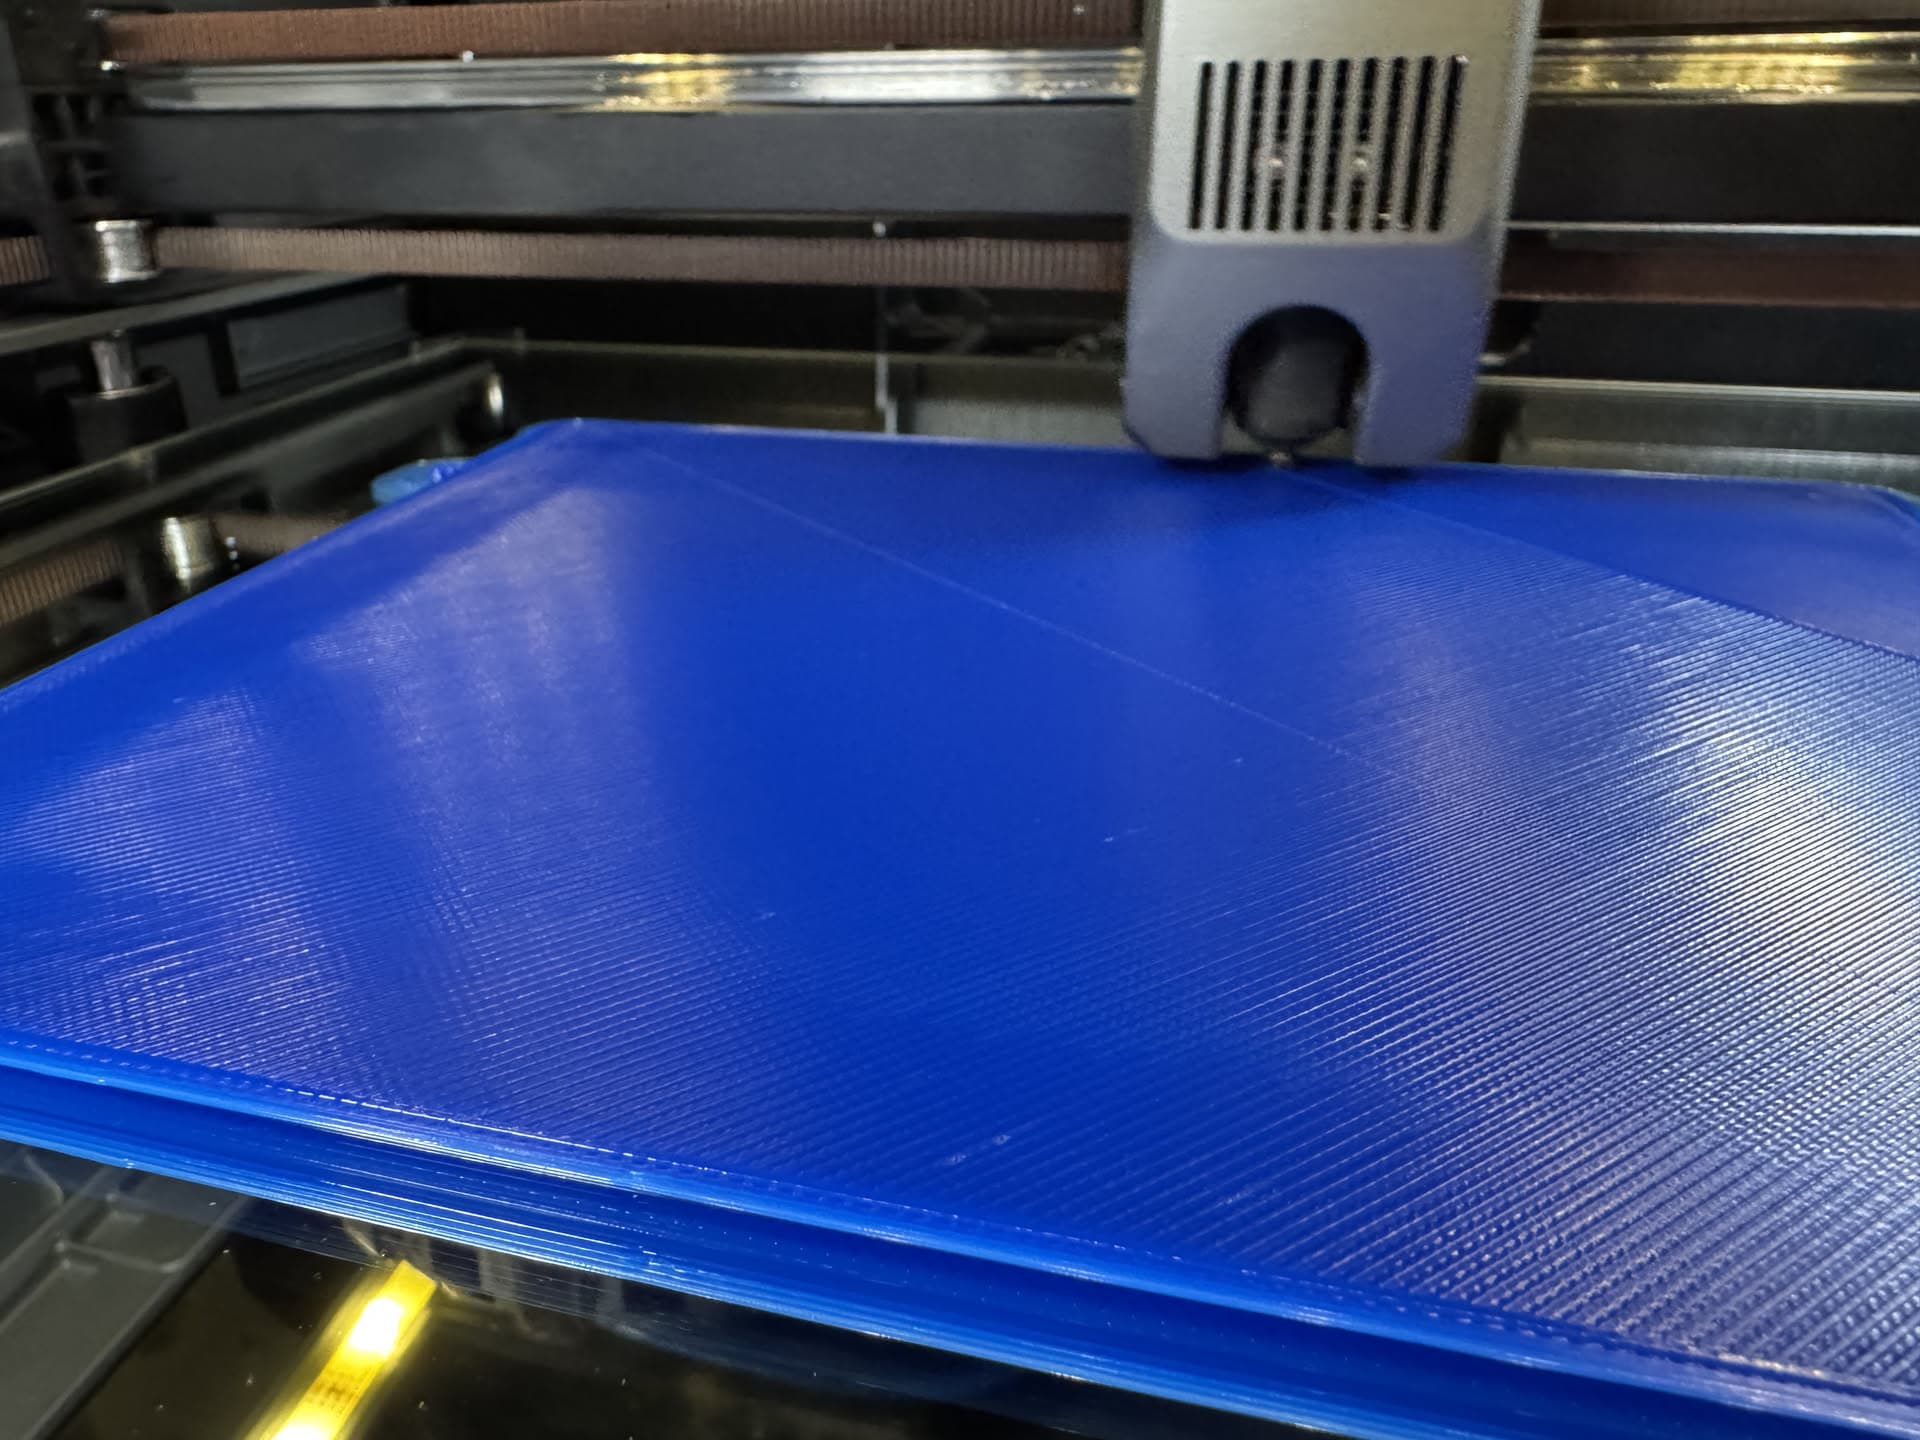
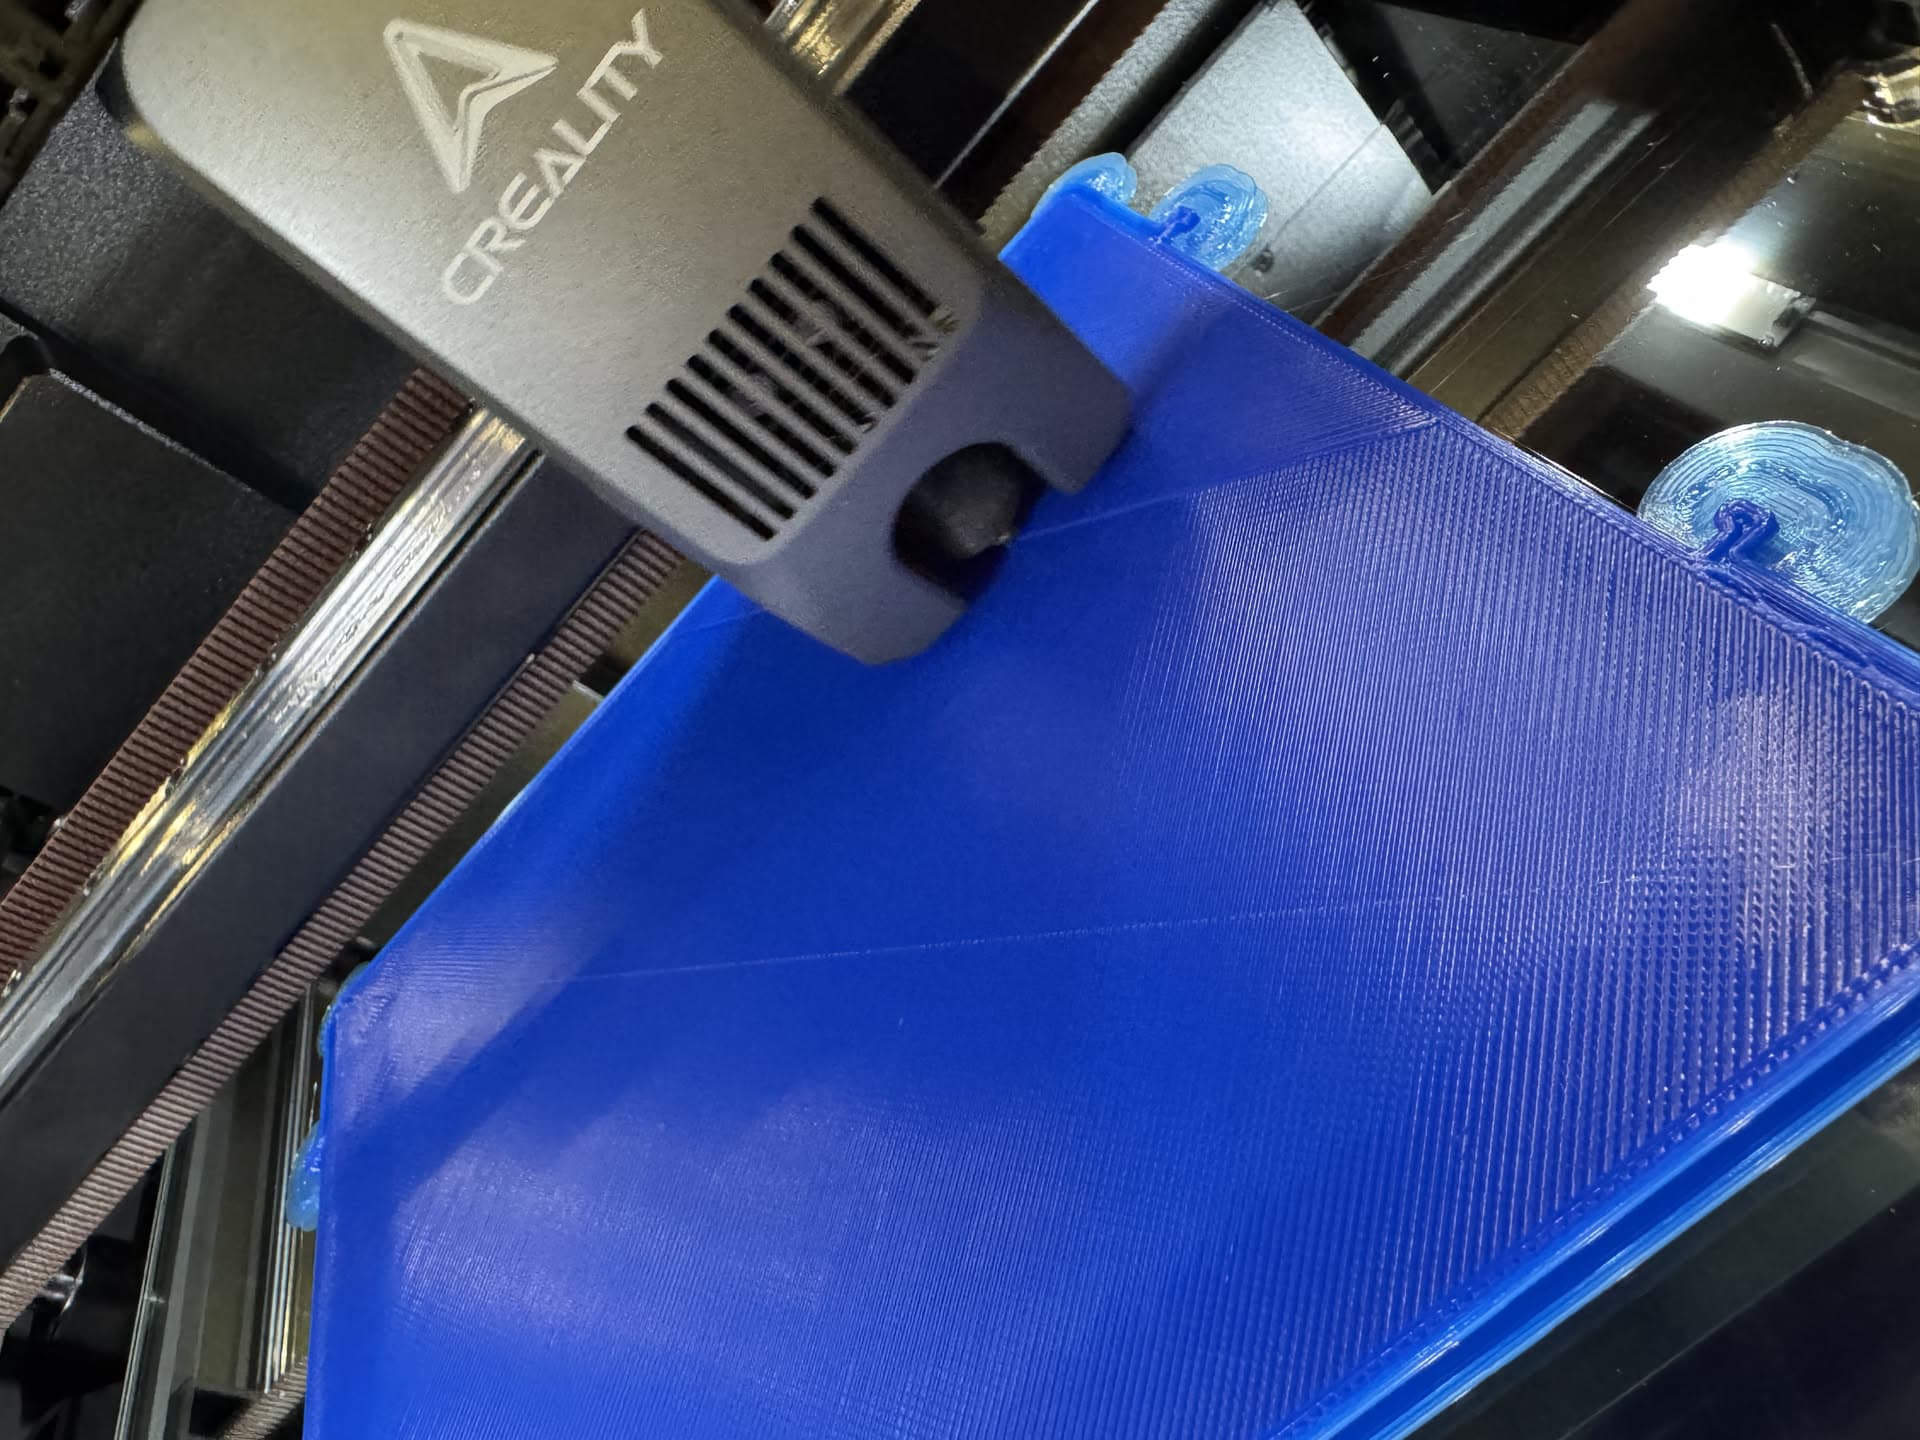
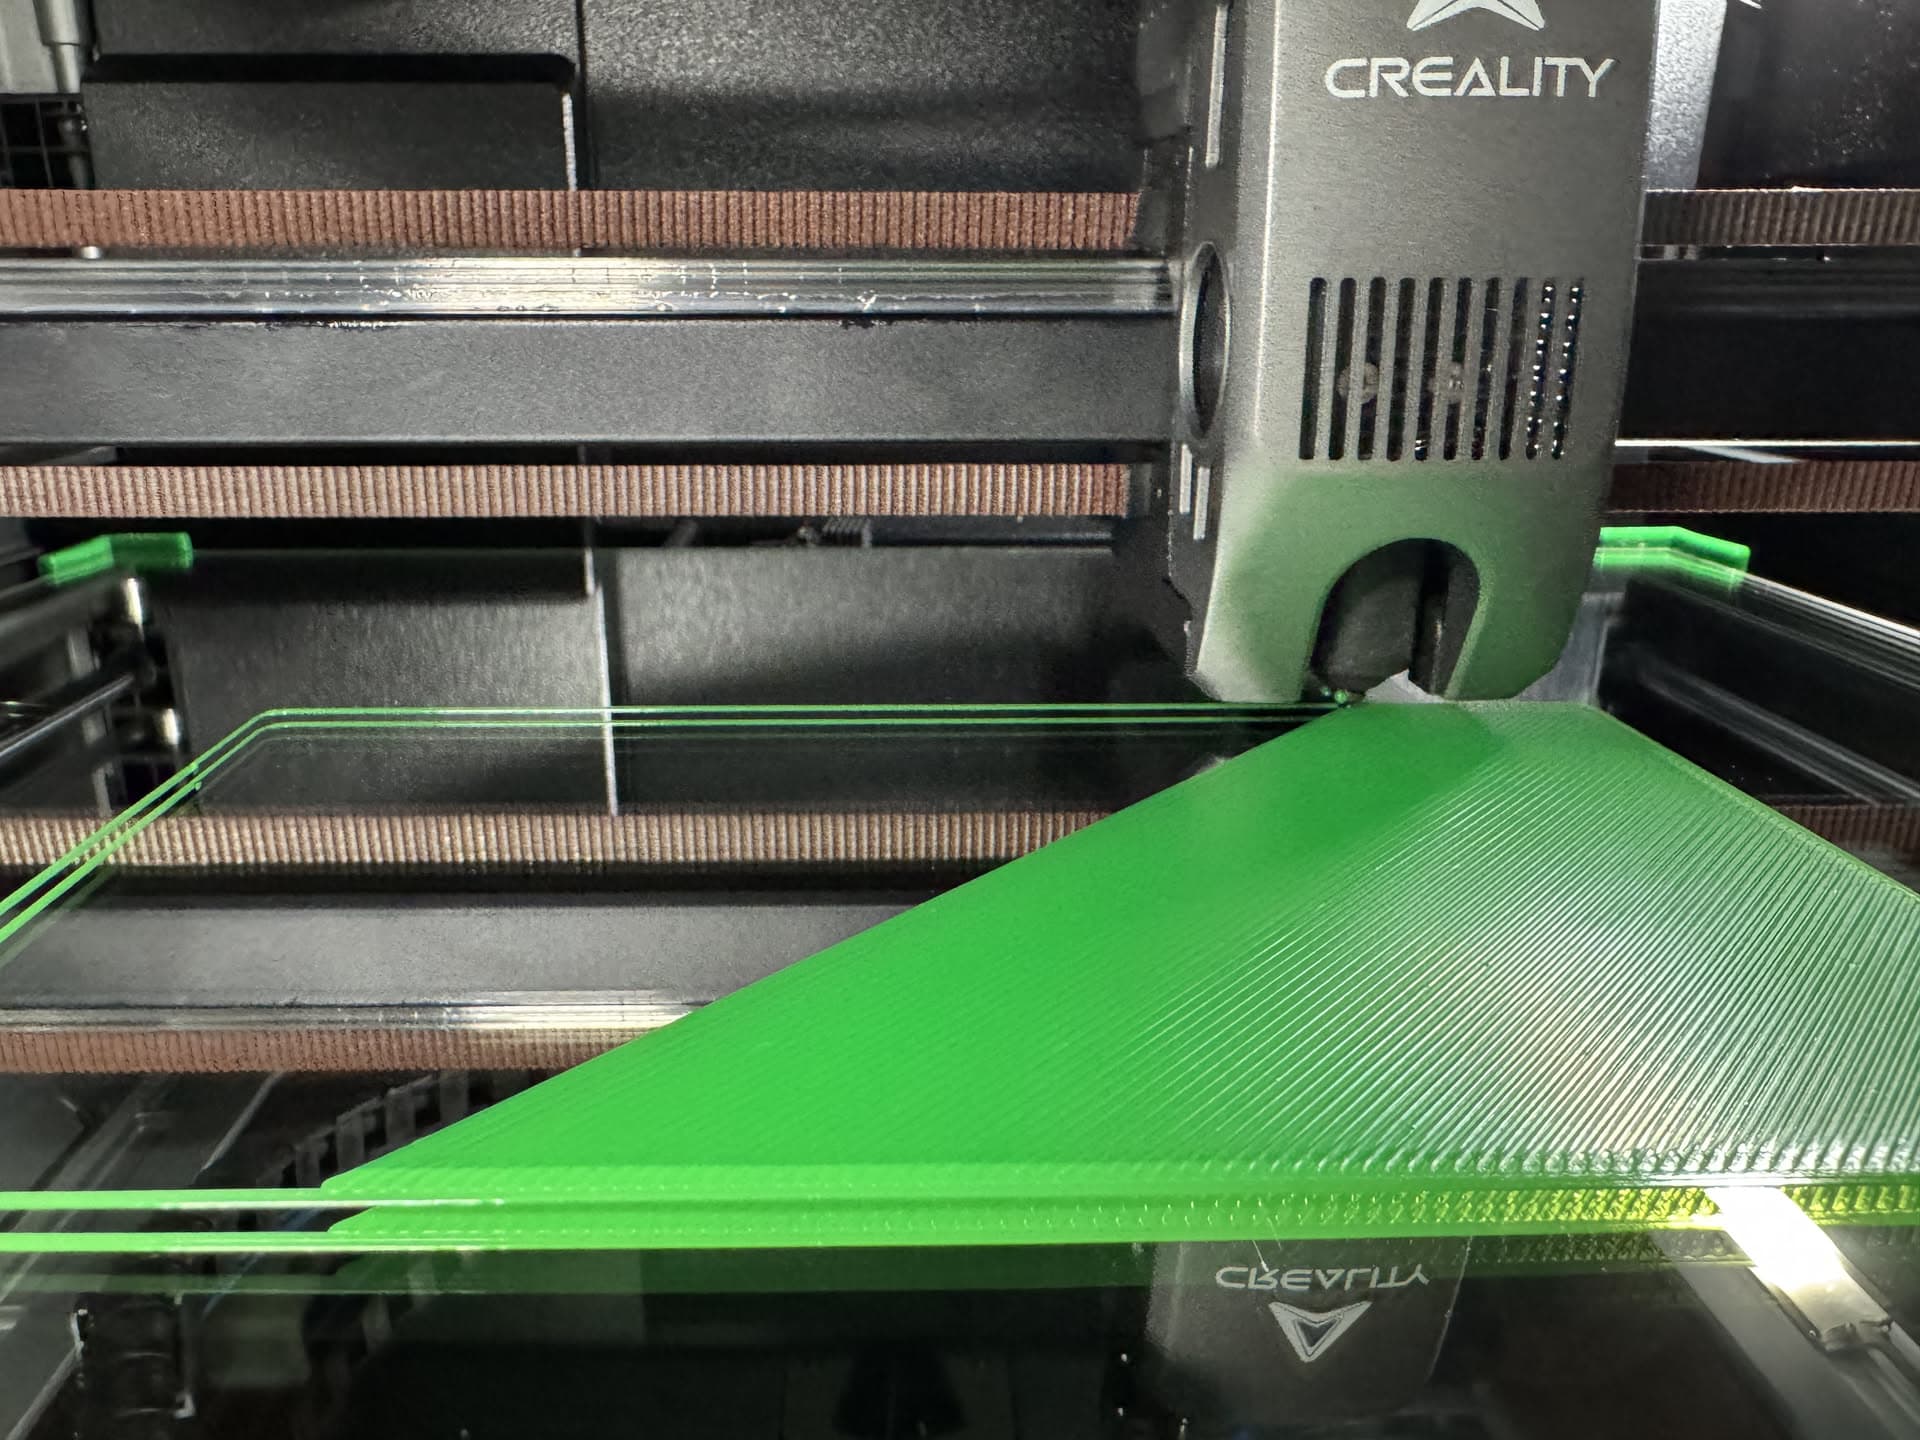
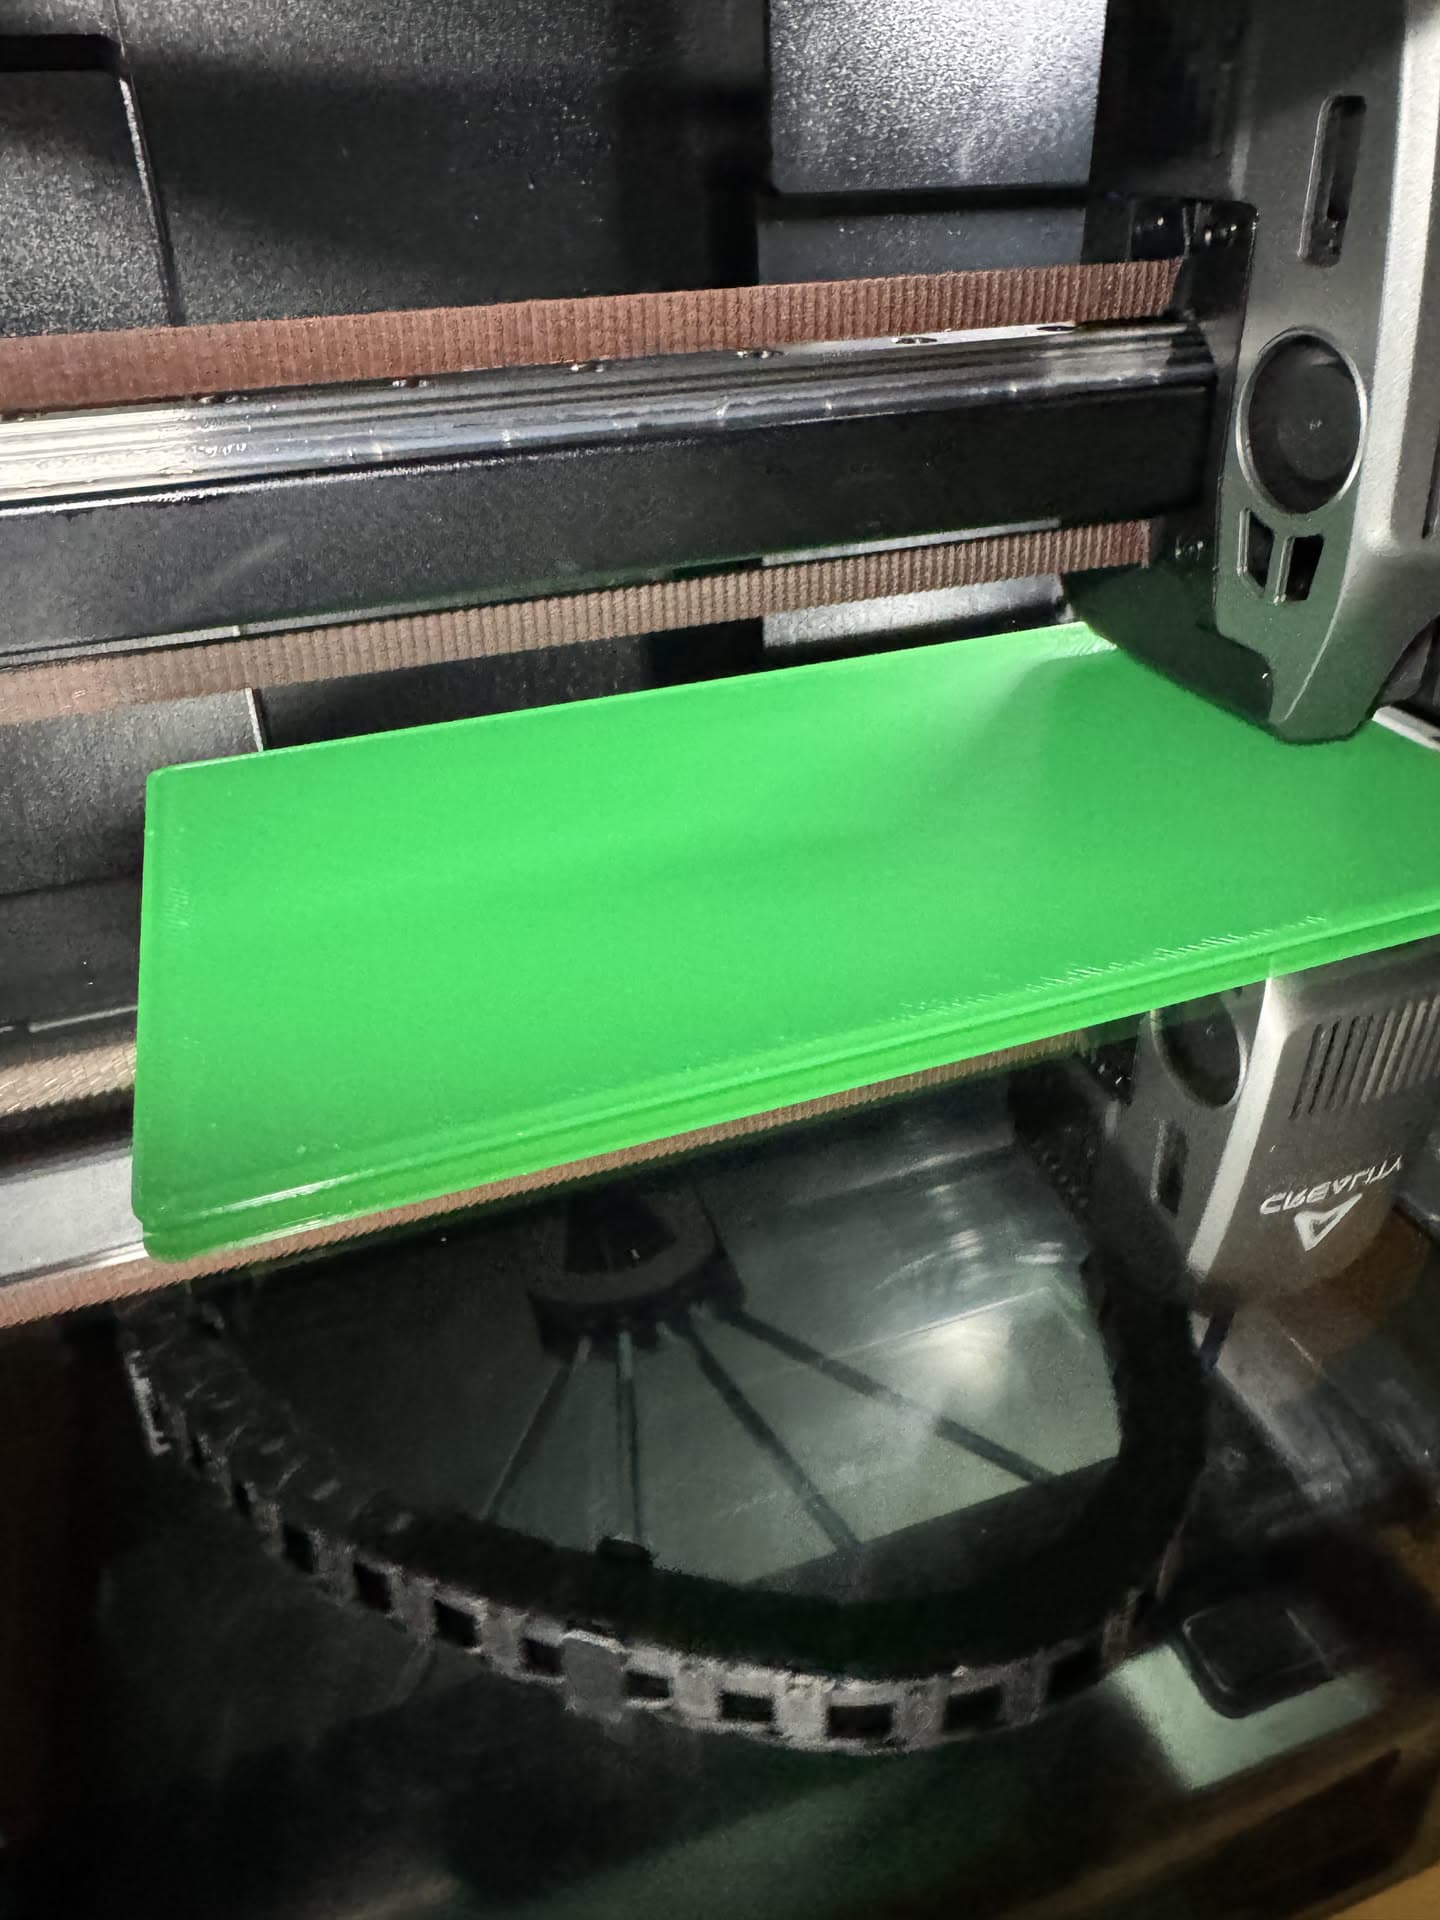
I’ve had the K2 Plus for about 2 months now and recently, the print head would scrape across the print surface after layers 2-3 (see below). I am using the default print profiles from Creality Print as they seem to work the best. I have done various tests with settings, fiddling with the Z-Offset, flow rates, speeds etc.
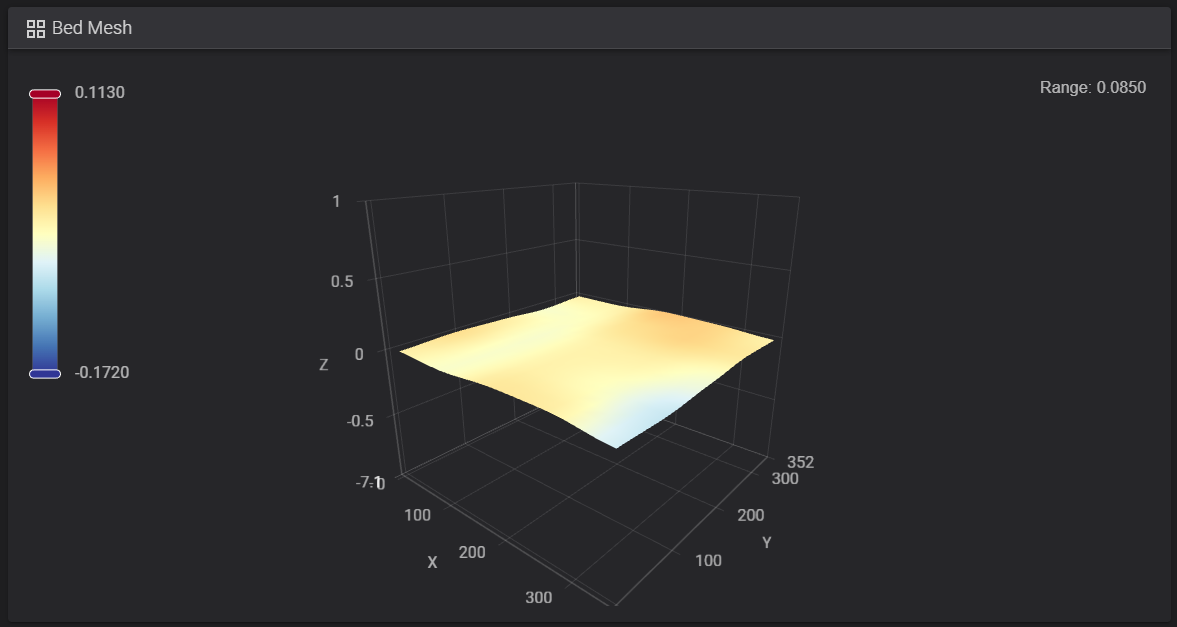
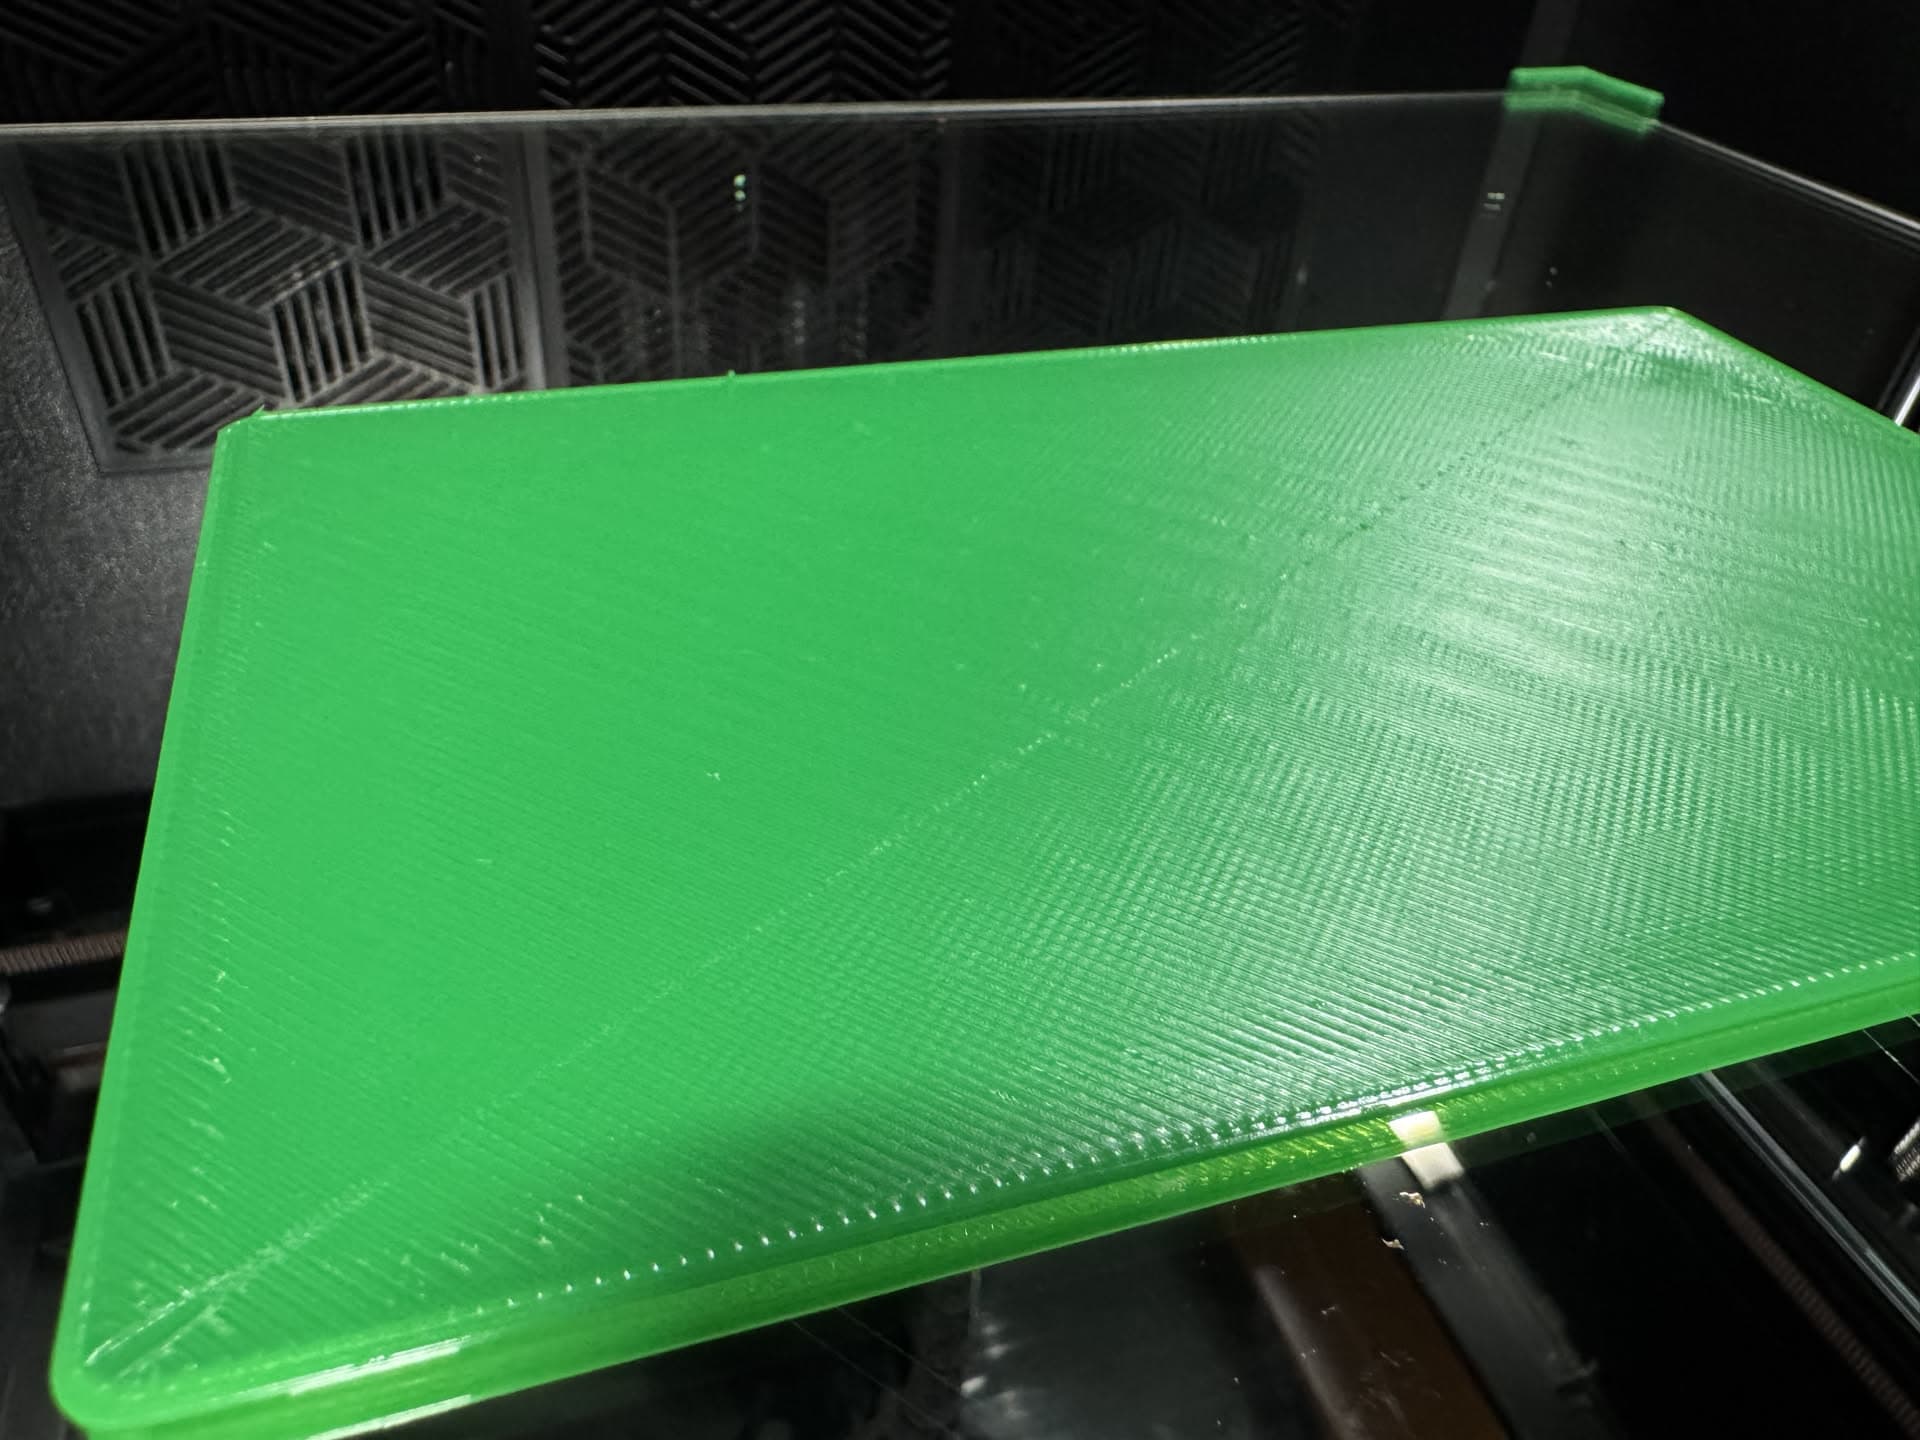
My first layers (with the above Z-Offset configuration), is near perfect. I have also managed to improve my bed level (see image below) by swapping it out for a mirror, going from a very warped 0.8+.
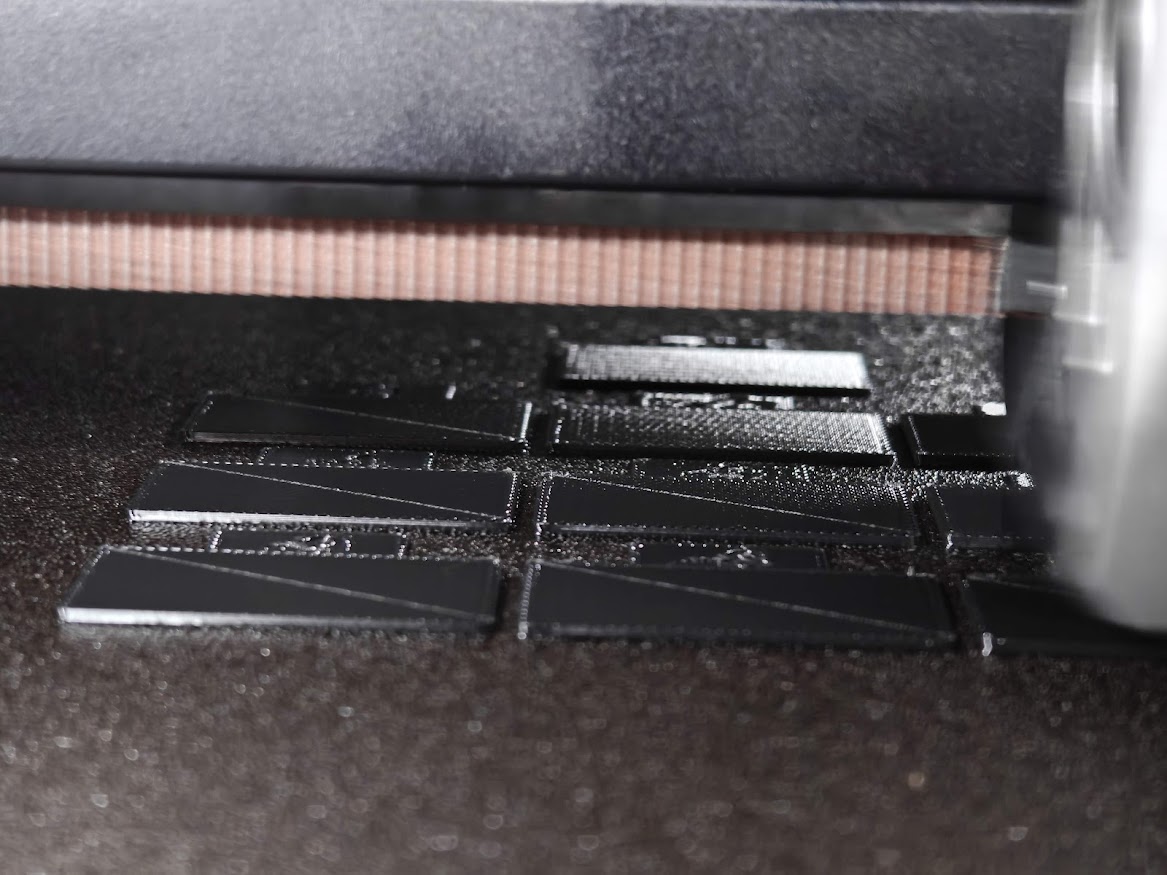
In the images below, you can see the scratch from the top left corner all the way to the bottom right corner (diagonal). This happens on all prints after about layer 2 onwards and stops at about layer 10’ish.
Here are some of the things I have tried over numerous prints:
Countless bed levels
Countless tweaks and configuration settings in Creality Print (from other blog posts and forums)
Numerous Z-Offset tweaks (ended with the above that seems to work the best)
Replaced the hot-end and heating block (twice)
Replaced the nozzle (stopped counting)
Numerous maintenance runs (from the Creality Youtube videos)
Added vibration feet to the printer
Wiggled (to check if it is loose) the extruded and tightened all screws
Tightened all the screws inside the case (I could find and that felt like it needed a good tightening)
Dried my filament (days)
Tried various rolls of filament (this issue persists regardless of filament type or brand as well as with the 0.4mm nozzles)
Fiddled with the fade configuration in Klipper printer.cfg (basically made no difference)
Ran all the calibrate options in Creality Print
Numerous Calibrate runs from the printer’s control panel
Do not cross walls had zero effect
Z-Hop various distances, types and distances - Sadly no effect.
Travel speed (slower made it worse and sometimes just ripped the print off the bed)
It almost feels like this is not a Z(offset/hop) issue as it only does this when it travels from one corner of a print to the opposite corner of the print.
Apart from this horrible scratching thing, this printer is amazing! Really good quality, stability and performance which motivates me to rather fix this one issue.
It looks like you’ve covered all the tests to see why this is happening. I would check the bed temperature accuracy with a temp gun. I say this because on my K1 Max i generally run a little higher temp as the middle and outside edges don’t always reflect the temp being shown. So for example 70C might actually be 68C or 67C around edges. Might not be much but it could be a cause for the middle part of the piece to warp enough to hit the nozzle…?
Also try bumping up the temp for the PETG a little if you haven’t tried that already.
Hi @jimandyen Thank you for the nice welcome message!
Thank you for the tip! From all the things I’ve tested, I never thought about testing at different temperatures . I have a few prints in my backlog that I will use to test some different increments (perhaps 5c at a time?). I will relay my feedback. Maybe just some further info, this happens with PLA, PLA+, EN-PLA and CR-PLA at roughly 60c.
What are the max temps for PETG / PLA? For some strange reason, I really do not have any bed adhesion issues (at all). My first layers are also (from what I can see others complain about) near perfect!
Will also invest in a heat gun to further my investigations.
Not sure what the max temps are but if I remember correctly the profiles show a different temp depending on what kind of plate you are using. (Smooth, textured etc.)
Temperature did not seem to make a difference (apart from learning that at some point, PETG fuses with Glass
I am back on the default PEI Plate and sadly had to sacrifice my perfect first layers and level bed for a the all too familiar Taco (0,6150 the best I could get it after HOURS of paper levelling attempts and 3 new blisters)
Back to the default profiles with the default temps
0.250 z-offset
The scraping is gone, but so is my first layer quality. I am now able to print very fuzzy items (perhaps a new style unlocked)
Not ready to admin defeat just yet
To further my debugging (and lower my bank balance), I have ordered the following:
Creality Bed Levelling Silica Columns (perhaps this will assist with the heat expansion?)
Creality K2 Plus Epoxy Resin Build Plate (perhaps this will turn the Taco in to a Pizza?)
Extruder Gear Kit (they were shiny, so why not?)
Creality Metal Hand-Twist Bed Levelling Nut (the default ones do not go well with my current hand designs)
Heat gun (so I can monitor the temps with the new plate)
Once these parts arrive, my debugging journey will continue! I will provide updates on my findings to hopefully identify the winning change and share my learnings with the community struggling with the same.
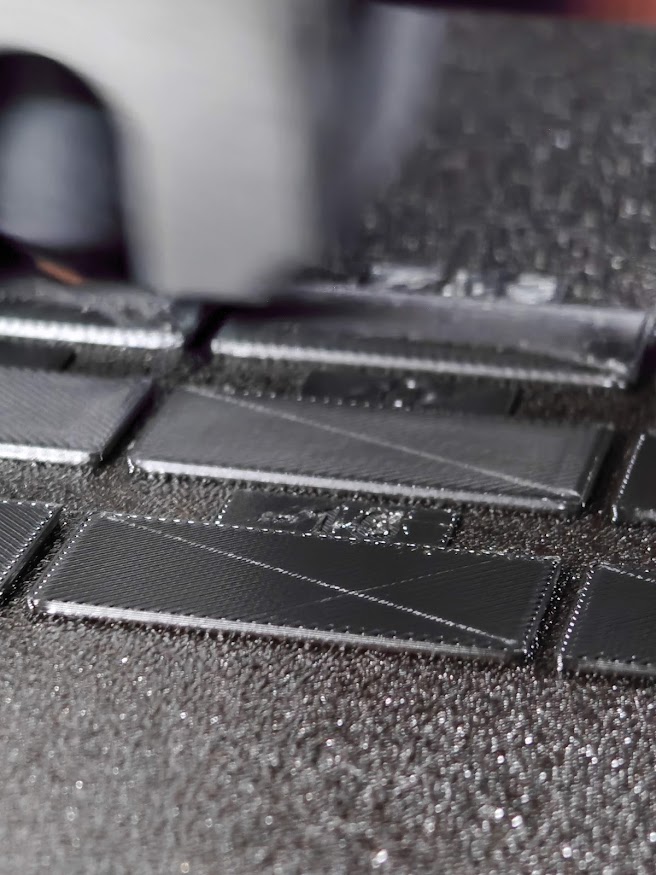
I’m unfortunately not here to offer much help, but just to let you know I have the exact same issue. See these pictures below from my flow rate calibrations.
I’m having what I think is a related issue with nozzle bulldozing, leading to buildup, leading to shedding clumps onto my build plate, leading to failed prints. (see here)
At this point, I’m guessing this is a bug somehow present in the K2’s firmware or in CP, although I (obviously) haven’t figured out the mechanism/exact issue. If you make any progress, I’d be interested to hear what you find!
Try stepping through the gcode preview in CP, looking for exactly what is happening during this time - is the bed supposed to lower 0,1mm (all other layers) but does not (only on these layers)?
Hi
Only a thought here but have you checked the hotend securing screws, they have a habit of coming loose. This can cause nozzle drag and inaccurate Z offset.
@scii334 thanks for your share! I will definitely let you know what I found. My new parts have not arrived yet, BUT, the bed scraping is now back even with the default PEI plate, so sadly my efforts thus far have not yielded success!
@rdtsc I am doing that tonight, from what I can see, the travel is definitely moving across the surface, I am yet to determine what the expected behaviour was suppose to be. I can definitely see the z-hop is not being honoured during these travels.
@Kevin_Eames Yes, I have also replaced the actual hot-end twice, and replaced the screws with better ones that are less prone to “warp” during heating. I am (fairly) confident that thing is secure
Update:
I am currently busy experimenting with the “Travel” speed. CP’s default for this printer is 500.
Higher speeds (>500) = deeper cuts
Lower speeds (<500) = shallower cuts but more ooze (naturally)
Higher z-offset = less cuts, but worse line quality
Increased my probe density from 9,9 to 13,13 and probe distance from 5 to 2 and speed from 100 to 500 (so that my ABLs are much (much) faster) = cuts are not as frequent and now only shows up from layer 4 - 5 onwards. This however is contradicting the bed level as this is even happening on a 0,08 range with the Mirror
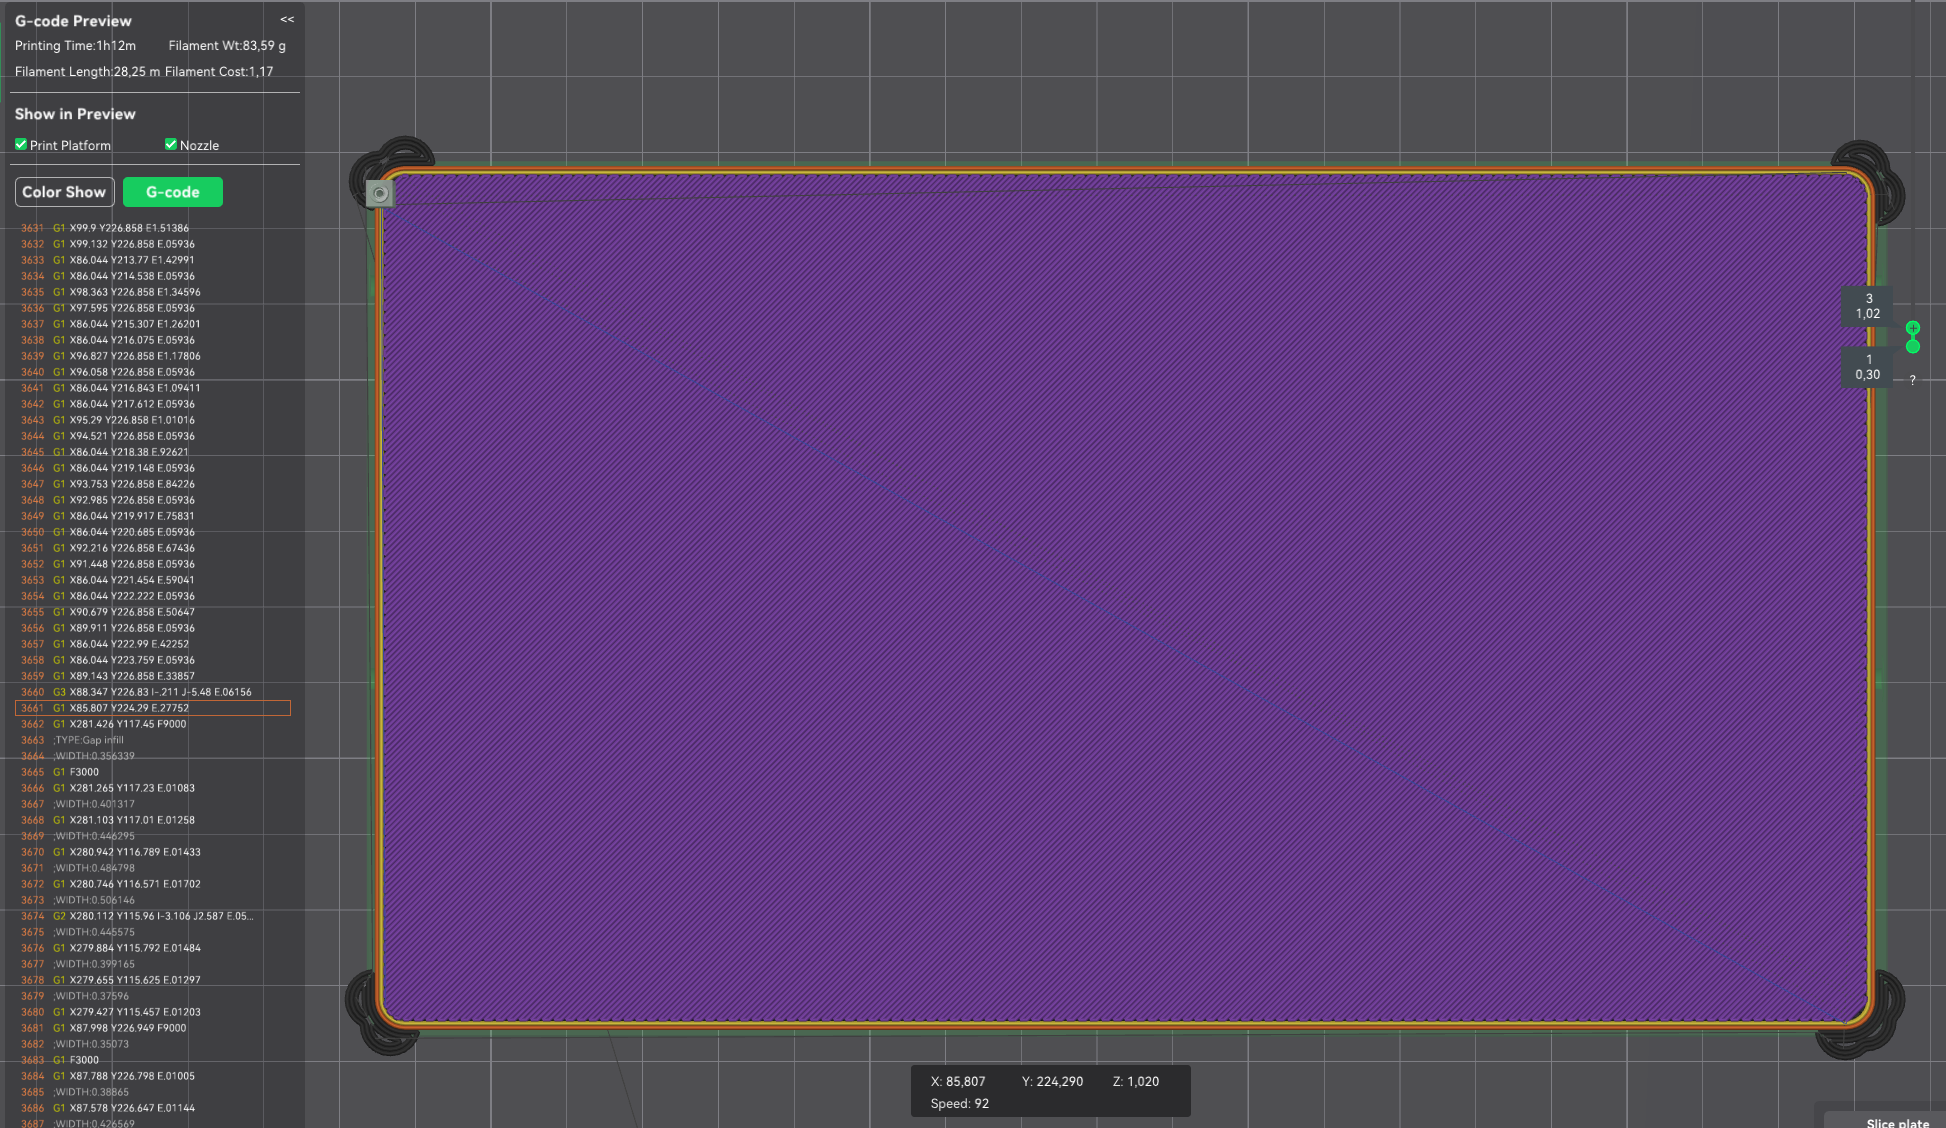
In the screenshot (I hope it is visible), highlighted is 3661 G1 X85… The scrape happens when it moves to 3662 G1 X85 (the blue diagonal line). There is no z-lift happening there. It looks like it is doing a gap infill there… Is it possible to prevent it from filling gaps that are directly opposite from the print? Thinking about it, it does not solve the original issue and I am now just working around the issue…
When disabling Gap Infill, the print head travels across the surface of the print diagonally drastically less, thus less scrapes. Side effect: You have these awkward gaps in the corners that are not filled in the same layer.
I can now confidently confirm that the z-lift actually works when it travels from one layer to the next.
I can now confidently confirm that the z-lift is not triggered on the same layer when moving back to the start to fill gaps and this is where it scrapes across the print.
With the above tests done I can now deduce the following:
z-lift works when switching layers
z-lift does not work when moving from the end of a layer to move to the start of the same layer to fill gaps.
Disabling Gap infill with the recommended z-lift settings from @Greg_McGee the scraping is completely gone, but with open gaps in the corners.
My testing is still on-going to figure out how to fill the gaps and prevent the scrapes
That’s a huge breakthrough in understanding what’s happening! I admire your tenacity in getting to the bottom of this problem and I’m looking forward to whatever you (or Creality) come up with to solve it. It’d be brutal to have to manually insert Z moves into the code at the beginning and end of every gap fill operation.
Probably a dumb suggestion…but…I assume you’ve tried this issue out on multiple objects. and… Once I stopped rescanning prior to every print, my quality went up.
I have no good options other than perhaps doing a manual edit on the G-code, or maybe cooking up some Python (or whatever) that will post process the G-code to add the additional z-axis lift when shifting layers.
Mostly, I just wanted to say I’m impressed with the quality of this thread. From your first post, you really had committed time to resolving this. And I’m guessing at the end of the day, Creality will end up using what you discover to improve their product.
Just out of a neophyte (me) level of curiosity, do you have the same results if you use a different slicer (like Orca or Prusa)?
I had to replace my heatsink to solve a similar issue as the problem with the loose screws wasn’t the screws but the holes in the heatsink itself, would seem secure until it was hot, then they would just drop out.
Capricorn Bowden Tubes (blue) - replaced ALL the tubes, routed it everywhere without tension
Created a custom Print Profile for the Mirror Bed (basically the PEI + 10c for the hotbed)
New 0.4mm Nozzle, New 0.6mm Nozzle - after the calibration will test both of them
Creality Bed Levelling Silica Columns - THIS made a big difference in really, REALLY, fine tuning my bed level - I can highly recommend these - just get M3 30/35 screws as this gives you a lot more height to work with then print these 3D Printer Files | 3MF File | K2 Plus Build Plate Stop Extenders | Creality Cloud to extend the ends of the hotbed
Creality Metal Hand-Twist Bed Levelling Nut - works a charm with the above
Still waiting for:
Epoxy resin build plate
Extruder metal gears
I have now installed Prusa, busy setting up all my print profiles then will do a new round of tests - @EngineerBob I will relay my findings, followed by Orca.
I am also busy learning Python and how to introduce custom mods in to a slicer as not only am I super curious about how to do this, but it might just be a temporary workaround till I can find the hardware/software issue we are dealing with here
Side Note:
I only change one thing at a time between my tests, this ensures that should I hit success, I know (or can deduce) which component / config it was.
From all the things installed above, one at a time is introduced using my existing setup, then testing.
For the hot-end, I did a full calibration before testing
For the nozzle changes I did a new level before testing
For the slicers, I am doing a full suite of tests, tweaks, head-scratching per slicer before moving to the next.
Quick update on my new learnings and resolution (for now)…
Orca Slicer
I was not able to replicate the issue with Orca slicer, using the default profiles for the filament as well as the printer, nozzle and layer height…
Two primary differences between Orca and Creality Print that I have noticed:
Orca’s default profiles uses: Gap Infill - Nowhere
Creality Print’s default profiles uses: Gap Infill - Everywhere
Orca’s default print startup includes a Home All sequence vs CP not doing this
M140 S0
M104 S0
G28 ; HOME ALL - THIS IS THE LINE I'VE ADDED
START_PRINT EXTRUDER_TEMP=[nozzle_temperature_initial_layer] BED_TEMP=[bed_temperature_initial_layer_single]
T[initial_no_support_extruder]
M104 S[nozzle_temperature_initial_layer]
M204 S2000
G1 Z3 F600
M83
G1 Y150 F12000
G1 X0 F12000
G1 Z0.2 F600
G1 X0 Y150 F6000
G1 E0.8 F300
G1 X0 Y0 E9 F{filament_max_volumetric_speed[initial_extruder]/0.3*60}
G1 X150 Y0 E9 F{filament_max_volumetric_speed[initial_extruder]/0.3*60}
G92 E0
G1 Z1 F600
I am continuing my debugging, but for now, this is my work-around. I have also set my Z-Offset back to 0. I think I am also going to stick to Orca Slicer for a short while, see if the issue comes back. For now, I am unable to replicate the issue in either Creality Print or Orca Slicer.