Could be extrusion temperature a little high along with flow ratio too high. Calibration time, for a quick fix take 10% off of the flow rate.
It’s just finished printing the brim, it looks like the extra bits of plastic have gone now, i will try your suggestion on flow rate, my temps are 240 and 75 all round, should i adjust this im using PLA and these temps seem to get the best result.
I’ll try a flow rate calibration after this print, maybe next week even…other things to do at work.
regards
Trevor
75 bed for PLA seems way too high, I print at 55, anything over 60 the PLA stays plastic and you can get elephants foot. Extrusion temperature I use about 210.
OK, I’ll try that as well.
thanks for your assistance with this.
240/75 is more like PETG values would probably print quite well with that.
1.About you said ‘‘copy the header code from the good gcode file and add that to my gcode file’’ ,maybe you want to do this, see pictures.
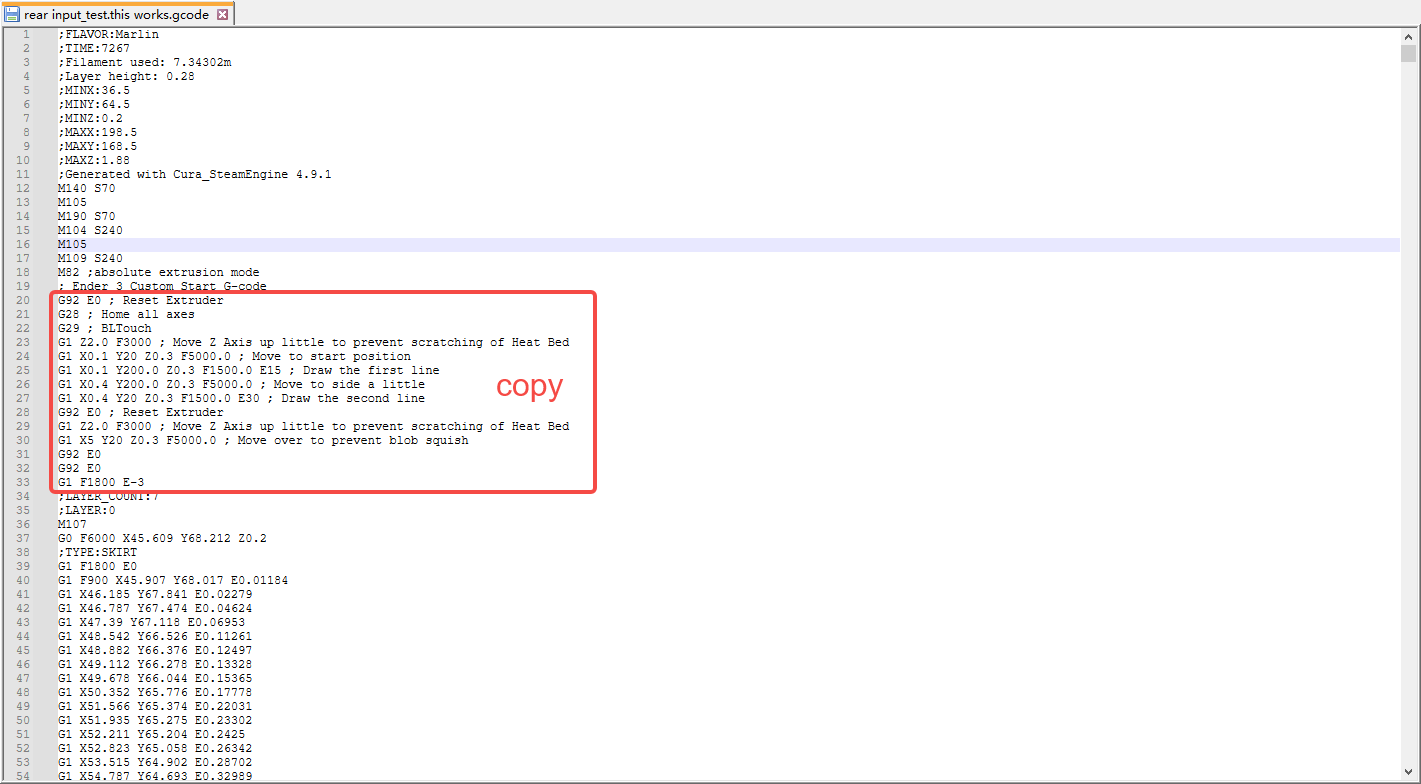
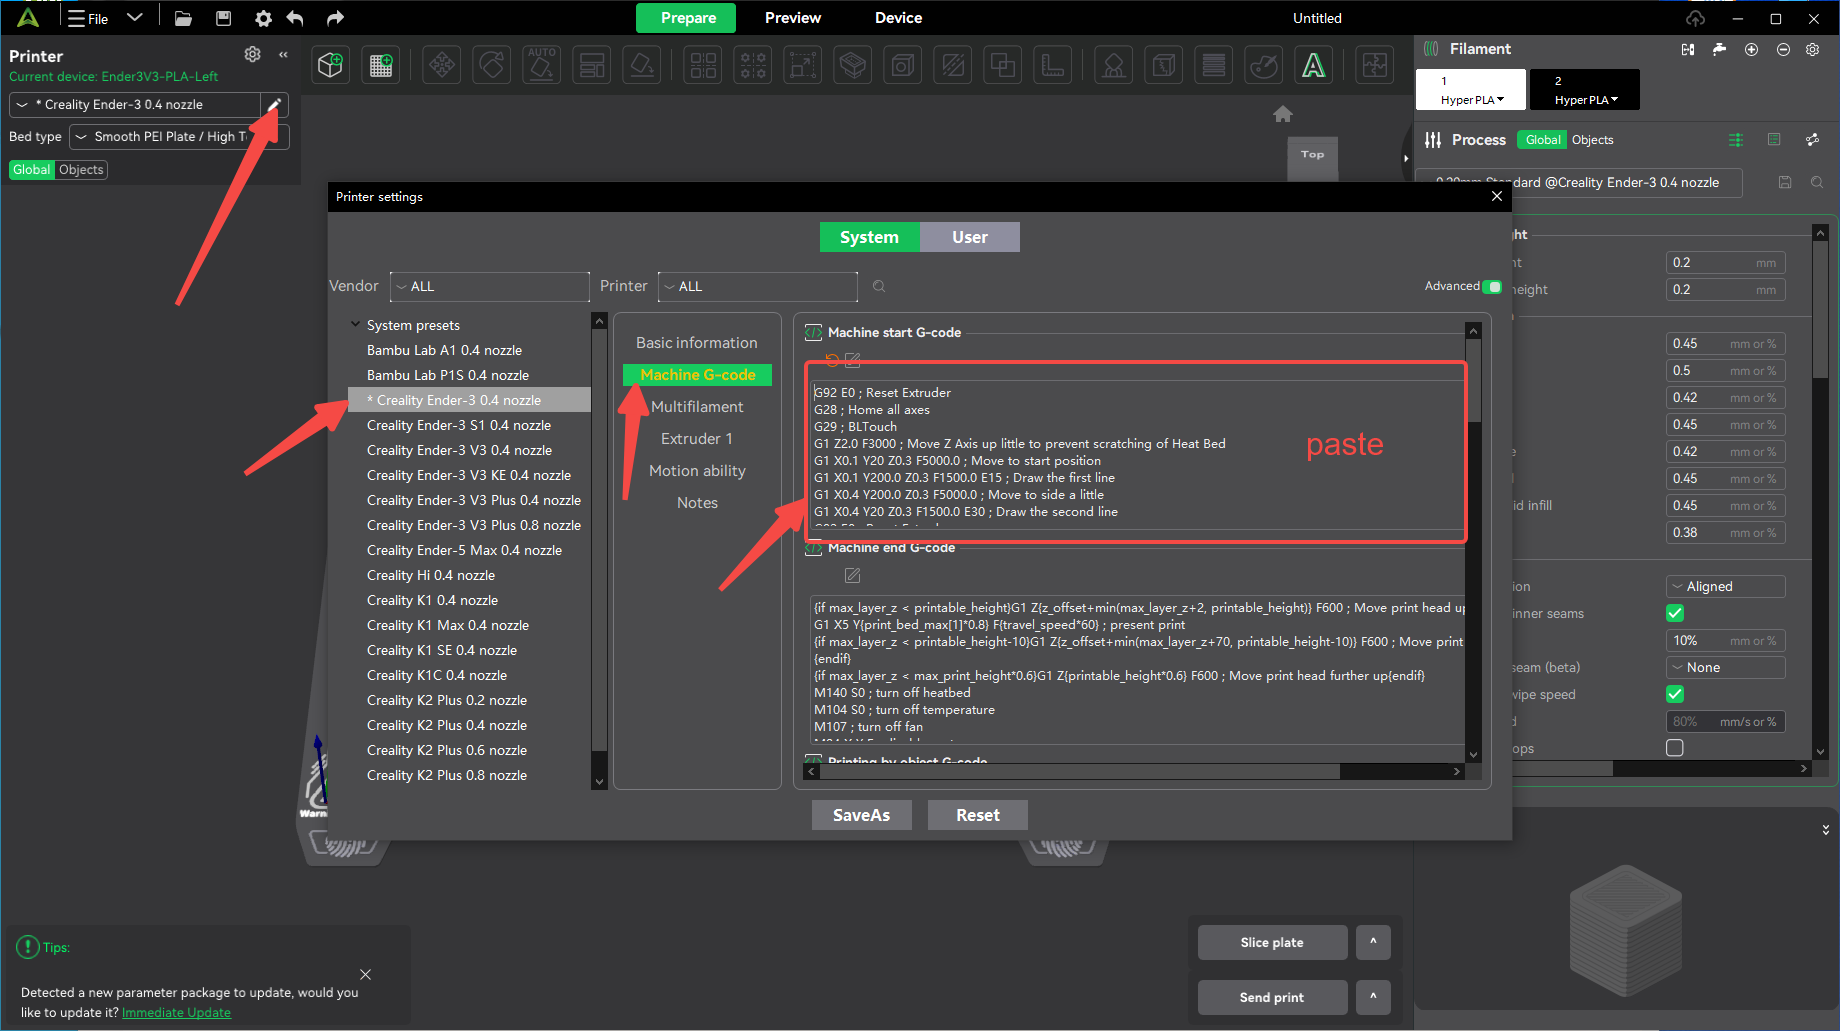
2.I noticed that the temperature you set is too high and obviously not suitable for most PLAs as it is usually 220 and 50, otherwise it is prone to leaks as shown in your pictures.
Hope this solves your problem.
i’m starting to pull my hair out on this…
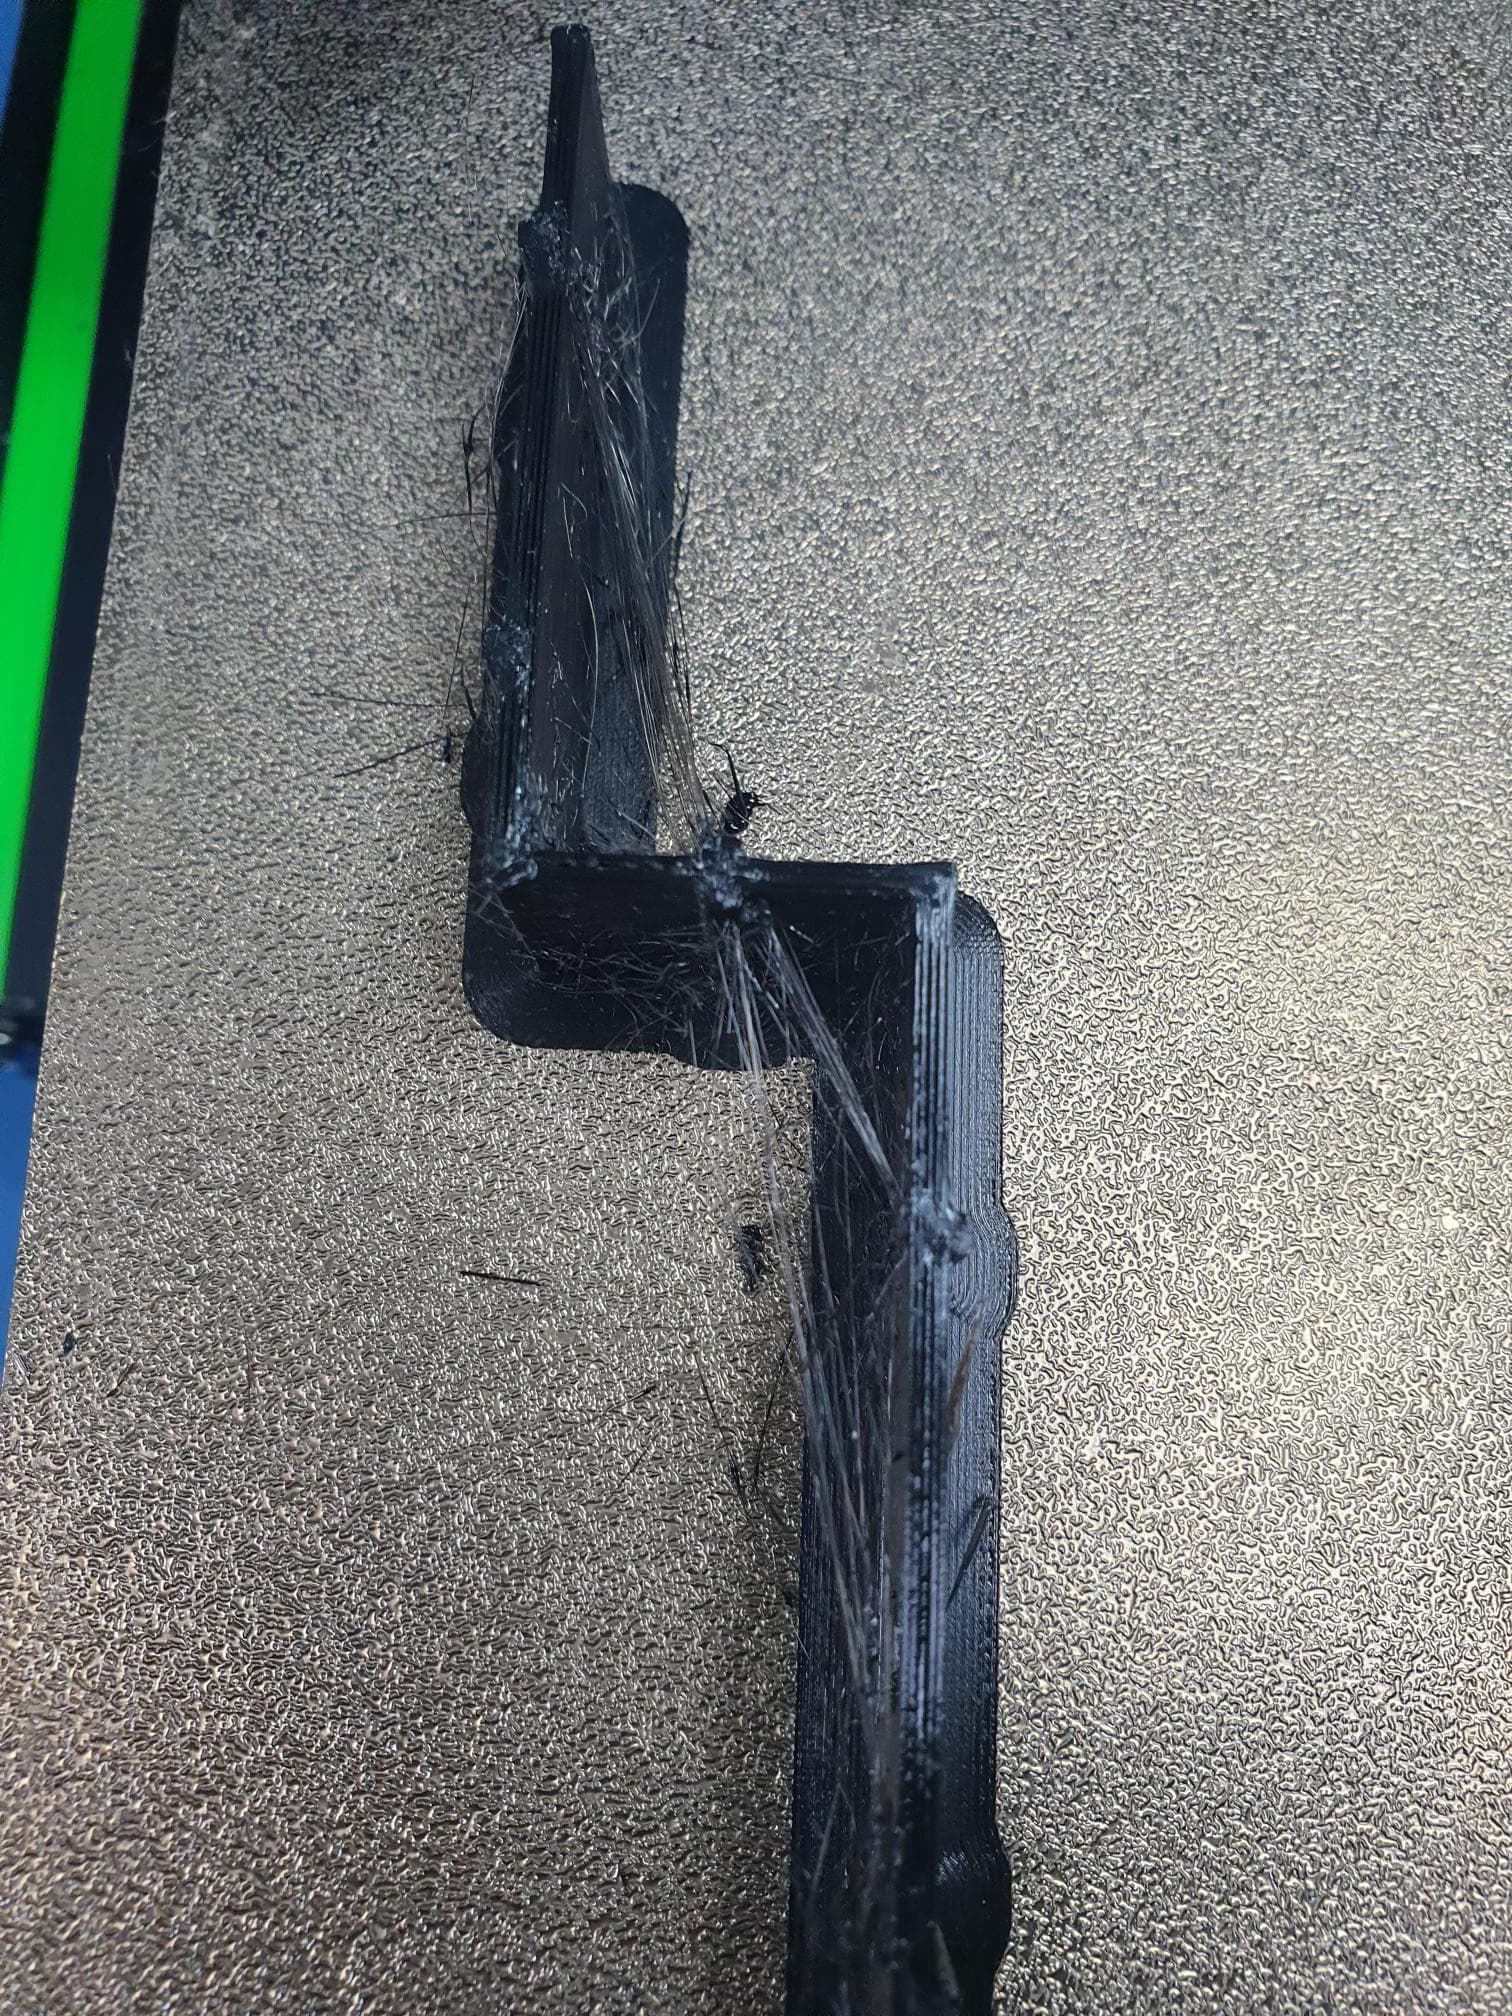
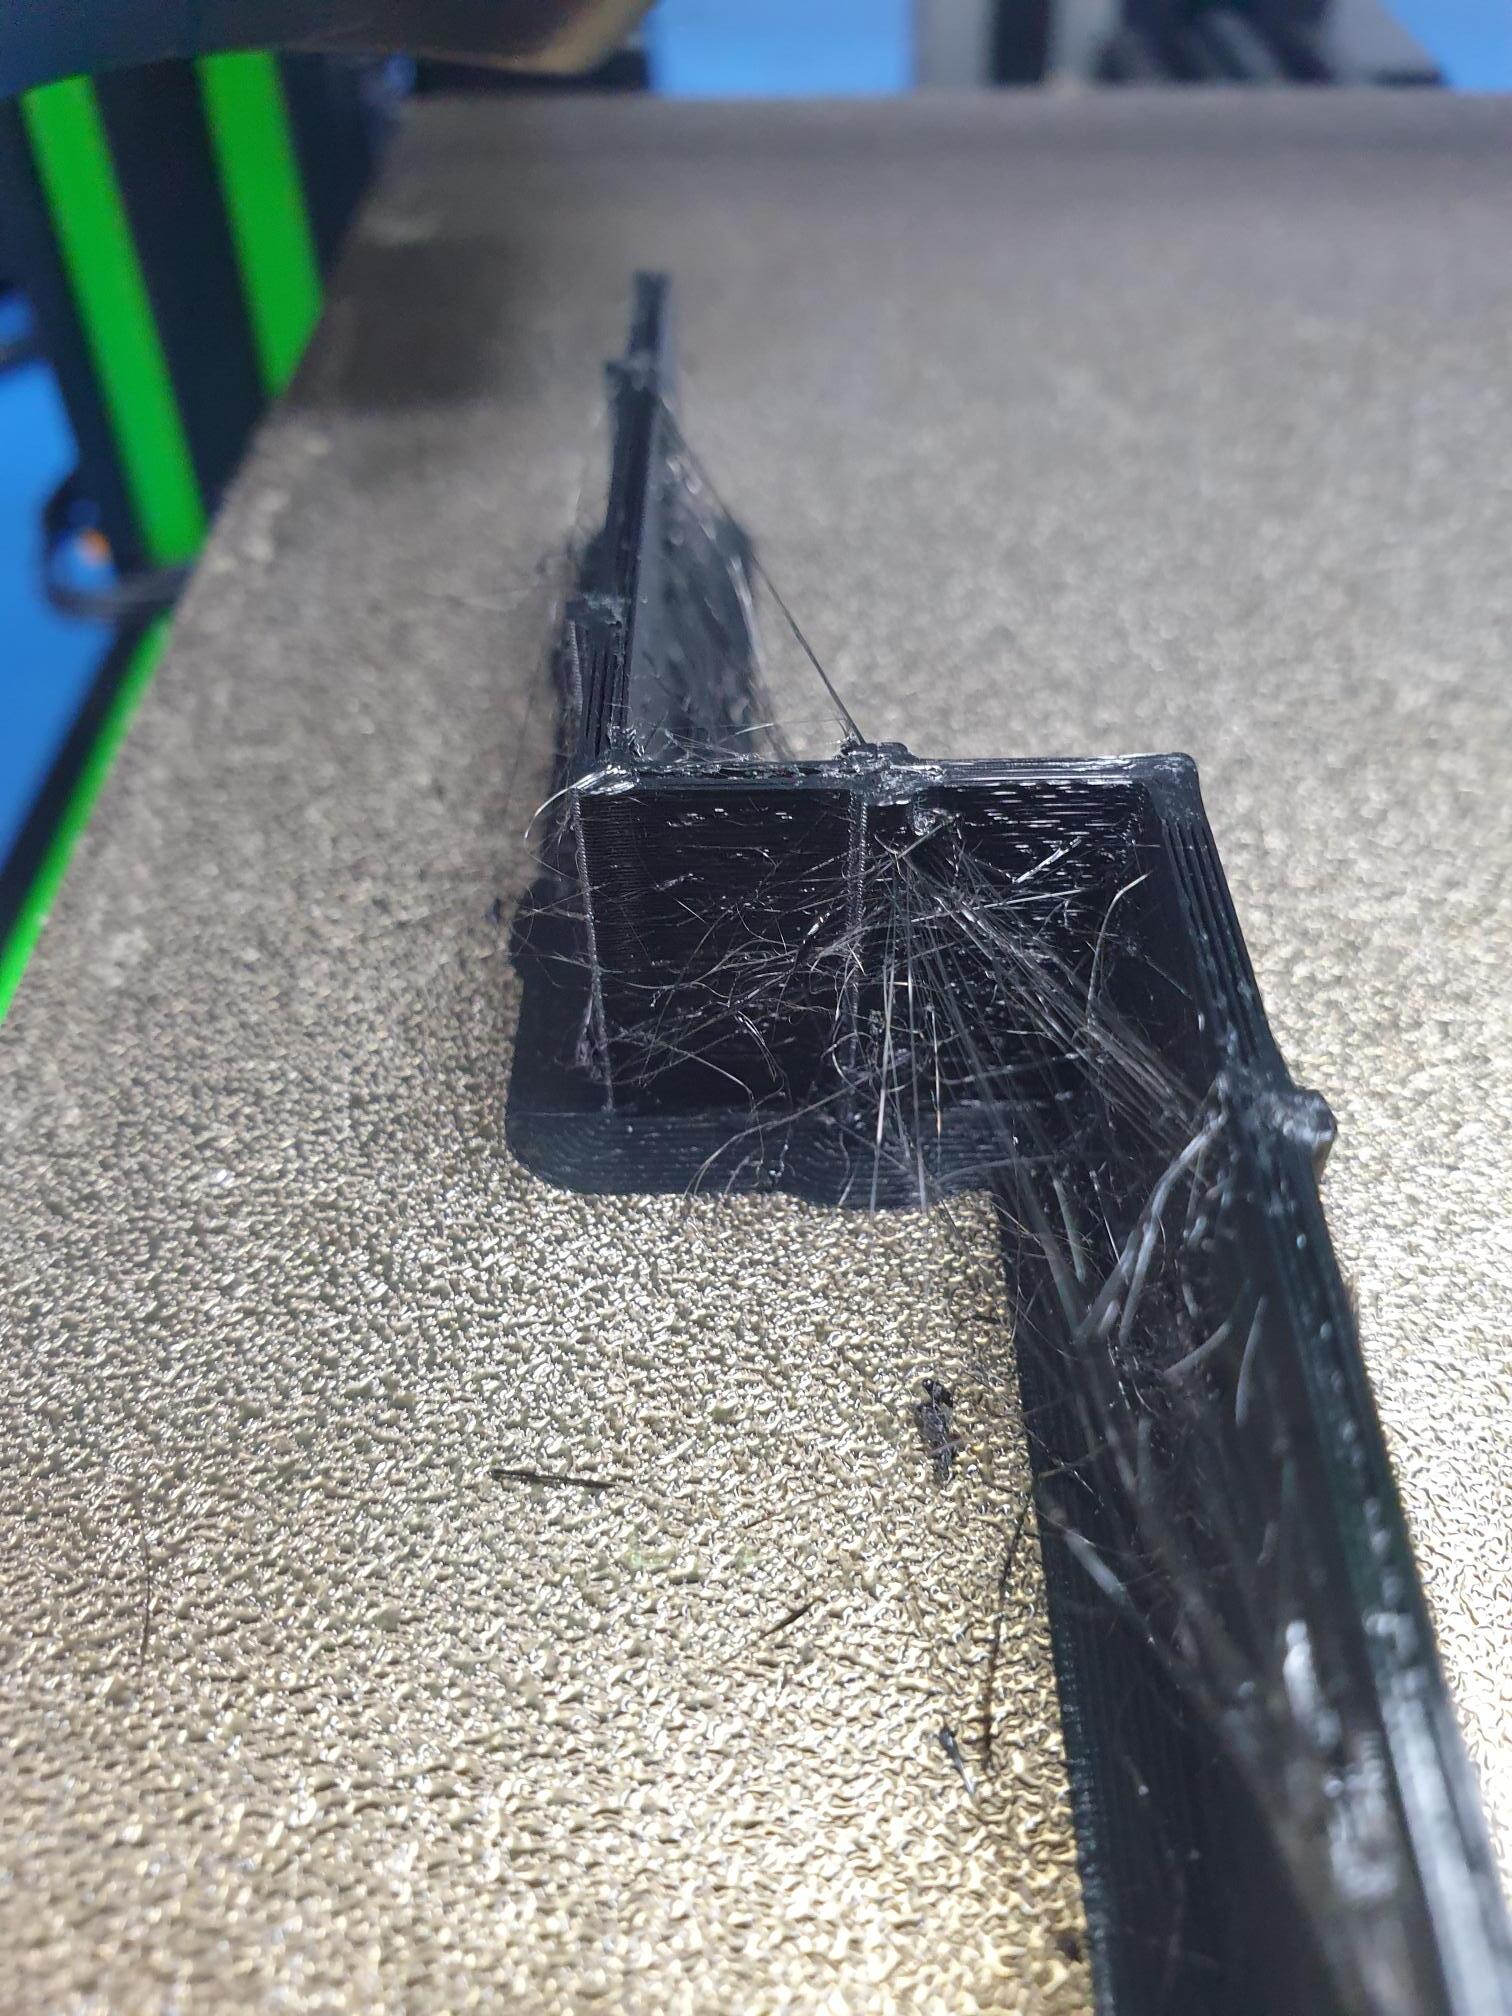
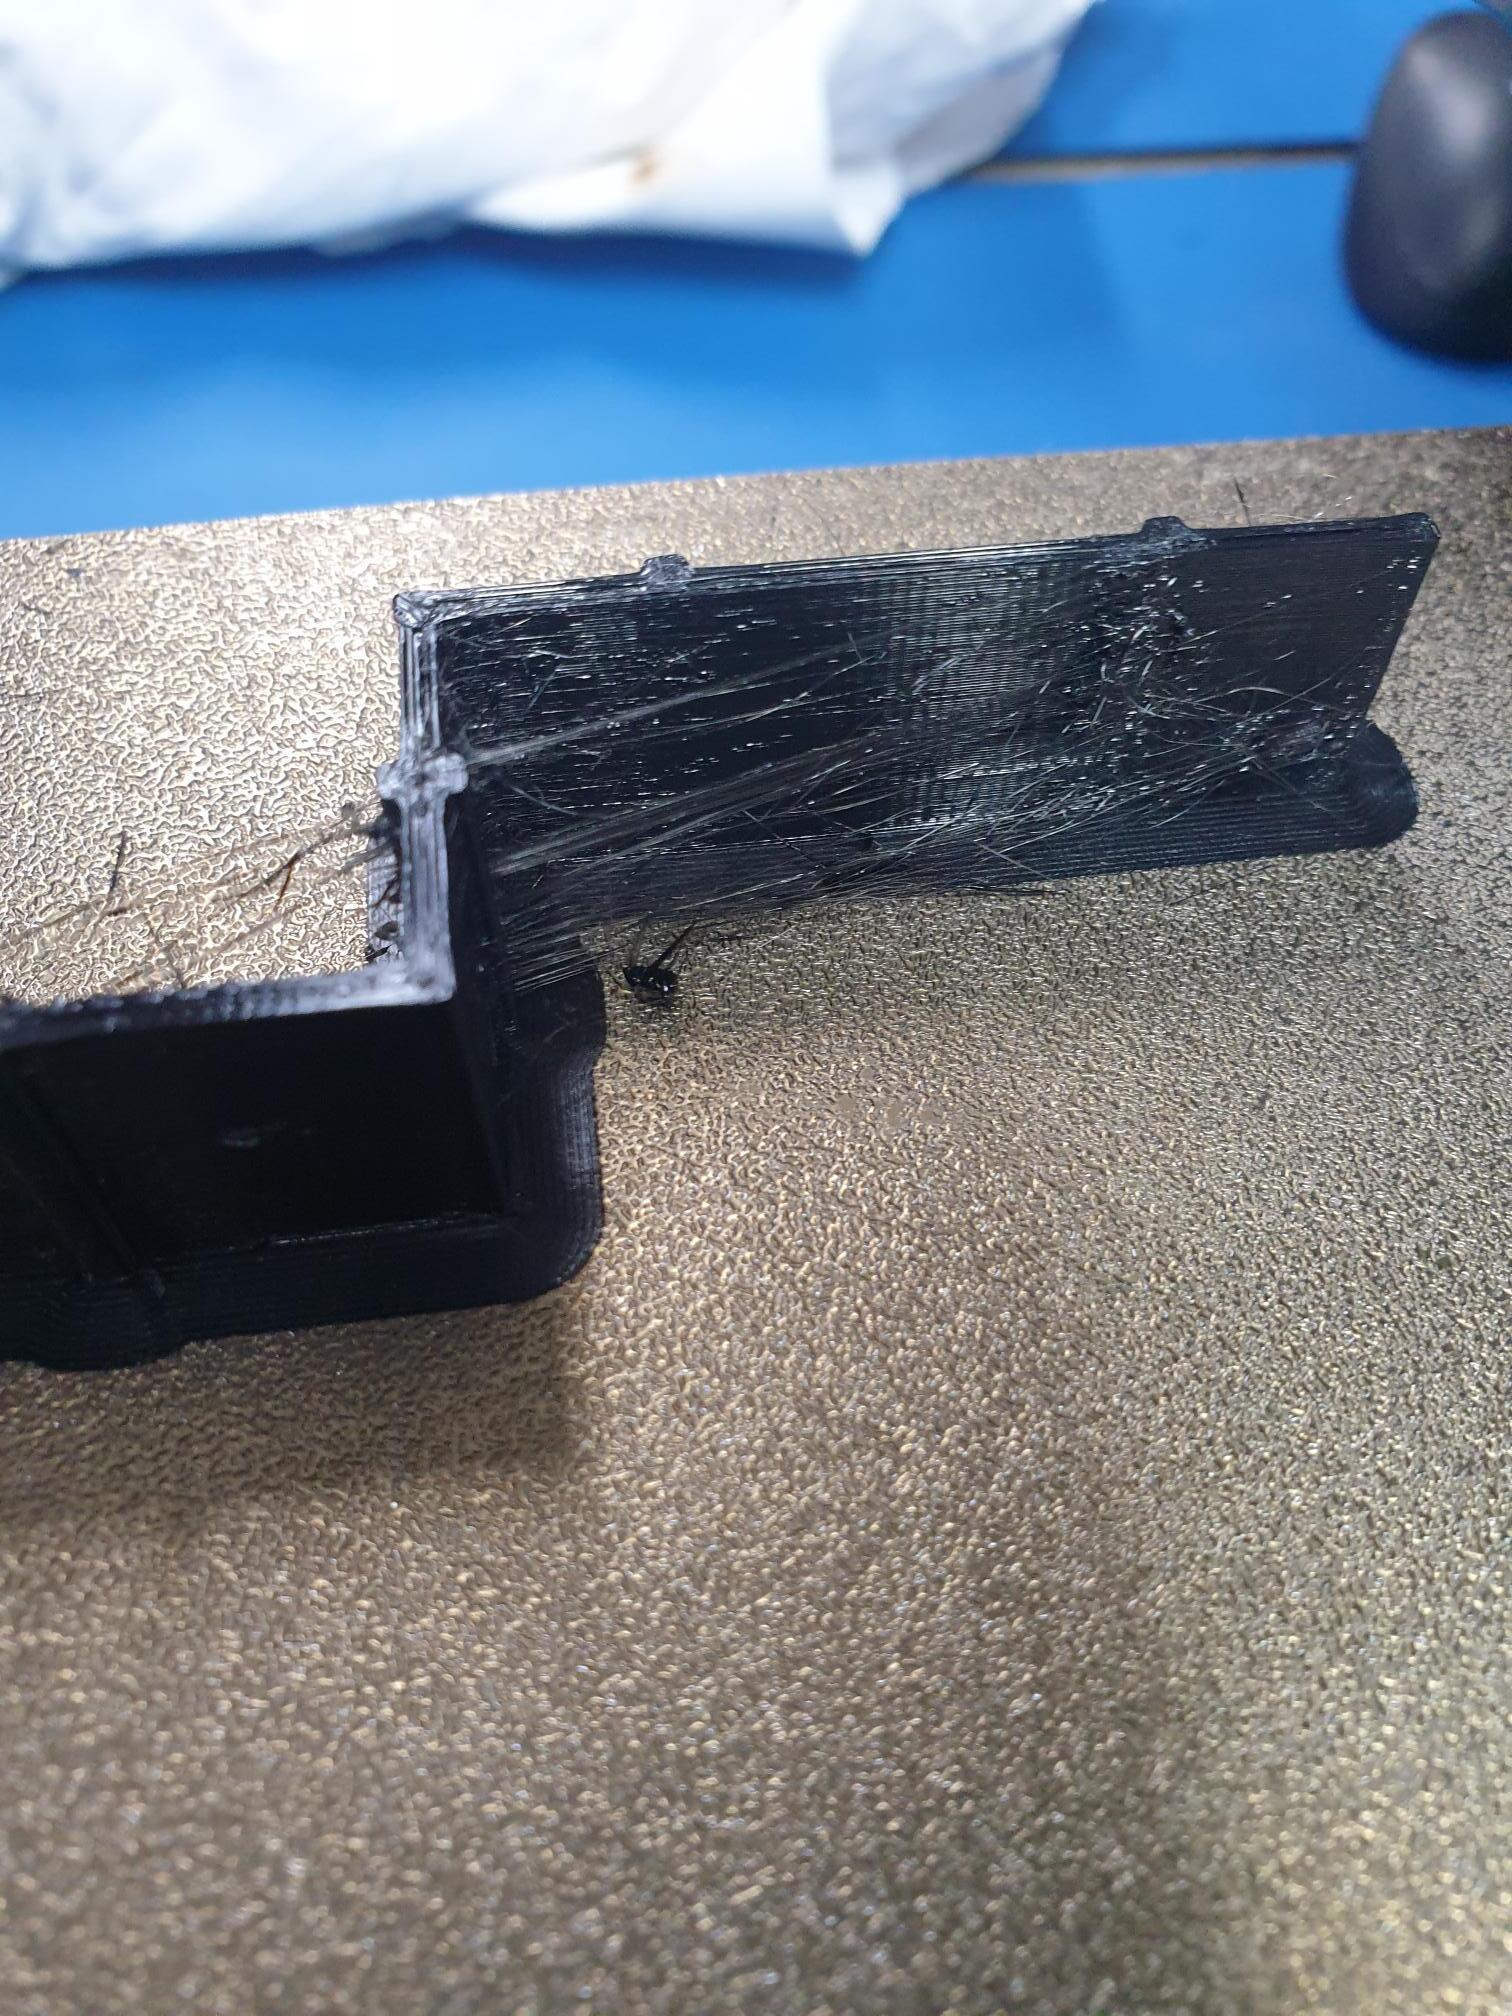
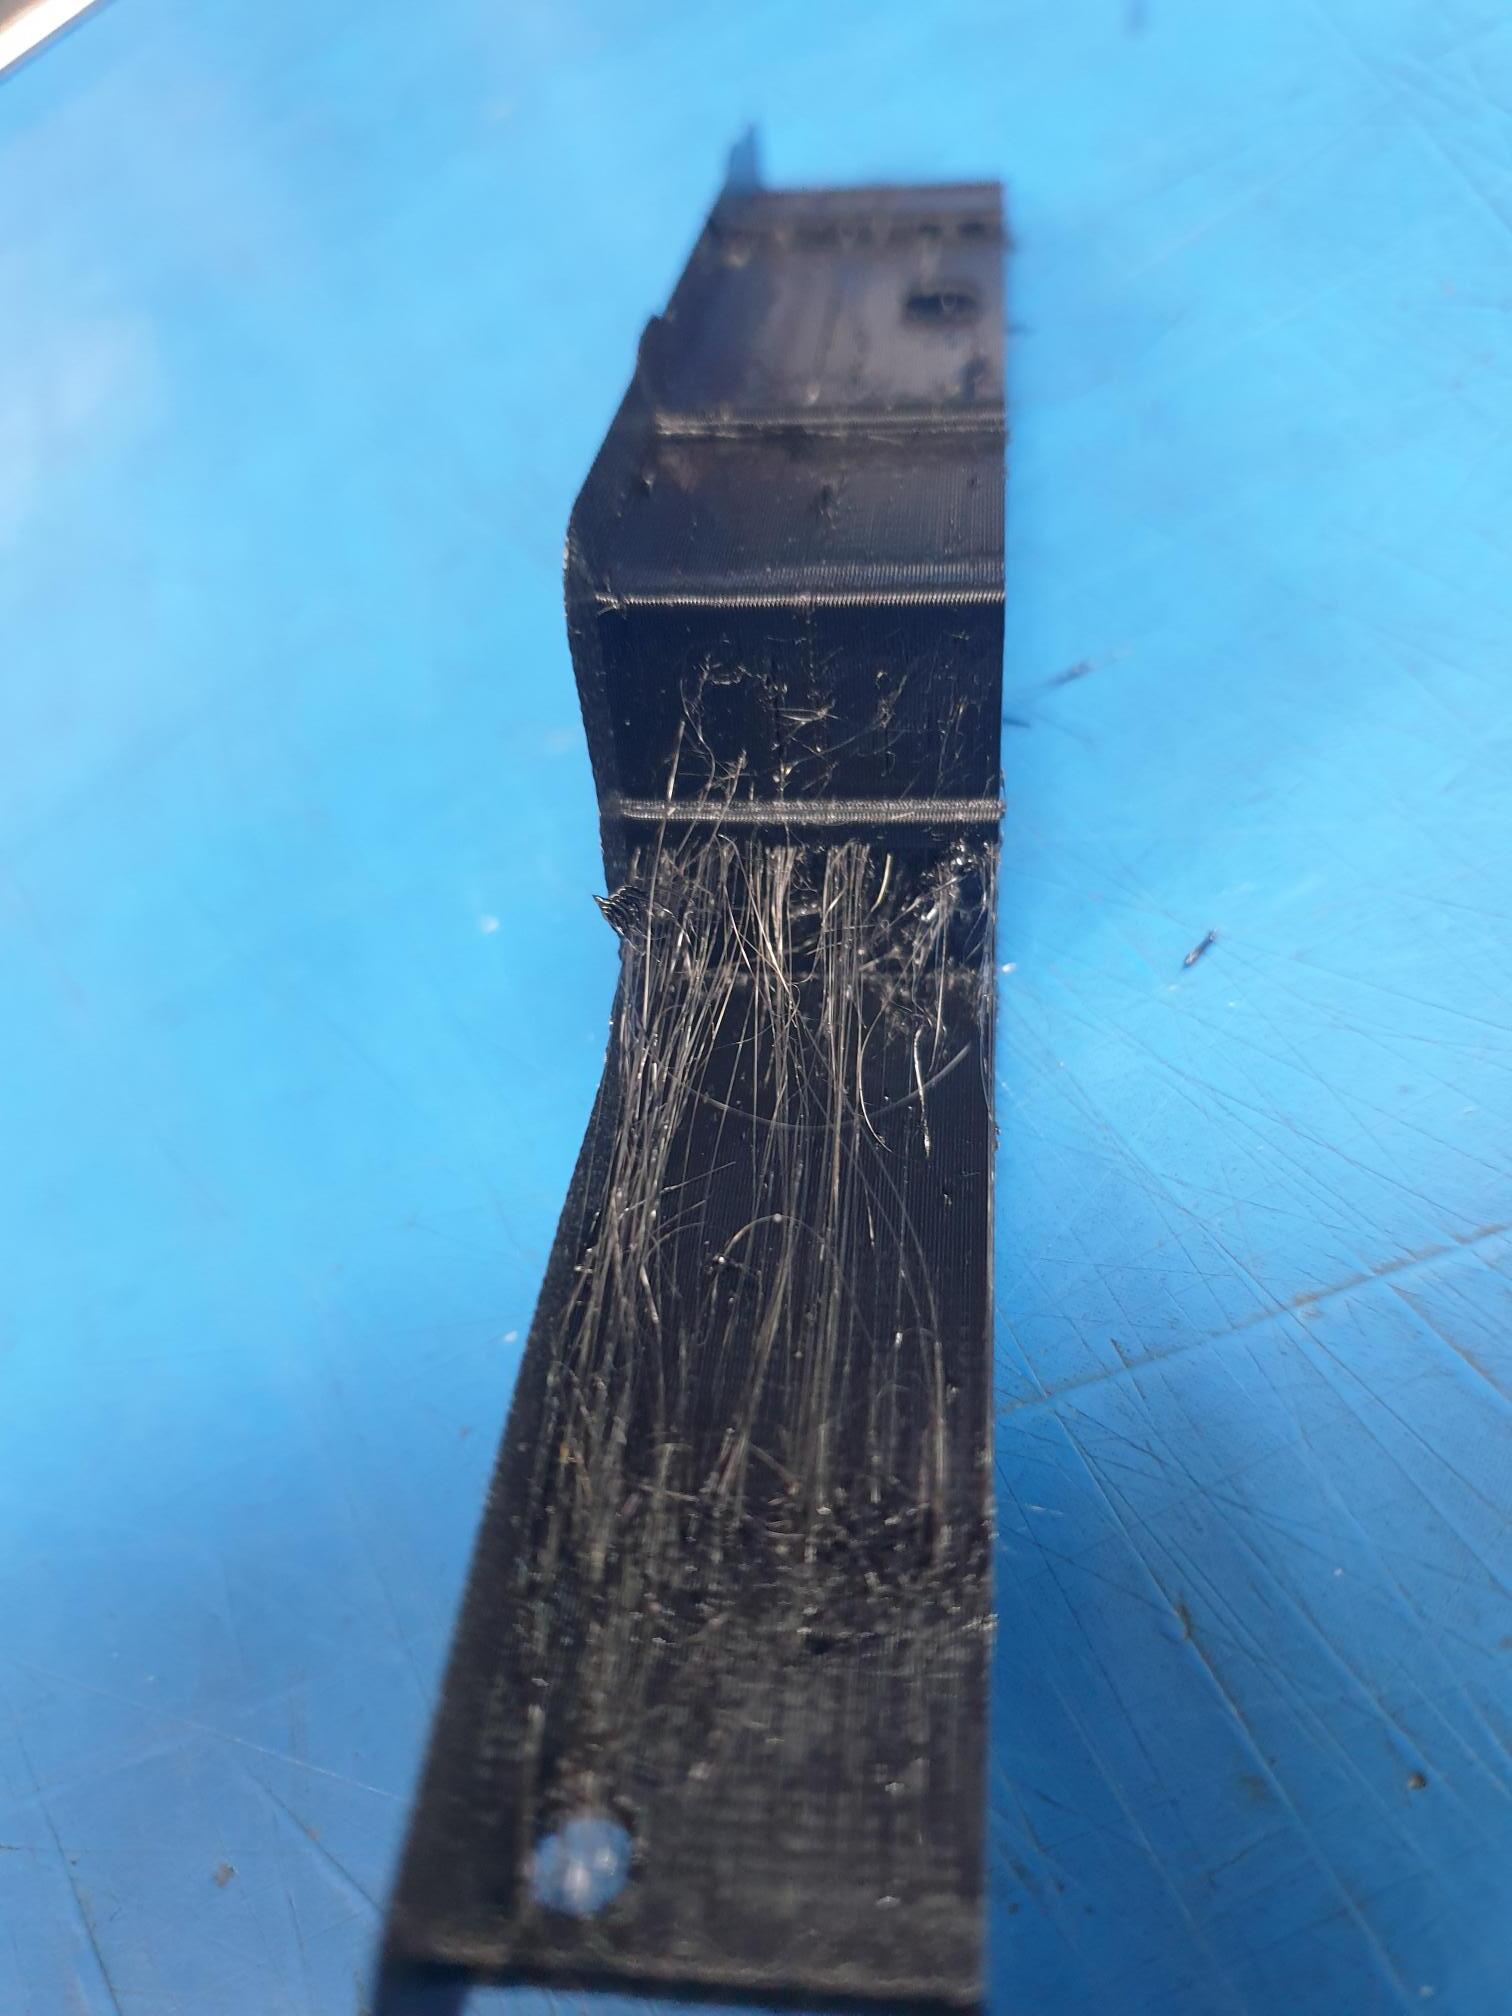
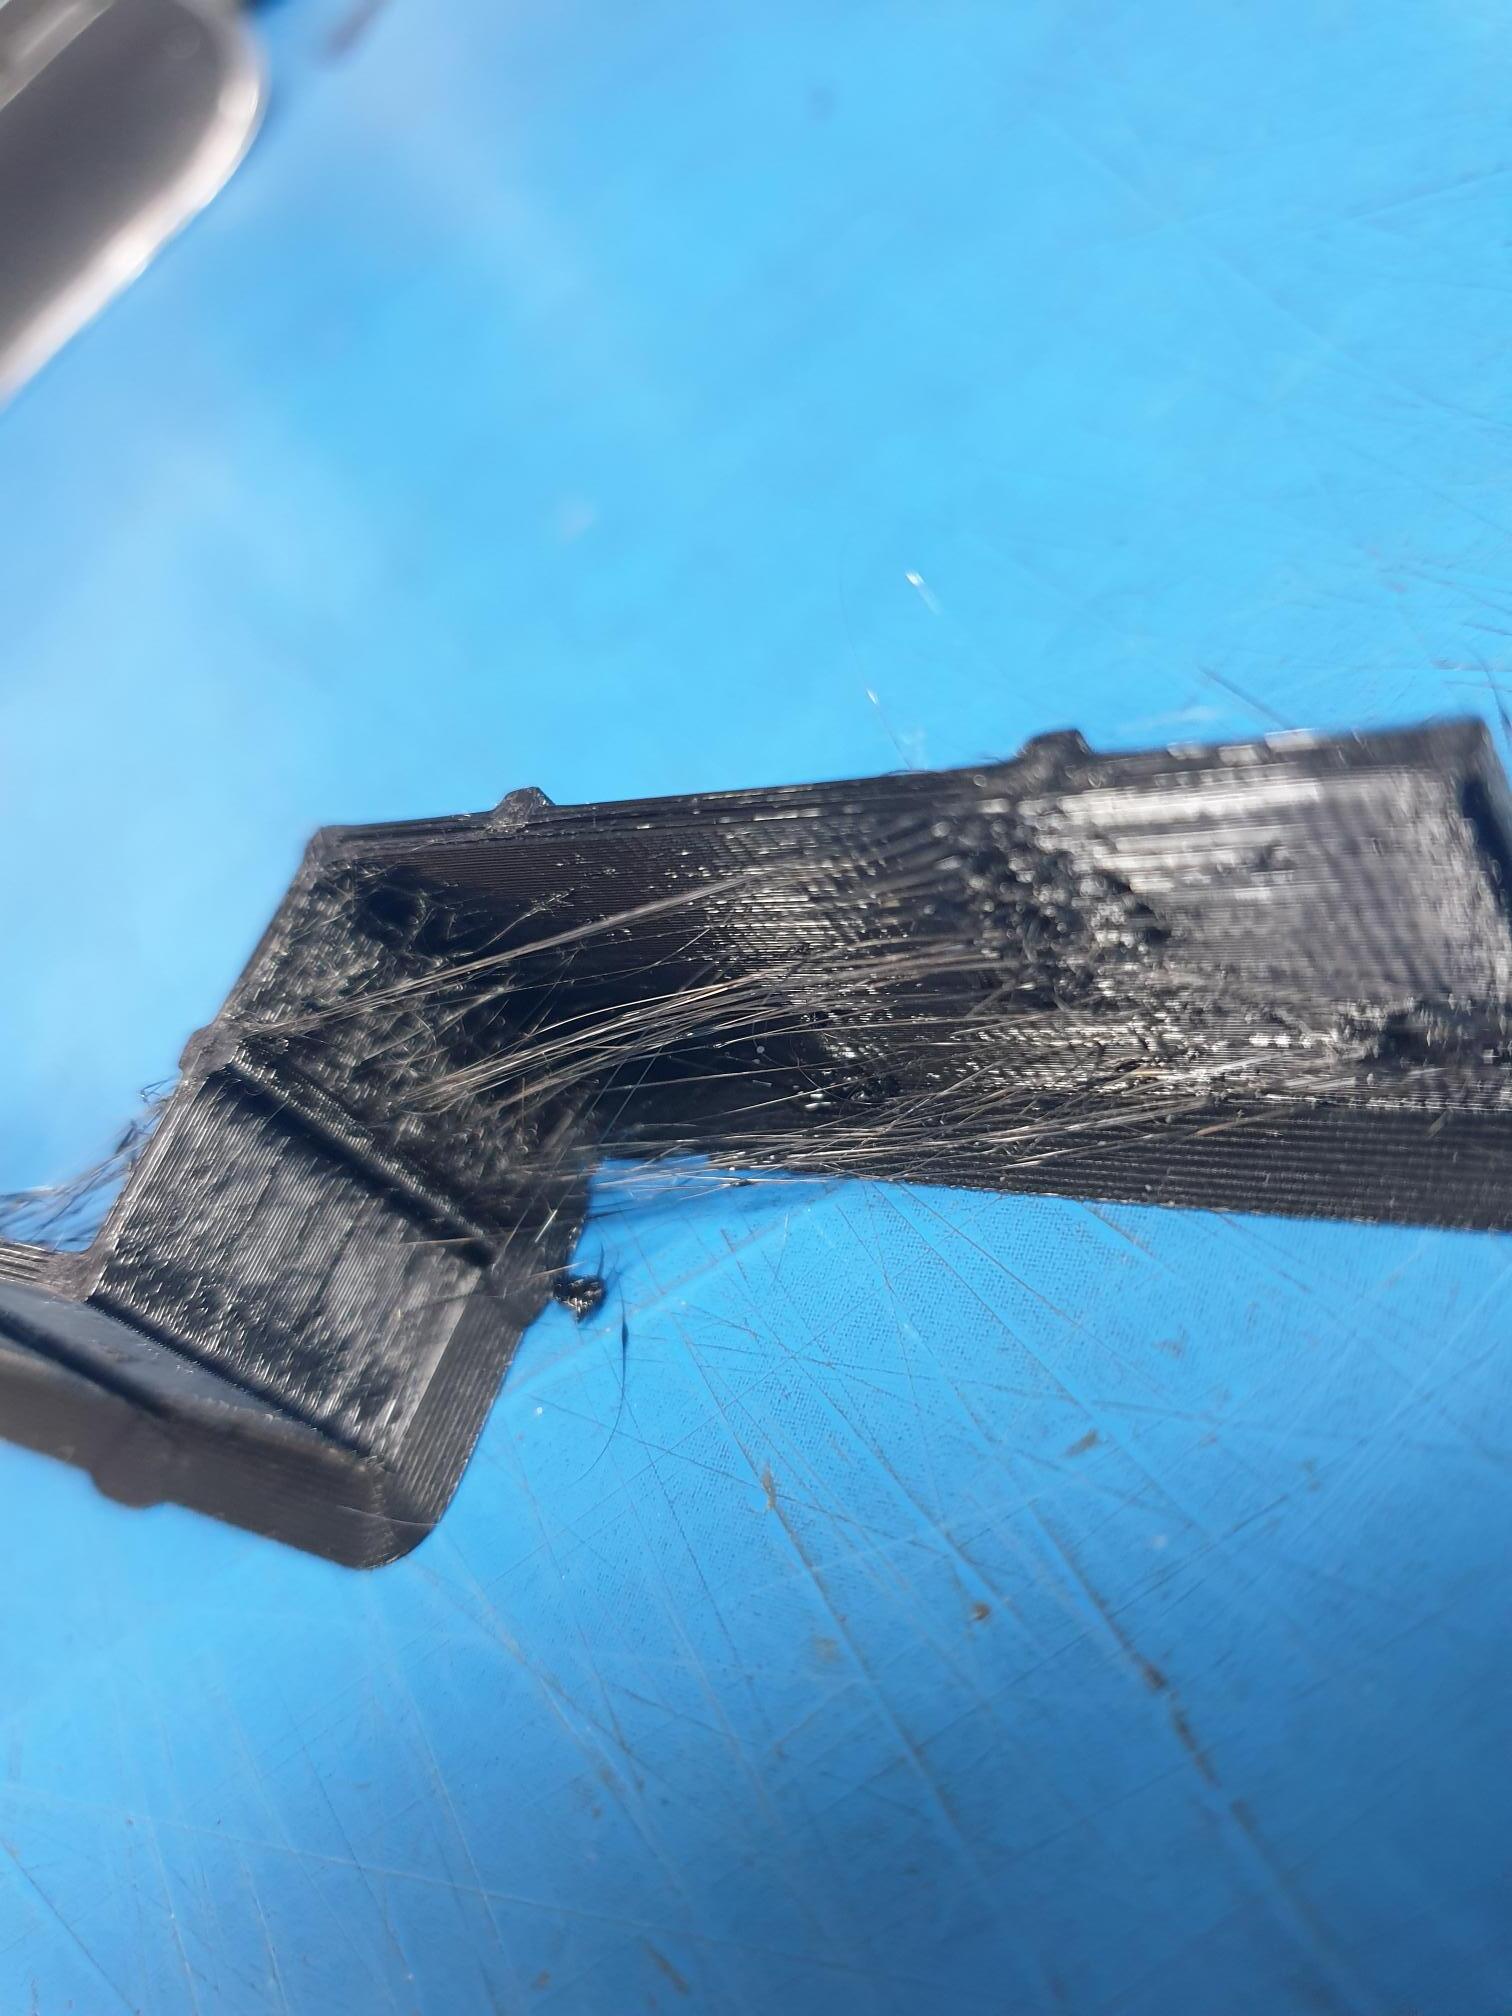
Still have the same problem, when ever i try to do a print it just comes out bad see pictures…
lots of blobs and streaks, i have tried turning down the temperatures flow rate and even cut and paste gcode header from other files but in the end it still comes out bad.
The old files all work fine some do have minor bits of plastic but not that bad to stop the print.
All my files are crap. Even using the default settings on the Creality slicer. I also tried a cura slicer and Orica slicer all to no avail.
See the attached gcode files and pictures of printed output, the only good one is were there are several pads printed and some ovals. it works fine.
The stl files i created were of simple shapes for testing.
files with .stl extension are .gcode files
All help is appriciated
P.S. limited to file amount so will post several replies to put all relevant files here about my problem
CE3_RJ45 .gcode.stl (2.4 MB)
monitor tray.stl (11.2 KB)
round.stl (44.2 KB)
These are Gcode files, i added the .STL extension to upload them here.
the Ce… file is the good one that does print ok
CE3_RJ45 .gcode.stl (2.4 MB)
monitor.gcode.stl (372.6 KB)
These are the original STL files i used to make the gcode output
monitor tray.stl (11.2 KB)
round.stl (44.2 KB)
So inclusion, i have tried several things, none of them worked very well.
If i can get a gcode header to fit into all my files will that fix the problem, and if so were/ how do i add it into the existing gcode header.
OK, I’ve decided to learn how gcode works and will modify the output file after being sliced.
So far i have added bed leveling G28 then G29, slowed down the speed - G1 F900, set the temp to M104 210 Nozzle and M109 65 for the Bed,
And still no luck, will keep trying though
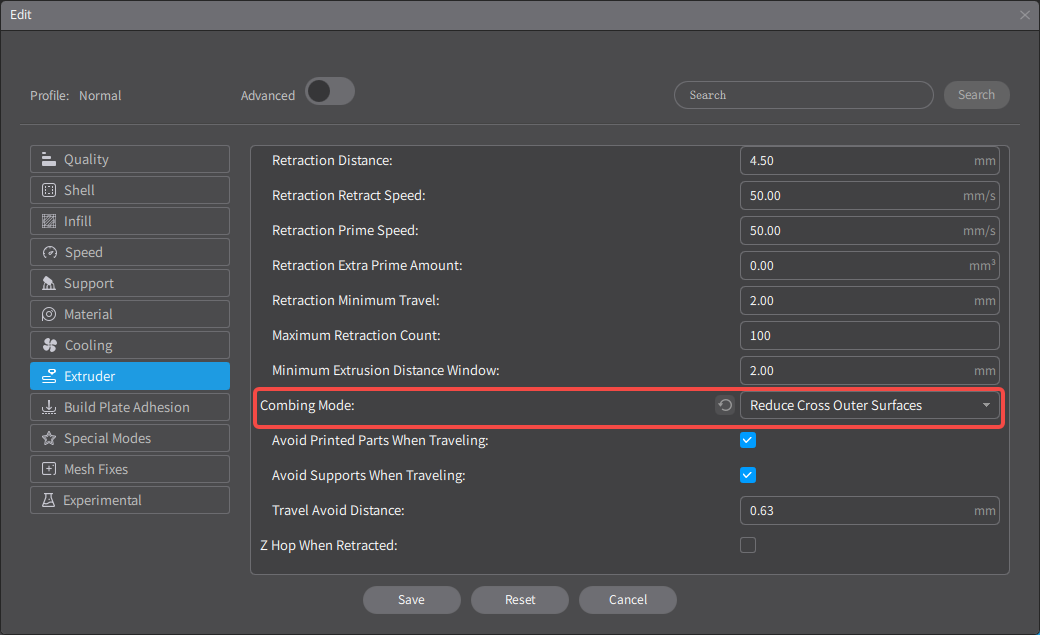
The END 3V2 uses a distal extruder, which is prone to leaks as shown in your pictures. So that, You can try turning on ‘’Combing Mode-Reduce Cross Outer Surfaces‘’ in Creality Print 4.3.8.
Thanks horace,
Ill try anything at this point but why do the older gcode files work ok.
Back at work on Tuesday ill try it then.q
I have analyzed the difference between the old gcode files and the new one, the old one should have ‘’Combing Mode-Reduce Cross Outer Surfaces‘’ turned on and the retraction distance of 3.
I don’t understand, the old files work ok, my new ones don’t.
I also remember that the extrusion is different in places, ill post a video tomorrow showing this.
Heres a good update so far,
the output is almost perfect, just some small wisps of plastic being left behind in some places but not everywhare. And the model is still in a usable state after cleaning it up.
The only change i made to the gcode file was to add G29 after the G28 command for bed leveling
i also used the Orca slicer to make the gcode file.
Temperature set to T220/B60
the file with extensions .gcode.stl is the gcode file i used
Side Plates rev5_PLA_12h39m.gcode.stl (5.8 MB)
So, any ideas on why those fine lines are being left behind ???
Side Plates rev5.stl (164.3 KB)
Hello Travor,
I didn’t notice the question asked, do you dry your filament ? and how is it stored.
Damp filament will not make fixing the issue an easy one as it can cause the exact problems you have.
Cheers.
Thanks for the reply,
I just keep it in the office area, no special place, so this could add to my problems. What temperature / humidity settings are best for PLA plastic prior to printing.
Also, after checking the design of my model i think that some of the stringy nit could be caused by poor design. I’m going to check that tomorrow.
Hello Travor,
With PLA or any other type of filament I use, I dry it in a filament drier for a few hours.
When I have used it for a print (unless going to do another print also), I put it in the drier a few hours then put it in a vacuum sealed bag with a packet of silica gel and back in its box.
This is done with even brand new filaments that arrive in a vacuum bag as they can be damp when packed.
Damp filament is the curse of 3D printing, so keeping it dry is worth the expense and time.
Cheers.
Thanks,
Appreciate the input, I’ll try and find a way to pre-heat it from now on.