I am finally getting around to trying out the reason I purchased the K2 Plus. Have not had much of a chance because holidays and life. I will start printing a benchy followed by calibration tests on the factory settings for PC.
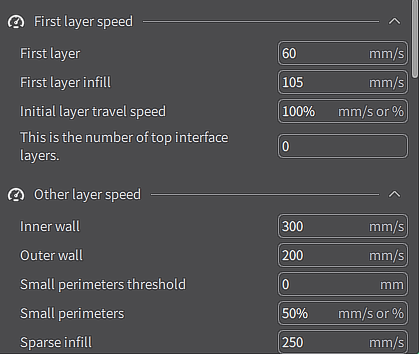
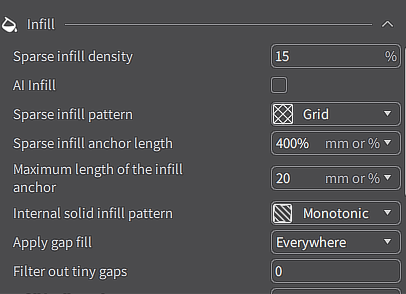
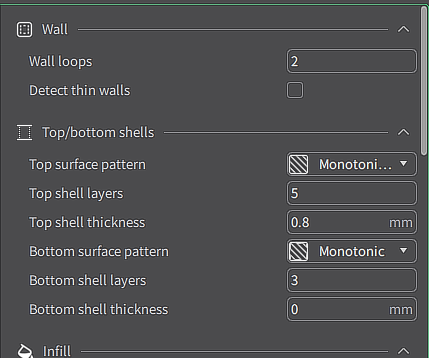
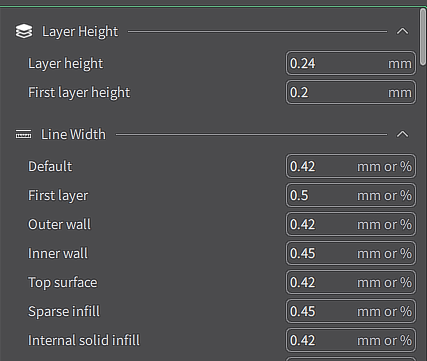
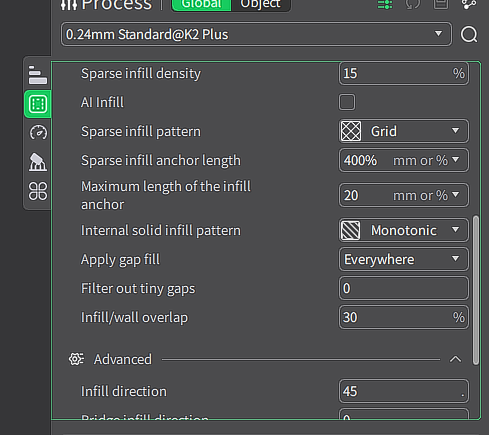
These are the settings from Creality Print 5.1. I wonder if the speed is going to be too much for the filament. Polycabonate is new to me so any advice is much appreaciated
I noticed all the standard profiles for CP 5.1 (haven’t checked older versions) has the infill wall overlap set to 30%.
My personal opinion is that is too much, I usually print that at 15%, which is also the default for the High Quality profile.
Depending on what is being printed, 30% can lead to some overextrusion impacting layers above.
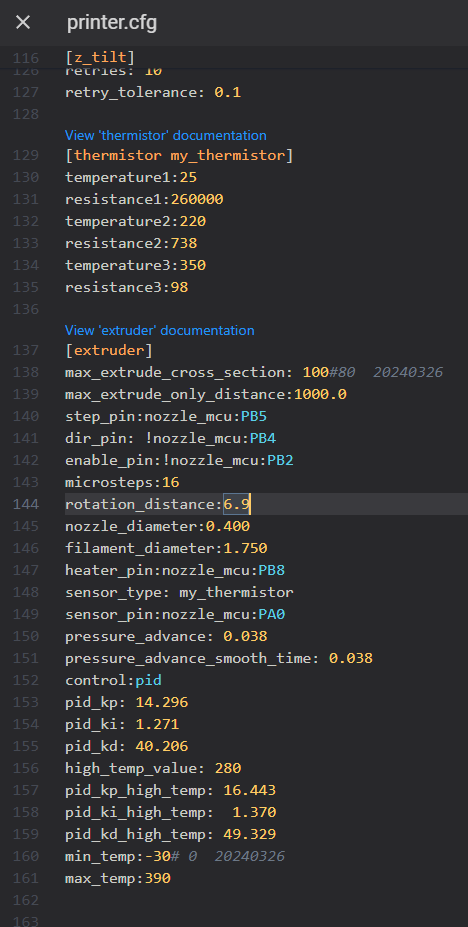
Thank you for that information, I did not think about that. At the moment I started with the rotation distance (or e-steps). Following a guide on YouTube, I measured out the filament and noticed there was about 2.4mm difference. I updated the printer.cfg file with the new value and will update.
Wait what? That’s the one feature I would expect to be properly configured.
I can understand slicer settings being subjective and filament dependent, and bed leveling having issues because of improper handling during shipping (who knows what happened while traveling by ship, airplane, truck, and etc until it get to us).
Tweaking rotation_distance was very surprising.
I will try to test on mine and see how it comes.
Welllllllllll this is embarassing. After running through all the calibration tests and having the same issue over and over I forgot one thing. Keep in mind first large format print and second printer in general. The issue was glaring at me the whole time…
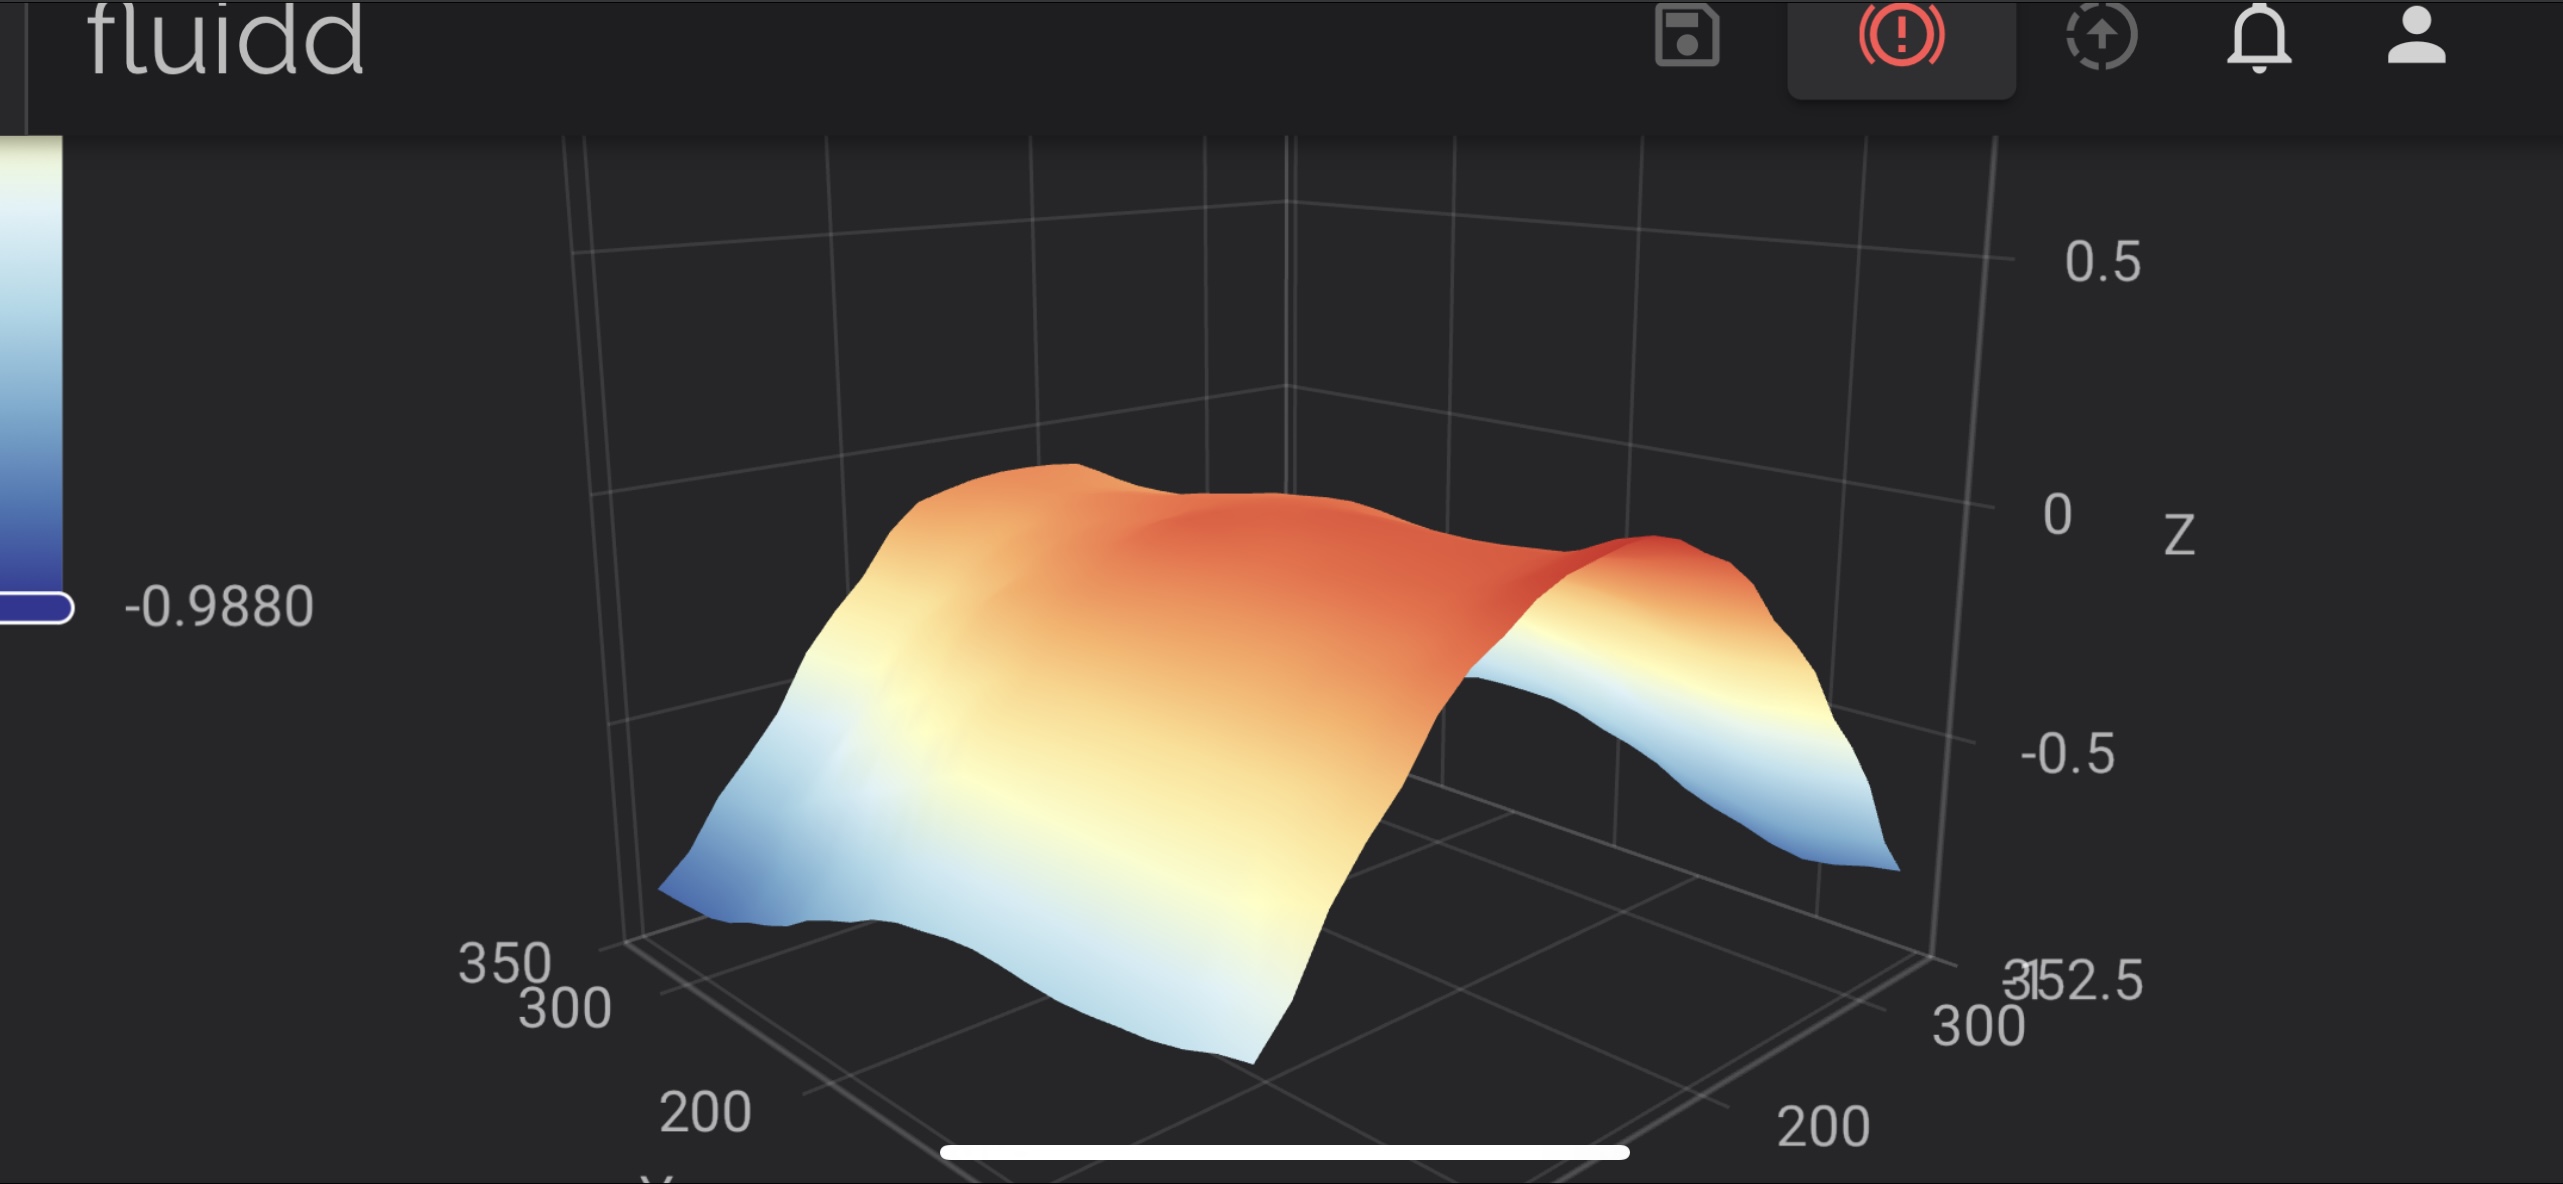
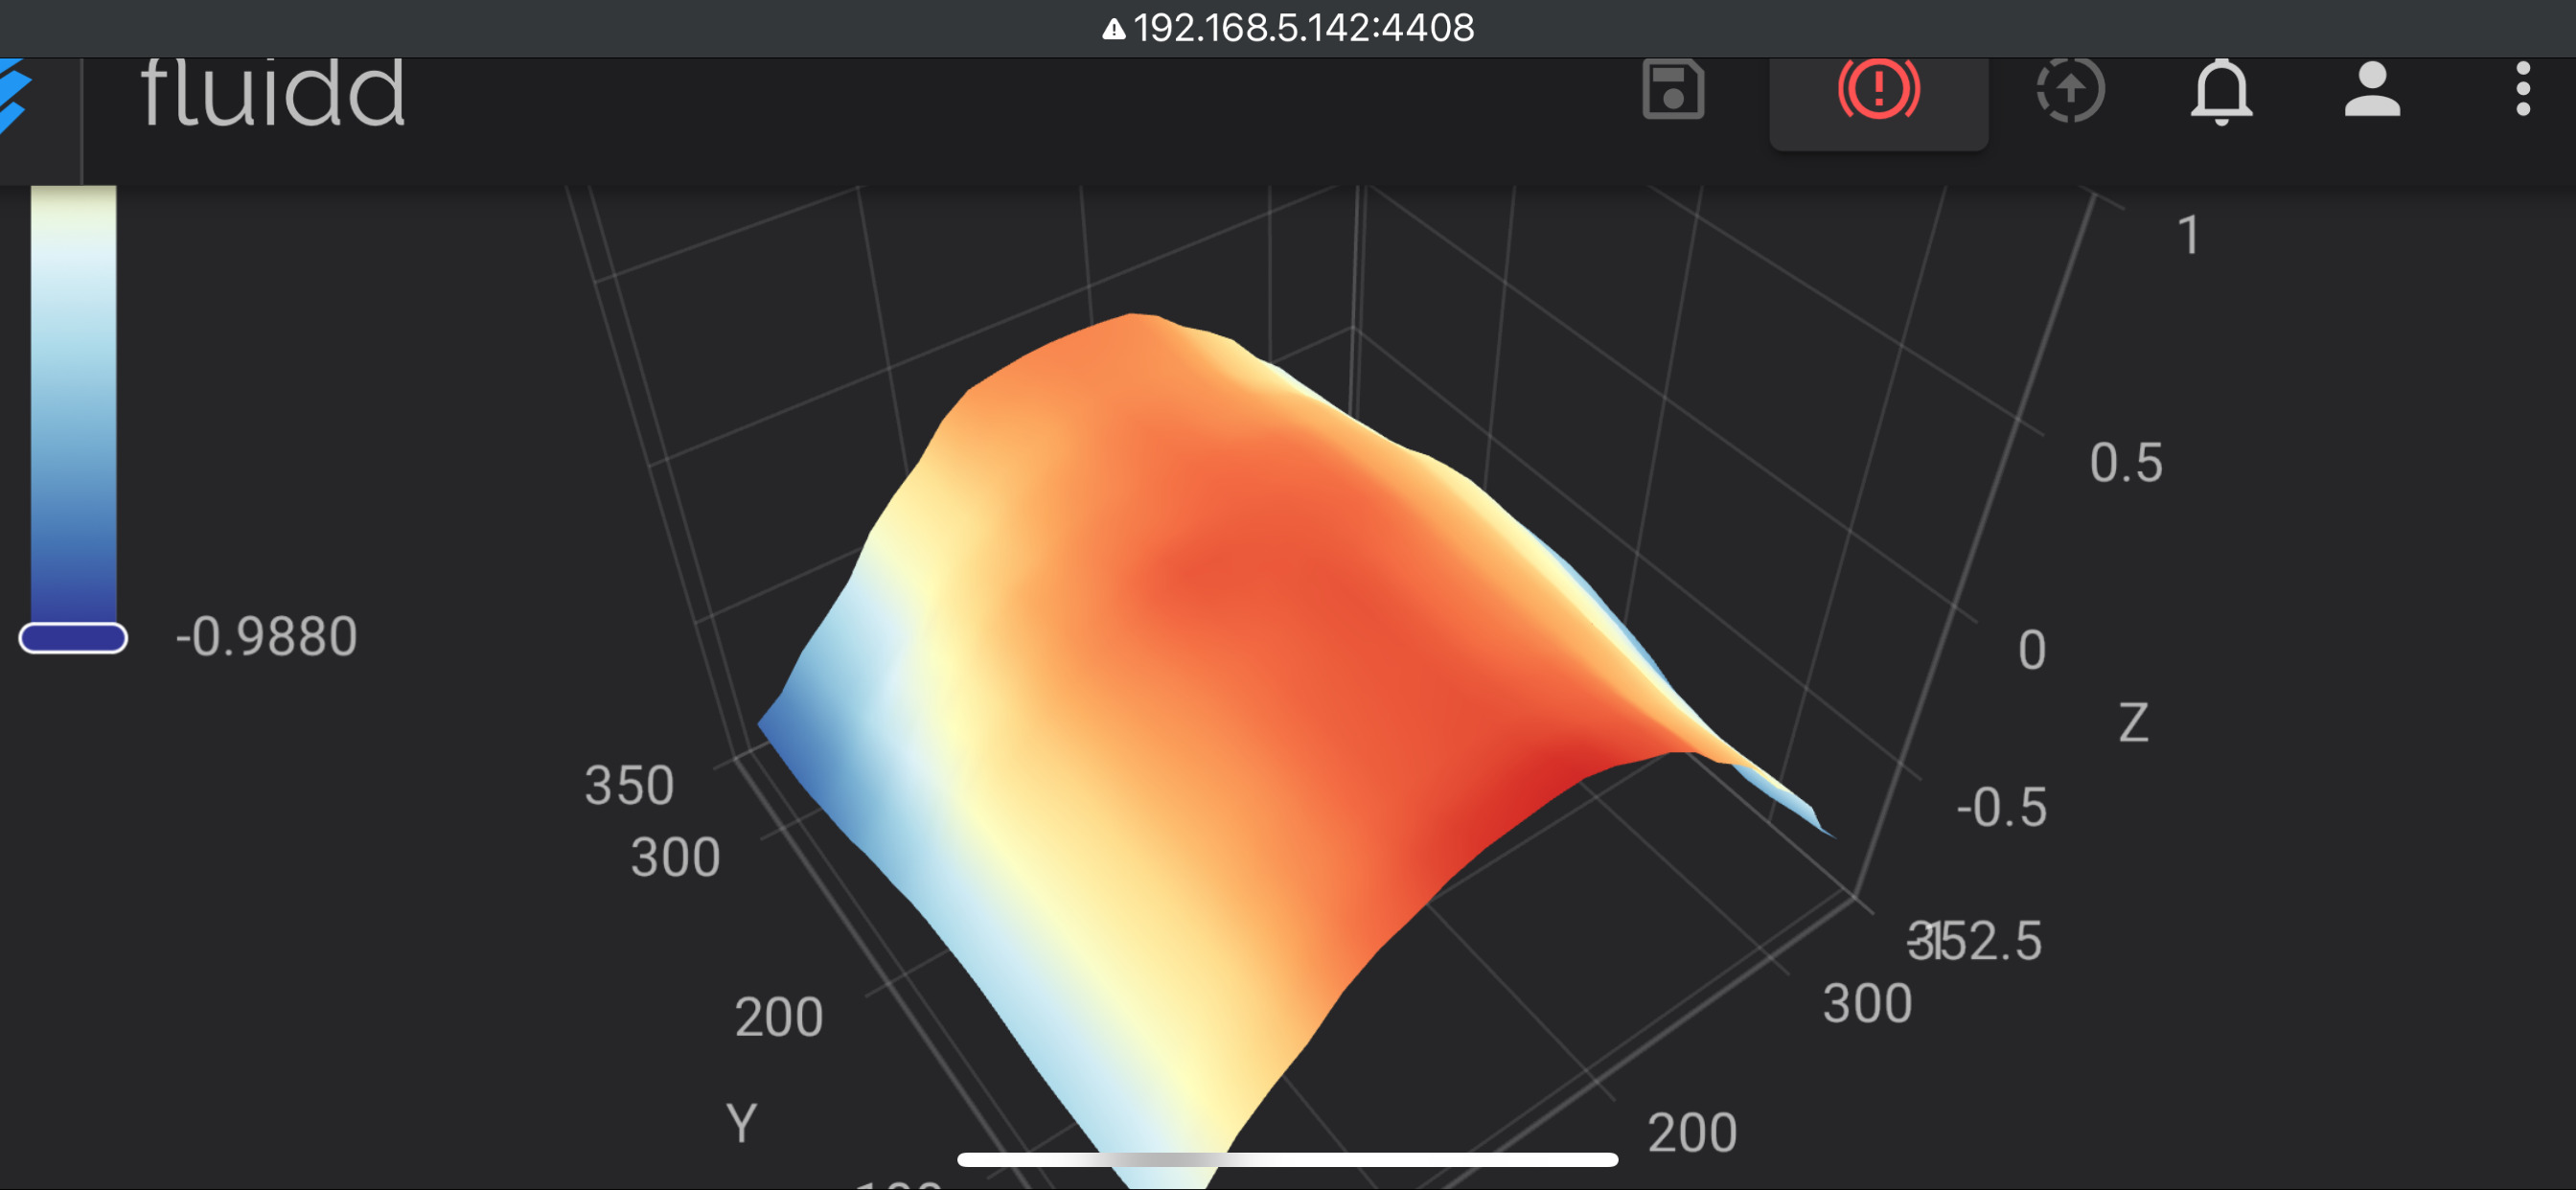
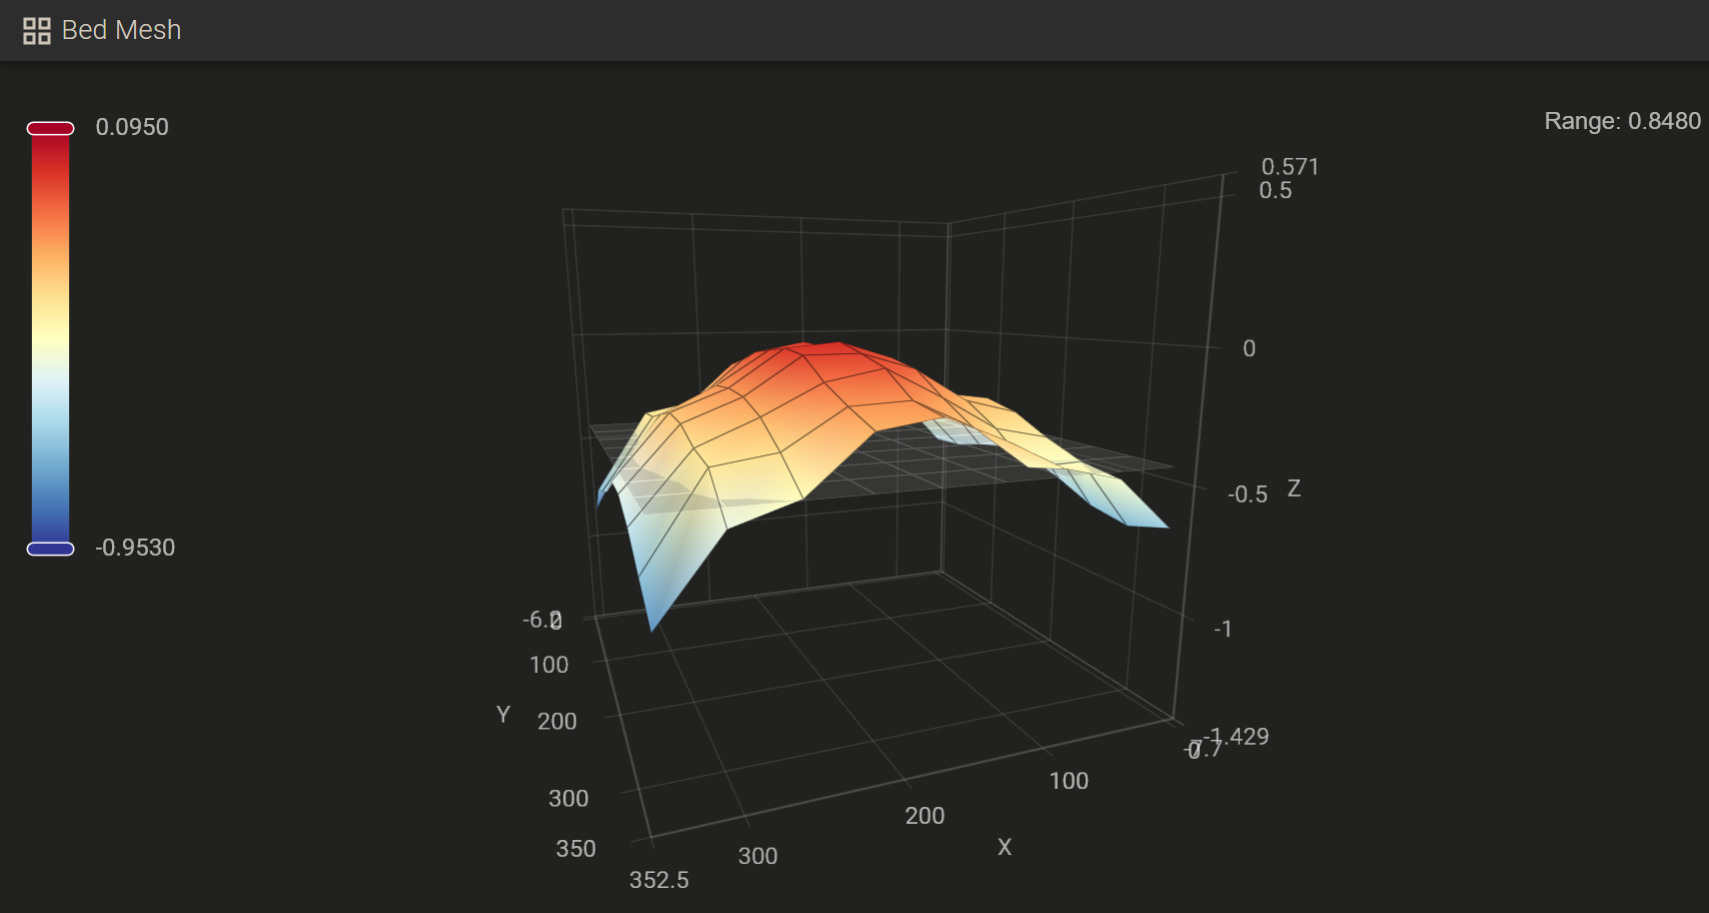
Yes, this is not ideal, but it kind of is predictable. Mine goes up and down in different places, it is so weird, so the compensations algorithm has issues, I think it got bent in different places.
I have never used Klipper, but I heard it should be able to correct up to 2mm, so even this bed should be able to work. As I mentioned a few times before, my bambu x1c is not flat at all, yet it prints beautifully (as far as first layers go).
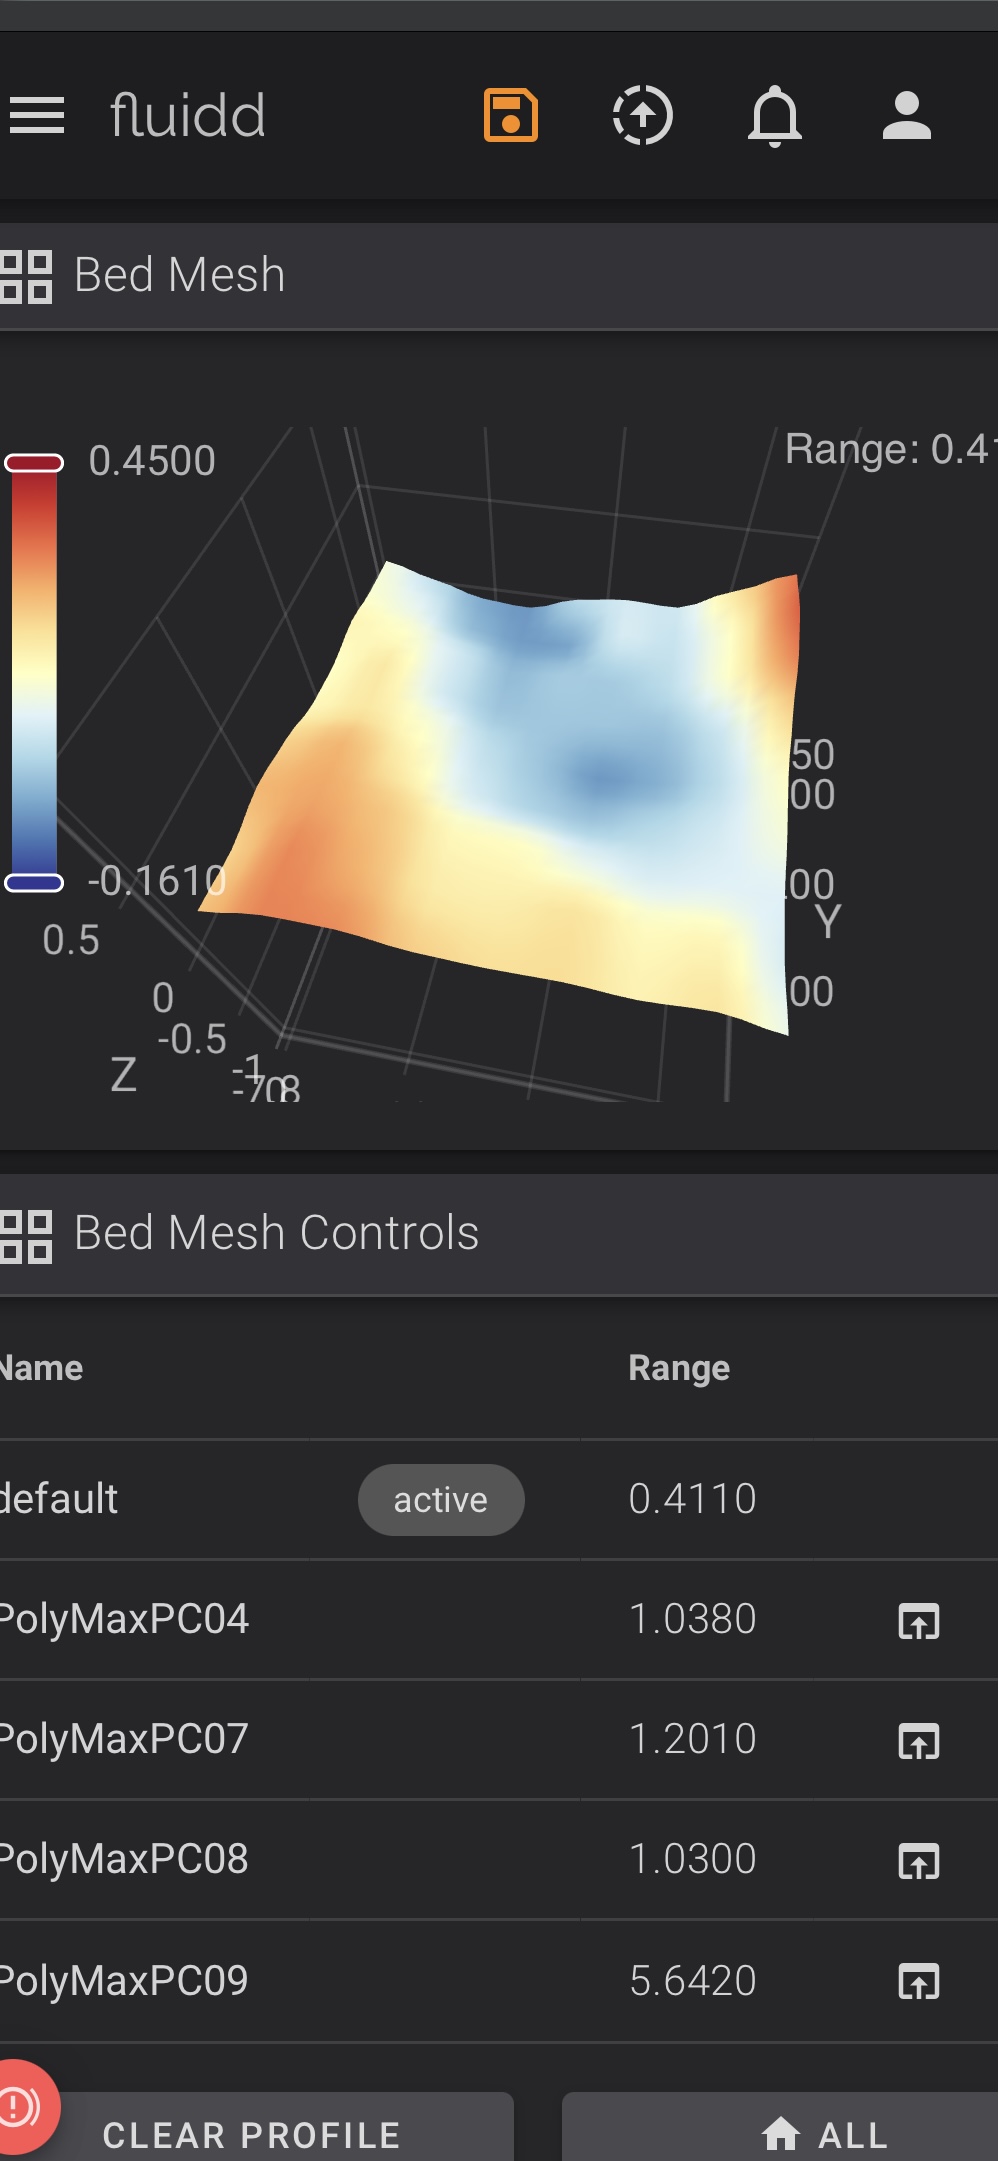
Yesterday before goin to bed I had the printer doing 10 calibrations non stop calling the bed_mesh command manually with different profile names, they get queued and executed after each other.
All the measured points where different from each other, not a single one was the same. Some of the averages were the same h 0.380, but that’s about it.
When I talked to the engineer, I mentioned the bed, mesh and etc. Flat out I was told the bed would be replaced but, more interestingly, I would also receive a strain gauge.
I believe the main issue is inconsistent reading and not the flatness of the bed.
Now, let’s talk about your bed - I would definitely reach out to support, you might receive the same as me. That said, I heard multiple people talk about just applying pressure to the plate and you can “unbend” it by hand, or using a rubber mallet (it must be fully removed from the printer first). If in doubt, do only the ticket.
I will send in a support request to their after sales email to see what they say. Hopefully the issue will be resolved shortly I want to make a few HueForge prints for making Christmas presents/holiday cards for my family and friends with the two CFS modules that I purchased alongside the printer. Kind of a yikes moment when I found out about the issues though. But it is to be expected. I am still glad I purchased though. The issues can be solved and will be solved. I will turn the gifts into New Years presents!
Ive seen somewhere the K2 strain gauge replacement is a modified design, the frame is a little more substantial, not sure if anything else is different.
Ok its been a while but I will update for the updates. After the holiday, Creality got back to me about my issues. Asked for pictures of the toolhead and video for the belt tensioning. They guided me theough the process of adjusting the belt tensioner and checked for issues with the hotend. When they seen the screen shots for the bed, creality promptly sent a new bed to fix my issue.
@digi I’m also printing Polymax PC almost exclusively, and I am having constant issues with the first few layers. There is always some part of the bed which is too close to the nozzle, leading to overextrusion and clogs. Is this the problem you were having? If so, I guess I may need a new bed too, as my mesh looks just like yours:
But it only looks like this when heated to 110C for PC. It’s nearly flat when what it’s at 50C. Was that true for you too? And your new bed stays flat after heating?
The one thing I really don’t understand, though, is why the mesh calibration does not account for this? Theoretically the first layer should be fine regardless of the mesh shape, as long as it’s not too extreme. A range of ~1mm should be easy to deal with, so I’m struggling to believe that the bed is the problem.
I use glass plate + Magigoo PC for printing this filament on my ancient Raise3D N2 printers. Works very well. The only minor trouble is that this filament pulls so hard when it warps (and the Magigoo holds so strongly) that it actually sometimes shears little chunks of glass off the surface of the plate when printing large objects with a lot of surface area adhered to the plate.
As for whether glass would be better than the K2 textured plate for fixing the first-layer problem I’m having… maybe, if the problem truly is the warped bed. A glass plate would stay more flat than the spring steel magnetic plates, but you’d have to find a way to secure the plate to the bed without warping it, which may be difficult depending on the shape of the bed. If the bed is low in the middle, you could simply clamp the glass plate to the sides of the bed and let the plate float above the bed slightly in the middle. With my inverted U-shape, I guess I could just clamp it in the front and back. If the bed is hill shaped (all sides lower than the middle), you might be out of luck unless you modify the bed.
That said, the mesh calibration should take care of any unevenness. I just don’t understand why it doesn’t.
Hello Anubis132,
Thank you for the reply, much appreciated.
So, I have a question regards what you mention here …
With the glass plate, would it help in any way if it were frosted, as in “fine sand blasted” ?
Am afraid I have a curious mind about things.
Mind you, I do also wonder why the calibration does not adjust for the un even bed. Only way I would have thought that is if the bed temperature was different when calibrating as to what it is when printing; but it is not though.
No idea; I’ve never tried frosted glass. This particular issue probably has more to do with the type of glass than the surface finish. I’ve only used borosilicate, but there’s other options like tempered and untempered mirror glass. In any case, it’s a fairly uncommon issue that is usually avoidable. It just means I have to replace my build plate once a year or so.
Did you ever get tge PC filament to work after the bed fix?
I’m trying to use Inland PC and wqhile the calibration parts seem to print fine, the actual pribt either clogs or gets an e-step error.
Using default generic PC profile in the latest version of CP6.
In some ways yes and in other ways no. But it has been mostly due to user error.
After getting the new bed and installing a new nozzle. I forgot to do a few things and ended up with getting a blob on the nozzle.
n
After chasing down some possible fixes I followed this video
And installed bigger knobs on the bottom of the heat bed to help with leveling the bed and using the macros to position the nozzle on the build plate.
Then I remembered to do the PID tuning to help with the printer adjust heating.
Then i went to rerunning a temperature tower to see what is a good temperature. Mostly due in part because I noticed the filament would string out of the nozzle when the print was doing nothing. I had the temperature set at 270 C. I have a feeling the blobbing on the tip of the nozzle is the high temperature i am running at🙂↕️
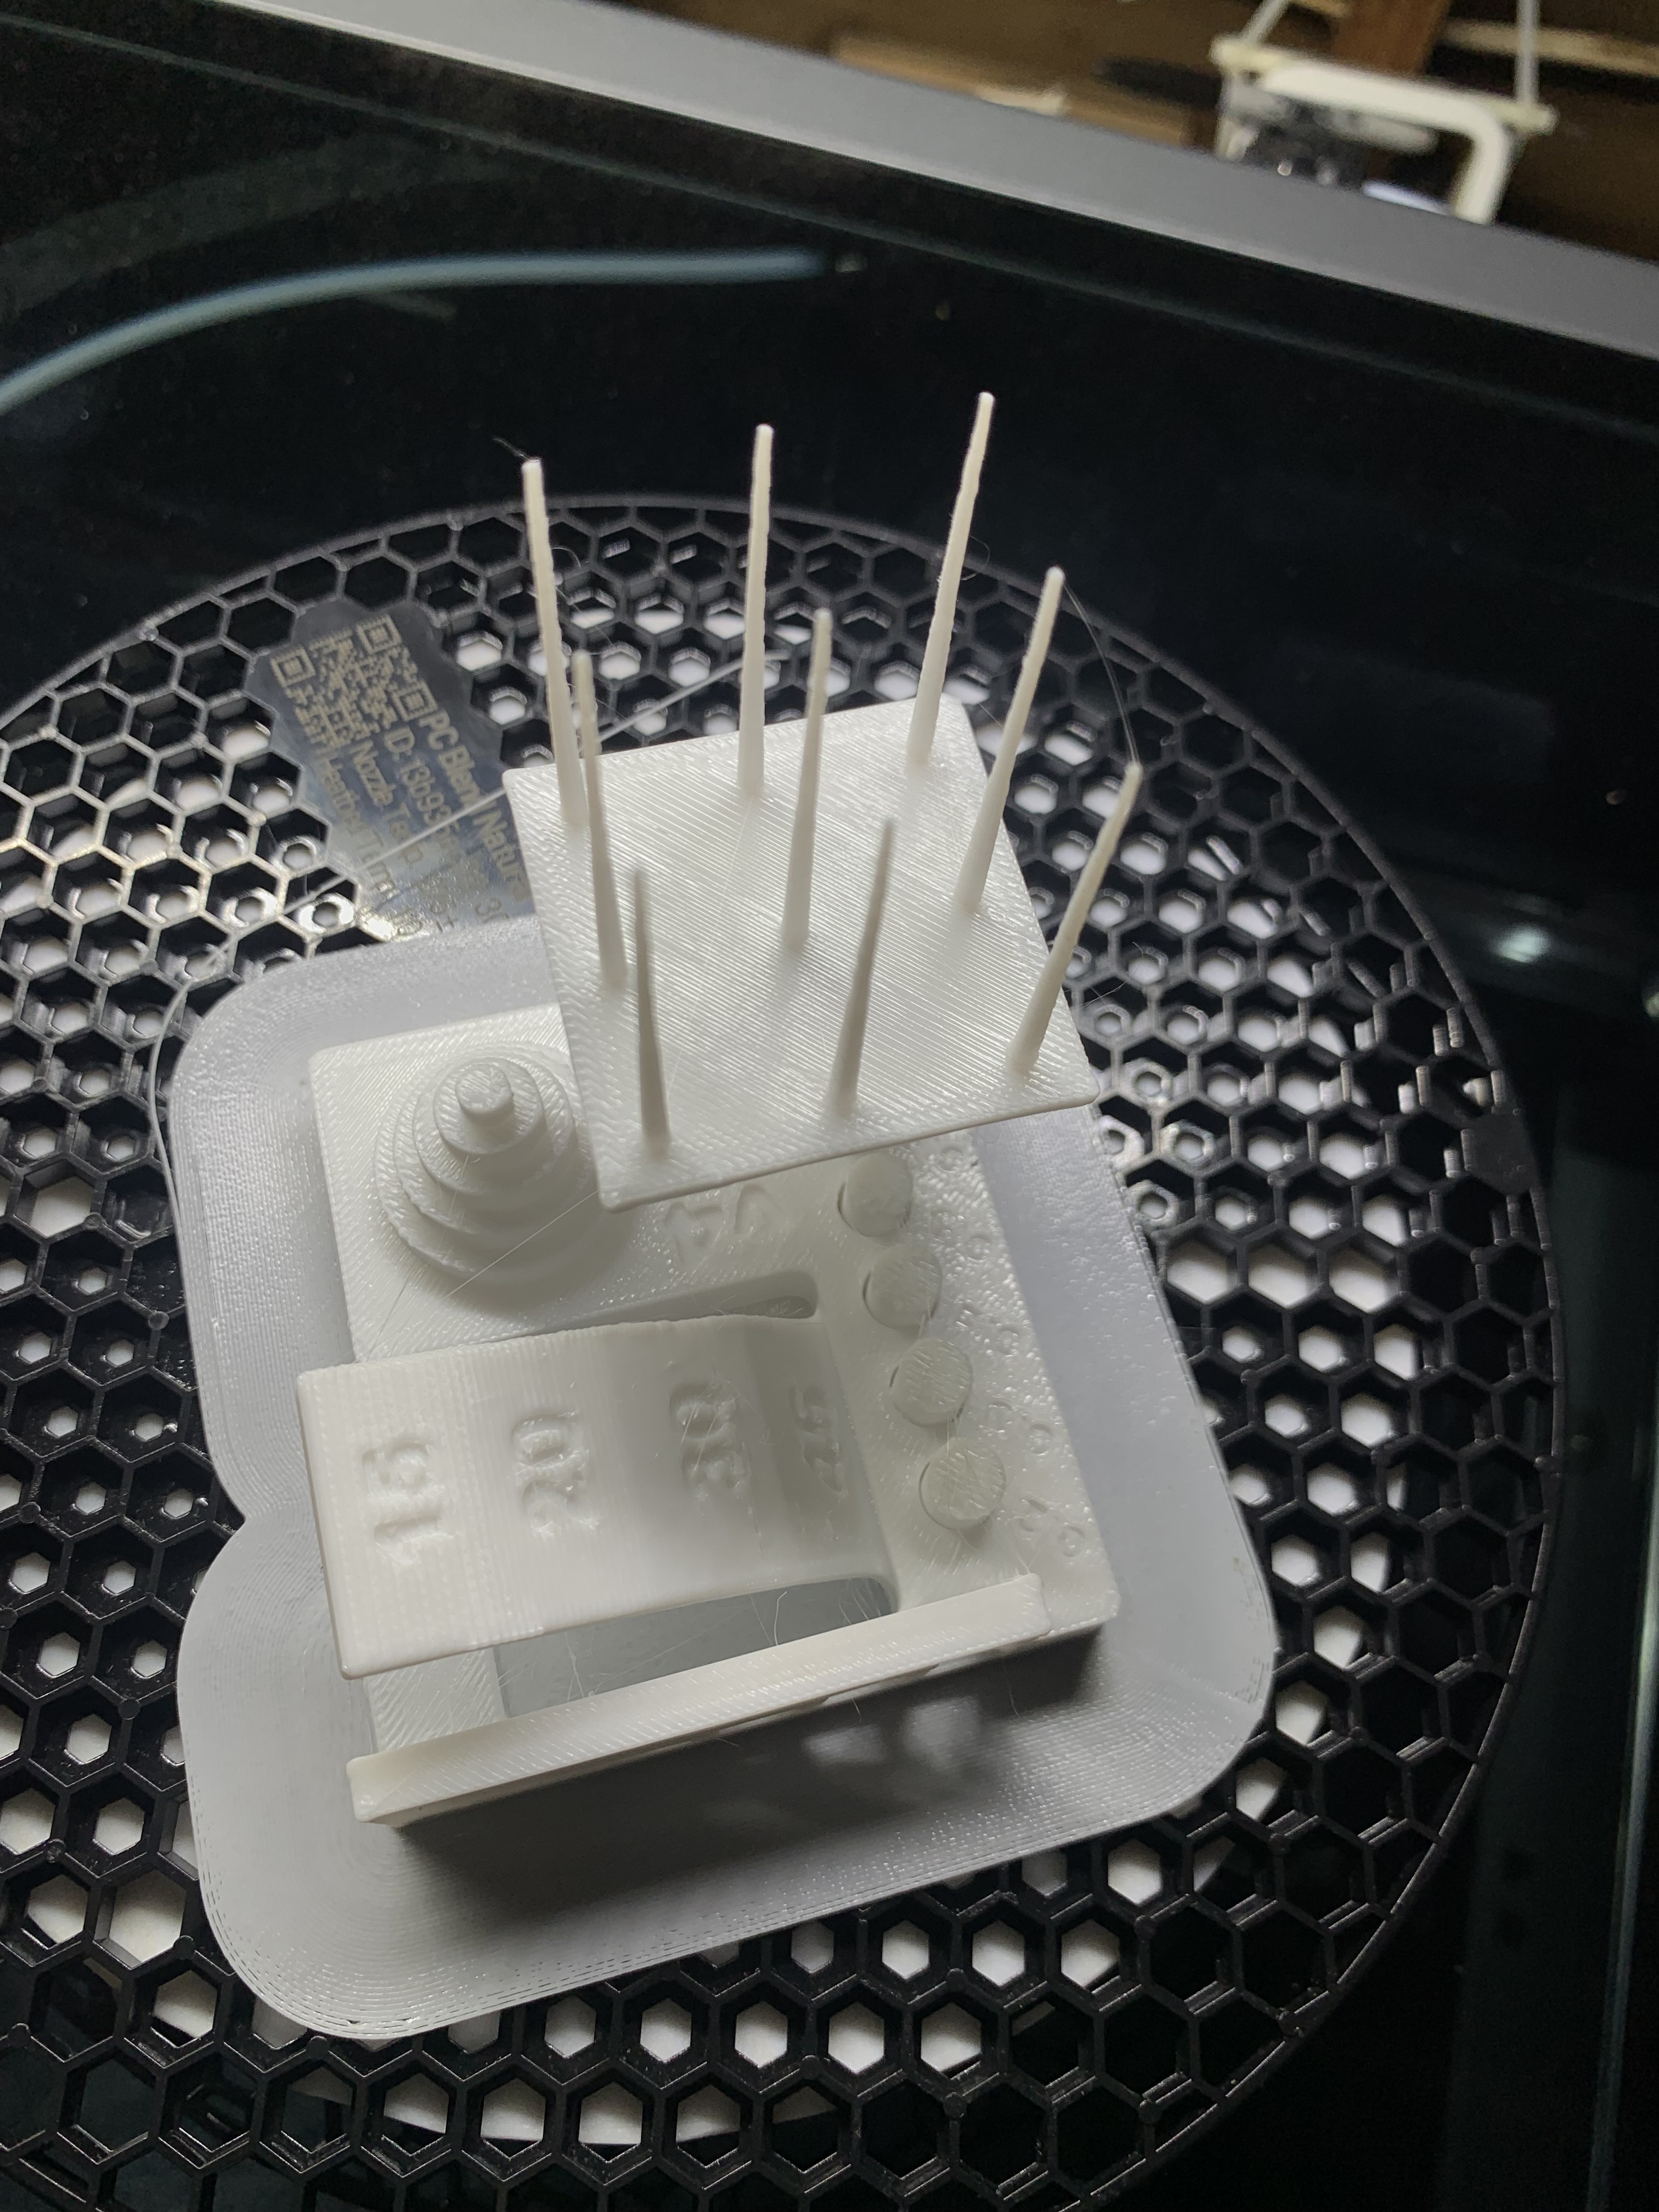
I will post images of the finished temperature tower. Also, the temperature tower i scaled it up by 50% to see more details and where faults occur.
Heres a thought I was watching a youtube video about the K1 series where they installed a glass bed with a magnetic plate onto the K1. But since the loadcells on the K1 are located under the heat they had to install a Cartographer3D.
Whereas the K2 Plus uses PRtouch to handle the leveling process. Sooooo I am thinking get a glass plate for an end 5 plus (Ender 5 Plus I believe has a glass bed at the size 377x370x4) and ask a vender to cut a magnetic sheet and spring steel build plate to see it works without having install a new probe or custom firmware.