yesterday I mounted the sonic pad on my ender 3 v3 se. I performed both the test to calibrate the print bed and the z offset test several times. the printer cannot find decent values and it is impossible to print. either the nozzle is too far from the platen, or too close to the point that it scratches both the platen and the printed surface. from sonic pad it is impossible to manually calibrate both the z offset and the printing plane. how can I solve it?
furthermore, in some cases, I notice that the motors that move the x and y axis do not stop and cause the belts to slip a little with consequent wear.
I currently find myself with an unusable device that gets damaged every time I try to print.
Are you using the serial cable to connect your V3 SE to your sonic pad?
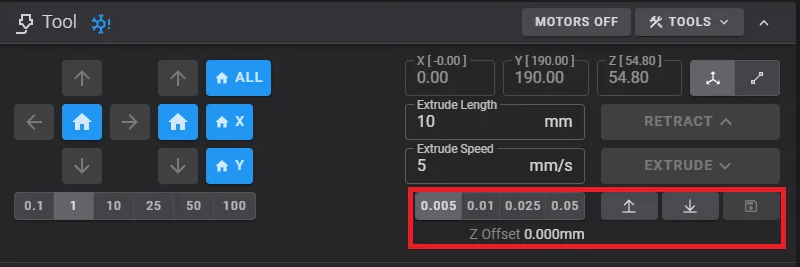
You can adjust the z offset by accessing the web UI of the sonic pad and using the z offset control buttons, you can then also save the offset using the save icon next to the adjustment buttons.
Thanks for your reply Nikoli.
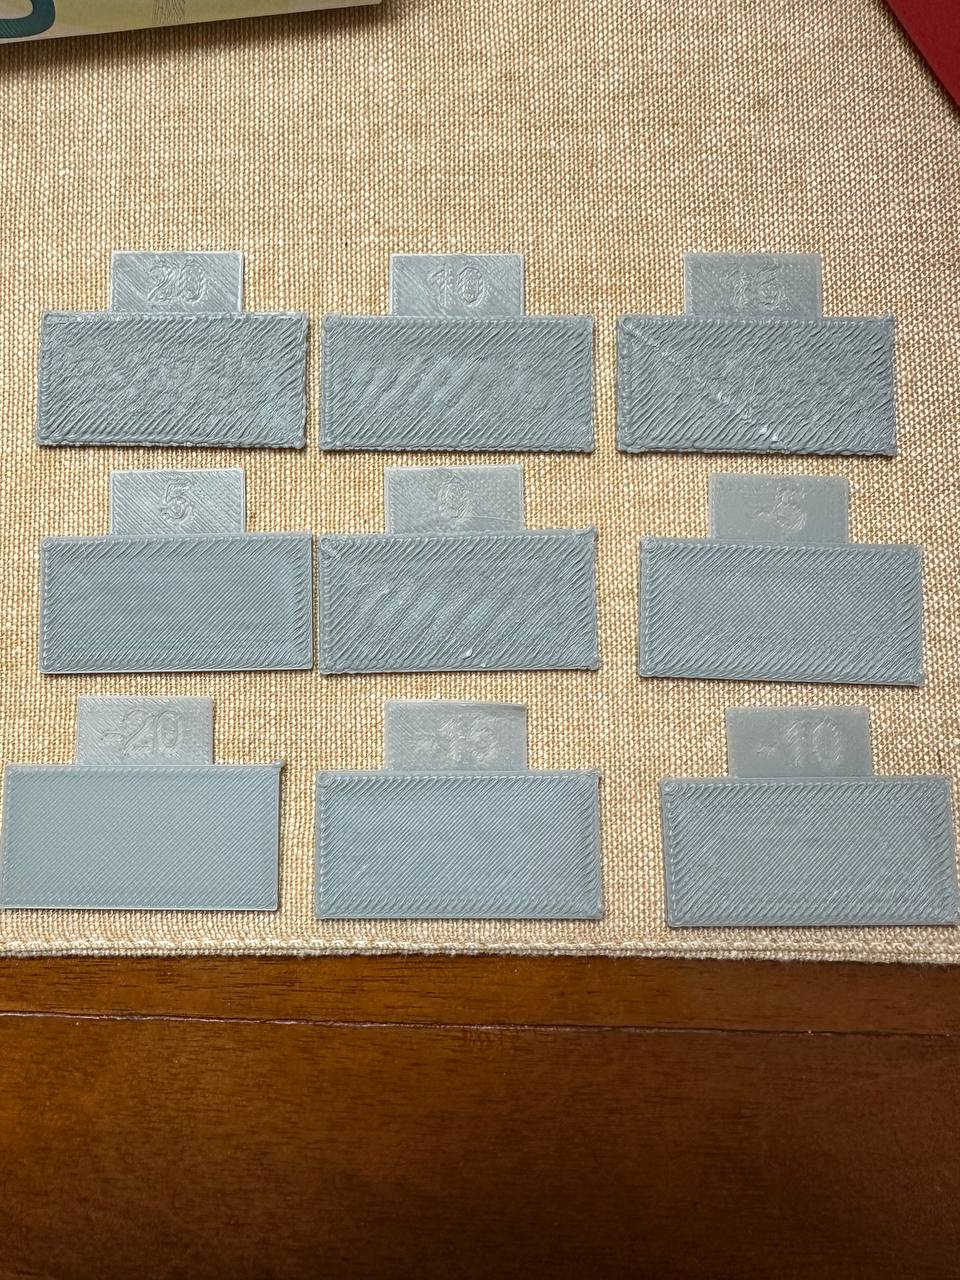
yesterday I tried both the keys you reported in the web interface and the klipper command for manual calibration. I managed to find an acceptable value of the zoffset, but I don’t know if the values detected for the bed are correct or wrong like those that the pad detects for the zoffset. I currently have a 6x6 mesh setup and have managed to print a few thumbnails.
unfortunately using the orca slicer profile for the ender 3 v3 se (the marlin profile), I had several extrusion problems (even selecting klipper in the printer settings on orca). the flow test gave me an extrusion parameter of 0.77 which once applied does not work (the nozzle seemed to scrape on the print bed). with the stock value of 0.98 some files suffered from excess extrusion and the nozzle scratched the surface of the first printed layers. maybe I solved it by using the profile for the ender 3 v3 Ke on orca slicer. I still have to do extensive testing to see if it works consistently.
It is unacceptable that the software for calibrating the sonic pad has the same detection problems that I had on marlin, if not even worse. the only advantage is that I can correct the z offset during printing or manually via a sheet of paper.
I keep having y-axis motor slips every time I select the button to return the axes to the home position, randomly. at this rate the gears will be damaged. is it a sonic pad bug?
sonic pad promises faster printing speeds, but I still take the same time for my prints. How do I know how I can change the speed and accelerations on my slicer? there is no documentation to help you configure the slicer after switching to klipper. The real performance of my printer with a klipper system is not known. it’s all very frustrating…
Are you referring to the values displayed on the screen when bed leveling?
If so these values are the distances from the nozzle to the bed which the printer will compensate for during the print.
If your nozzle is scraping on the bed then you have your z offset set too low, try raising your z offset to prevent the collisions with the bed. Once you have tuned the z offset height try redoing the flow tests in Orca, be sure to do both tests.
The Sonic Pad is designed to pick a z offset value that it deems “safe”, on all printers it is very common to need to adjust the z offset after leveling and calibration as not all filaments flow the same way and not everyone uses the same nozzles.
The slipping sounds to me like either incorrectly tensioned belts or an incorrect bed size being set in the Sonic Pad configuration. If you could clarify what you mean by slipping it might be easier to diagnose. Feel free to post a video of the issue if easier.
The printer will run as whatever speeds you set within the slicer. The reason you are able to use higher speeds with the Sonic Pad is due to the extra features such as input shaping and pressure advance. This allows the printer to print faster with less errors as the printer will adjust its flow etc throughout the print to ensure the best quality possible.
I generally find the best way to find you max speeds you should print as by printing the Max Flowrate test in OrcaSlicer. It will print a test model and increase the printing speed on each layer allowing you to easily determine what the max speed of your filament is.
when I talk about a y-axis motor problem, I’m referring to the fact that the printer moves the bed towards me (Y 230), and doesn’t stop. the engine continues to turn and I can feel the gear being forced by the engine. you can hear the noise of a mechanism that continues to rotate even if the plate has reached the end of its journey. this movement lasts 1 second, and then Y is brought back to 0 where the bed touches the switch and everything works normally thereafter. this anomaly occurs randomly every time Y moves towards me. Was I able to explain myself better? sorry but I’m Italian.
Thank you for clarifying, I understand what you mean now No need to apologise, your english is very good
It sounds to me that the endstop of the Y axis needs adjusting to prevent the collision with the end of the rail…
Home your printer and then move the Y axis as far as it will go without collision, make a note of the value of the position of the Y axis.
Open a web browser and enter the IP address of your Sonic Pad, in the sidebar select the “Configuration” button, then open the printer.cfg file.
Scroll down and locate the section [stepper_y]
You should see position_max: with a value after it.
Change the value to the one you noted down earlier on when you moved the Y axis.
(Your new value should in theory be lower than the default value.)
Select Save & Restart at the top of the screen and the Sonic Pad should restart its firmware.
When you next run a print you should hopefully find that the Y axis no longer collides with the end of the rail
I’ll try it as soon as I get home from work. the strange thing is that it doesn’t always happen. many times I select the home button and everything works perfectly. Sometimes I had the impression that this also happened on the X axis but in a less perceptible way.
It sounds like you may only need to adjust the value by a couple of mm to prevent the collision. Sounds like the current value is just on the edge of the limit.
so…my stepper y position max is 223. in stepper x 220. i have the problem with these 2 values. (I’m under 230).
I can’t understand why every time I start a new print, after turning off and on the sonic pad and the printer, the PLA doesn’t stick to the plate and I have to re-adjust the z offset manually from the klipper web interface. i always save config. IM becoming crazy…
beyond the first layer of fill, it always seems too extruded. I attach the photo. I did the flow test on Orca. as I explained before it returned me a parameter of 0.77 which did not print the second test. There is some other anomaly that I can’t understand. with marlin the first test, give me a value near 0 and -5. 0,98 is a good value with marlin (in the test in photo, i start from 0,98) I also attach the photo of the flow test.
Today I’m continuing to print and doing various tests. I have the impression that since I have been using sonic pad, there are obvious anomalies. if I try to print the same object several times with the same parameters, I notice significant differences. sometimes the nozzle seems to extrude well, other times it seems to extrude too much. I just continually adjust the zoffset. I even lowered the printing temperature, but I can’t find a stable setting
Did you get a chance to look at the printer.cfg file to see what the max position of the Y axis was set to?
Have you tried using the After Sales videos to square off your gantry and also edit the z values of the bed to tune it? If not try the following videos as it should help you square everything up… Service Tutorial Ender-3 V3 SE Adjustment of X axis leveling
I followed all the after-sales videos, I did all the calibrations listed both here and in the other thread. it’s best to close this post and continue where I posted the photos of the miniatures with the bubbles on the base