Why is my Ender3 V2 making me so miserable?

I’ve had this printer for 2 months and it’s causing me so much heartache… at first it printed a few things pretty well. Basic things, but I didn’t have to do much at all to get it to work. I’d print a unicorn, a christmas tree, a dog, etc. Then I printed a really complicated articulated dragon, perfecto.

But ever since then, I’ve been totally up a creek. I started of course with all the standard parts from Creality. Then I switched to a new filament, LOCYFENS Silk PLA Filament Multicolor, 3D Printer Filament Rainbow PLA Filament 1.75mm +/- 0.02mm. But it worked like a charm for several prints, and then lastly, the dragon.

Now, I seem to have many different problems. And while that’s possible, I would tend to think that it’s all one thing, and manifesting in different ways. I’m a total amateur, so I’m learning this troubleshooting as I go.

First I think the hot end is clogging, so I replace the nozzle. Then I realize that the filament itself is literally worn through by the gears of the extruder. So is the nozzle not hot enough? I try 205, 210. I am trying to make another dragon, and I think I have found the issue now, so I print another. Makes it through about 24 hours of printing before boom, total failure, again at the gears of the extruder.

Do I just need a better extruder? Or is there a setting that will improve this one? I don’t even know if I should be wanted it to grab the filament tighter or looser - on the one hand it’s obviously slipping, so maybe it’s too loose. But it’s so tight that it grinds through it. Or again, is that the wrong tree to be barking up because the problem really exists somewhere else in the path, like the nozzle or the rest of the hot end? How does it print for 24 hours before the problem manifests?

I know answering these questions is incredibly hard without seeing it, and relying only on my untrained reports. How can I get expert advice? I thought about posting a task on upwork for a 3D printing expert, but then I got that 24 good hours and I thought I had solved it.

Any suggestions?
I can say with almost 10 years printing experience, the articulated dragon was a very difficult print. I think after 8-10 errors I finaly found the correct settings and I cheated a little by using a raft. But that was the only thing that worked for my Ender 5 plus.
After that I think I printed about 10 dragon’s without any problems.

That said, looking at what the last part of the dragon is. Is very small printing time and there is a lot and i mean a lot retracting involved in the last hour. I would focus on your retracting settings, maybe slow down your printing/moving speeds for the last part of the print.
With al the retracting the material will be crushed by the extruder more and more. Maybe the material is “harder or softer” than the other one you used? What I do know is that most silk materials are a little bit harder that the normal gloss materials.

Like the Poly Terra silk PLA material from Polymaker is very “hard” as my brass extruder wheel wears out after only 2 kilo material. That’s why I’m using a stainless steel extruder wheel atm. But still this one wears out after 4 to 5 kilo. Not ideal, but I love the silk material from them.

Do you have the same issue’s with your normal PLA material? or only the silk rainbow?

I haven’t tried different filament yet. Would that be the first thing you tried? Didn’t seem like the most (or 2nd most) likely problem so I didn’t try that.

I only got to that last printing part 1 time recently, but it’s been all sorts of other times as well, with the ground-through filament at the gears. I had no idea changing those gears would be a thing, would have never occurred to me that that might wear out in 5 years, metal defeats plastic, I would have thought.

So, if it was you, first thing to try would be new filament? I don’t take very good care of my platform either. I scrape it but am I killing myself by not using rubbing alcohol to clean it? It looks quite beat up. I do have lots of trouble getting the distance from the nozzle to the plate correct from run to run. Takes a lot of honing, every time I get a fail, I have to re-calibrate it.

I’d love to know what an experienced user does every time they do a run (before and after), and what they do differently when it fails vs success. Right now of course I usually have to remove the nozzle and clean it, pull the filament out, take off the rubberized spacer and clean the hot end. I don’t do much cleaning INSIDE the tubing because frankly I can’t figure out really how to do that very well, and my judgement has been that once I put it all back together and I can get the filament to come out freely once I heat it up, I must not have a problem in the tube. Wrong? Then I have to re-balance the 4 corners to get the distance right again.

An interesting note - on the right side of my printer, the 2 wheels on the outside of the print head scaffolding really move freely with my finger. I thought that was a problem but the inner one, with the motor, certainly doesn’t. It’s tight. Is that normal?

So many questions…

Are more modern, expensive 3D printers less trouble and less ‘manual’?

Thanks!

Ok, when you explain it like that. I think your printer needs a little bit of love :wink:

Check you extruder wheel, if you see that the teeth are worn down replace it with a new one.

Each 3 to 4 months I clean my glasbed with dishwashing soap by hand. And rinse it of with warm water. Becarefull that it doesn’t slide out your hands :slight_smile:
If you coating on the glas bed is damaged just take it off, clean it and flip it. So the coating is facing down. After that apply some hearspray or use 3Dlake (only fine layer).
When your print is done, apply some water round the print and let it cool. It will most likely come off by itself. When It doesn’t take a sharp and very flat object (scalpel works like a charm) and try to get the water underneath the print.
This way you almost never have to recalibrate your bed :wink:

I think that I need to calibrate my bed once every 2/3 months this way.
When I calibrate my bed I use a post-it, so not the 80 grams paper they say in the manual. This will place the nozzle a little closer to the bed, but it work great.
When you have the paper between the nozzle and the bed move the post-it and tune the bed untill you feel a buzz like vibration in the paper (the nozzle will almost touch the paper but not very hard). Now apply the on all 4 edges and do this 4 - 5 times untill all corners feel the same.

I never take out my nozzle to clean it. I just take off the silicone sleeve heat up untill 215 and wipe the nozzle clean with some paper cleaning towels (this can be hot so don’t burn yourself) and place the silicone back.
When your have a lot of blocks of the nozzle just replace it. I know from testing that the material on the inside will keep blocking the nozzle after a long time of printing.

When ending a print I wipe off the water and done.
When starting a print some times wipe the dust off (some times with a wet paper towel). And depenting how much I printed ones 20-30 prints apply a new layer of spray. That’s all :upside_down_face:

The Ender 3V2 is a cheap printer, but will work like a charm with some love. Ofcourse if you have a bigger budget, go for a Bambu or Prusa :slight_smile:

1 Like

You should also find that the extruder has a tension adjuster on it, try loosening it off slightly if the extruder gear is chewing through the filament, it should be leaving tiny grooves in the filament and not chewing it up.

1 Like

Forgot about that, yea that’s a good plan :slight_smile:

1 Like

As for this issue.
I think the tension isn’t right on one side, all wheels need to touch the beam. It’s a balans you need to look for.

1 Like

Thank you for all the leads - busy right now but I will try them out asap and report back. Thank you!

1 Like

Goodluck, you know were to find us :upside_down_face:

1 Like

Finally got around to trying a Creality filament, but no success. Same basic outcome - after about an hour, filament stops feeding through the pipes. Waking up this morning it is completely severed in the extruder. I think maybe a dual gear extruder would be smart? This is very frustrating, heck of a lot of work and trials without a single successful print to show for it for months now.

So it starts out printing great and then… :sparkler:…?

I’m wondering if somehow the heat is moving up the hotend to the filament and when it get too warm of course the gears can’t push when it’s mushy…
Just thinking out loud here…

Maybe send a pic of your setup and extruder…?

Just looked back into it again today and discovered that the extruder gear was not firmly attached to the vertical pole, with those tiny screws that hold it tight. So it was spinning, but the gear was not turning. How long had that been the case? Seems unlikely that it was ever the case until last night when it failed, since it’s not as if that would ever not be a problem. So I fixed it, much tighter, and ran it again. So far so good, an hour into a run, it still is working like a charm. We will see how long that holds…

:grinning: :+1: Well I’m glad you won that battle… Always check for loose parts on yourself and the machines…
Glad you got it rolling again…Hopefully it stays together…

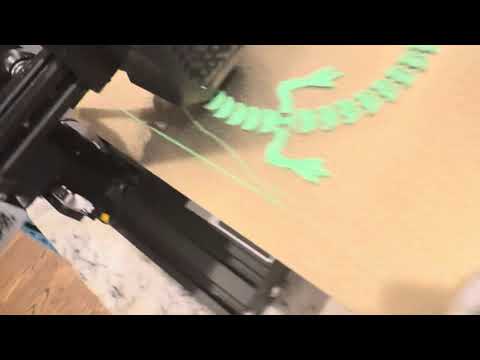
Another fail I’m afraid. Same basic amount of output beforehand. Video of my setup below: Thanks for your attention.

Looks like it has chewed up in the extruder, maybe the gears are too tight and chewing through the filament? Smaller retraction distance might help too.

What throws me off is why does it always seem to work fine for 60-90-120 minutes before chewing up the filament. But i’m willing to loosen. How do I do that? I don’t see any obvious screw that seems like it would be the smoking gun. Can you point me to a youtube video showing it, or some good picture steps? Thanks!

This might help, not used that type of extruder in a couple of years so I can’t remember too much

Thanks - that video gave me some good background info but the part about the Ender3 extruder was very quick - seemed to say that removing the tension adjuster screw to reduce the tension furthest was the best outcome he had. I can try it!

Edit: So actually, removing the screw that they describe will only increase the tension, not reduce it.

Made a couple of easier things with the tension increased. Now trying my white whale, the articulated dragon, which I made successfully once, the first time, but never since. Turned down the speed to 75%. Fingers crossed. Leaving town, won’t know the result until Monday.

Sounds like your hotend is failing. Check the temp with an infrared temp tool. Mine is doing the same thing.