This may be useful information for others who don’t have a filament sensor in their set. Thanks for sharing. Coprint could indicate this on their Wiki page.
Yesterday I printed a solid black, with a poor quality filament that breaks. It did break, and the printer stopped, saying it ran out of filament. The interesting thing is that Fluid didn’t indicate this, only the printer. I just threaded the new filament up to the feeding extruder, then pressed continue printing, and from then on it automatically threaded the filament all the way through without error and started to throttle the printing. Then the same thing happened as you, that it stopped printing, printed a big blob on it, and started to continue printing. I think this could be due to 2 things, either it needs the flushing tower for 1 color, or the macro for restarting after filament runs out is not perfect. Or it could be that the parameters related to these are not good in one of the CFGs.
I figured it out with help from discord. Co print has yet to answer questions.
1 Like
Coprint support answer to my query about filament breakage was;
Generally speaking, after pausing the print and changing the filament, the machine should squeeze out the excess filament at the waste slot and then continue printing.
They asked me to record a video
I think it primed the nozzle on the print rather than at the “waste” spot
I noticed, because I noticed right after you wrote this, that when the filament ran out, the head came out completely to the right, and it pushed the tray all the way, and when I inserted the new filament and selected continue, it still extruded about as much as it had, even on the print. It’s like it did it twice.
I need to record it for co print support, but I’m so busy printing I can’t find the time to do it ;D
1 Like
I use a camera, but since I stopped printing, the timelapse video was automatically deleted. But I will record the reloading the next time the filament runs out. The error is in the G code in the macros. You should also try running out with multiple colors. I will experiment with it when I have time. Can a rinsing tower be assigned to a single-color print? I also asked this question on Discord, but they couldn’t answer it for now.
you could tick the box, but no purge tower would be generated if there’s only one filament
1 Like
In principle, the KCM set only works well with the Orca slicer. This is also highlighted in all installation instructions. There is no Coprint profile in Creality Print, and it is not possible to add one. There may be an update for it in the future, but as far as I know there is none. Install the latest version of the Orca slicer and try printing with it. Installing Chromahead will reduce the printable area, but there is a solution, although you have to replace the print head carrier with a modified one.
In one color you can use Creality Slicer , but with 2 or more colors no.
The reduce printable , its the problem i have. and it not in the creality store info, .
use @frause head carrier
https://www.printables.com/model/1268100-ender-3-v3-plus-x-carriage-for-coprint-chromahead
and modify the cfg files to recover lost space
1 Like
Filament change video;
Note, I inserted the new filament before pressing retry.

It worked as expected
1 Like
I made a video too. I used it with two colors. It did the same thing as you. However, if I use only one color, then on top of that, when it goes back to print, it goes towards the print and extrudes a huge blob onto the print, then continues printing as if nothing had happened. But this small mistake is also annoying, because as you can see, it got stuck in my head. A short while later, after I stopped the video, it tore up the part that had been printed so far. https://www.youtube.com/watch?v=J8urTub8q4E
it would be great to be able to share thios with creality support
can you put it on a google drive ?
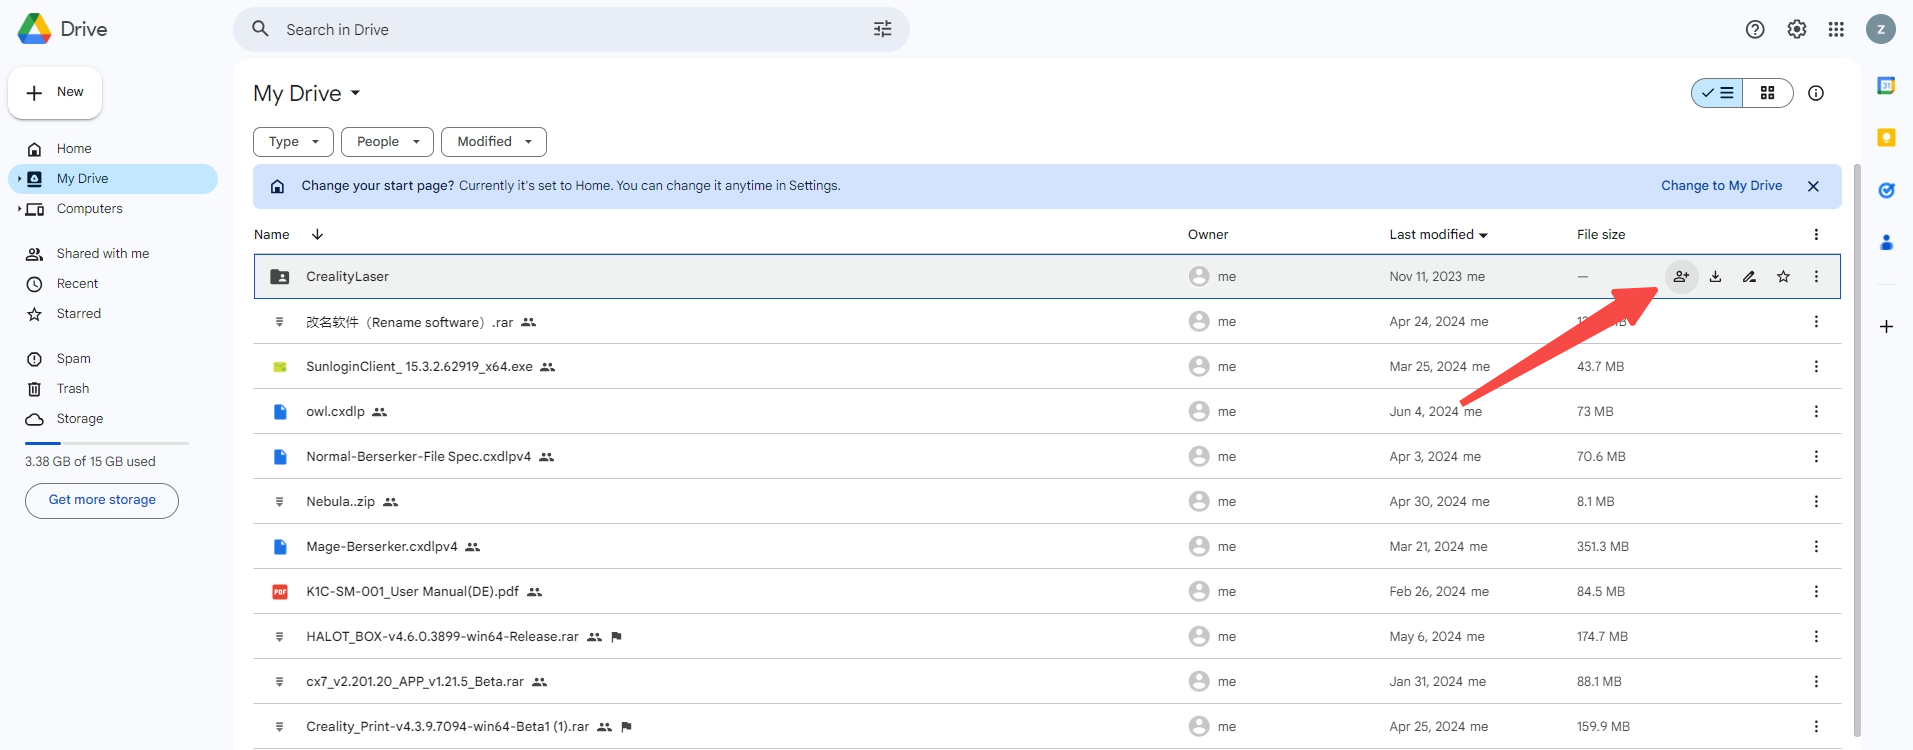
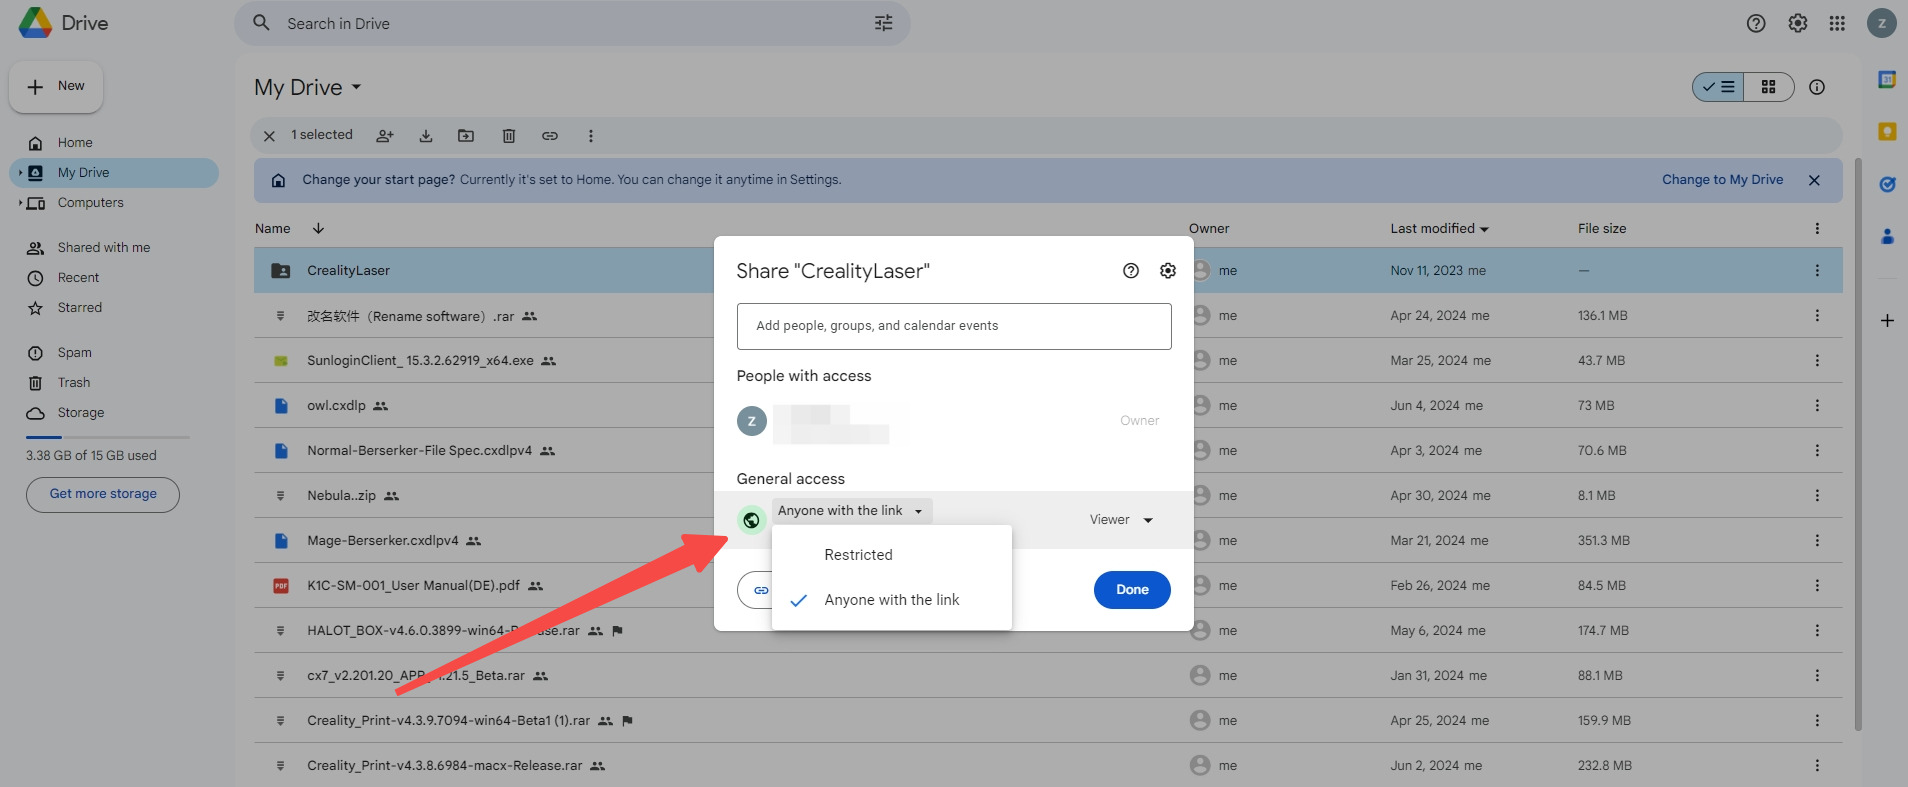
That’s the way they asked me to do it, so I could share it with them
1 Like
I’ll upload it when I get home, but in the meantime it’s available on the YouTube link. Does Creality need it too, not just Coprint?
1 Like
I sent them the YT link, we’ll see how it goes
1 Like
I have changed to head using frause’s model. Not as difficult as you might think. In fact using a full carriage replacement method from the start would have be less work and less time consuming than the default prescribed method where you clean out the metal carriage shell of all the print head parts and fitting the Chromahead on the front. This way you basically just remove and replace the entire print head.
Be careful to not overtighten the screws for the z-axis though. Be sure to also use frause’s “Extruder bracket” (https://www.printables.com/model/1259385-coprint-kcm-mount-ender-3-v3-plus/files) or some other alternative as the homing movements hits and moves the default top brackets horribly.
1 Like
After finishing the head carriage replacement and printing multicolor prints using Orca for a while now, I finally upgraded to Creality Print (version 6.1.1.227 at the time of writing) and was able to get a successful multi color print first time, just as in Orca. Just an initial test, nothing fancy. I sliced a cone with several different coloured layers, and included a purge tower. I did not get the errors I used to get at the start of the print with previous versions. For the profile I basically just copied my Orca profile for the ChromaSet. This means I just edited the stock V3 Plus profile by changing the Machine G-Code settings for
[Machine start G-Code]
start_print EXTRUDER=[initial_extruder] EXTRUDER_TEMP=[nozzle_temperature_initial_layer] BED_TEMP=[bed_temperature_initial_layer_single]
Machine End G-Code
END_PRINT
Change filament G-Code
FILAMENT_CHANGE LAYER_NUM=[layer_num] NEXT_EXTRUDER=[next_extruder]
PAUSE G-Code
PAUSE
All the other fields in this tab are empty
In the Multifilament tab I have enabled Single Extruder Multi Filament (I think this might be on by default)
Manual filament change setting is off/unchecked
2 Likes
I started with Frause’s modifications right away. I just pulled the original head off the rail in one go. I can only recommend it to everyone. He figured it out very well. Coprint and Creality should sell it this way too. Yes, you still need the bracket for the carrier.
I’ll try the Creality Print too, although I’m already used to the Orca. They’re pretty similar.