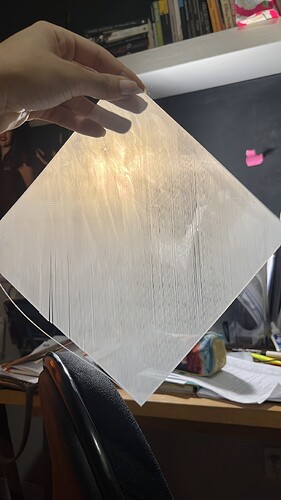
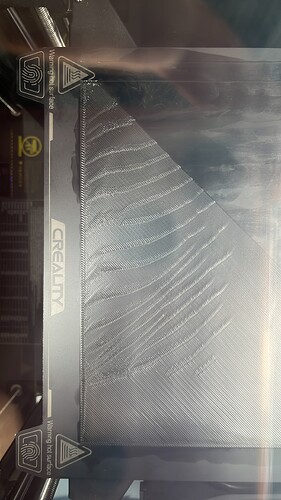
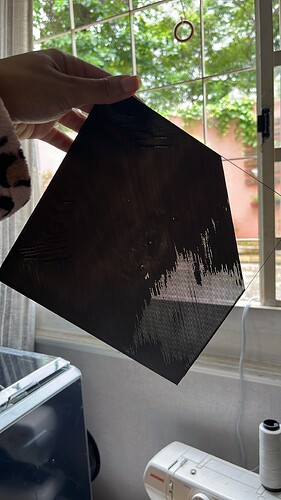
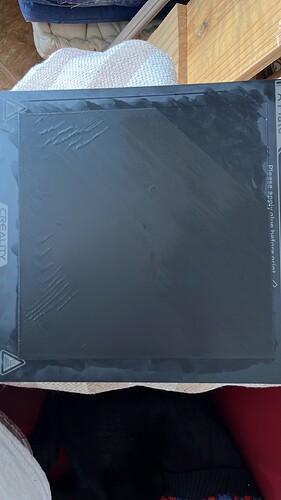
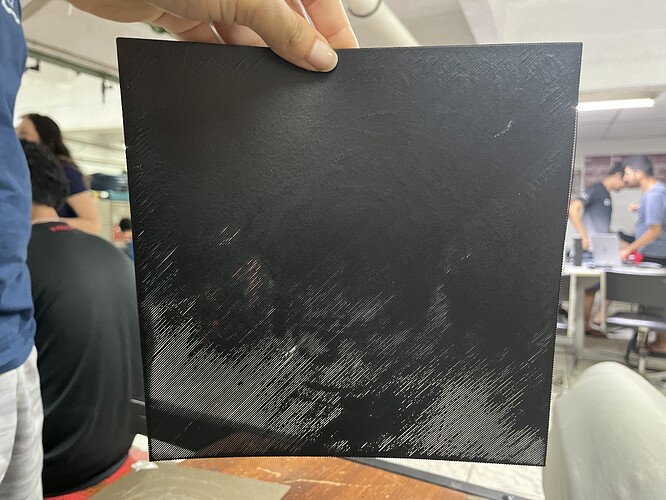
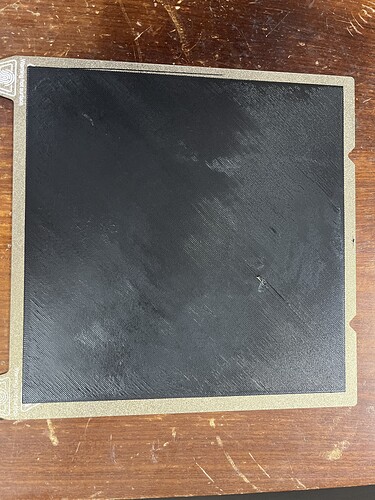
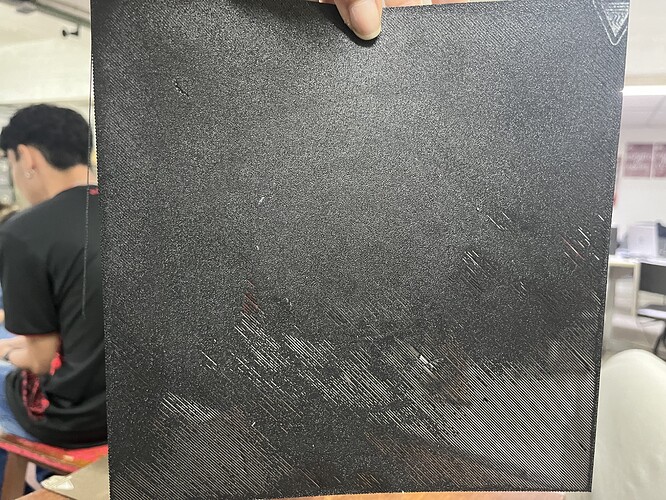
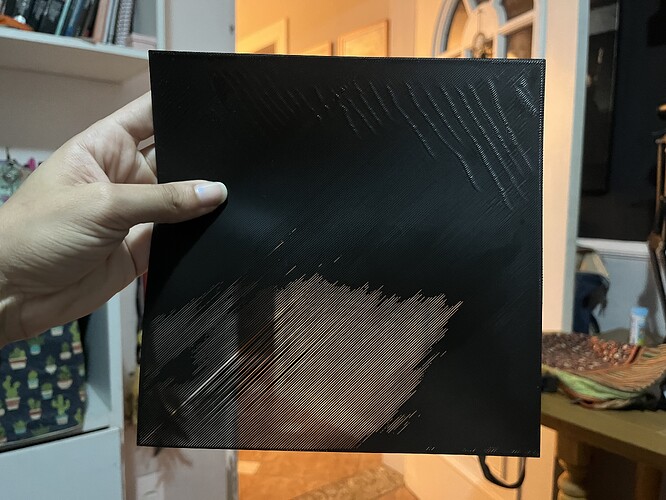
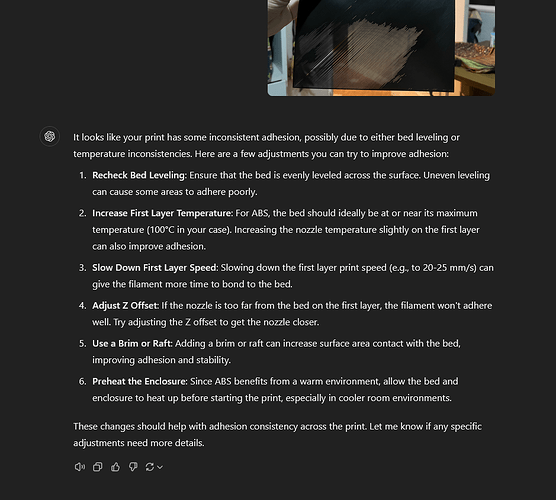
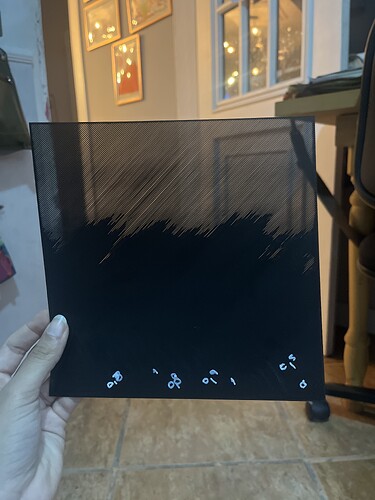
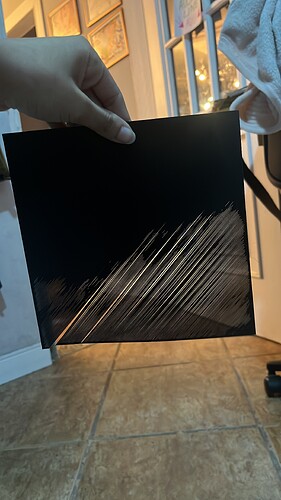
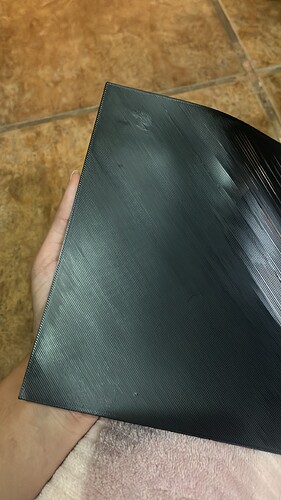
Hii, I bought a K1C last week, and I’m having this problem with the first layer. I did the auto leveling and calibration many times and i’m still having that results, I updated the firmware also. The white filament is the Hyper PLA with the standard settings, and the black one is ABS. I have a friend with the same problem, even worst. Someone knows how I fix this problem?
I also tried the textured bed instead the PEI, It’s better, however, not quite ideal. In the end of the day I wish I could use the smooth plate too for smoother prints.
Hello @Bililu …! ![]()
Welcome to the Creality Forum…! ![]()
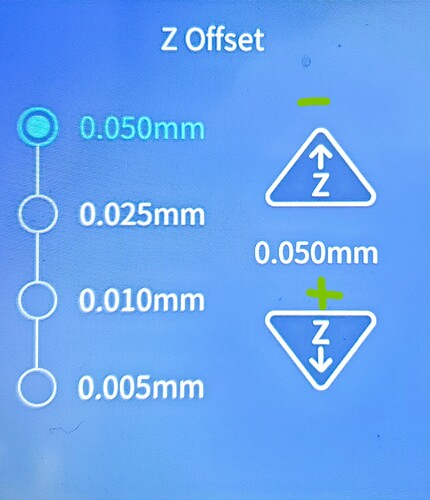
Try another test piece and set your Z offset using the menu on the printer screen to see how it prints out. A minus number brings the print head closer to the bed. Move a little each time and watch how it prints. Remeber the number as you may have to set it in the slicer for the printer profile.
The newest firmware version has a save button now to keep the Z Offset setting…
I’ve used this for PLA as I’ve not tried for ABS
Use Iso Alcohol to clean the build plate.
Settings / Expert mode / Z Offset
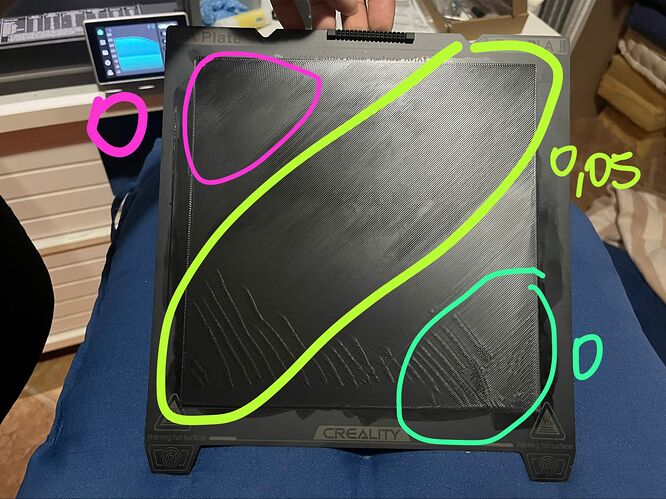
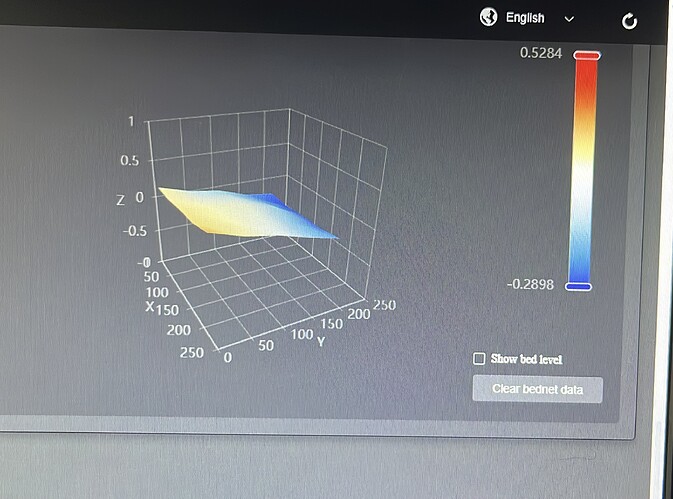
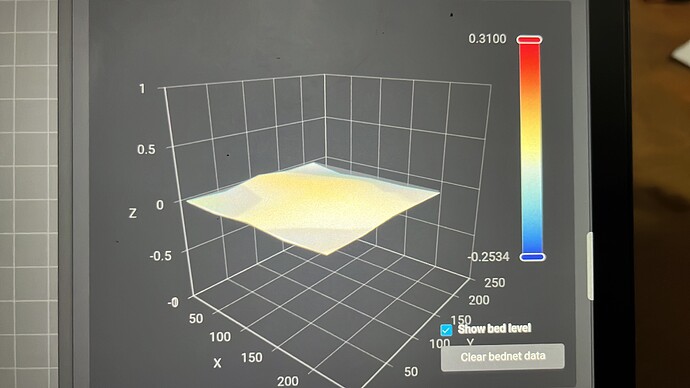
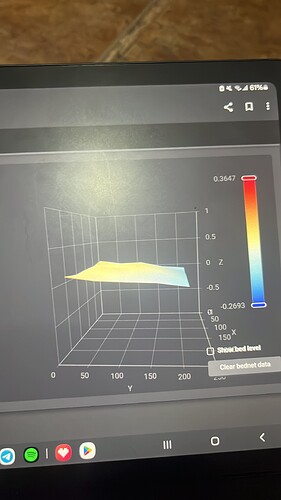
I made this change with the Z offset, I started at zero (green/blue), then changed it until the mark decreased (before 0.05), left it at 0.05 until the mark ended (green) and decreased it to zero again (pink). I took another first layer test file and increased the temperature a little too. I also looked at the bed leveling by IP, and it seems out of calibration. I didn’t want to disassemble it, because it’s still under warranty ![]()
why is the logo on there?
ive fought with this too, could be a bunch of things but i use ender 3 v3 ke
for creality or sovol pla my bed is 65c, nozzle 215 to 220
first layer width you could increase to 6 mm
lower the z offset like previosuly said by 0.05, (im not 100% sure on this amount)
there is a bunch of things to try.
I use chatgpt to help and really did help everystep of the way.
i uploaded the image and it can tell what to do, you can try the same.
for now looks like under extruding
Try replacing the nozzle, recalibrating and input shaping and possibly trying a new roll of filament. But I’d suggest trying everything separately to figure out what’s the actual problem.
Hello the reason your bed level is off because the lower belts are not properly adjusted. I think many people out there the past year or so have had same issues but not correctly done the procedure to level and align the bed as it should. The best we can get from the reading of your bed mesh is about 0.2 because of tooth size and the Z threaded bars which is enough to be honest to get good first layer.
:first remove the left and right panels
:You have to take the feet off
:Take the bottom cover off, there is fan connected to the cover so be gentle.
:In the centre you will see the pulleys/belt system
:take the top screw out and just slacken the lower screw lightly
:now take your time and pull down on that pulley system to slacken the belt then on your left or right Z threaded bars just twist them clockwise/counter clockwise to move up or down the bed by earring one tooth at a time to adjust for your needs
:then put everything back as it was then do a bed level and check your results
:you may have to do this once or a couple of times but take your time and you will be happy ![]()
Good advice Jafster
This really shouldn’t be happening with a brand new printer! My K1C came packed pretty well, but it’s disappointing to see that kind of performance from a new “flagship” printer! ![]()
Things move during transport, especially if the seas are rough. Then there is the couriers who sometimes take no care at all. Having been to their factories and seeing how they test things I can say it was working well when it left the factory. One of the tests it prints before it leaves is a full plate single layer .
I must have been a lucky one. ![]()
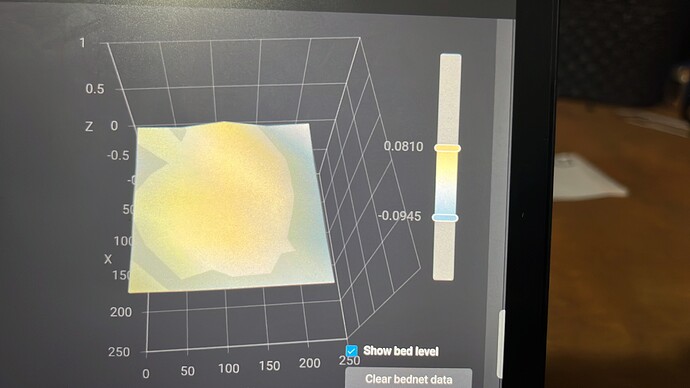
Hii, so I tried another solution to not open my printer. I founded this video about printing spacers and leveling with the online report. So I did that and had an awesome result with the bed leveling. However I printed a first layer again and had the same bad results. I did the auto leveling and also the reset, but I still with the same problem. I tried to change the z offset too with this new configuration, but didn’t worked ![]()
I did the calibration before printing and had a better result. However, this is the new graphic. Maybe the back Z axe is not working well? How can I see that? And have ways that I could fix that? I am afraid of missing the warranty deadline, and this be a critical problem. T-T
Hi you have too open it up don’t be afraid just take your time you can do it and have too. It not only will help your first layer but also have the Z screws and belts running in tandem so will run a lot better without putting undue stress on the motors like they start clicking as well as other issues. It’s easy enough do do and everyone has to do this in maintenance of the machine and for you to get to know it better.
Any info needed I will be here to help as much as I can ![]()
I opened and tried to do that. I did exactly like you and the official video described, but now one off the sides do a click sound. I already opened again and tried to revert, but still with that sound.
Don’t listen to people saying that the clicking sound is coming from the Z-axis motor; it’s actually the sound of one of the bushings that the belt moves along. This indicates that the Z-axis tension is too weak. Lower the table all the way down, disassemble the printer, remove the belt, and manually tighten all the gears to the maximum clockwise (the three gears responsible for moving the table). Once you’ve manually tightened them as far as they’ll go, secure the screws that lock the table in place so the gears don’t shift while you’re reinstalling the belt. Put the belt back on, and after you’ve done so, you’ll need to manually help the spring to apply tension. The spring tension alone won’t be enough—you’ll have to manually pull the belt tight. Then the clicking sound will stop. I know this from personal experience.
As for the poor first layer, I’ve been struggling with this issue since the first day I bought this K1C. I have another K1C that worked perfectly right out of the box. The K1C I’m battling with has had problems from the very beginning and has undergone a series of modifications. I replaced the hotend with one that can achieve a flow rate of 50mm³/s, and I printed a new table mount with adjustable leveling. The table is leveled to 0.16 at 65°C. Yesterday, I noticed that during a PROBE_ACCURACY test in Klipper, with 10 samples, I’m seeing Z-axis fluctuations around 0.08, which is unacceptable. The maximum value should be 0.0125. Now, consider that you’re printing at a 0.2mm layer height, and there’s a deviation of 0.08; it’s easy to see that this could be causing the first layer issues. Today, I’m expecting adjustable knobs with springs for the table, and if that doesn’t solve it, I’ll ask Creality to send me a completely new table with the main board and probes, as I believe these are likely the cause of the issues.
Thanks! But how I manually help the spring to apply tension? Do I need to tighten the screws on the middle piece of the belt more?
I tried to level up the table manually too(turning the gears by hand), but still with the click sound.
With one hand, you need to pull the plastic with the spring, and with the other, tighten the locking screw. I repeat once again, the clicking is coming from the bushing that the Z-axis belt runs on, from underneath the printer.
