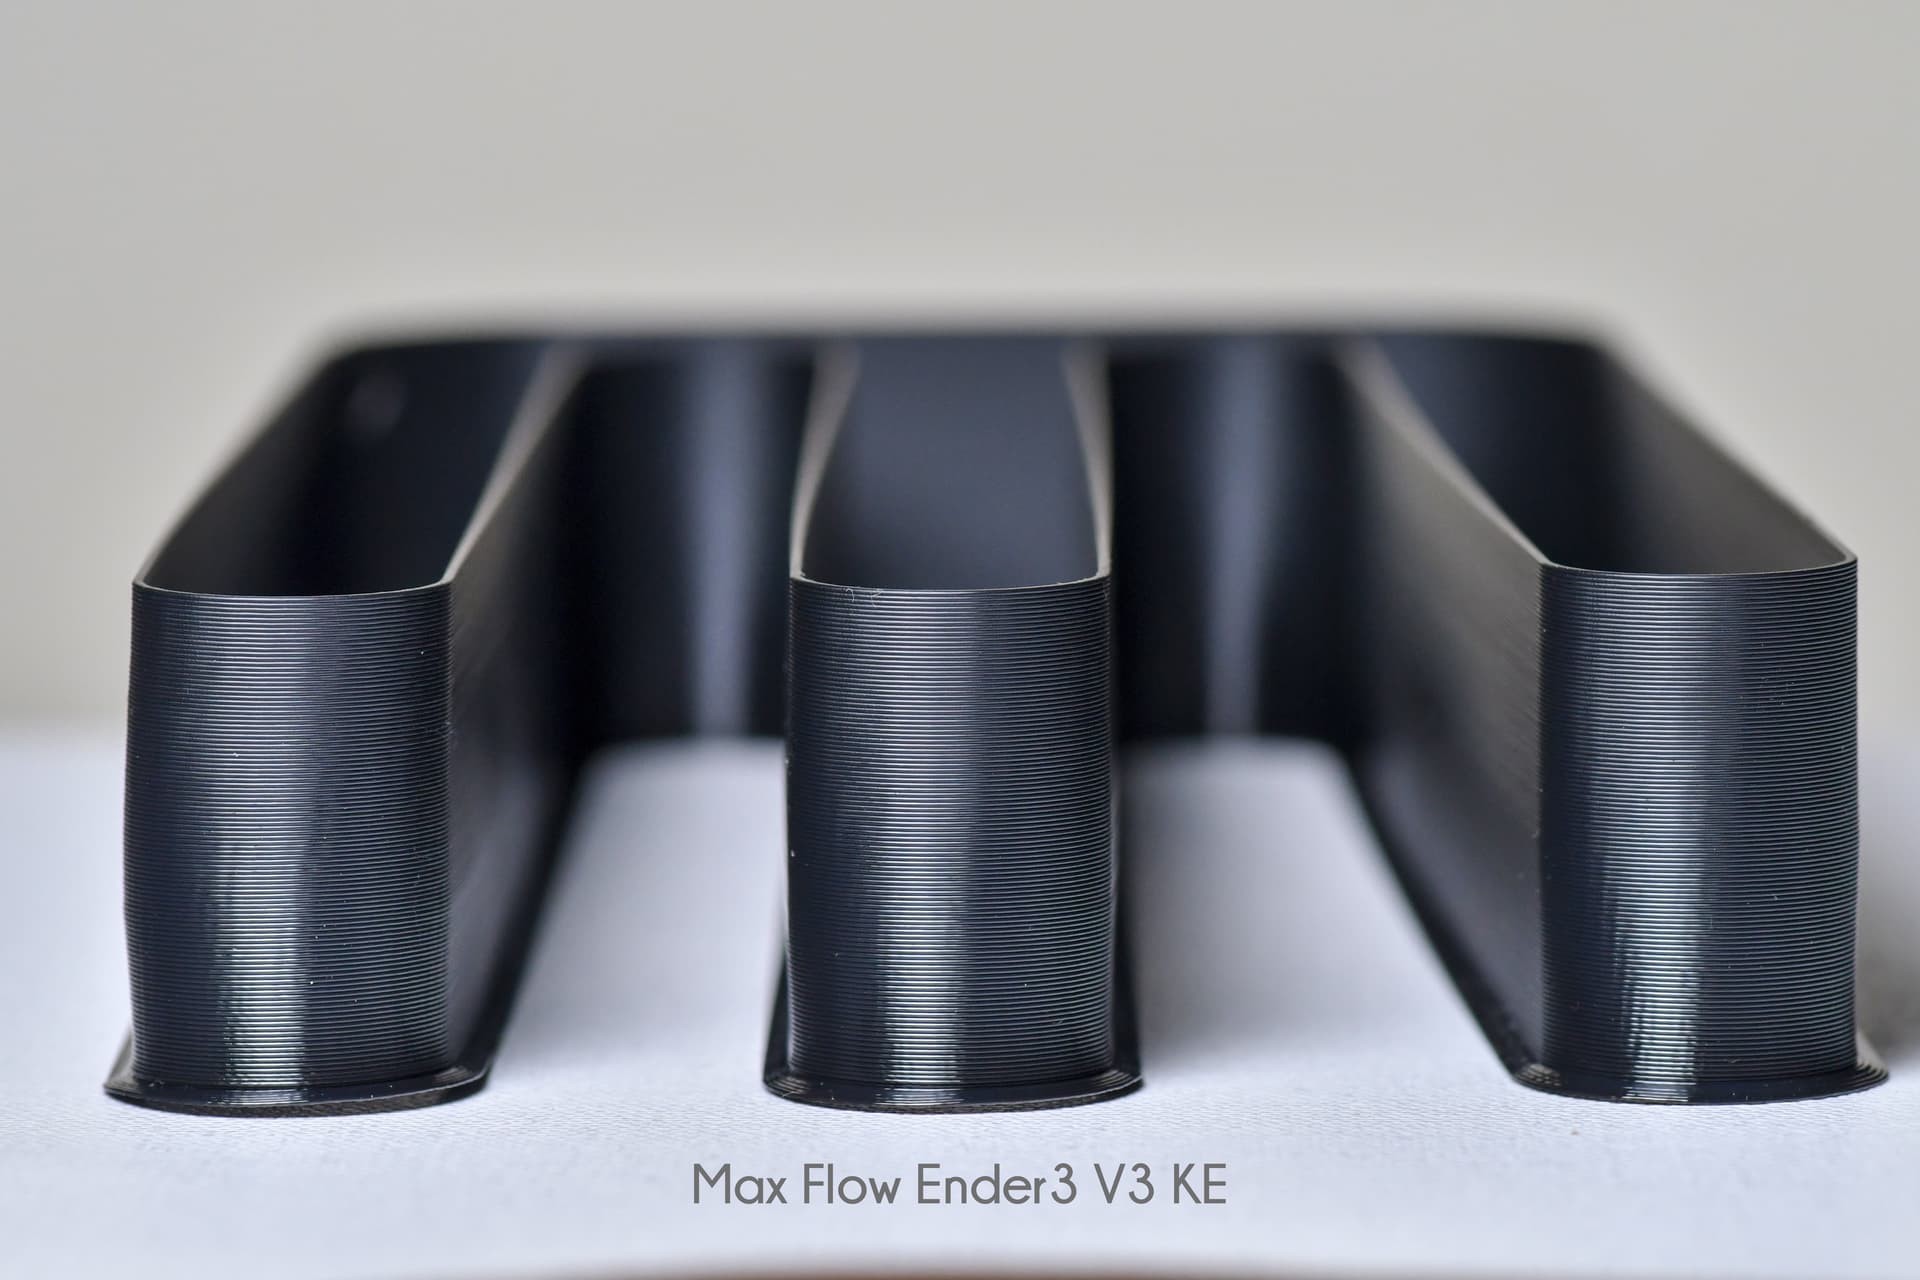
How would you evaluate these Temp and Maxflow tests especially the MaxFlow one? If you had to pick the best Temp what would you suggest? My observation is 220(?).
Also I have no idea how to evaluate the Maxflow model. What exactly am I looking for? I’ve read the Creality tutorial but it’s not the best. Some examples are “clicking” for me and others leave me a bit confused.
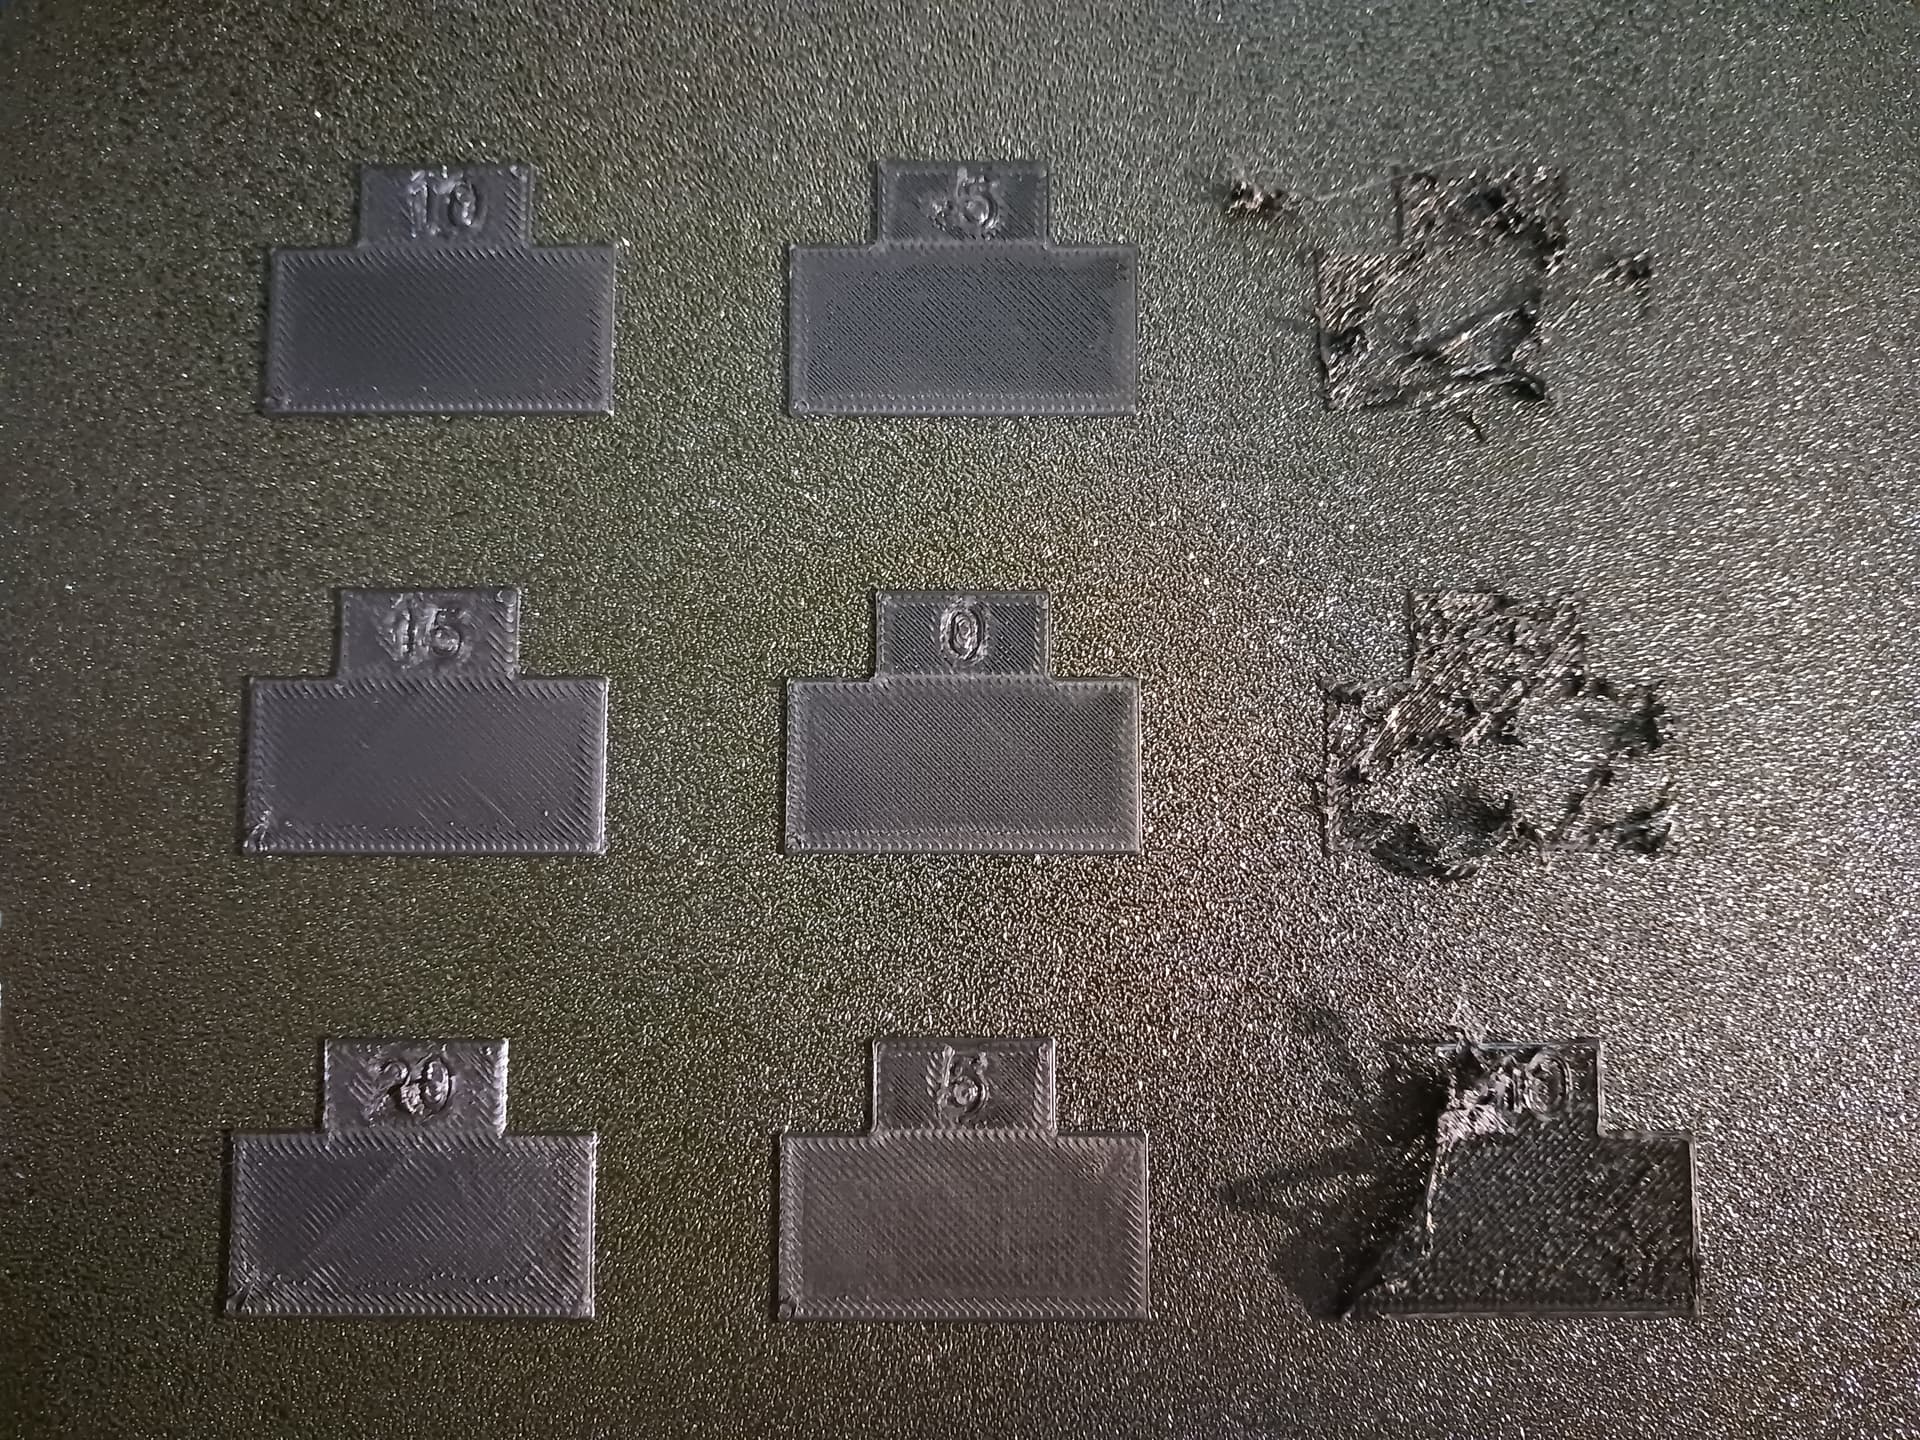
I can’t even complete the flow tests because of the issues in the photo and I can’t figure out what to adjust to complete it.
When it comes to evaluating the temp tower you need to check several things such as the rear of the model for cleanliness, the side of the model for overhang quality, the opposite side of the model for circular overhangs/holes and also the quality of the pin in the circle and also the quality of the bridging. You ideally want the temperature that shows no warping, drooping or under/over extrusion.
In terms of the max flow rate test you should be looking for the first layer that looks discoloured or has holes or missed filament and choose the layer that looks cleanest before the print started to deteriorate.
In terms of the flow ratio test I replied in your other thread…
Thanks for the reply. It’s frustrating because some parts of the temp test look best at 230° and others look better to me at around 190°. If I had to choose one I guess visually it would be 215°. But I’m not sure if that’s too hot or what since most models have a print temp of 200°
The Max Flow model has no holes, missed filament and no real “discoloration” except for the first layer looks a bit more shiny. I guess from that I can assume I don’t really need to adjust anything for Max flow. They’re all pretty close upon visual inspection.
I am guessing you are using Creality Print as your slicer going by the flow ratio pads?
Ideally with the temp tower you want both of the ends to be clean with no oozing or drooping and also with no gaps or holes, you also want a clean straight bridge over the gap in the middle, ideally one with least sagging.
It looks like your test wasnt maxxing out at a high enough speed for your filament so you could possibly run that test again but with higher values, not sure if this is possible in Creality Print or not.
In terms of the flow ratio you would choose the one that has the smoothest top surface to the touch, you want a surface with no ridges or valleys. Do not worry if some of the pads fail in the first test, they are not needed to continue on to the 2nd part of the testing. Even if your value comes out best as the 0 pad its often worth continuing on with the fine flow test to narrow down a precise value to be sure. When running the fine flow test you would select the pad that looked and felt best from your first course test print, the slicer will then usually generate new pads with a value closest to the pad you chose so you can double check and be sure the flow is correct not just as high flow in the first test but also at slower finer flows in the second test