How to Make the Most of Multi-Color .3MF Models on Creality Cloud?
The .3MF format print configuration files showcase immense potential and value in 3D printing due to their high versatility. This article will guide you on how to fully leverage the unique advantages of .3MF files on the Creality Cloud platform, from selecting files and editing models to configuring print parameters and sharing experiences with others, allowing you to explore multi-color models in Creality Cloud.
I. Log in to Creality Cloud to Select and Print Your .3MF Multi-Color Model
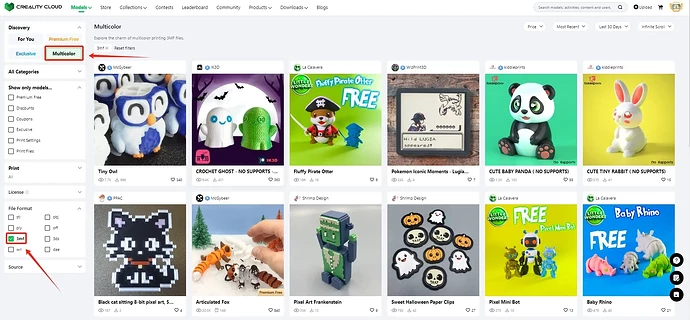
Visit the Creality Cloud website, click on “Models,” then select “Multi-Color Models.” Under the model file section, choose the .3MF option to filter and find your desired .3MF model files.
On this page, you can refine your selection based on personal preferences using the filtering tool in the upper right corner. This allows you to sift through numerous .3MF models to find the ones that best meet your expectations. Additionally, you can sort the options flexibly, making the search for your ideal model more efficient and personalized.
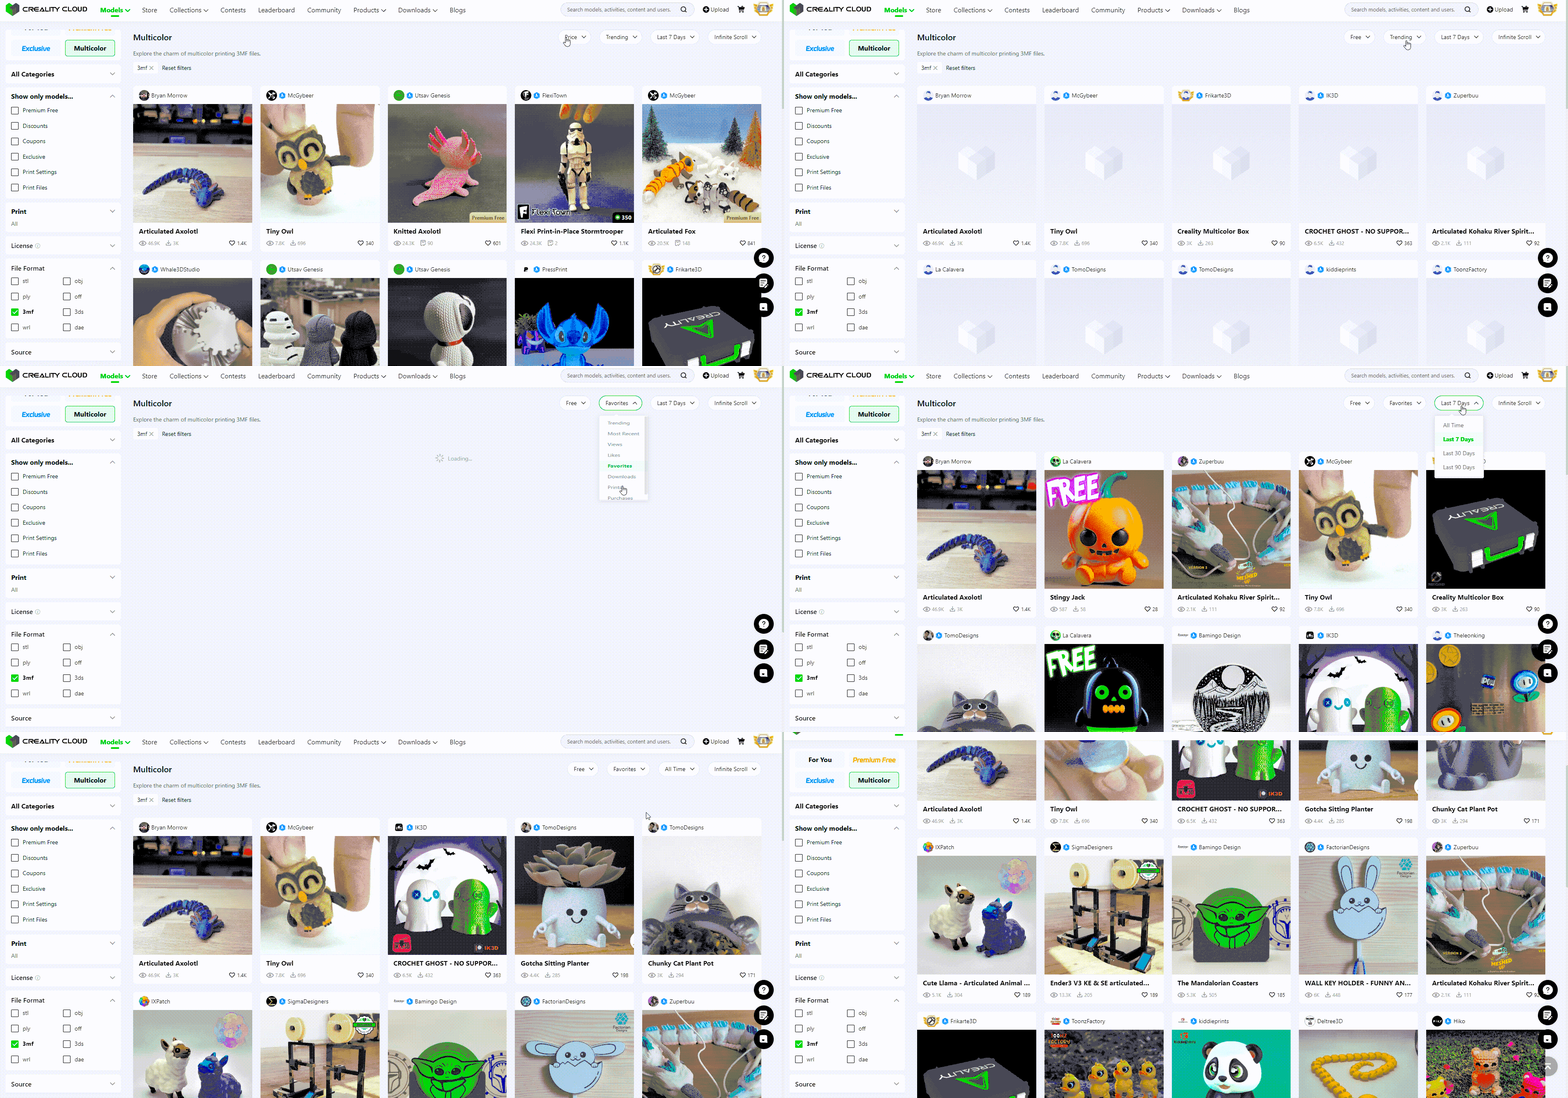
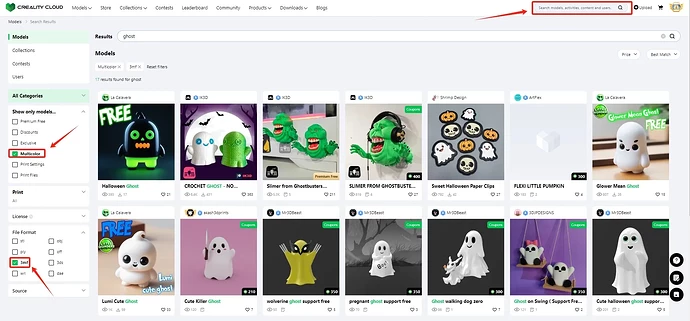
To more precisely locate your desired .3MF model, you can enter relevant keywords in the search box. Then, check the options for “Multi-Color Models” and “3MF File Format” to quickly filter out high-quality .3MF models that meet your needs. This approach makes the search process more efficient and targeted.
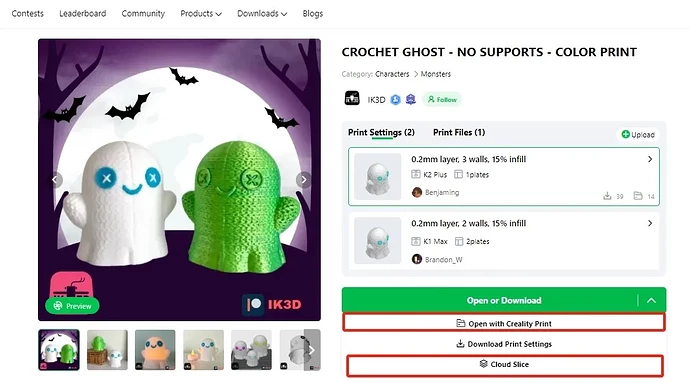
After selecting your .3MF multi-color model, you can perform slicing and printing operations on the model’s detail page. You can open the model in Creality Print for slicing; for specific details, refer to the article: How to Use .3MF Files with Creality Print?. Alternatively, you can use the cloud slicing and printing feature on Creality Cloud, which is more convenient and efficient.
Using Cloud Slicing for Printing:
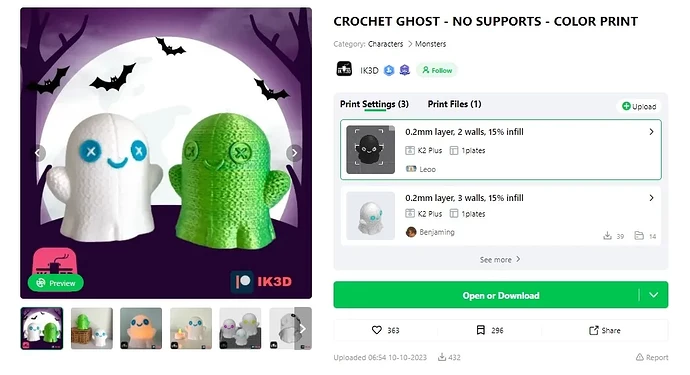
Step 1: On the model detail page, click “Open or Download,” then select “Cloud Slice.”
In the pop-up window, make sure to select the .3MF format model for the chosen design, and then click “Slice Now.”
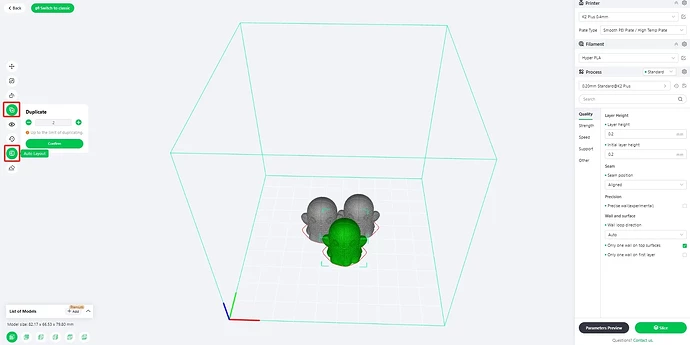
Step 2: Navigate to the Creality Cloud slicing page. In the drop-down menu under “Model,” add your printer type and click “Confirm.” Then, based on your specific printing needs, adjust the printing parameters located in the bottom right corner.
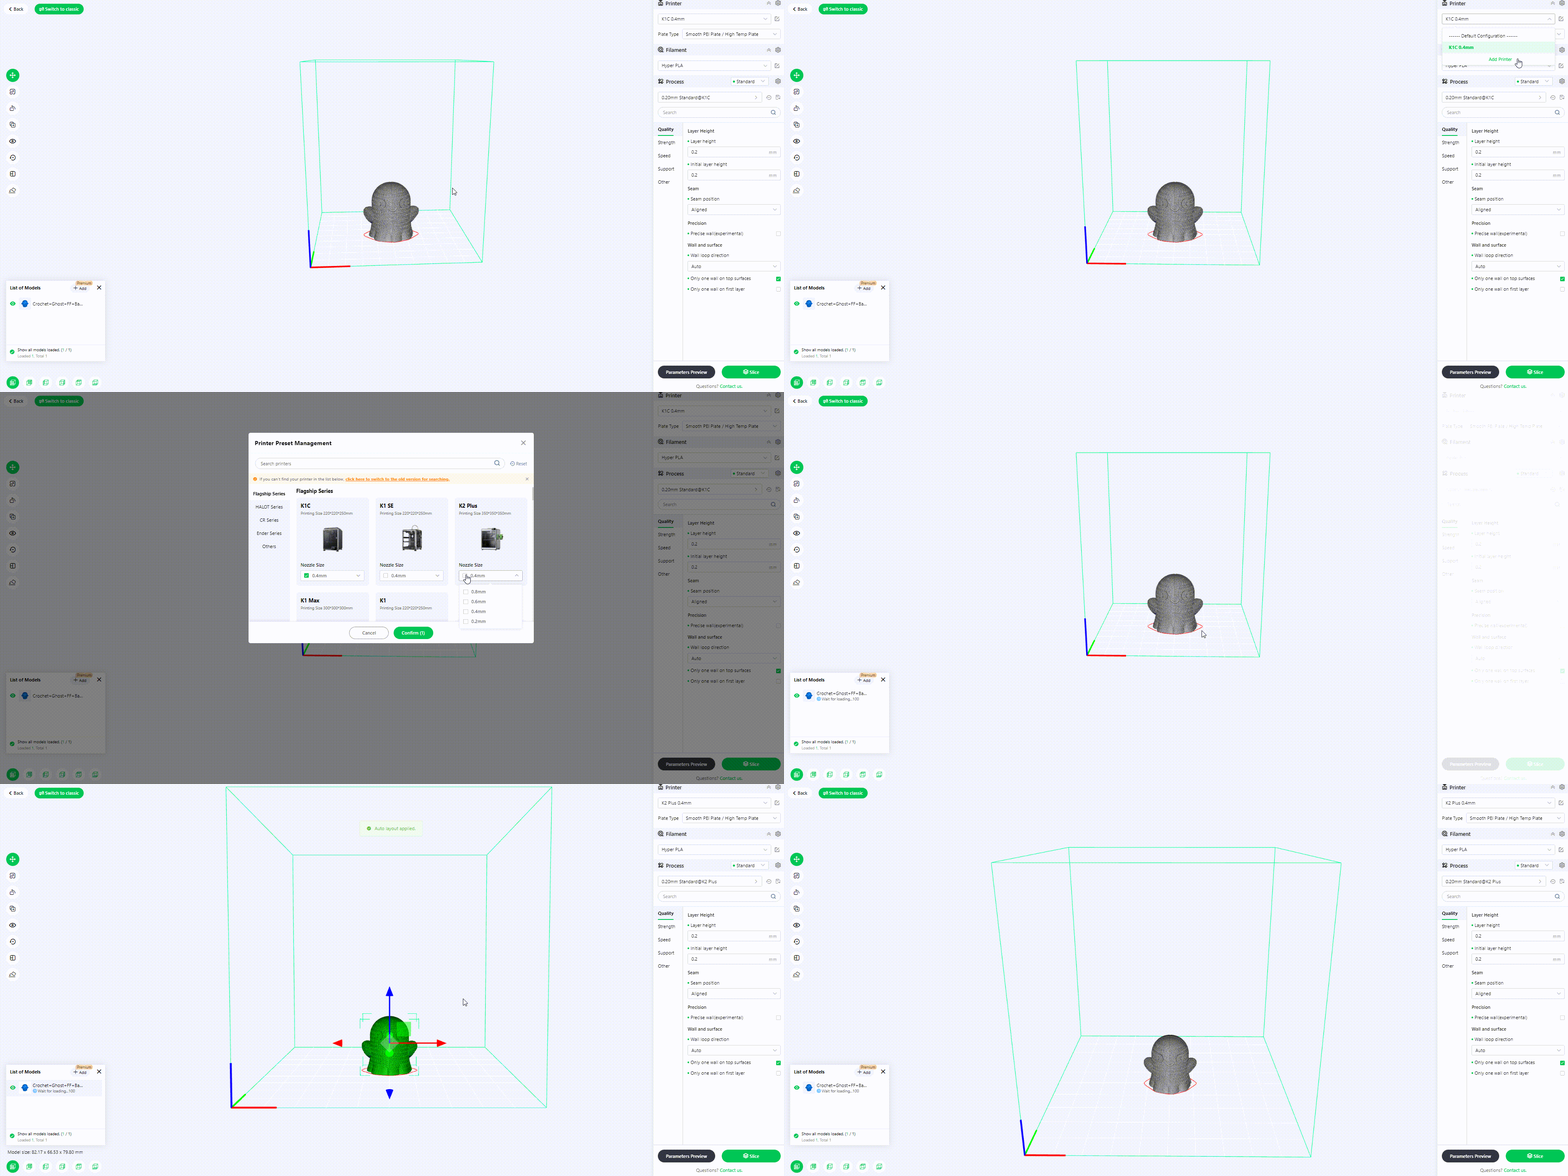
If you want to print multiple identical models, follow these steps:
a. In the options list on the left side, click on “Clone.”
b. Enter the desired number of clones.
c. Finally, click on “Auto Layout.”
This will complete the slicing task for a tray containing multiple identical models, allowing for efficient printing.
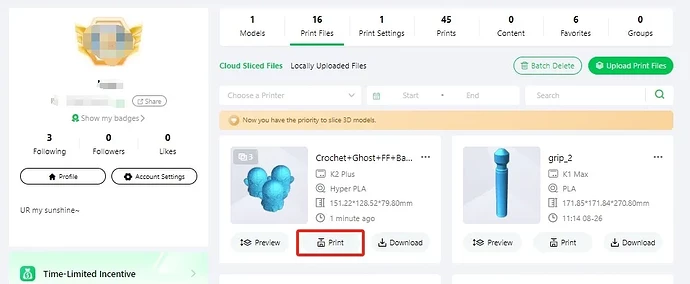
Step 3: After completing the previous steps, click the "Slice" button in the bottom right corner. This will redirect you to your personal homepage where you can view the generated print files. In the completed slicing tasks, click “Print” to send the print job to your device, allowing you to finish printing the .3MF multi-color model.
II. How to effectively utilize your multi-color printing configurations
The unique advantage of .3MF files lies in their embedded attributes, offering endless possibilities for print configurations. While browsing the detail page of your selected model, you’ll discover a variety of rich and thoughtfully designed printing settings.
We encourage you to share your personalized print configurations within the community. This not only enhances the uniqueness of your creations but also allows you to gain widespread recognition and appreciation. Through this process, the joy of DIY will be greatly amplified, making your printing experience full of surprises and fun.
If you’re struggling with how to create and upload personalized print configurations, please refer to the article titled “Printing Configuration File Upload Guide.” This guide is comprehensive and easy to understand, and by studying it in detail, you will quickly master the skills needed to get started and enjoy the limitless fun of DIY printing!
