How to Use .3MF Files in Creality Print?
Using Creality Print version 5.1 and above, you can adjust printing parameters for .3MF files. This article provides a detailed guide on how to utilize your .3MF files within Creality Print, as well as instructions on importing models in formats such as STL into Creality Print and converting them into .3MF print configuration files.
I. How to Use Your .3MF Files in Creality Print
First, you can refer to this article on What is .3MF Files and How to Obtain Them?. Once you have acquired a .3MF file, all the printing parameters, model data, and color information are already included. Therefore, there is no need for tedious model coloring or complex parameter adjustments. You only need to make minor tweaks, and in some cases, you can start printing without any adjustments at all.
The following sections will detail the process of printing after obtaining your .3MF file.
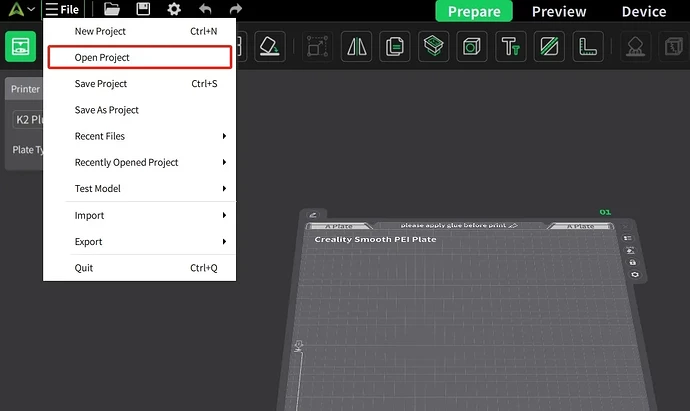
Step 1: Open Creality Print 5.1 or a later version. After downloading the .3MF file to your local device, navigate to the file menu and select “Open Project.” Then, choose the corresponding .3MF file to open it.
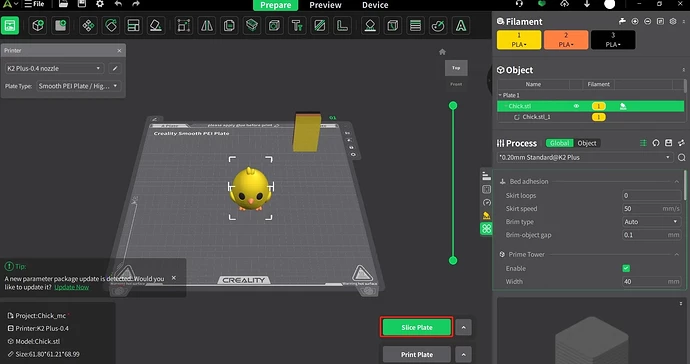
Step 2: After opening the .3MF model, you can adjust the printing parameters. The downloaded .3MF file contains settings for the printer, materials, and processes, but these parameters may not be suitable for your current printer or materials. You can make targeted adjustments as needed.
For example, if the downloaded .3MF file is configured for the Ender 3 V3, but you are using a K2 Plus, you can switch the settings accordingly to match your specific printer. This ensures optimal printing results tailored to your equipment.
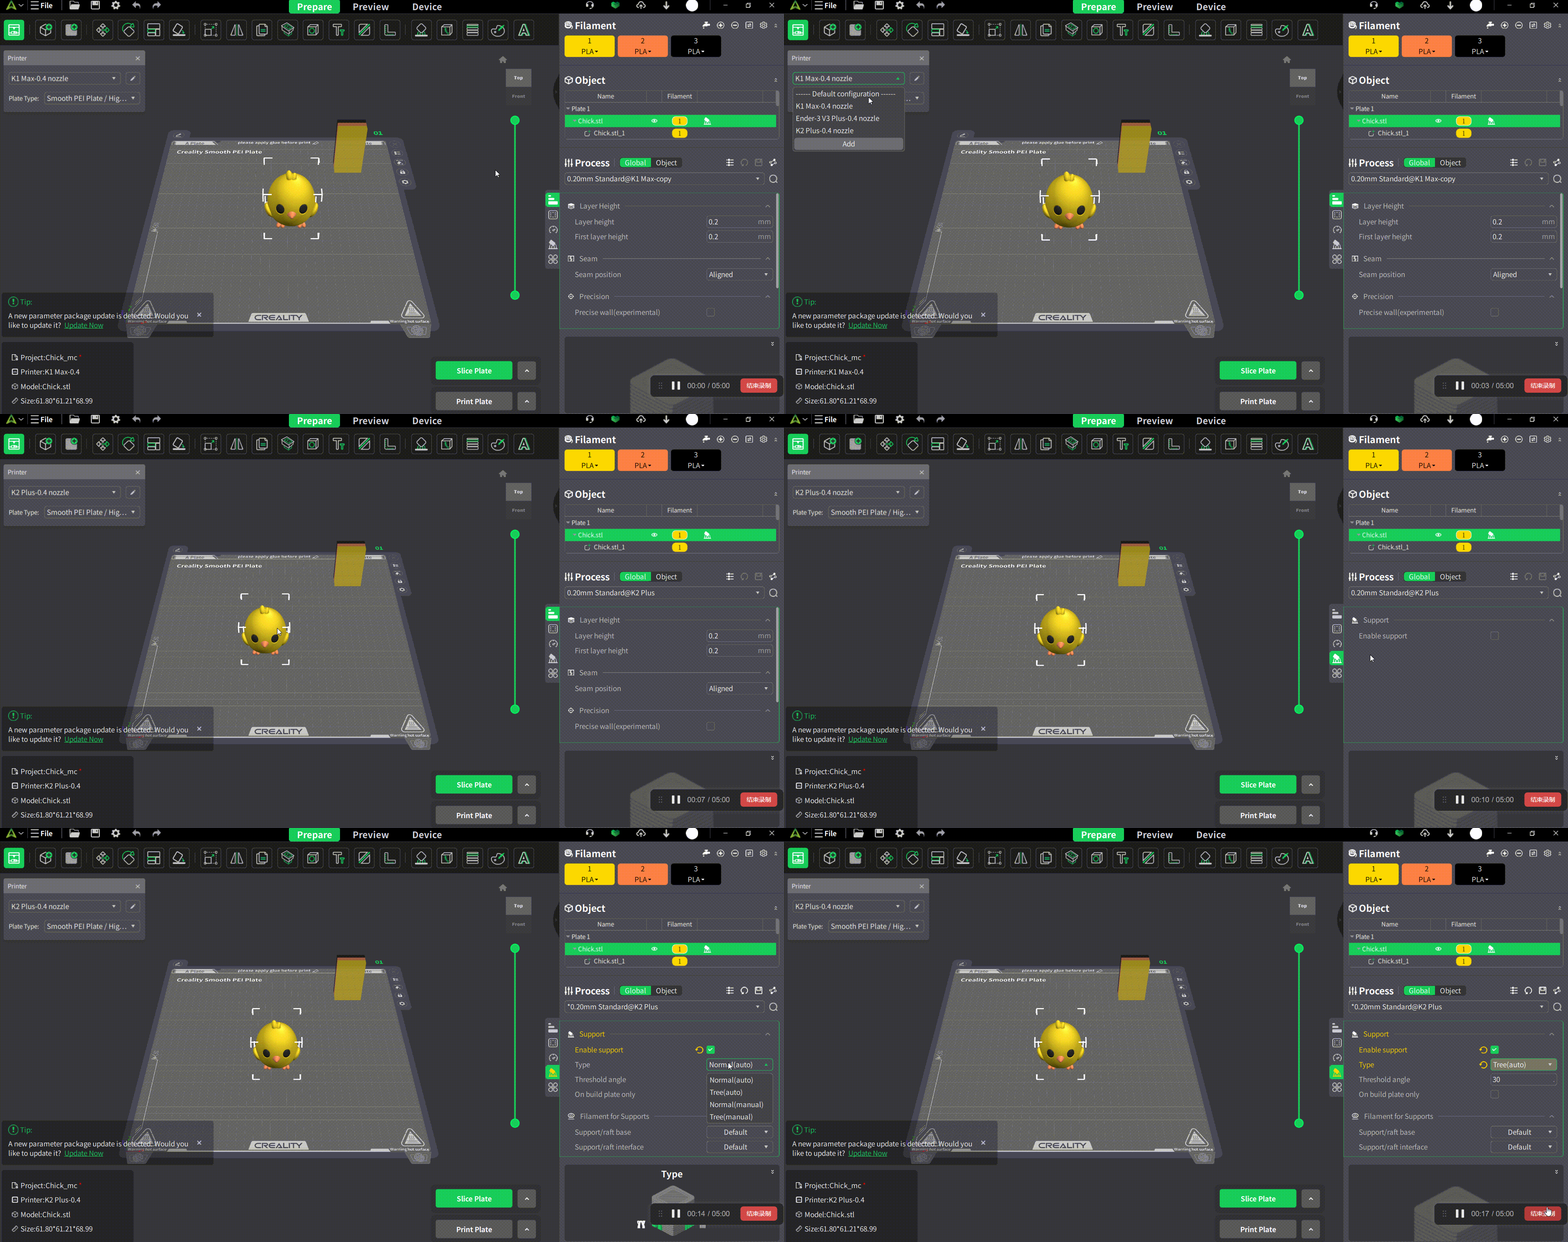
Step 3: In the options panel on the right side, you can adjust the parameters of your model. Choose either “Global” or “Object” to modify the settings for different parts of the model. You can adjust the following five parameters: Quality,Strength, Speed, Support, Other.
Make these adjustments to optimize your printing process according to your specific needs and preferences.
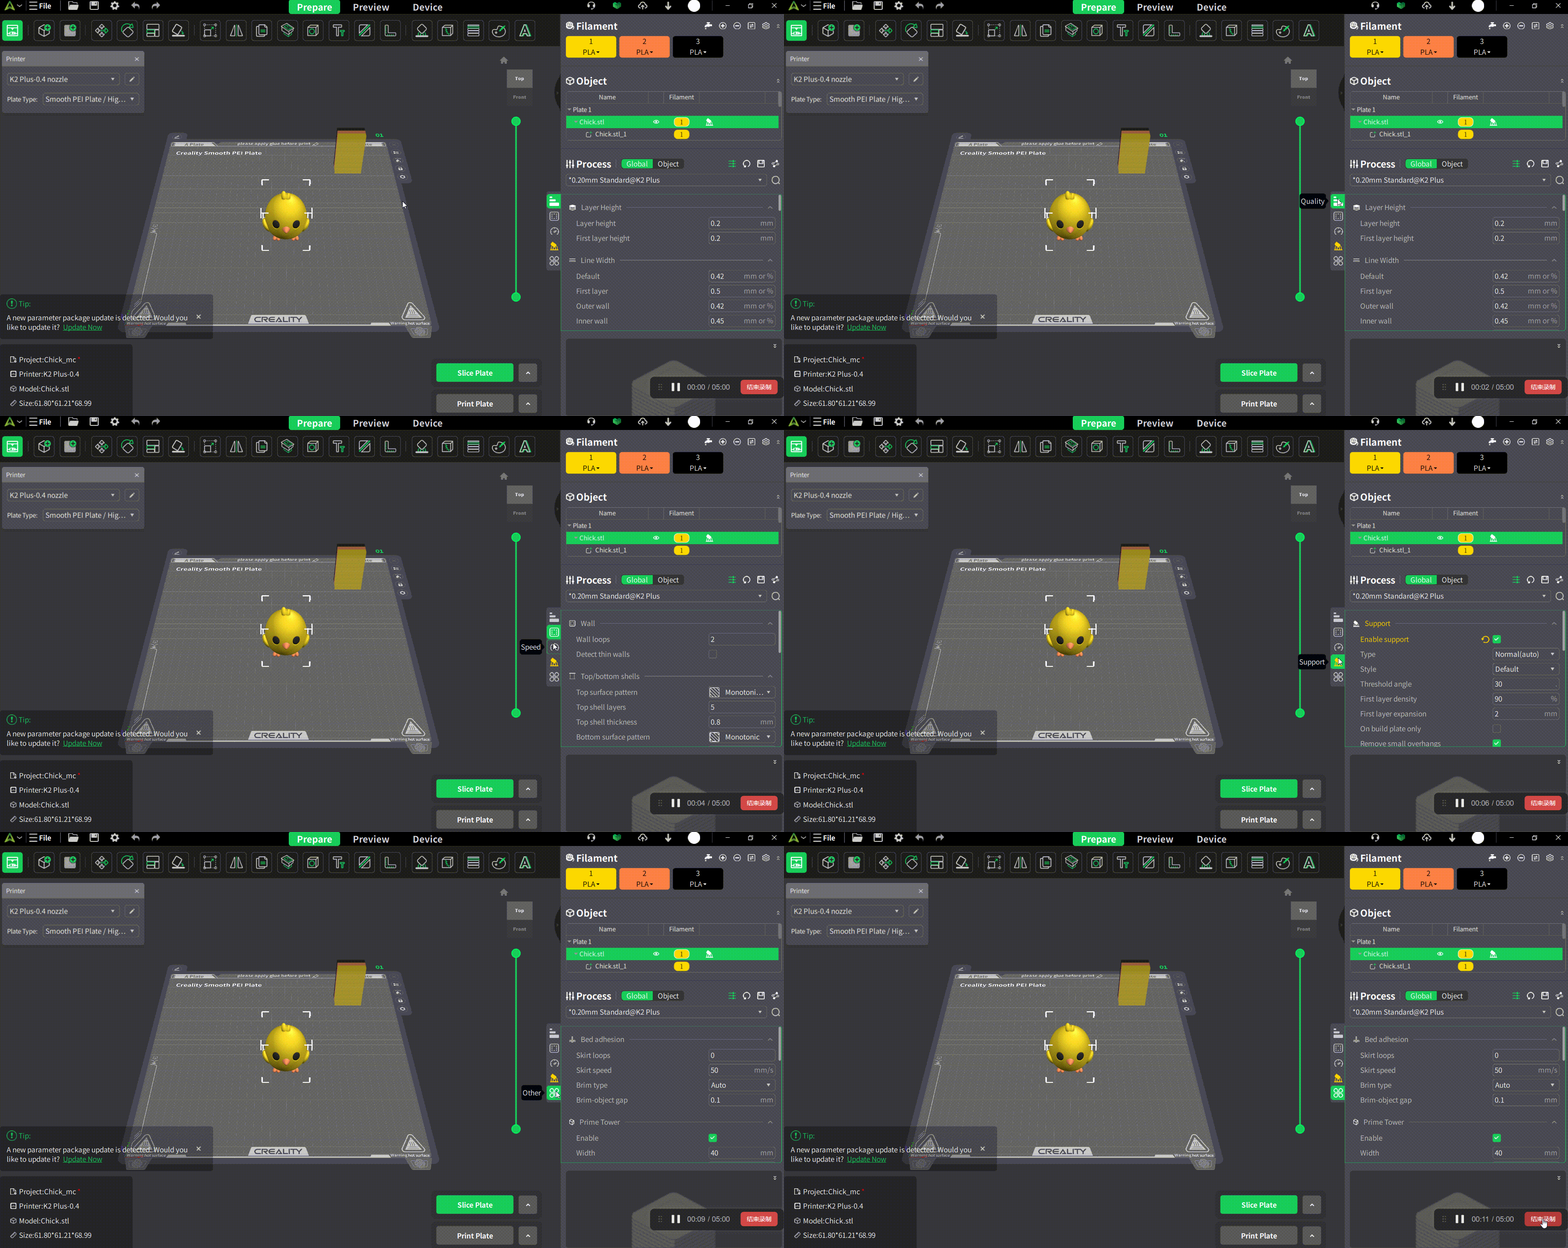
Step 4: Once you have completed the adjustments to the printing parameters, click on “Slice” to process the model.
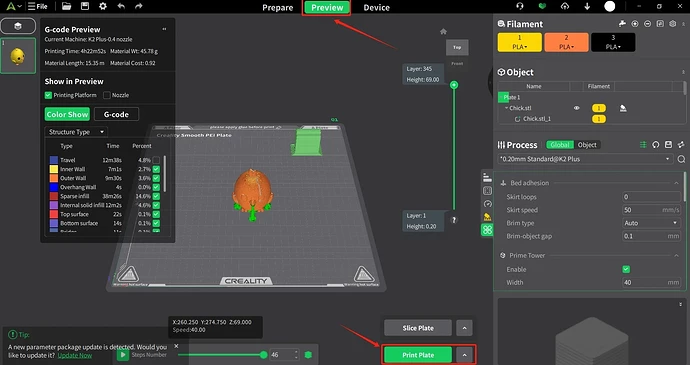
Step 5: At this point, your .3MF model has been sliced. You can check the support generation by selecting the “Preview” option at the top. After reviewing the sliced model and ensuring everything is correct, send the file to your printer to begin the printing process.
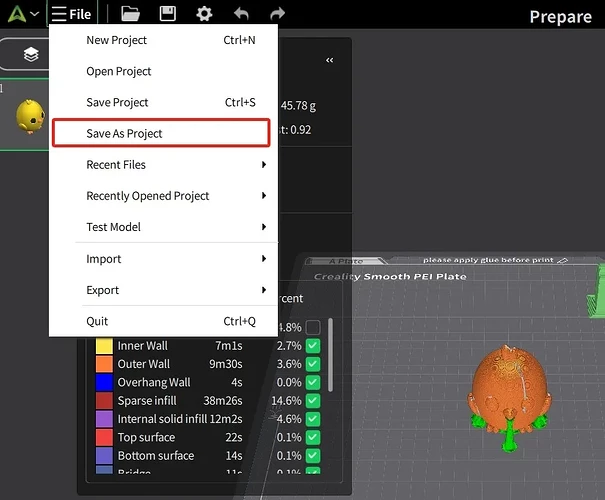
If you need to retain the file for future use, you can select “Save Project” or “Save As Project” from the menu in the upper left corner to save the .3MF file to your local device. This ensures that you have a copy of your project for later access.
II. How to Use Creality Print to Generate .3MF Files
In addition to importing .3MF format model files to create print configuration files, you can also import models in formats such as STL, OBJ, and STEP into Creality Print to generate .3MF print configuration files. Below is an example of importing an STL file and applying color.
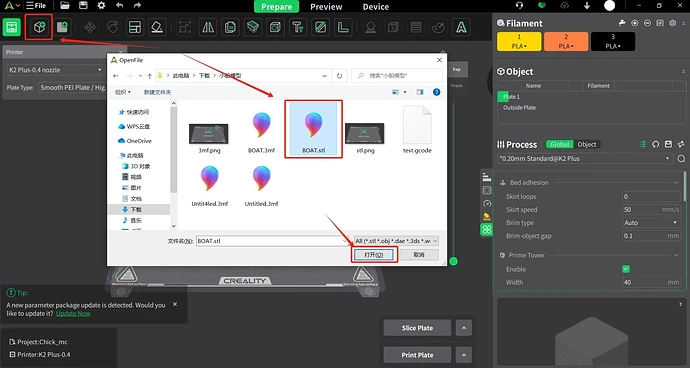
Step 1: First, open Creality Print and click on “Import Model.” Select an STL file to open and complete the import process.
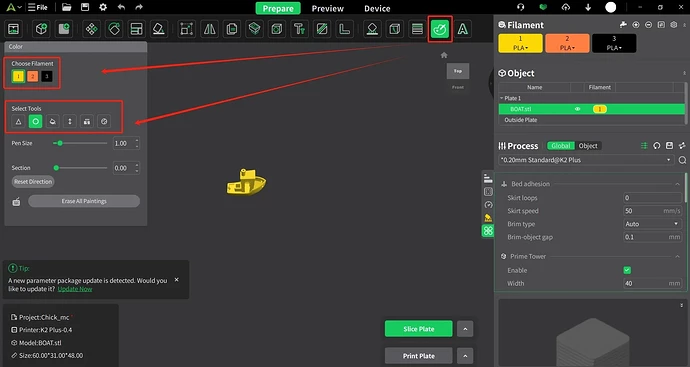
Step 2: Click on the “Coloring Tool” and select the color material option. Then, choose your desired tool to apply color to the model. This allows you to customize the appearance of your model before saving it as a .3MF file.
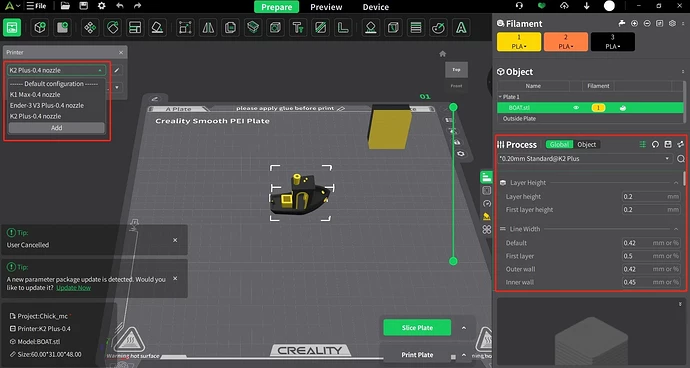
Step 3: After coloring the model, select the desired printer configuration from the left side. Then, in the “Process” section on the right, set appropriate parameters such as layer height and support options. Once you have completed these configurations, your .3MF file will be ready for use.
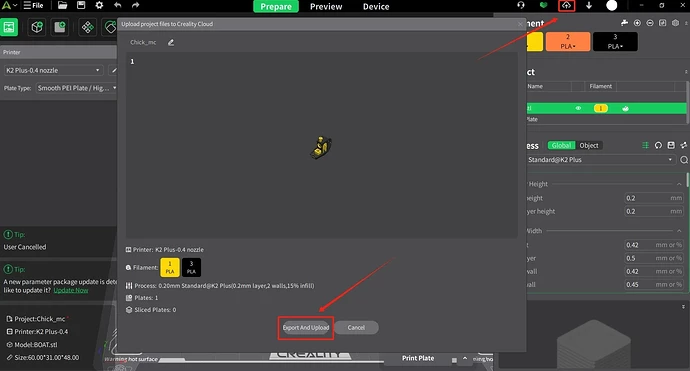
Step 4: Finally, you can complete the export and upload of your .3MF file by clicking on the upload project icon in the upper right corner. Before doing this, ensure you are logged into your Creality Cloud account within Creality Print. Once you click “Export and Upload,” you will be able to find the generated .3MF file in your local directory.
You can also upload the .3MF file to Creality Cloud. After clicking “Export and Upload” to save the file locally, you will be redirected to the upload interface on the Creality Cloud website. For more information on uploading .3MF files, you can refer to this article: How to Upload .3MF Files to Creality Cloud?

