How to Upload .3MF Files to Creality Cloud?
In the previous article, we provided a detailed overview of the .3MF file format and its advantages, as well as how to obtain such files. Next, we will guide you on how to upload .3MF files to the Creality Cloud platform (via Creality Cloud and Creality Print). For better understanding, we recommend familiarizing yourself with the differences between .3MF model files and .3MF print setting files within the Creality Cloud platform.
I. Uploading .3MF Files via the Creality Cloud Website/App
Method 1: Upload the .3MF file as a print setting
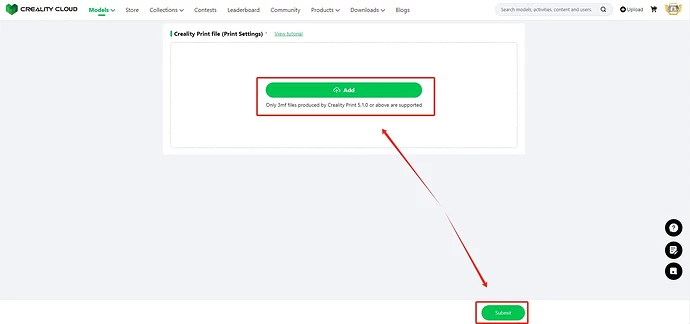
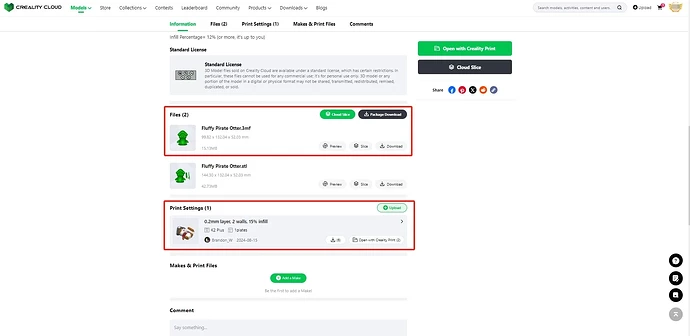
Uploading in the form of a print setting is currently only supported through the Creality Cloud website. On the model details page, find the upload entry for the .3MF print setting file, click “Add Print setting File”, and import the .3MF file exported by Creality Print 5.1 or a later version.
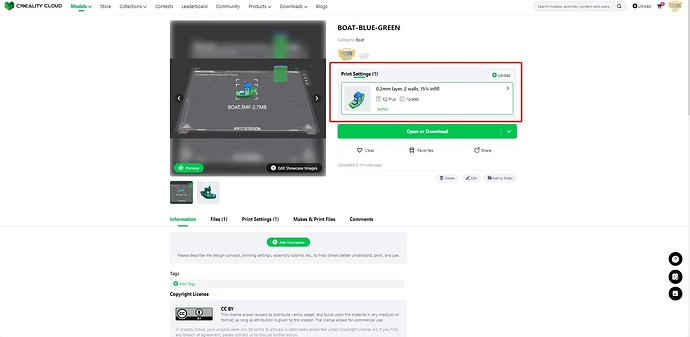
After clicking “Confirm,” you will be able to see the .3MF print setting you uploaded in the print setting section of the model.
Method 2: Uploading .3MF Files as Model Files
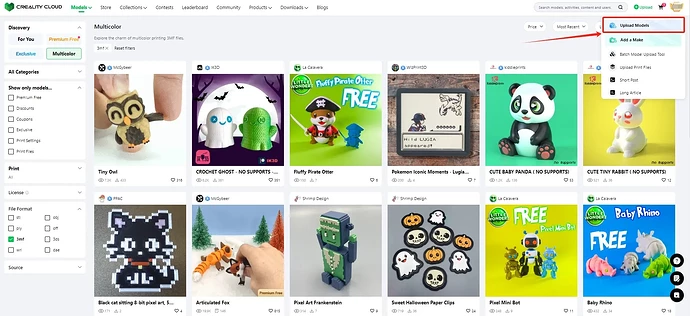
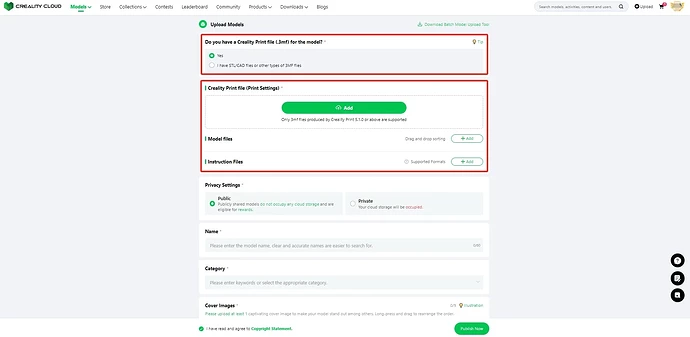
To upload .3MF model files via the Creality Cloud website, refer to the screenshot below.
Select the .3MF setting file exported by Creality Print, or choose another type of .3MF file. Next, add and upload your .3MF file. Finally, complete the public release by filling in any additional required information step by step according to the specified options.
Upload the .3MF model file via the Creality Cloud app, as shown in the screenshot below:
Note: You need to ensure that you have uploaded a .3MF model file. If you upload a .3MF setting file, an abnormal format error will be prompted.
II. Generate and Upload a .3MF File Using Creality Print
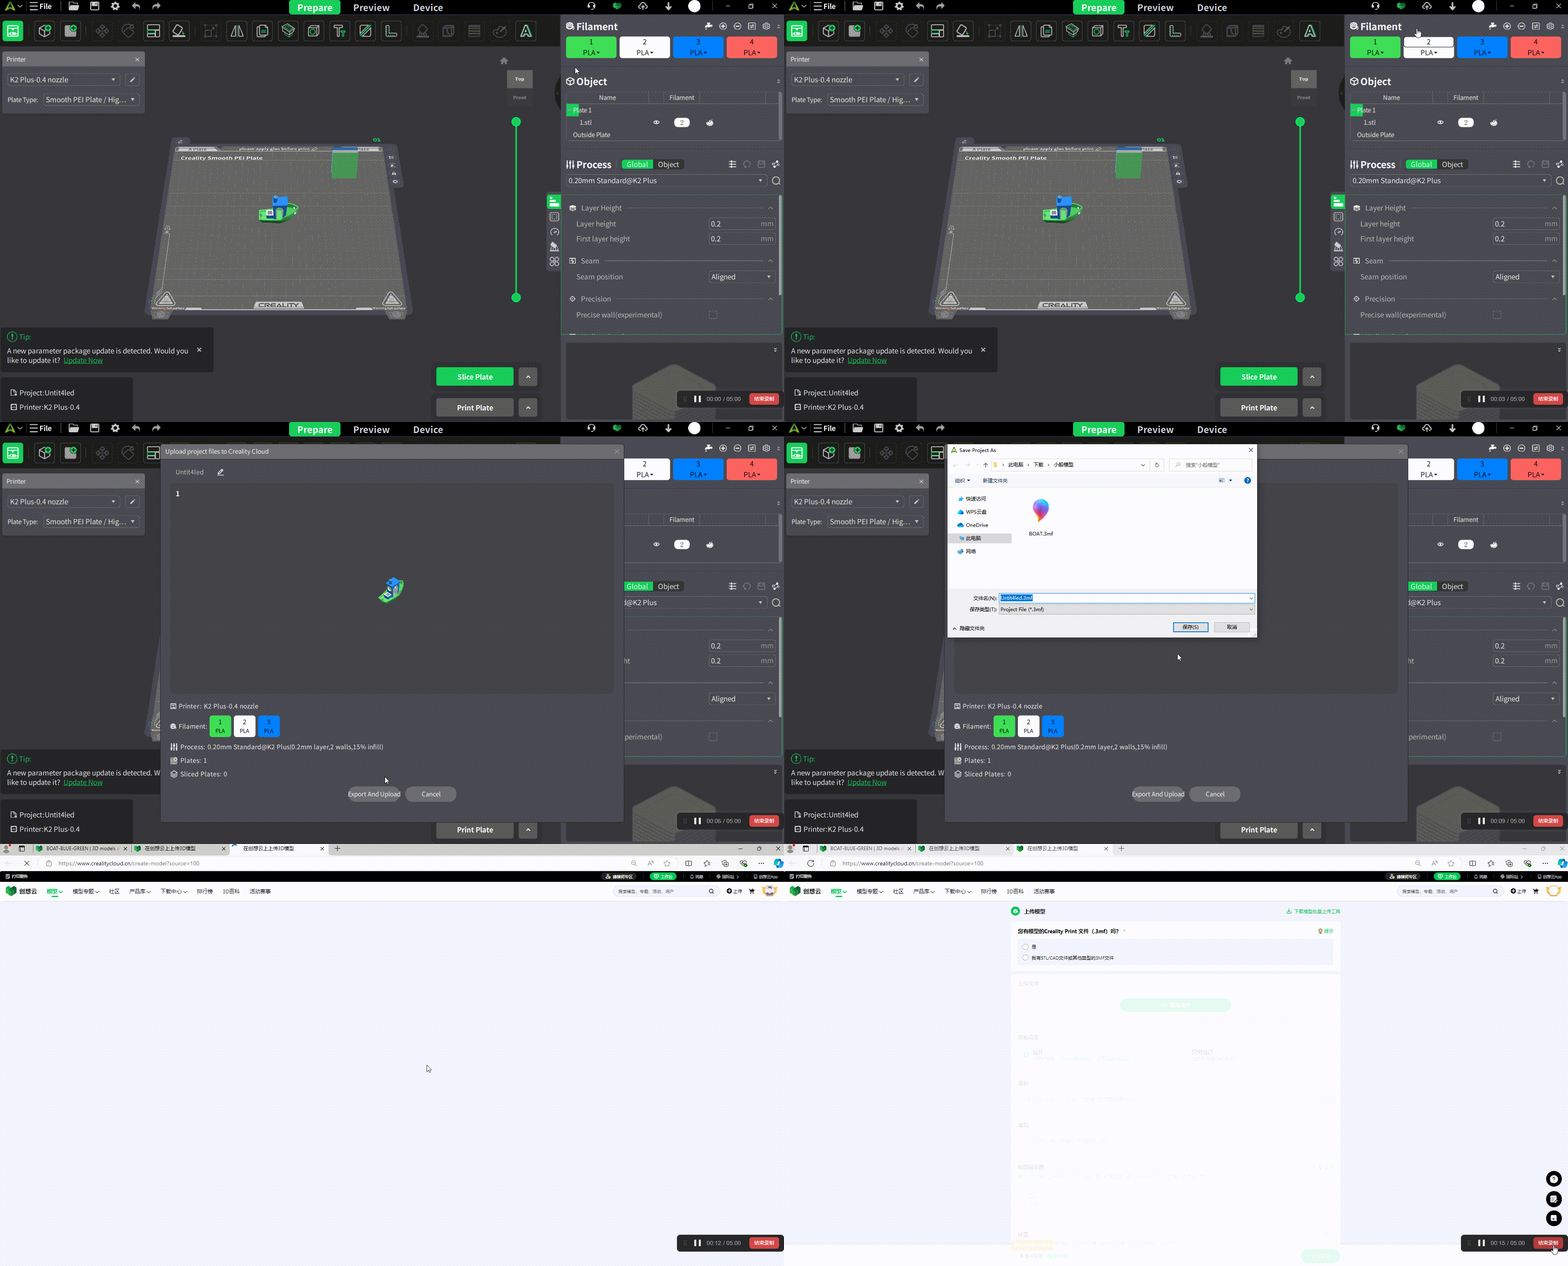
Here, we will use the example of importing an STL file and exporting it as a .3MF format file for upload:
Once you have completed your .3MF model project, click the “Upload Project” icon in the upper right corner of Creality Print, then select the “Export and Upload” option to be redirected to the Creality Cloud official website for uploading your .3MF model file.
Note: If you prefer not to upload as a model file but rather as a .3MF print setting file to an existing model detail page on Creality Cloud, you can directly click “Save Project” from the left-side menu, export it to your desktop, and then upload it using the previously mentioned method of “Uploading .3MF as a Print setting.”
III. How to Edit an Uploaded .3MF File?
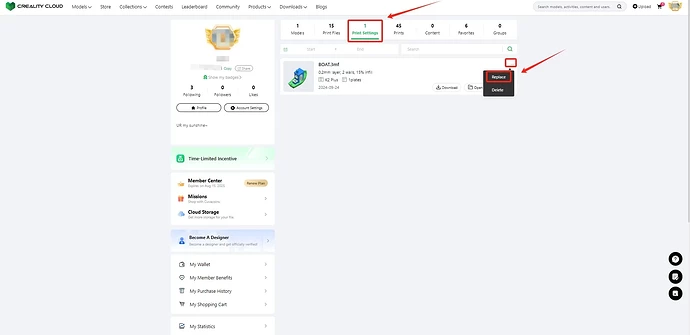
You can replace your published setting file by accessing your personal center:
Click on the personal center in the upper right corner, then select “Print Settings.” In the corresponding setting options under “Print setting,” click “Replace” to proceed.
IV. Knowledge Expansion: How to Distinguish Between Creality Cloud .3MF Model Files and .3MF Print Setting Files
Both .3MF model files and .3MF print setting files are in the .3MF format, but they serve different roles in the 3D printing domain and have distinct differences. They correspond to different sections on the Creality Cloud model detail page.
- .3MF Model File: This file type contains only the 3MF data that represents the 3D model and its attributes, including all necessary information about the model, materials, and properties.
- .3MF Print Setting File: This is a setting file specific to the 3D printing process. While it is based on the .3MF format, it focuses on printing parameters and settings. Different users on the platform can create .3MF setting files for processing and uploading the same model with varying print settings.

