Ender3 V3 KE specific topic.
I try to regenerate the same boat printing settings in Creality Print as provided in the USB stick as 1-Boat.gcode. Hyper PLA 1.75 used as material, but I unable reach the same about 16minute print time in the slicing preview as the vendor provided gcode capable to do.
Independently I create new Parameter config with the near same settings as in the gcode file I just able to print about 42minutes instead of the 16min.
The product selling main point the high speed (16min vs. 54min Benchy) and those are visible in the reality with the provided gcode file but I unable reproduce those with the Creality Print slicer.
QUESTION:
How could I config Creality Print to able produce the near same speed as the vendor provided gcode?
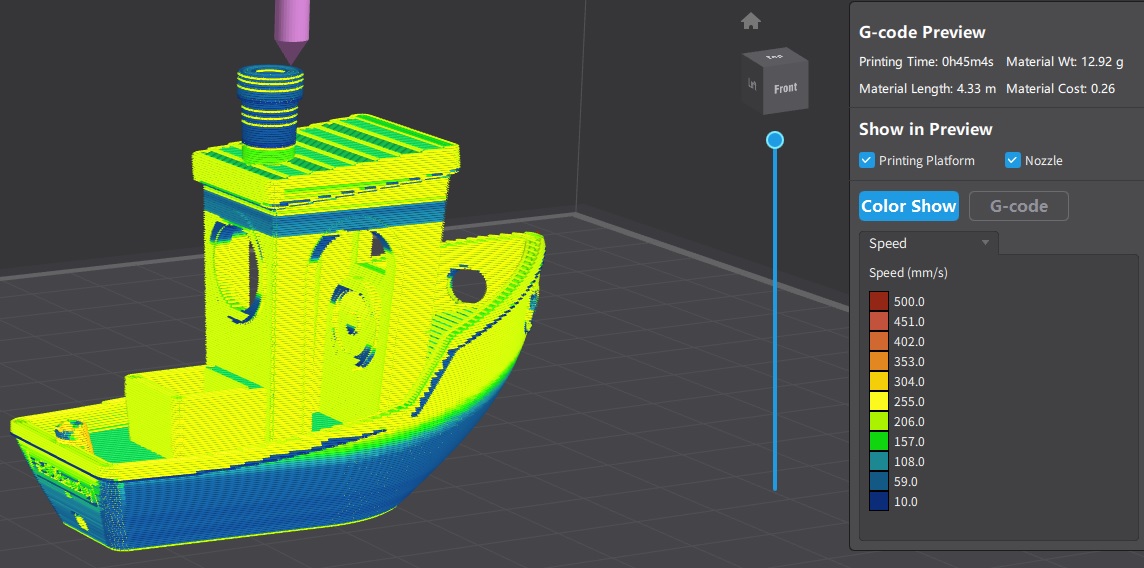
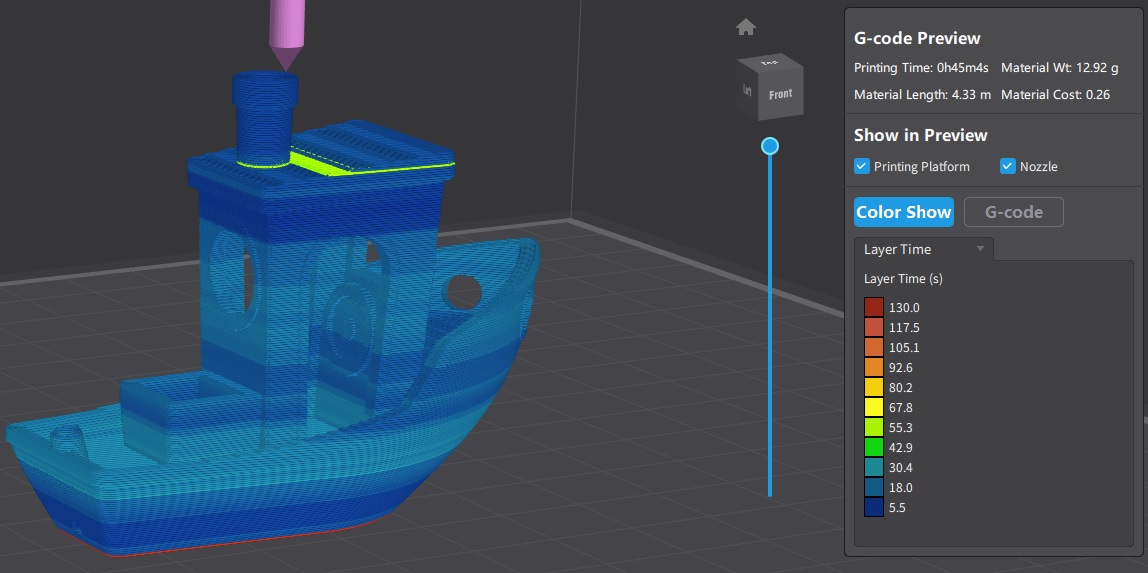
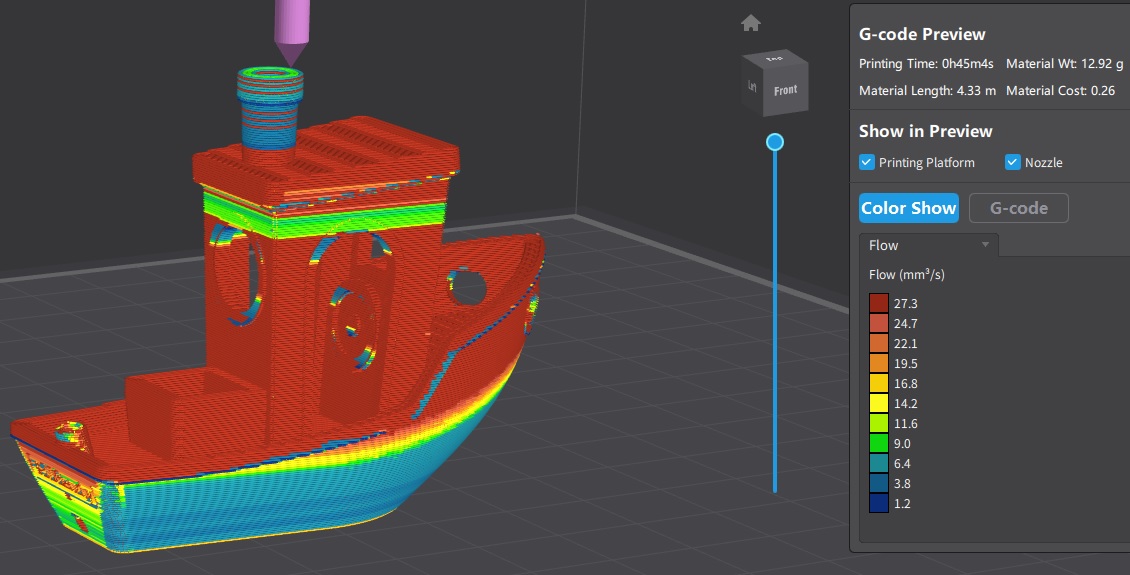
My sliced G-code Preview
Printing time: 0h45m4s, Material 12.92g
Material Length: 4.33m Material Cost 0.26
Here is the gcode info from the settings and on the right side my notes about where you can found those settings in the config editor
;Creality Print GCode Generated by CXEngine
;CRSLICE_GIT_HASH:b39074a
;Creality Print Version : V4.3.8.6678 —> I am using the same SW version to Slice
;CXEngine Release Time:2023-10-27 17:48:02
;Gcode Generated Time:2023-10-27 18:23:59
;----------Machine Config--------------
;Machine Name:F005
;Machine Height:240 —> Matching with Ender 3 V3 KE
;Machine Width:220 —> Matching with Ender 3 V3 KE
;Machine Depth:220 —> Matching with Ender 3 V3 KE
;Material Type:PLA —> Hyper-PLA material
;Material Name:Hyper PLA_1.75 —> Hyper-PLA material
;Number of Extruders:1 —> Matching with Ender 3 V3 KE
;ExtruderParams[0] Nozzle Diameter:1000 —> Hyper-PLA material
;----------Profile Config---------------
;Wall Thickness:0.87 —> Extruder:Infill Wall Line Width???
;Top/Bottom Thickness:0.8 —> Extruder: Top/Bottom Line Wifth
;Out Wall Line Width:0.5 —> Extruder
;Inner Wall Line Width:0.5 —> Extruder
;Inital Height:200 —>Quality:Initial Layer Height 0.20
;Wall Line Count:2 —>Shell
;Infill Line Distance:10 —>Infill
;Infill Pattern:grid —>Infill
;Infill Sparse Density:10 —>Infill:Infill Density 10%???
;Infill Wipe Distance:0.13 —>Infill
;Print Temperature:220 —>Material
;Bed Temperature:60 —>Material
;Support Enable:false —>Support
;Support Density:15 —>Support hidden due enabled False
;Support Angle:60 —>Support hidden due enabled False
;Adhesion Type:autobrim —>Build plate Adhesion Type:autobrim
;machine is belt:false
;machine belt offset:10
;machine belt offset Y:0
;Raft Base Line Spacing:1.6
;Wait Heatup Sync:true
;Enable Ironing:false —>Shell
;Material Type:PLA —>Hyper-PLA material
;Max volumetric speed:60.00 —>Hyper-PLA material default 27.3???
;Material Diameter:1.75 —>Hyper-PLA material
;Material Density:1.24 —>Hyper-PLA material
;Filament Cost:20 —> Hyper-PLA material
;Filament Weight:1000 —>Hyper-PLA material
;Preview Img Type:png
;Screen Size:Sermoon D3
;----------Shell Config----------------
;Outer Wall Wipe Distance:200 —>Shell
;Outer Inset First:fals —>Shell??? should be Wall Ordering:Iside To Outside???
;Infill Before Walls:false —> Infill
;Infill Overlap:0.15 —> Infill
;Fill Gaps Between Walls:nowhere
;Minimum Infill Area:15 —>Infill
;Top Surface Skin Layer:0 —>Shell
;Top Layers:4 —>Shell
;Z Seam Alignment:sharpest_corner —>Shell
;Seam Corner Preference:z_seam_corner_inner —>Shell?No matching entry?
;Z Seam X:110
;Z Seam Y:220
;Horizontal Expansion:0 —>Shell
;Top/Bottom Pattern:lines —>Shell
;Ironing Pattern:zigzag —>Shell hidden due Ironing disabled
;Vase Model:false
;----------Support Config----------------
;Support Type:everywhere —>Support hidden due enabled False
;Support Pattern:zigzag —>Support hidden due enabled False
;Support Infill Layer Thickness:0.25 —>Support hidden due enabled False
;Minimum Support Area:1 —>Support hidden due enabled False
;Enable Support Roof:true —>Support hidden due enabled False
;Support Roof Thickness:0.8 —>Support hidden due enabled False
;Support Roof Pattern:lines —>Support hidden due enabled False
;Connect Support Lines:0 —>Support hidden due enabled False
;Connect Support ZigZags:1 —>Support hidden due enabled False
;Minimum Support X/Y Distance:0.2 —>Support hidden due enabled False
;Support Line Distance:1.33 —>Support hidden due enabled False
; ---------PrintSpeed & Travel----------
;Enable Print Cool:true
;Avoid Printed Parts Traveling:false
;Enable Retraction:true —>Extruder
;Retraction Distance:0.8 —>Extruder
;Retraction Speed:40 —>Extruder
;Retraction Prime Speed:40 —>Extruder
;Maximum Retraction Count:100 —>Extruder
;Minimum Extrusion Distance Window:1 —>Extruder
;Z Hop When Retracted:false —>Extruder
;Z Hop Height:0.1 —>Extruder hidden due disabled
;Retract Before Outer Wall:false —>Extruder
The sample files have deliberately been tuned in a way to make them print fast. They are purely demonstration files to show the capabilities of the printer and therefore when slicing the models yourself you will not necessarily end up with the same speeds.
If you buying something for the fast speed and you are unable reproduce those with exactly same just with the vendor demo that we called that “unfair commercial practices”.
Common guys all of the KE users would like to use the full capability of the printer and not just guessing how could I setup the high speed.
Why Creality not provide us “High Speed” Parameter Config in slicer SW?
I understand the non KE/K1 users get the optimal “Normal” config, but why the high speed guys could know how to optimize for high speed with quality? Calibration not helps for the most of the configuration that is changed above and I still not reached the 16min.
The HW capable just we dont know how to optimize SW as the same way as they did it.
Yes we know and aware that could lead to quality problems, but we have nothing alias zero documentation about how to reach those high speeds with their product. If that is the key selling point I am simple not understand why they not proud and tell/show us how we can fine tune the configs to reach those high speeds.
The sample models are purely demos to show you what the printer is capable of, they have been tuned to show the speed of the printer. When you slice a file the slicer determines what areas of the print can be printed at what speeds reliably. There is nothing stopping you from playing with the settings and tuning to your preference. If you were to try and print most models in the same manner you would likely end up with imperfections and distortions.
When it comes to things such as “speed benchys” most people are not using stock profiles, they are using profiles that they have tuned themselves.
There is a high speed profile already in the slicer called Hyper PLA.
Surprise, I already use those Material. Default “Normal” config with Hyper PLA_1.75 create 47min print time. Which is quicker then Sonic Pad with Ender3 S1 52min (1h45m without Sonic Pad) but far away from the reference 16min.
You can be surprised but the vendor provided file dont have quality like problems meanwhile 1/4th time to create than the Sonic above.
As you can see above I made lot of custom changes in several categories above but those still not enough to reach those speed.
What is the major configuration change what I missing to reach the reference?
My question was not “Am I allowed to make changes?”
instead of “Which changes necessary to reach those goal far away?”
I have not personally tried to tune the profiles to replicate the speed of the sample print. From what I have read there are “cheats” in sections of the infill which help to make the print rapid.
You would need to search around online for people that have attempted to replicate the speeds of the sample file, but please be warned this may result in a fast benchy but will more than likely produce poor results for other prints. The gcode of the benchy was modified to make that particular model and its shape and size printable at high speeds. As I have mentioned before… if you were to apply those settings to any other models you would likely end up with failures or poor print quality.
The fact is that the sample models are purely a demonstration of what is possible.
I get and understand your point about the quality worst and not optimized for other models. Just would like to learn those difference due simple change speed and acceleration not the only factor they are touched.
Failures and poor print quality that is also included in the learning path so I am not afrading about that.
also if you look at the print speed settings that you put in your OP…you’ve got:
";Outer Wall Speed:300 —>Speed <===Speed this up to 500
;Inner Wall Speed:500 —>Speed
;Infill Speed:500 —> Speed
;Top/Bottom Speed:200 —>Speed <====Speed this up too…maybe not all the way to 500?
;Travel Speed:500 —> Speed
;Initial Layer Speed:200 —> Speed <====Speed this up too
;Skirt/Brim Speed:50 —>Speed <====Speed this up or eliminate it all together
;Prime Tower Speed:500
;Outer Wall Acceleration:6000 —>Speed <== this up to 8000 if you want the benchyspeed
;Inner Wall Acceleration:6000 —>Speed <== this up to 8000
;Infill Acceleration:8000 —> Speed
;Top/Bottom Acceleration:6000 —>Speed <== this up to 8000
;Travel Acceleration:8000 —>Speed
;Initial Layer Print Acceleration:2000 —>Speed <== this up to 8000
;Initial Layer Travel Acceleration:5000 —>Speed <== this up to 8000
;Skirt/Brim Acceleration:500 <====Speed this up or eliminate it all together
;Acceleration to decelerate:50 —>Speed
enable this silly. Slowing down FASTER will probably be important for quality
;Combing Mode:off"
also take the wall count down to 1
at least that’s where I would start
I’ll bet that slicing with those changes will signifigantly reduce your estimated print times…not saying that it will PRINT SUCCESSFULLY…but print time will be low
I think it’s a little deceptive to have a gcode on USB that’s not easily reproduceable on Creality Print. Having said that if it can be done under Creality Print it would have been nice for some tutorial on how to go about it. The KE is certainly a lot faster than my previous printers, but I did notice some of the prints took longer than I thought they would. I looked at the gcode from the USB vs Creality Print using Hyper PLA and the supplied normal profile, and there are some differences although haven’t gone through the whole thing yet.
I see my material listed as CR-PLA even though I have Hyper-PLA selected. Not sure yet why this is the case.
;----------Machine Config--------------
;Machine Name:F005
;Machine Height:240
;Machine Width:220
;Machine Depth:220
;Material Type:PLA
;Material Name:CR-PLA_1.75
;Number of Extruders:1
Layer height for the USB boat is 0.25 rather than 0.2
Speed and acceleration are up so can be tweaked in Creality Print to match.
;Outer Wall Speed:300
;Inner Wall Speed:500
;Infill Speed:500
;Top/Bottom Speed:200
;Travel Speed:500
;Initial Layer Speed:200
;Skirt/Brim Speed:50
;Prime Tower Speed:500
;Outer Wall Acceleration:6000
;Inner Wall Acceleration:6000
;Infill Acceleration:8000
;Top/Bottom Acceleration:6000
;Travel Acceleration:8000
;Initial Layer Print Acceleration:2000
;Initial Layer Travel Acceleration:5000
;Skirt/Brim Acceleration:500
;Acceleration to decelerate:50
;Combing Mode:off
Has some input shaping Klipper macros which I haven’t worked out yet how to do via Creality Print.
;LAYER:0
M106 S0
M204 S8000
SET_VELOCITY_LIMIT ACCEL_TO_DECEL=4000
M205 X60 Y60
;MESH:0_0
G0 F30000 X90.041 Y108.738 Z0.2
M204 S6000
SET_VELOCITY_LIMIT ACCEL_TO_DECEL=3000
M205 X50 Y50
;TYPE:WALL-INNER
Anyway, maybe because the KE is so new there’s not a lot of info yet, but would have been nice to have more info on printing fast given it’s one of the selling points.
Cheers Peter
Adding to above. I notice the max volumetric speed of Hyper PLA as supplied with the Creality Print profile is set to 27, yet the volumetric speed for the USB boat gcode is set to 60. This along with the other speed and acceleration settings will have an effect. Maybe Creality can explain why they’ve set it to 27 in the software instead of 60?
I imagine the flow temp graphs would also change as they are currently set to [[5,200],[10,210],[15,210],[20,230]] although I’m not 100% sure as I’ve not seen this in other slicers.
OK. By setting the speed and acceleration as above, layer height to .25, volumetric speed to 60 and infill to 10% I got the benchy to 26mins. I then set the min layer time to 1 sec as it was at 5 sec, and got the benchy down to 18 mins which is pretty good. Ran a print and quality is very good. No different to the boat gcode on the usb. The only difference was the first layer seemed a bit squished as the letters are not as pronounced on the bottom. Trying one with calibration to see if that makes a difference but may need a bit more tweaking. I also notice in the boat gcode that “avoid printed parts traveling” is set to false but on mine it’s true. Haven’t found where to set that yet but maybe it might shave some extra time as well.
Thank you all for the research carried out, since the same thing happens to me and I want to use the speed and good finish that the benchy demo configuration that comes on the USB has for my next impressions.
Do you have the .cxprofile file with the quick parameters to be able to enter it directly into the creality print?
Hi All. Here is a link to 2 files. One for the filament (.cxfilament) and the other for print parameters (.cxprofile). Creality Print profile
I’m working on seeing if I can tweak a bit more as I’m not 100% happy with the slight squish on the bottom.
I’m trying also to get things to work in Prusa slicer and Cura. Prusa seems to add some extra solid infill which effectively makes a third internal perimeter so can’t get the time below about 30 mins. Can’t see yet how to turn that off. Cura might be more successful given Creality Print seems to be based off that.
OHH thanks for the contribution, I really appreciate it.
If you manage to improve what you say, do not hesitate to expose it to the community, I will also try to work on it to be able to contribute my grain of sand.
I think the volumetric speed 27 vs. 60 in the boat code caused by the SW optimized for non KE printers. So they keep stable settings. For Ender 3 V3 KE totally different settings needed as normal and HQ printing.
Only problem the vendor not helping/support us (customers) to provide settings good for our product. Also the K1 Max users have issue with those printing speed settings?