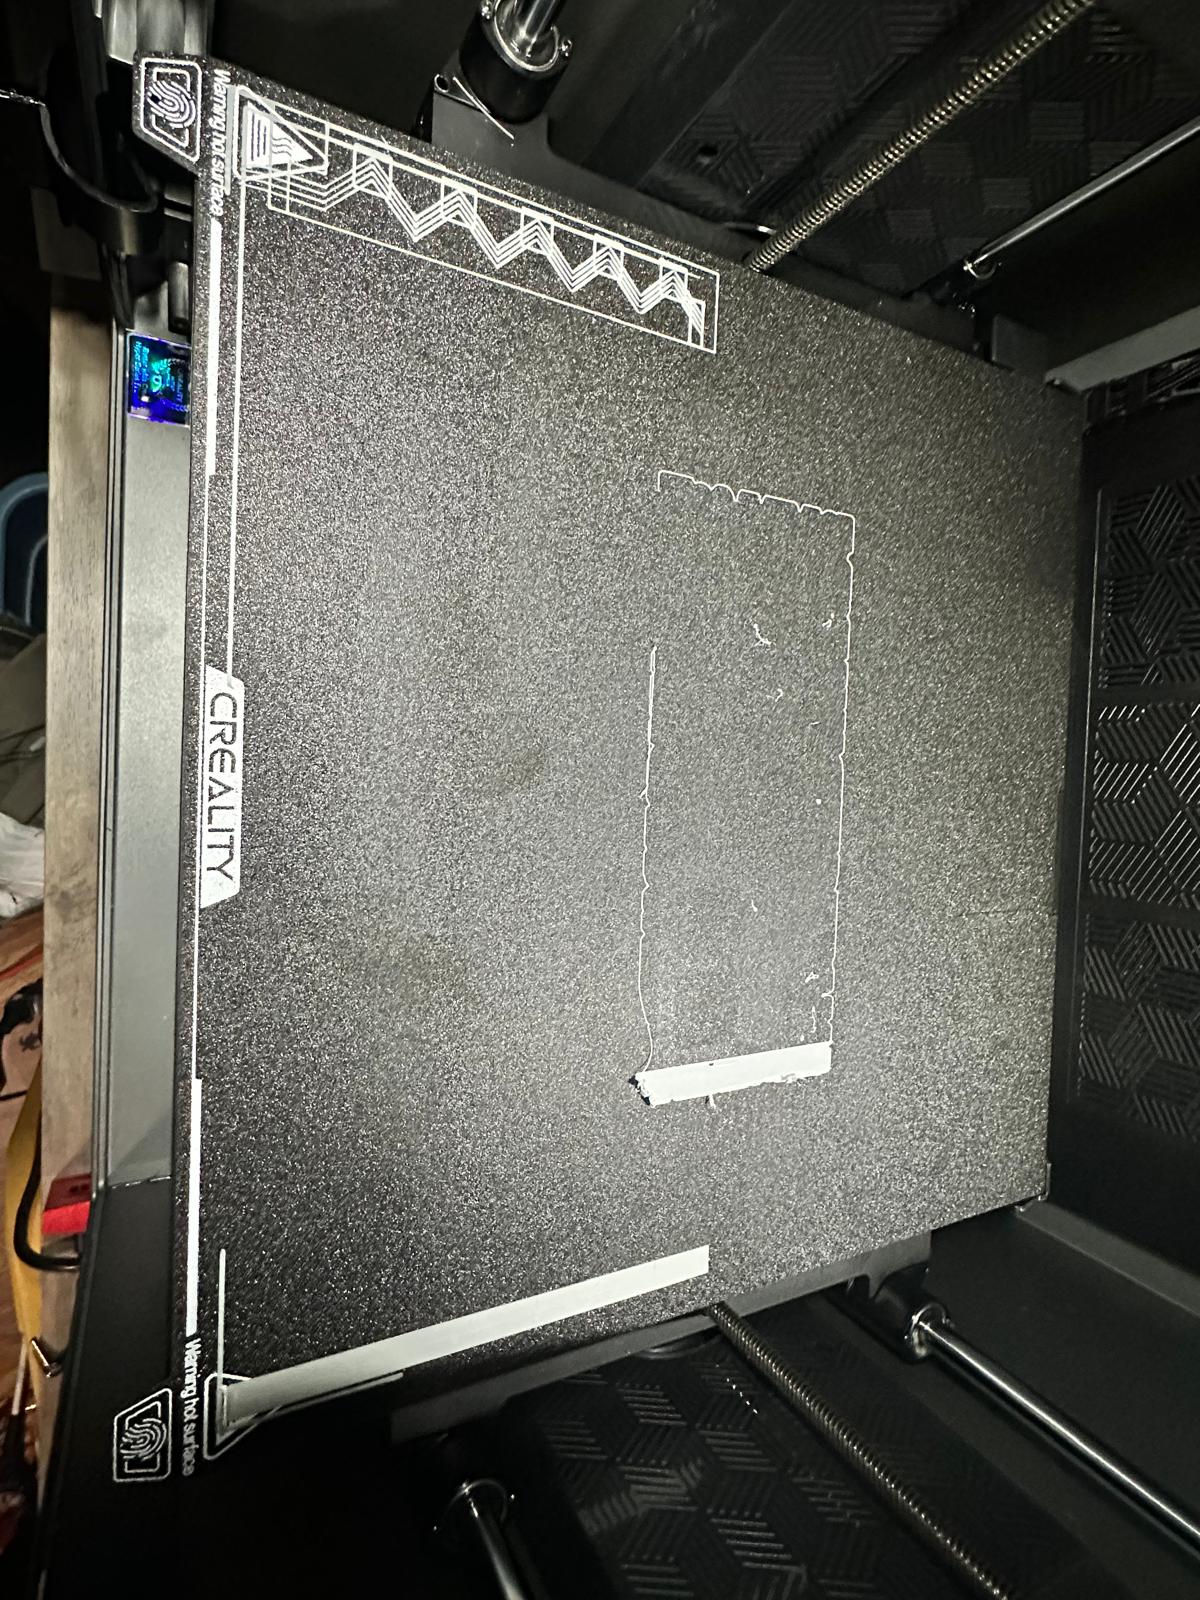
So many issues, in such a short amount of time. I’ve had this printer for a couple of months and I’m not really even able to use it. I printed something that seemed to complete and without issue - so I ran it back and clicked “Send print” to see if I could print another consistently. Boy was that a stupid move. The nozzle was scraping so hard I could hear the heartbreaking grind from 10 feet away. The first image is the successful print, the other two are when I tried printing it again. The slight lines on the build plate are from the nozzle scraping it. I’m lost and ready to check if I can return this and get a bambu or build something with a friend who puts them together all of the time. This is just disgusting.


1 Like
Check the hotend screws are tightened into the heatsink, they sometimes come loose and also check the nozzle is fully tightened. You should check these sort of things on any printer no matter the make.
2 Likes
I checked the screws and changed the nozzle. This is the result of a print I did just now through creality print, using the calibration option in the print dialog:
The fact that I have to babysit every single print, and I got this in December, is beyond disheartening it’s criminal. I wish I had kept count of the number of failed prints. It’s not as if I tried a few times to print out of the box and expected perfection (which at the price tag of this pile of garbage, isn’t really too far-fetched of an expectation). This is going on now since December 13th or so. I wanted to throw something so bad when I saw their CES videos demo’ing this printer because you know they actually gave a shit and made sure their demo model wasn’t full of bugs or failures like the ones they released to the public.
3 Likes
What firmware and slicer version are you running? I’ve had mine since Feb (just in time for 1.1.2.6 firmware) and it’s mostly printed right first time, but intermittantly the first layer is so squished it causes extruder error, which fails the print (this happens around 30% of the time, mostly with ABS). It initially looked like hotend clog, but after several dismantles of the hotend it’s clearly not that, but an issue with the bed leveling and Z offset. What could cause the bed level/Z offset to flip “randomly” between correct and far too close?
Firmware is 1.1.2.6 and the slicer is Creality Print 6.0.3.1591
This is the latest attempt with calibration ticked within CrealityPrint:


As you can see, there are even holes and spots where it didn’t extrude. ![]()
Are you using the CFS or single reel feed ?
Also how old is filament?
It looks to me as being either an adhesion or feed issue
Single reel and brand new filament.
Kris,
which filament are you trying to print here?
Some observations reading though this topic:
- Your print bed is really dirty. This creates these ‘holes’. NEVER print on a dirty PEI bed, even touching the bed with fingers is already leaving oils which prevent some filaments to stick to the bed at all.
- You mentioned that you changed your nozzle. If you do that you most probably set an Z-offset for prints because the new nozzle is seldom exactly in the same distance with the sensor. I had same, and had to add 0.015mm at beginning with new nozzle. Now after printing again for ~200h with new nozzle the required Z-offset was already reduced to 0.005mm.
- You do not need to run full calibration (PA and flow rate), just the bed leveling and define a profile for you filament like described here
- If you need different Z-Offsets for different print beds or filaments you may use a macro like described here.
- Check your extruder if it is wobbling or has loose screws.
- Check your build plate, especially the part in the middle at the back which is used by the printer to test the nozzle touching to print bed and cleaning the nozzle and calculation required offset to distance sensor. If you bended this part down the the printer will use a wrong nozzle distance and you prints are not correct anymore!
Luckily all problems I had I could be resolve with above checks/corrections and my print head had never scratched (or even touched) the bed.
I even have not used glue sticks or so even printing 300mm long ABS/ASA parts.
3 Likes
Firstly I can’t begin to express how grateful I am that you took the time and care to write all of that out and share your knowledge. Everyone here is about the only reason I’m still giving this a shot after countless attempts resulting in disappointment. Something I found while searching around, is that apparently Creality sets the z offset to 0 via gcode before every print.
https://www.youtube.com/watch?v=sMVAJIM2RMQ is the video that shed some light on that. Now, a friend of mine super well-versed in printer calibration had guided me through my z-offset and we couldn’t figure out why it would just “randomly” start digging in and prints not be as good as they were during calibration. This would explain it. In my printer.cfg the offset is set to 0, regardless of whether or not I hit ‘save and restart’ or the little diskette icon for ‘save’. Regardless of what’s done, that offset never gets stored in the printer config anywhere and is set to 0. So basically, the reason we had even calibrated the z offset was similar issues to what I’ve been describing. The fact it never resolved it really, this would make sense. I’m about to give this a try, as I’m physically limited (handicapped a bit) and can’t stand long at my printer but I’m going to keep at it. The frustration is only heightened by the fact I literally go through quite a bit of pain every time I have to go take out failed prints and try to re-calibrate or do anything. Just stating a fact, so that it’s not appearing as if I’m whining without putting forth every damned effort I possibly can here. Thanks a lot again, I’m going to post results.
2 Likes
I wonder what would happen if you change the z-offset to 0.2 in printer.cfg and start macro, it should raise it off the bed, just as a test, you could dial it in manually I suppose, not ideal.
1 Like
I actually put a feeler gauge on the bed and directed the z-axis down to 0.03 and it was basically touching the bed. That being said, I used a feeler that was 0.08 and adjusted until it was just touching both the nozzle and bed, then got the value of the axis there and set that in the start_print macro directly. It seems it might have been a bit high based on the test disc I printed being very separated and also pulled off of the bed during the print to the point I had to abort. I imagine it needs to be lowered down some more. Is my method of zeroing the z-axis not ideal? I figured using 0.08mm would be pretty close to as good of a zero without rubbing the build plate.
On all the printers I have I would adjust using the touchscreen and it would save it from there. i think the feeler gauge/paper method is a good start though. On my Enders I don’t autocalibrate once I have the z-offset sorted.
Thanks again for everyone’s feedback. I’m never one to be one-sided, or just complain and not post the positive. Hopefully something in my journey helps anyone else out. That being said - it turns out the offset being reset to 0 before every print, definitely had a major hand in screwing everything up forward hence. I calibrated my offset to the best of my ability and set it in gcode_macro.cfg where this line exists:
SET_GCODE_OFFSET Z=0
and set my offset there. The results from there, even during calibration are worlds apart from earlier. I can actually read the values on the flowrate tiles now once they’re printed instead of having to try to figure them out by way of matching their position to the print preview. I’m still struggling to get some things down pat, but I’m still here and still trying.
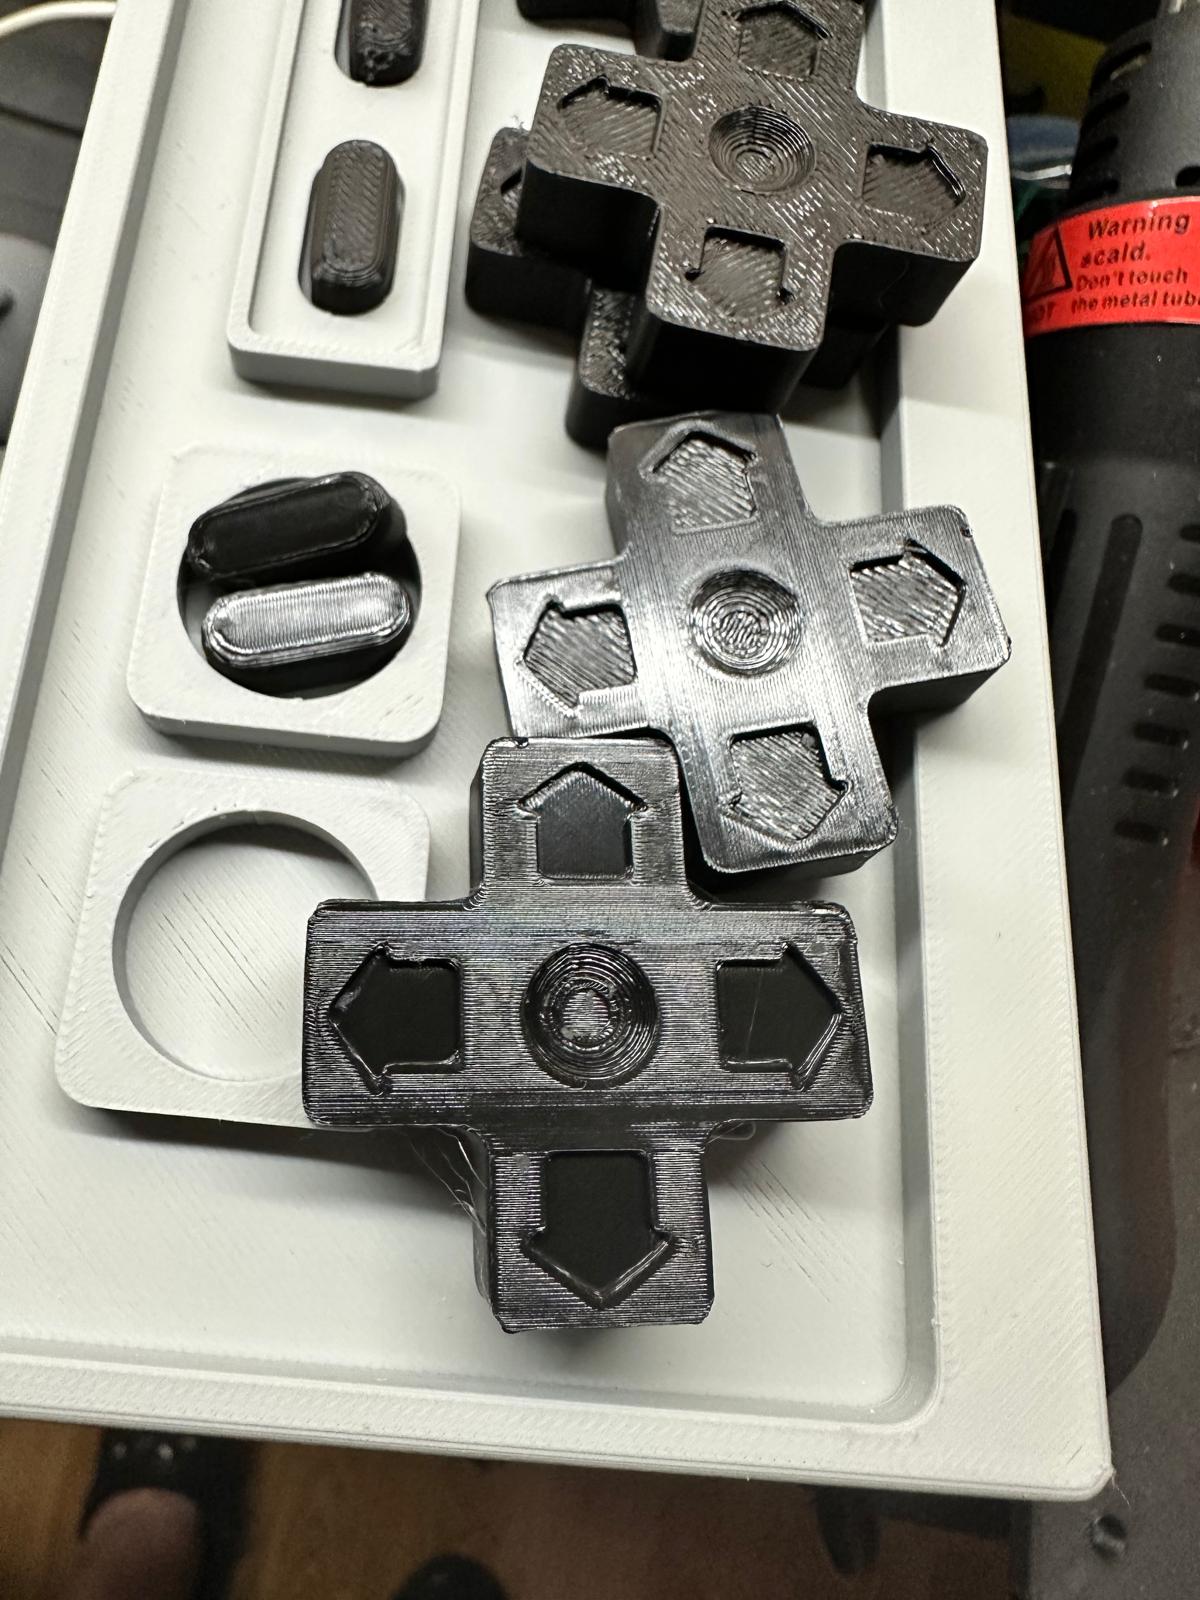
Here are some buttons I printed out for a model, that the progression from top to bottom is displayed and me getting a bit excited/bold and testing ironing out once I was able to get prints that didn’t rip off of the bed or were complete trash:
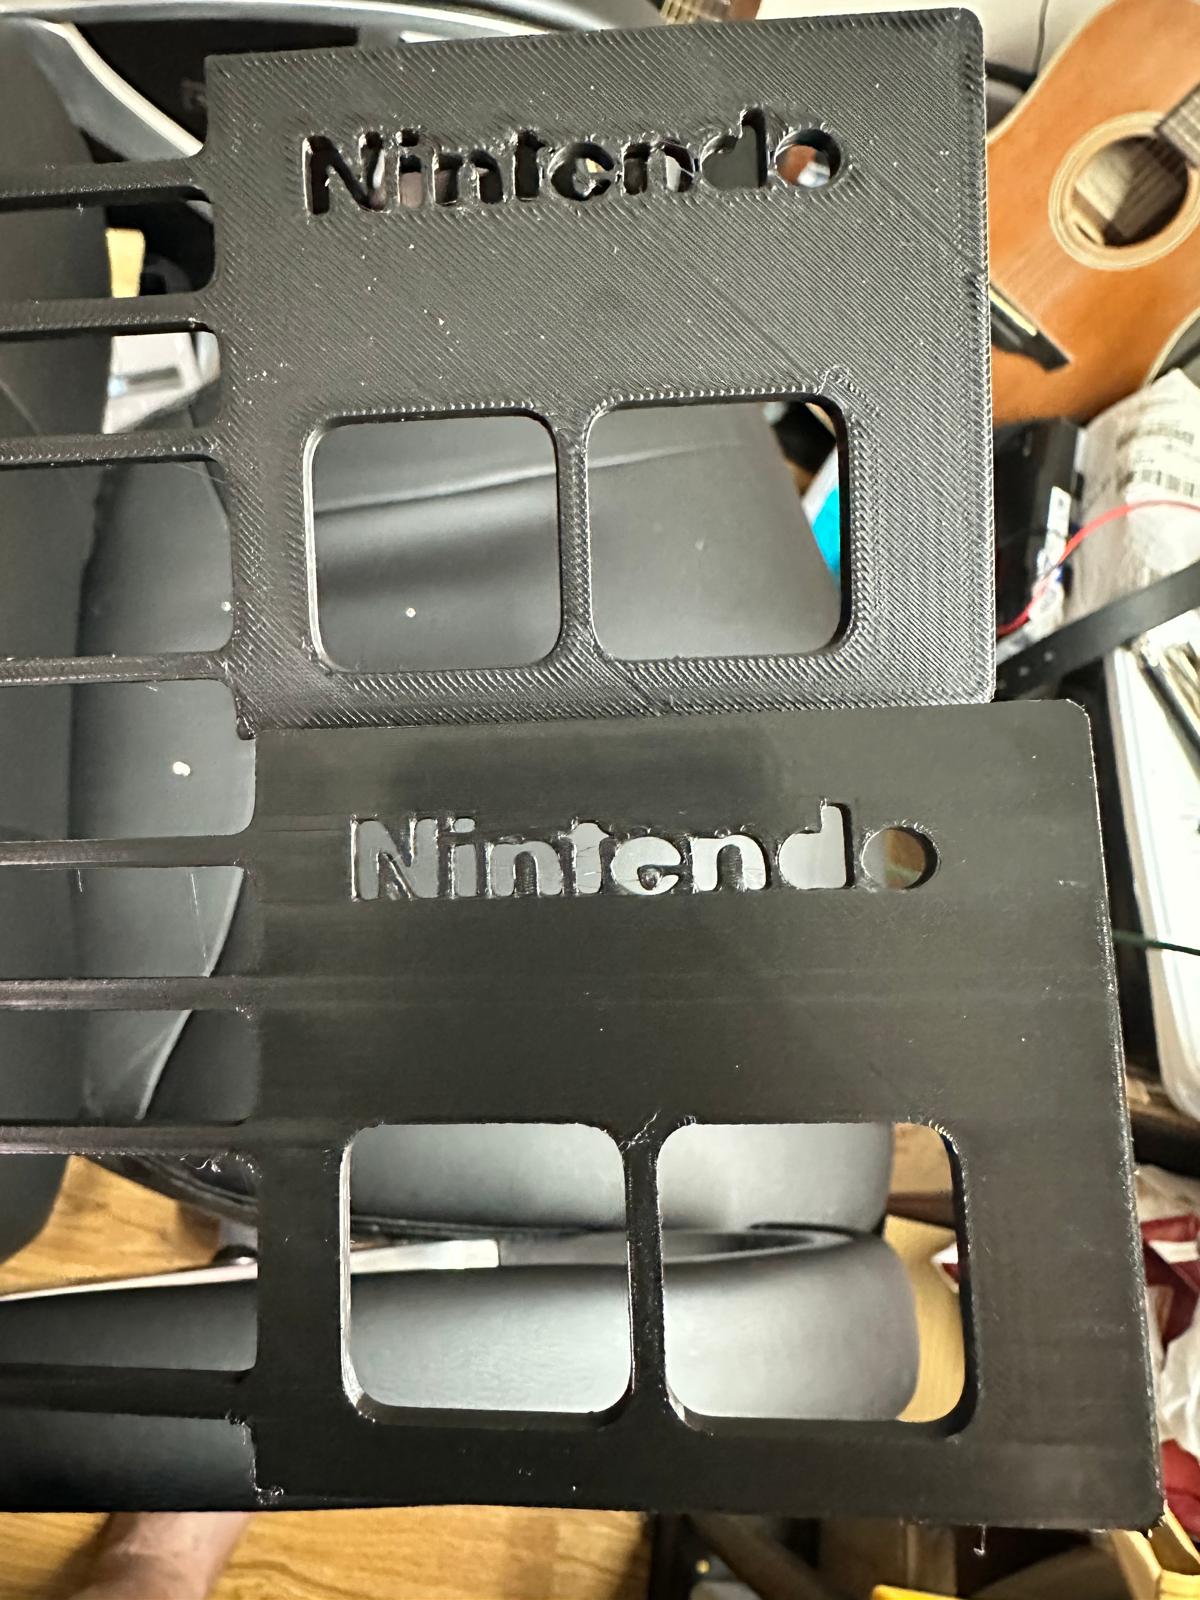
Here’s a faceplate that I re-printed a couple of times after not even being able to print it at all, that I tested ironing out on as well:
Now I’m just trying to figure out what’s going wrong with what’s below:


If anyone has any suggestions, I’m always open to them. Thanks again everyone!
Kris, you are right, the START_PRINT macro of the printer clears the Z-Offset and that’s why I wrote my macro described here to set Z-Offset even based on filament or print plate and inserted this in printer config just after the START_PRINT macro.
1 Like
Hey @Kris_Bee! Glad to see you dialing things in - this is valuable info!
If you’re into Klipper tuning, I highly recommend checking out @frankjoke’s Z-offset Macro thread - absolute gold for adjusting offset per filament type. ![]()
Quick question - what’s your nozzle size? Based on what I’m seeing, I’d take a look at:
- First layer line width
- Inner & outer wall width
- Top/bottom solid infill & wall overlap %
- Infill/wall overlap %
It looks like your wall width might be a little low, and the overlap % might need a slight bump. Not by much though—too much overlap, and you risk that “whip and valley” effect (where the nozzle overcompensates and creates little ridges/dips). It can also lead to filament buildup on the nozzle head, especially with PETG.
Try bumping overlap slightly (+2-5% max) - you should see tighter seam connections without unwanted surface artifacts. You can use the discs mentioned by @frankjoke, or print 0.2mm high squares to dial it in efficiently without wasting too much time or filament.
Those other prints are looking SWEEET!!!
Thanks a lot! I saved his post so I could reference it later on once I have the basics all dialed in.
nozzle size: 0.4mm
first layer line width: 0.5mm
outer wall width: 0.42mm
inner wall width: 0.45
top/bottom solid infill & wall overlap %: 25%
infill/wall overlap %: 30%
1 Like
I modified the following:
top/bottom solid infill/wall overlap: 26
infall/wall overlap: 31
the result:


Is the bit of crud around the top face edges expected/nothing can be done printing-wise about it without post-processing? Or is there something else needing tweaking to get that toned up better?
1 Like
Guys, I have almost zero knowledge of 3D printing but am close to hitting buy on the K2 plus. Threads like this reassure me there is a brilliant community who will help. Kris_Bee, you are a very patient guy, I hope I don’t experience such hassle but well done for sharing, learning and updating. All of you are really helpful, thank you. Ian (UK)
2 Likes
I can tell you that coming from someone who has been involved in IT (programming, hardware, networking, everything) since a very young age - I put 3d printing off for years now, since it became feasible for consumers. I was intimidated by calibration and all of the parameters of it all. I was/am completely humbled by this experience so far, but it’s incredibly rewarding. If I had any advice, it would be to wait for them to hammer out some more kinks and for the next iteration of k2+ machines. That’s what I would do if I could again. I had originally bought a k1 max, then saw “you can print 16 colors” without even understanding the mechanics of it all and returned it to upgrade. I completely threw away my tech experience knowing that new products always have a break-in period and bugs, just like you never really want to buy a brand new vehicle that was released the current year typically. I however, love to work through problems even if while kicking and screaming. It’s super fulfilling for me. Honestly though, if it weren’t for this community and a really great friend who’s a wizard with 3d printing I would be pretty hopeless and not enjoying myself as much due to all of the invested time in trying to figure out these issues. I wish you the best in whatever direction you take and feel free to message me if you have any questions once you do get your printer, and I’ll try to field whatever I can from one newcomer to another - and see if we can save you some headache/heartache. I would be prepared mentally to write them a “my hinge came broken from my door” email and provide proof of purchase for them (receipt of any sorts) and ask them to please ship you a new door and provide your address. It’s a super common thing with these printers unfortunately.
1 Like